
Paneling Our Van Walls and Ceilings
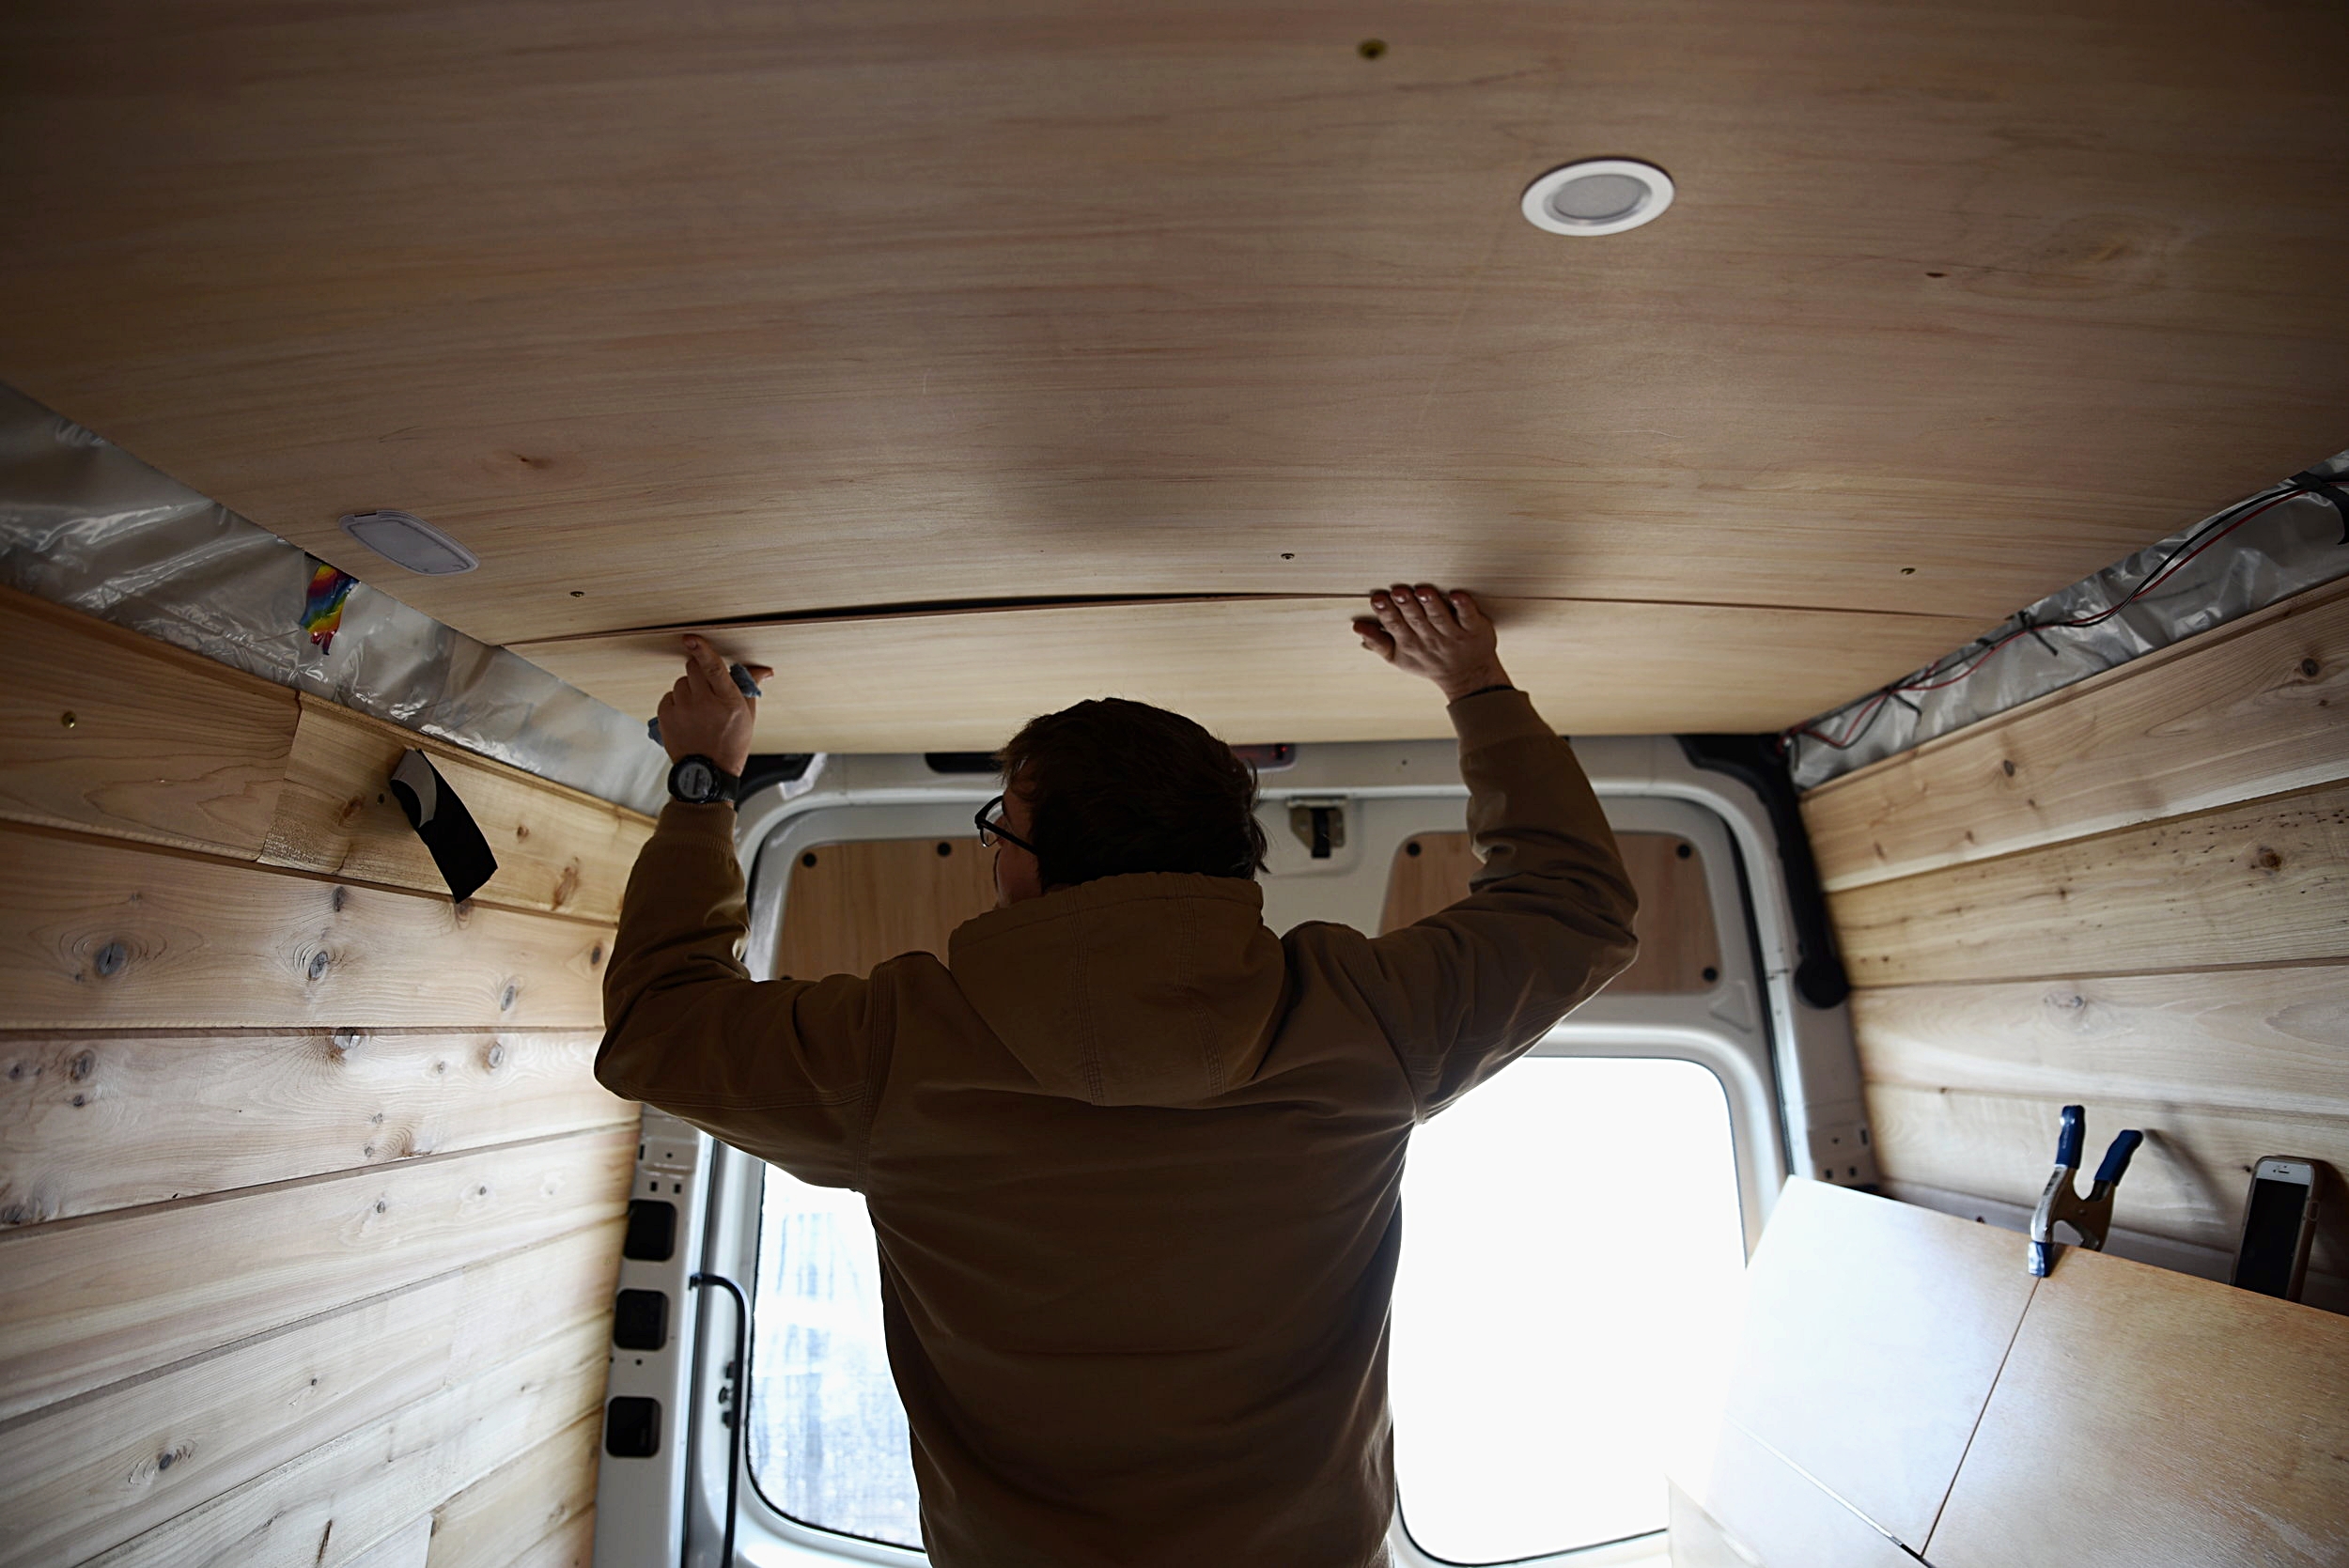
Ian test fits the final ceiling panel before screwing it to the wood lath underneath.
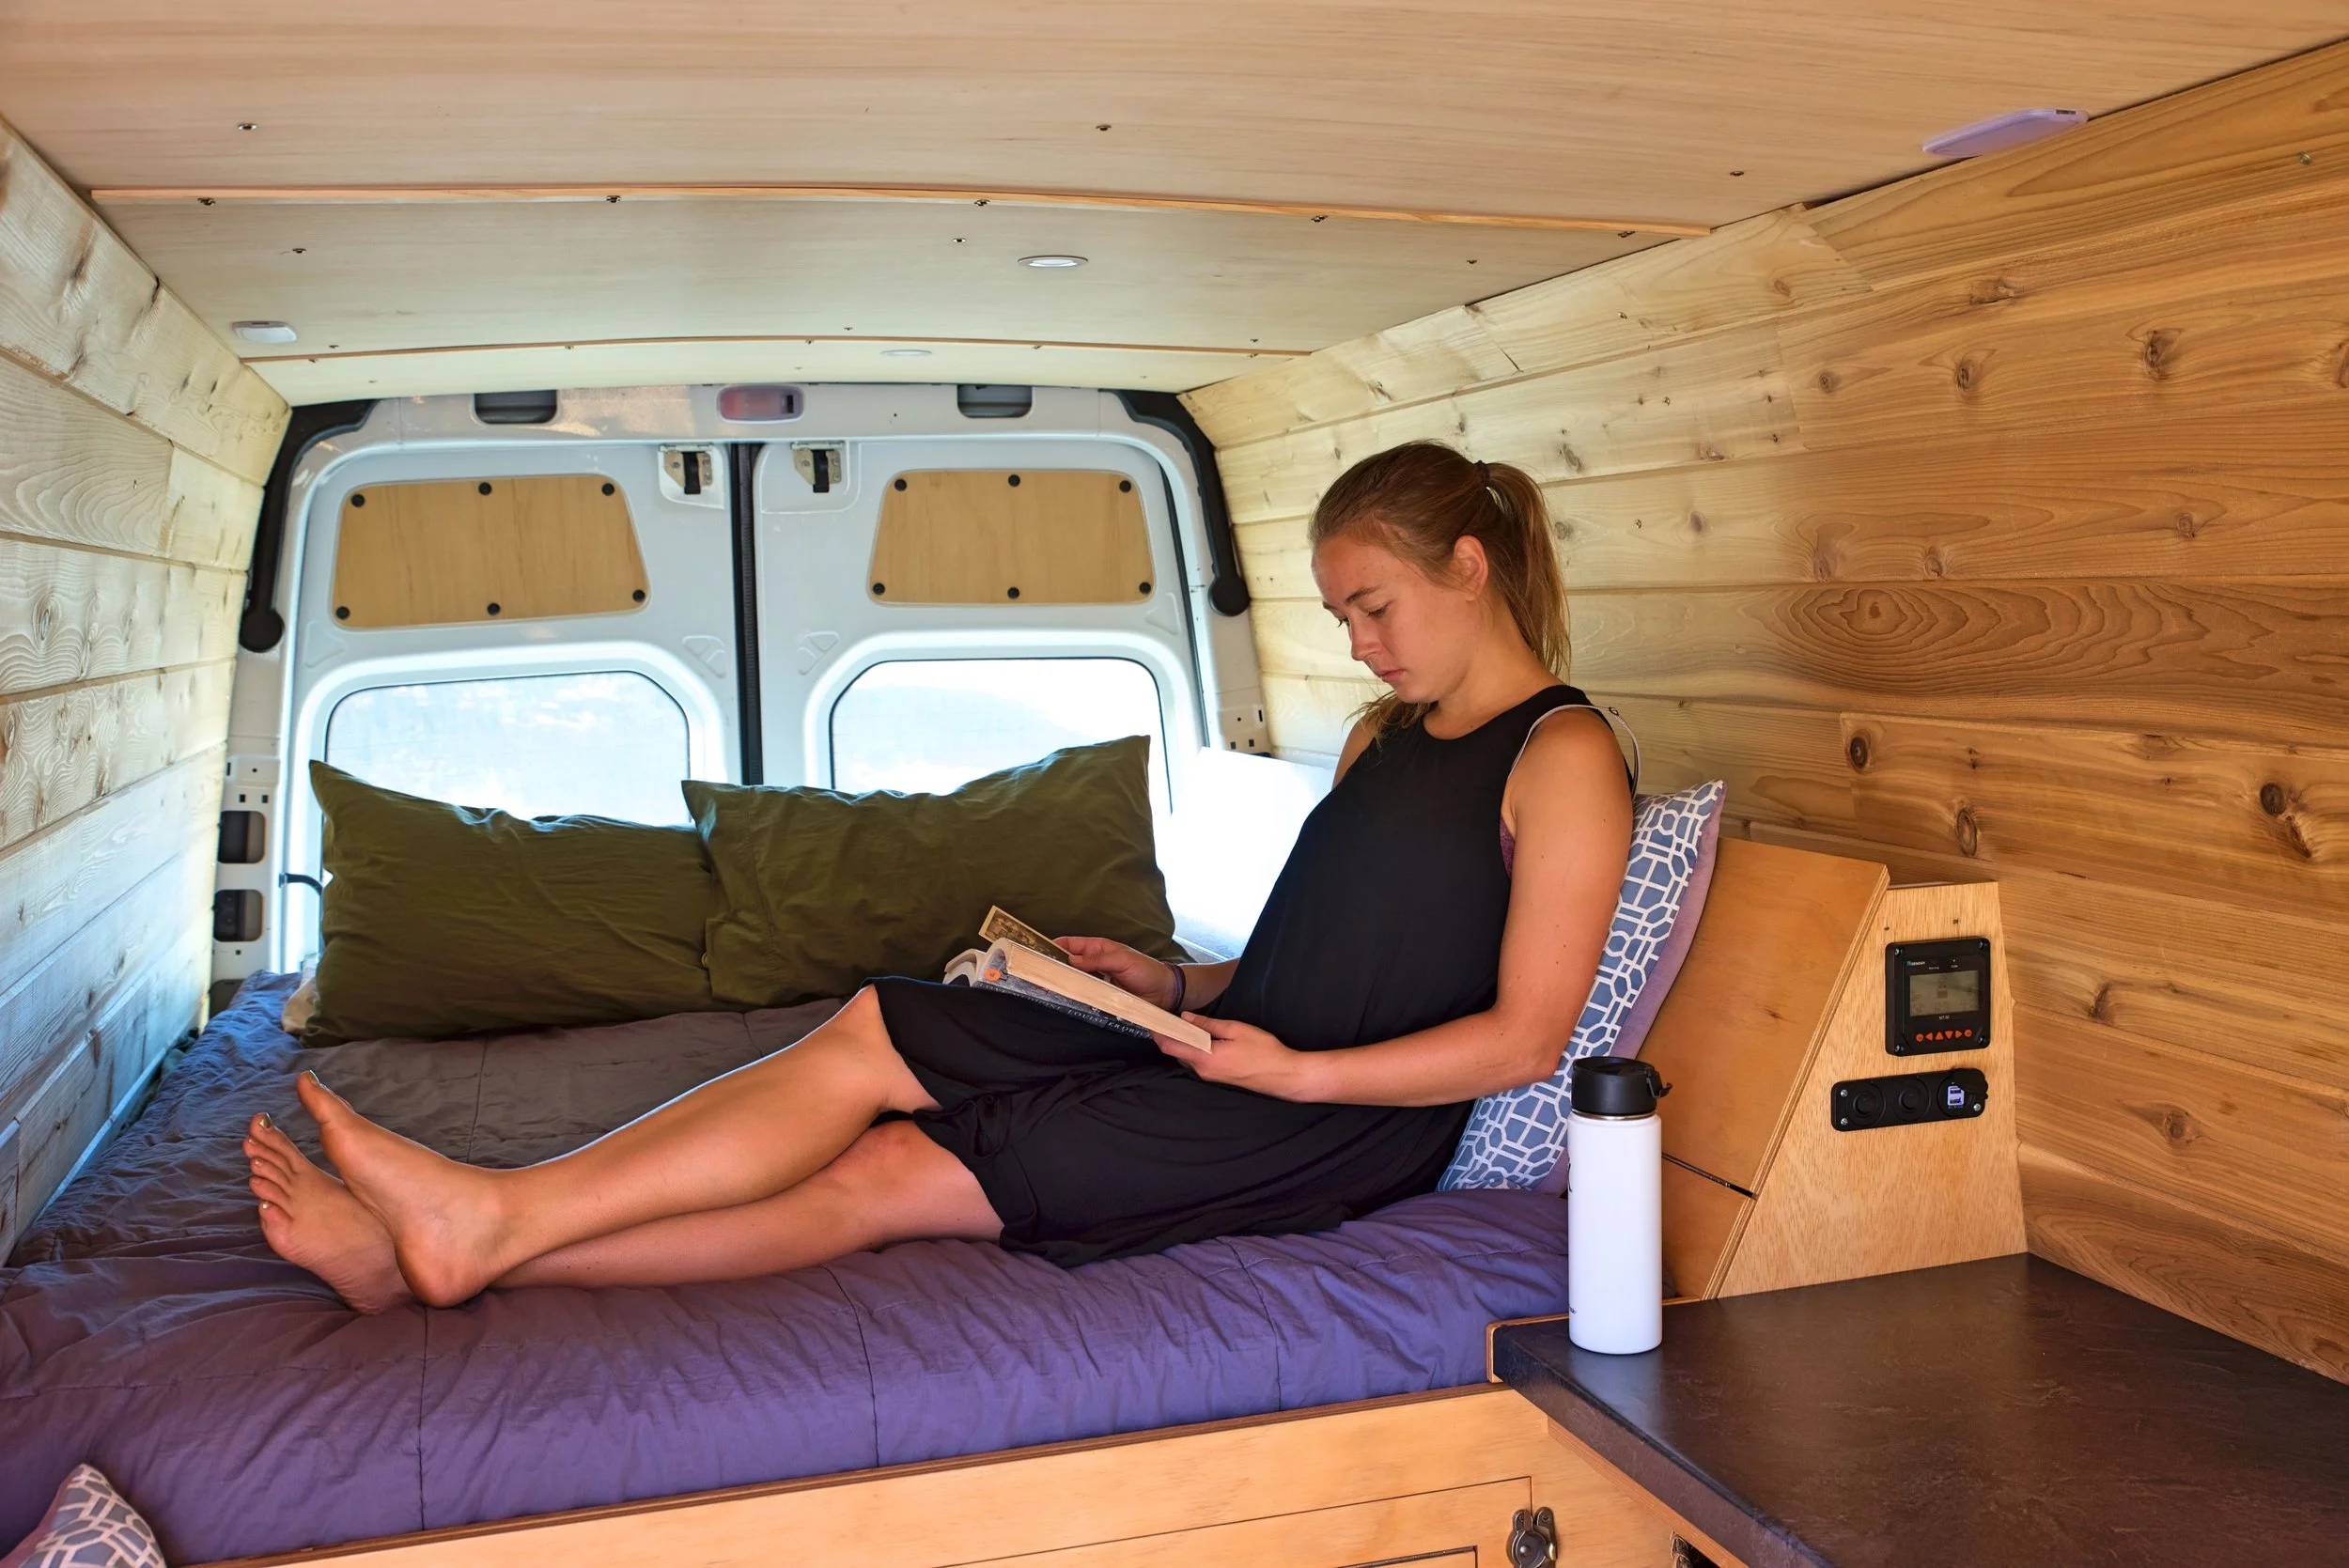
Giving our Van a Cozy, Cabin Finish
Since we live in our van full time, it was really important to us for the interior to feel comfortable and finished--like a home. We both like the rustic feel of cabins, so we knew we wanted a mostly wood interior. We landed on a tongue and groove cedar planks for the walls. On the ceiling, after considering a many other materials, we decided to use lightweight 1/8" lauan plywood.
Tools
Cardboard and scissors for stencils
Materials
1"x6" Cedar Tongue & Groove (about 15- 10' boards)
Wafer-head, self-tapping sheet metal screws (We used 1-1/4")
1/4" lath (about 8-4' pieces)
1/8" lauan plywood (4- 4'x8' pieces)
1/4" x 1-1/8" flat pine trim (about 5- 8' pieces)
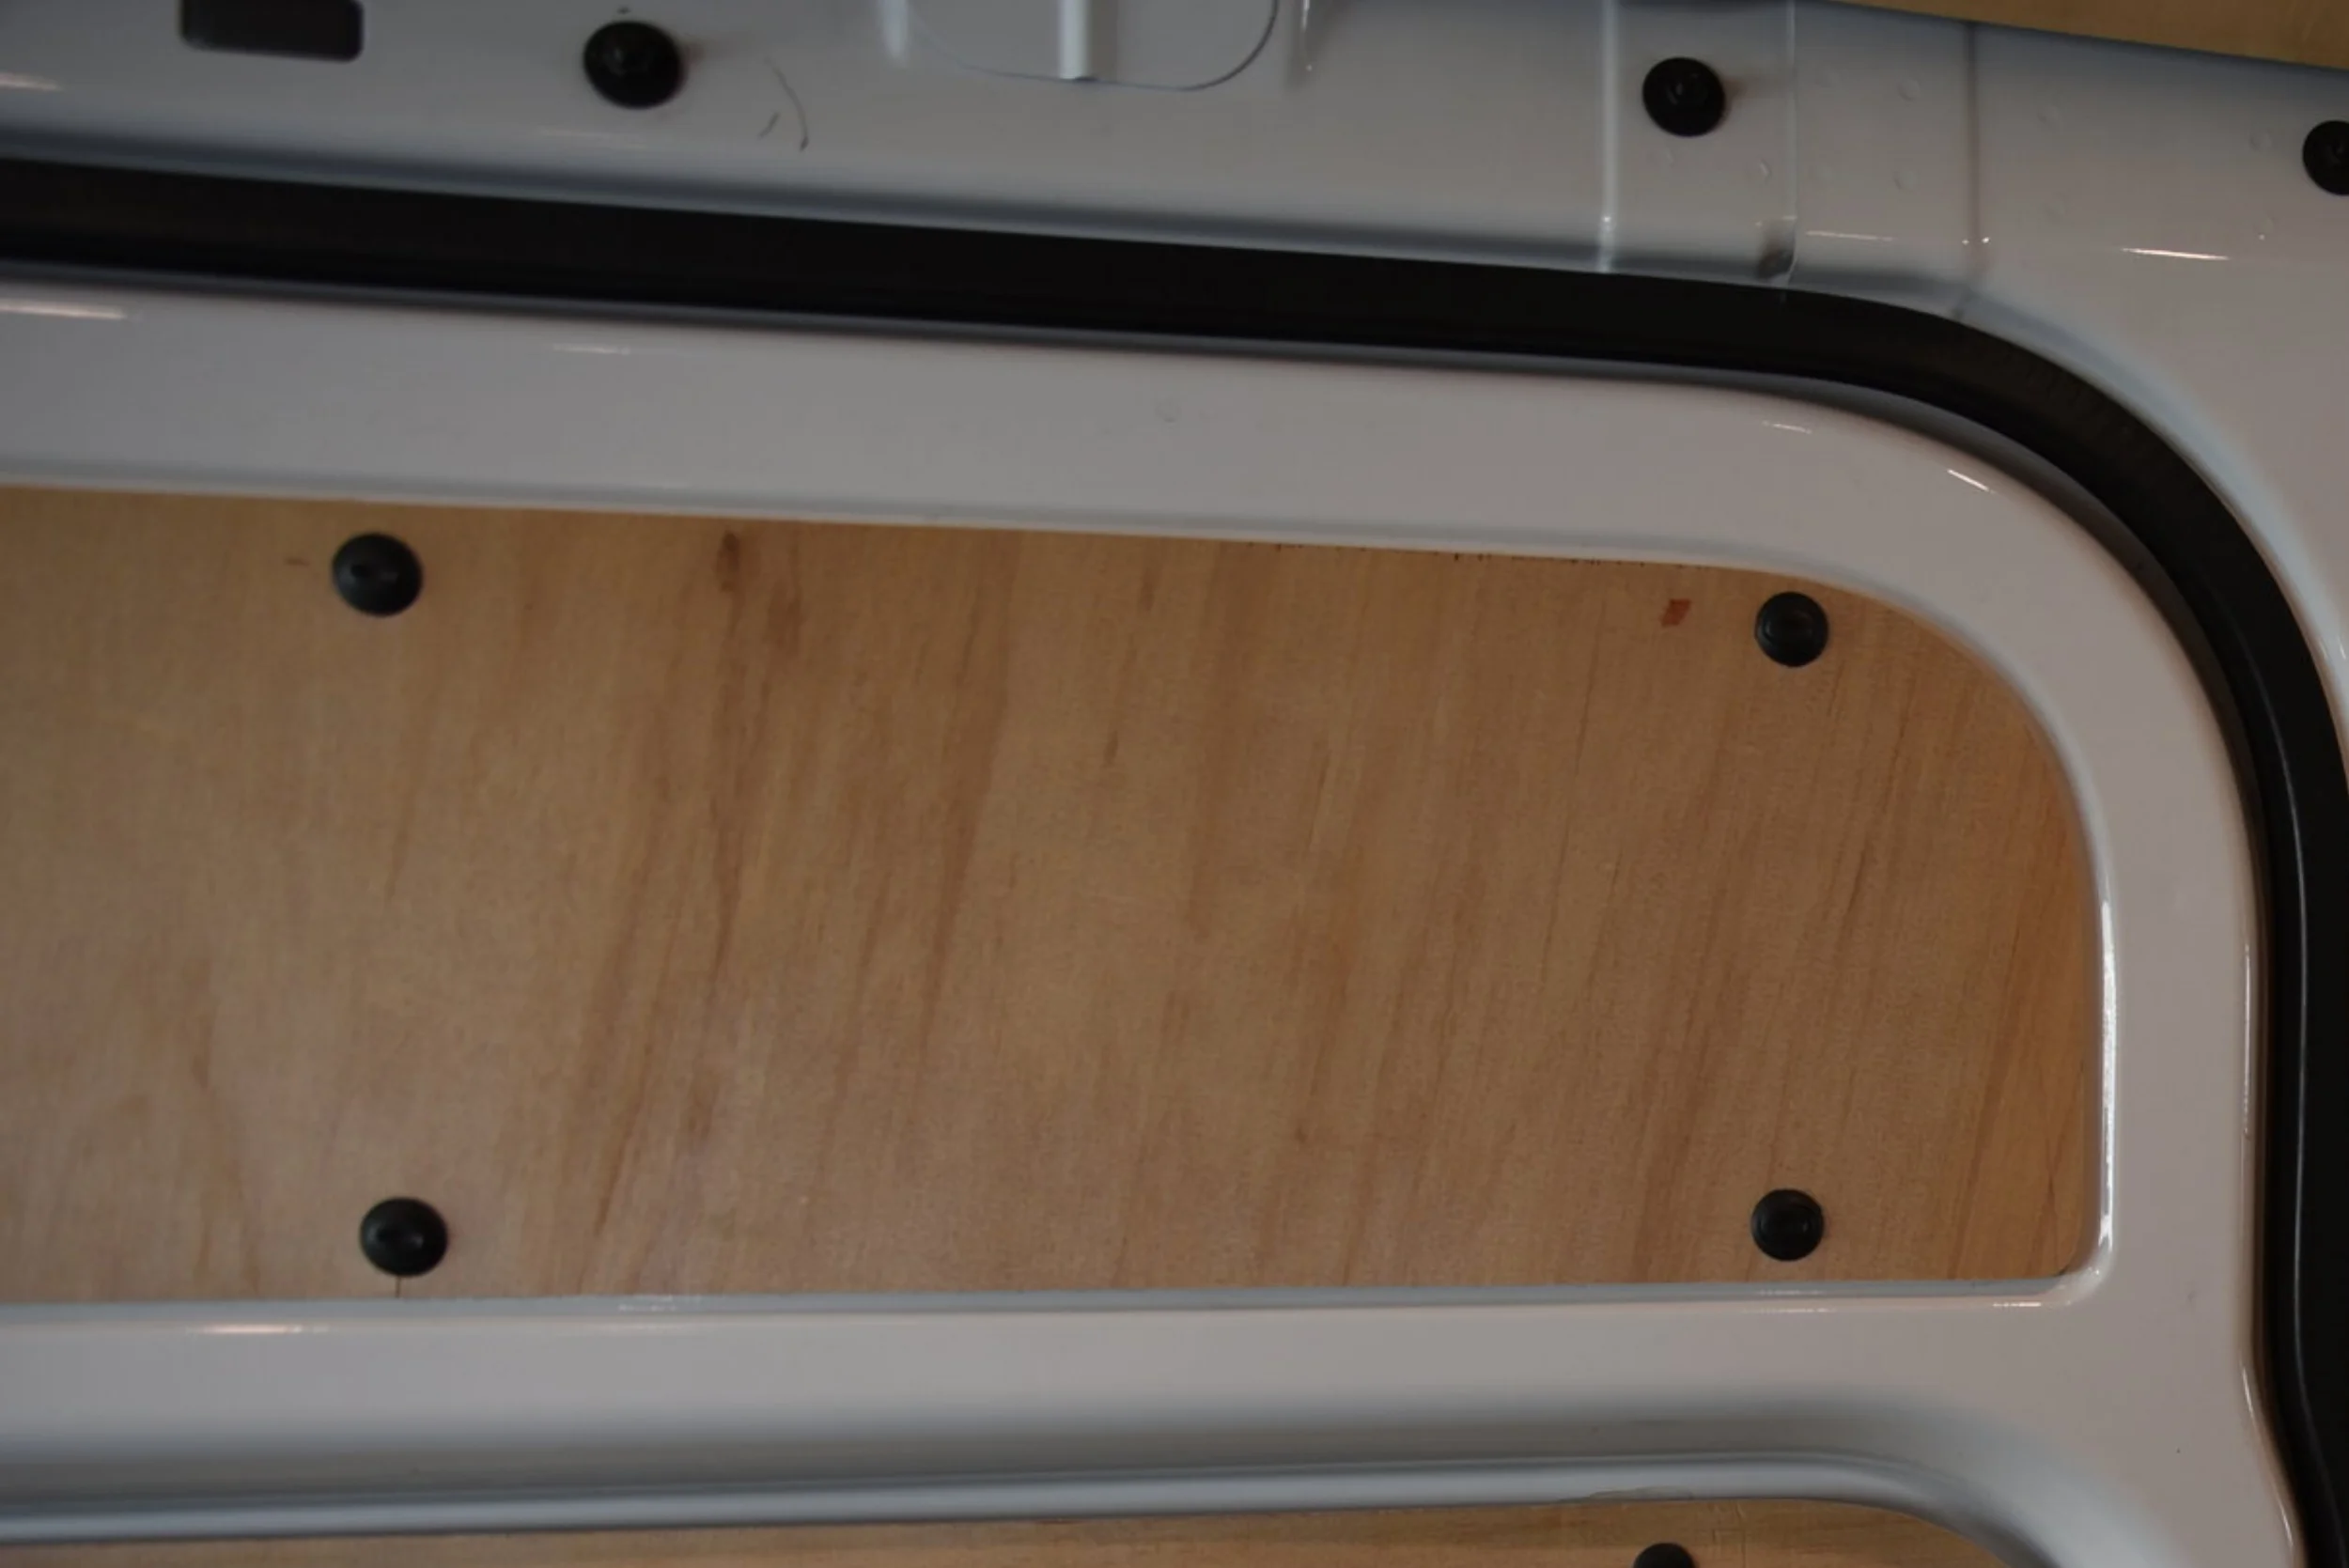
Plastic panel fasteners (The same amount the van comes with. Check your particular van, because these vary.)
Walls
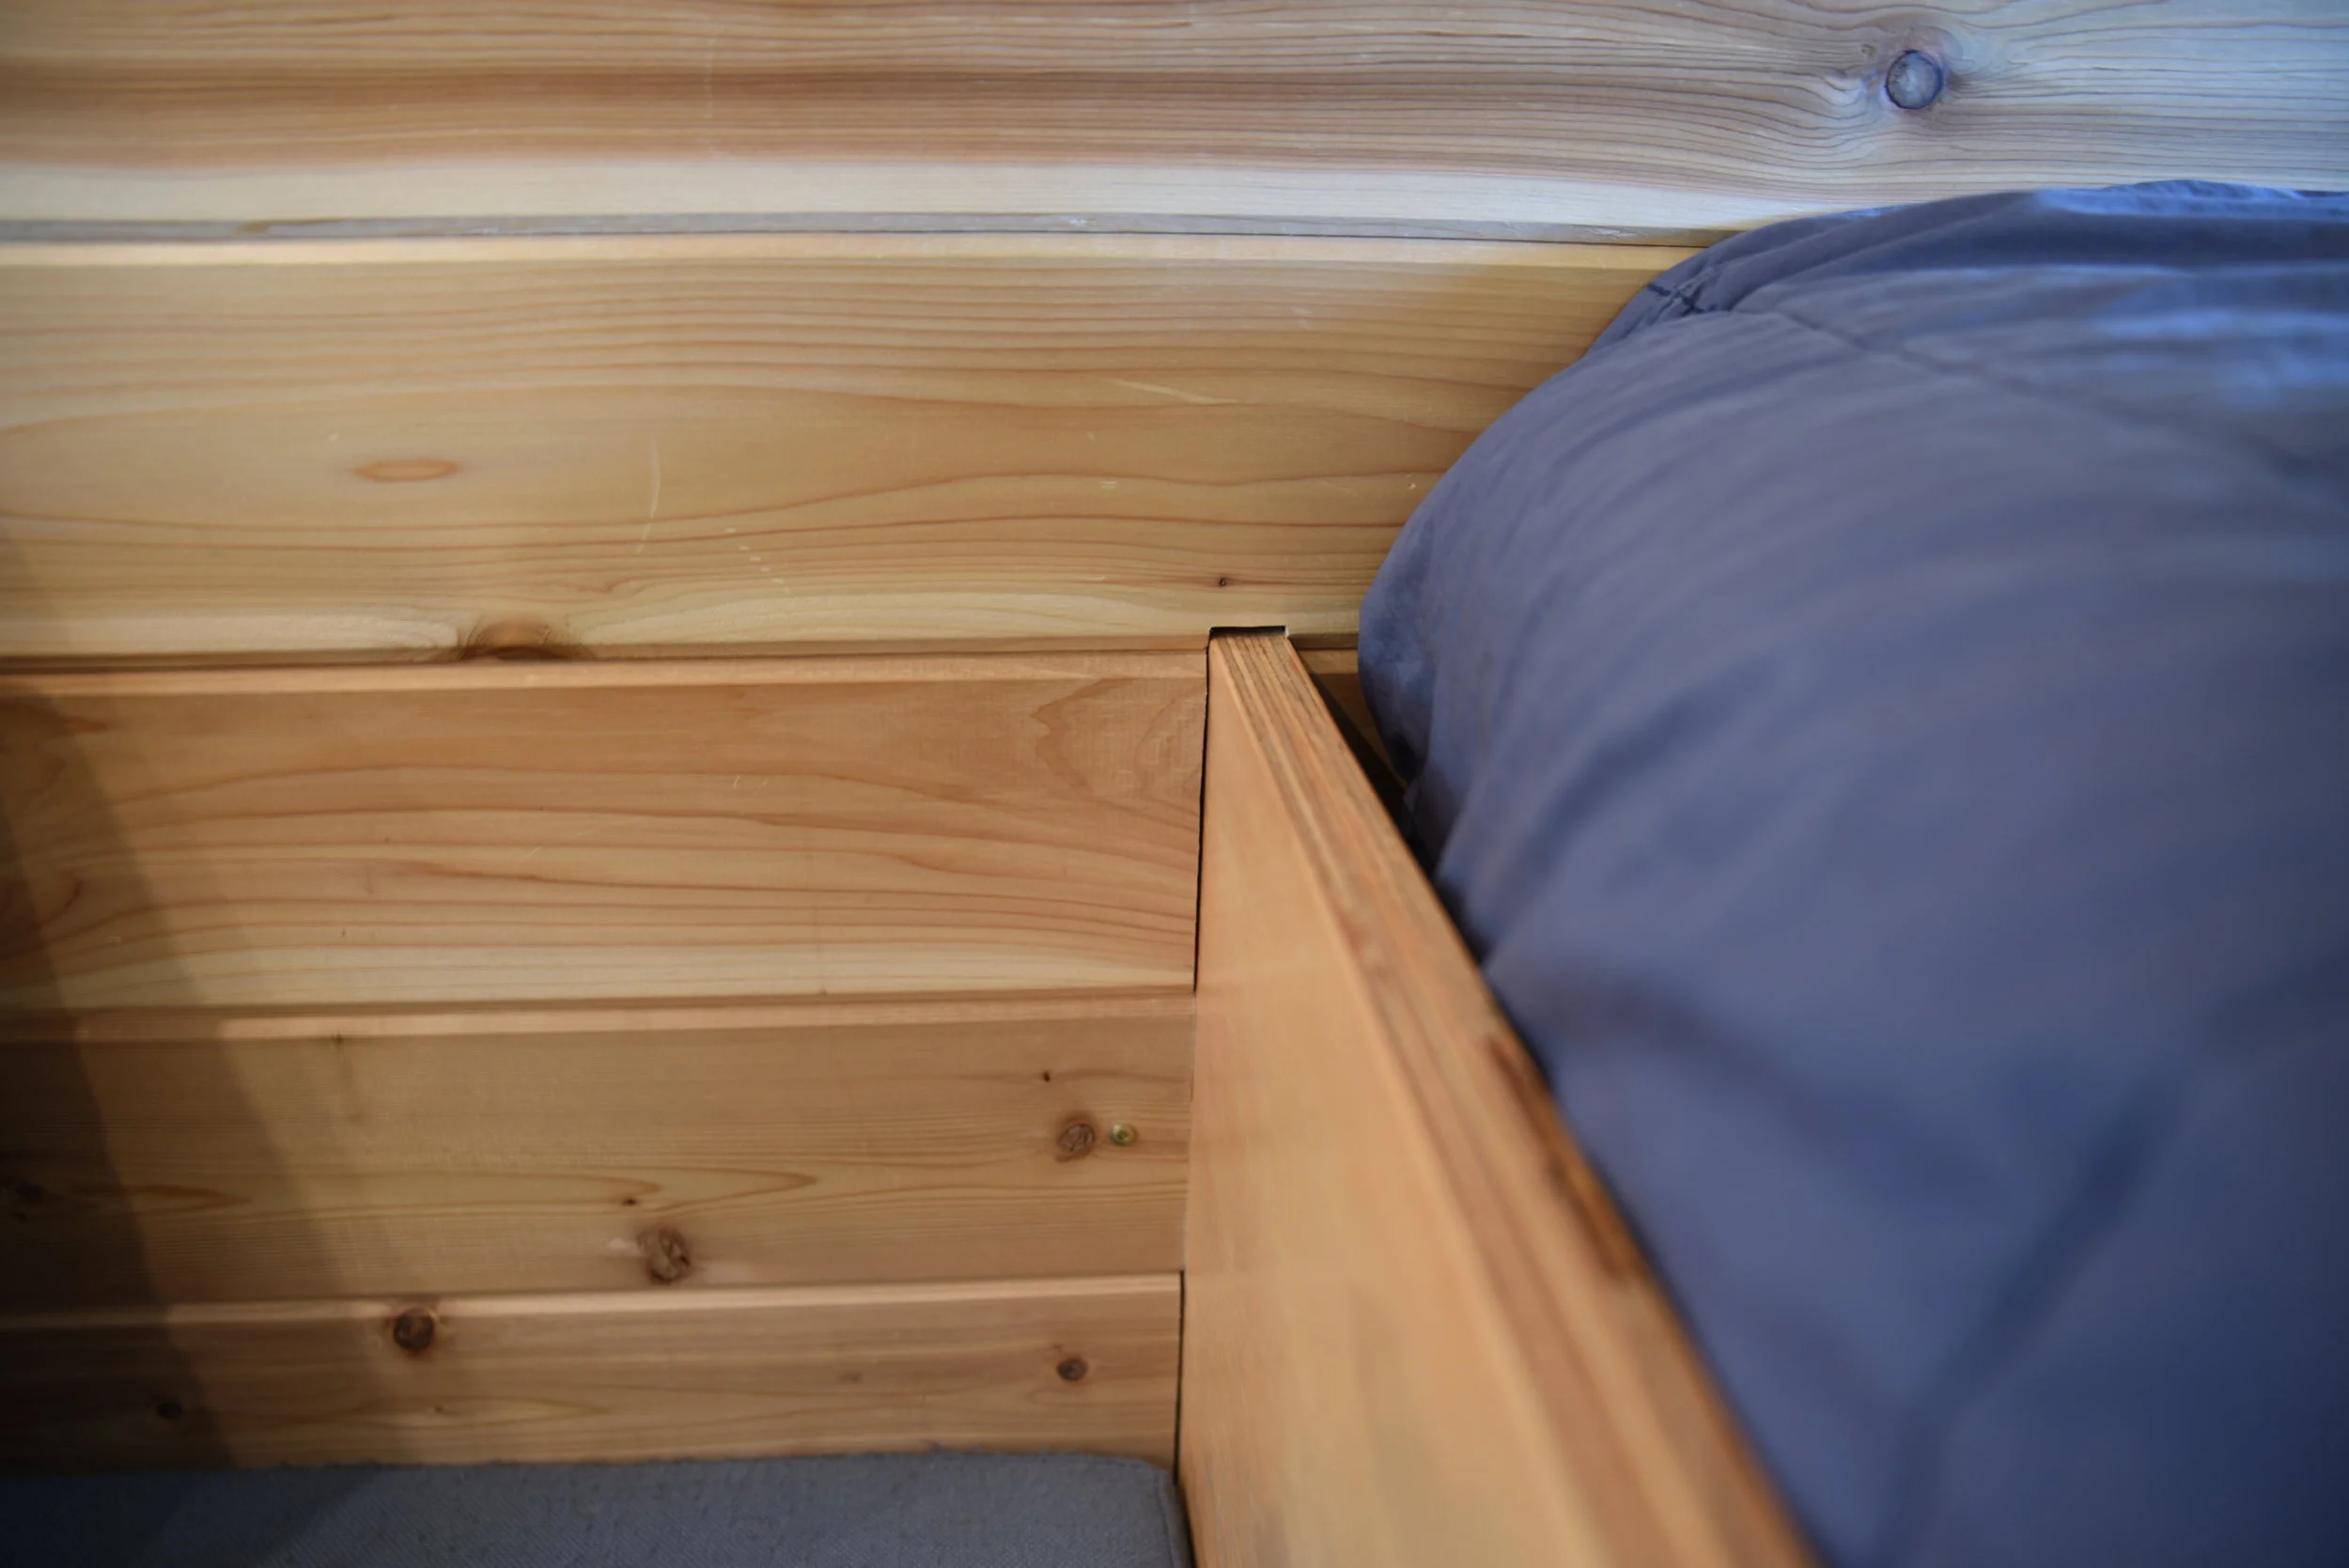
Many van builds start by paneling the entire van from top to bottom early on. For us it made more sense for paneling the walls to be one of the final tasks on our list. Cedar paneling is expensive, so there wasn't any point in putting it under the bed platform or behind our cabinets where in wouldn't be seen. The back of the cabinetry is just finished with a simple 1/4-inch plywood. This helped keep the cabinets square, saved us space, and also meant we didn't have to waste the more expensive cedar.
After a great deal of deliberation, and figuring out exactly how many planks we would need, and exactly how much pine, poplar, or cedar would cost, we finally decided that cedar was the best choice. It was significantly more expensive, but my dad had some full planks and many shorter scrap pieces left from when he built my parents house in the early 2000s. We liked the idea of "reclaiming" this wood, and it was also free (thanks, Dad!). With the scrap wood, the cedar was only about $60 more expensive than our next choice of pine.
The other benefits of cedar is that weighs less, and it's a better insulator than pine. Cedar has natural oils in it that make it resistant to damage from water or decay, which meant that it would be okay if left unfinished. We wanted to leave the walls unfinished, to reduce provide a contrast with our more glossy bed cabinets and fridge-storage bench. We have no regrets about using cedar. It gives the van a warm atmosphere, and every morning when we boil water to make coffee, we reminded by the fragrant scent of the cedar why we chose it for the inside of our van.
We only needed to buy about 15 planks of cedar for the van, so we bought them individually rather than in packs. We literally sorted through all of the 200 some planks that Menard's had in stock before choosing our pieces. We wanted to make sure that all the pieces were very straight and not warped. A lot of the pieces we looked at had cracks or the tongue or groove were broken in places, so we avoided those as well. We also chose the pieces that had beautiful grain or knots.
The driver side paneling is all dependent on the first piece of paneling that we installed behind the countertop, so it was critical that that piece be straight.

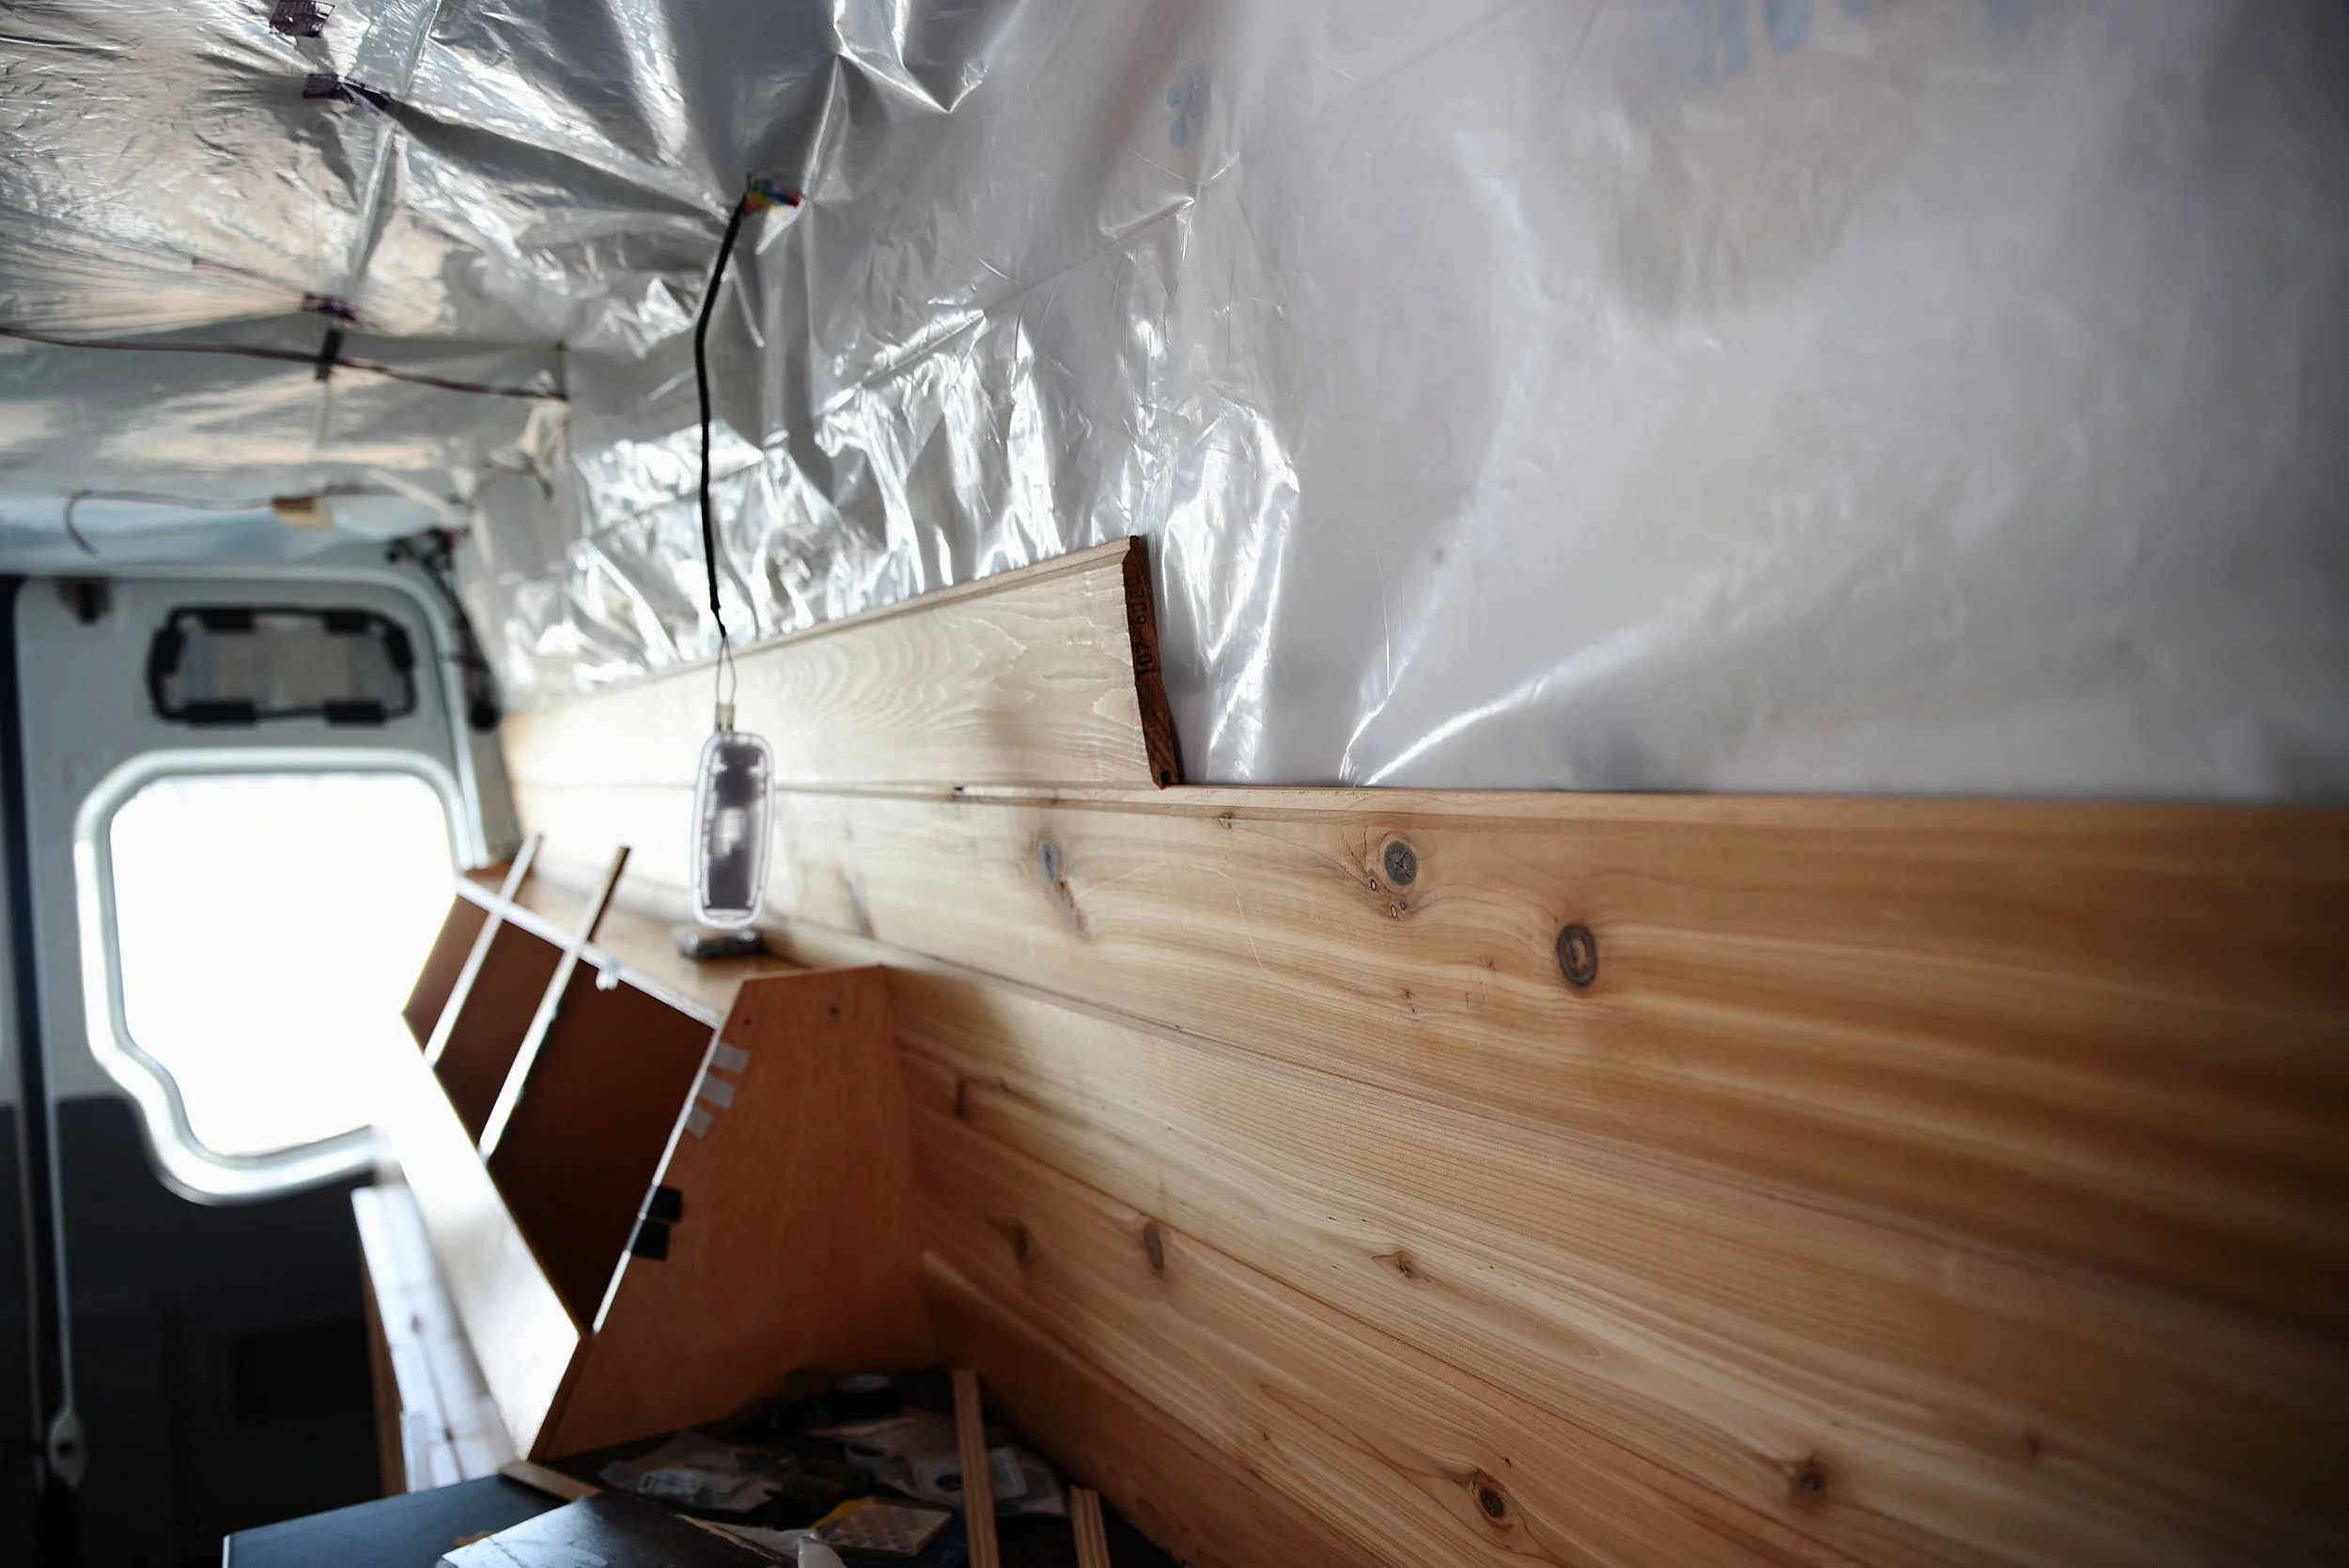
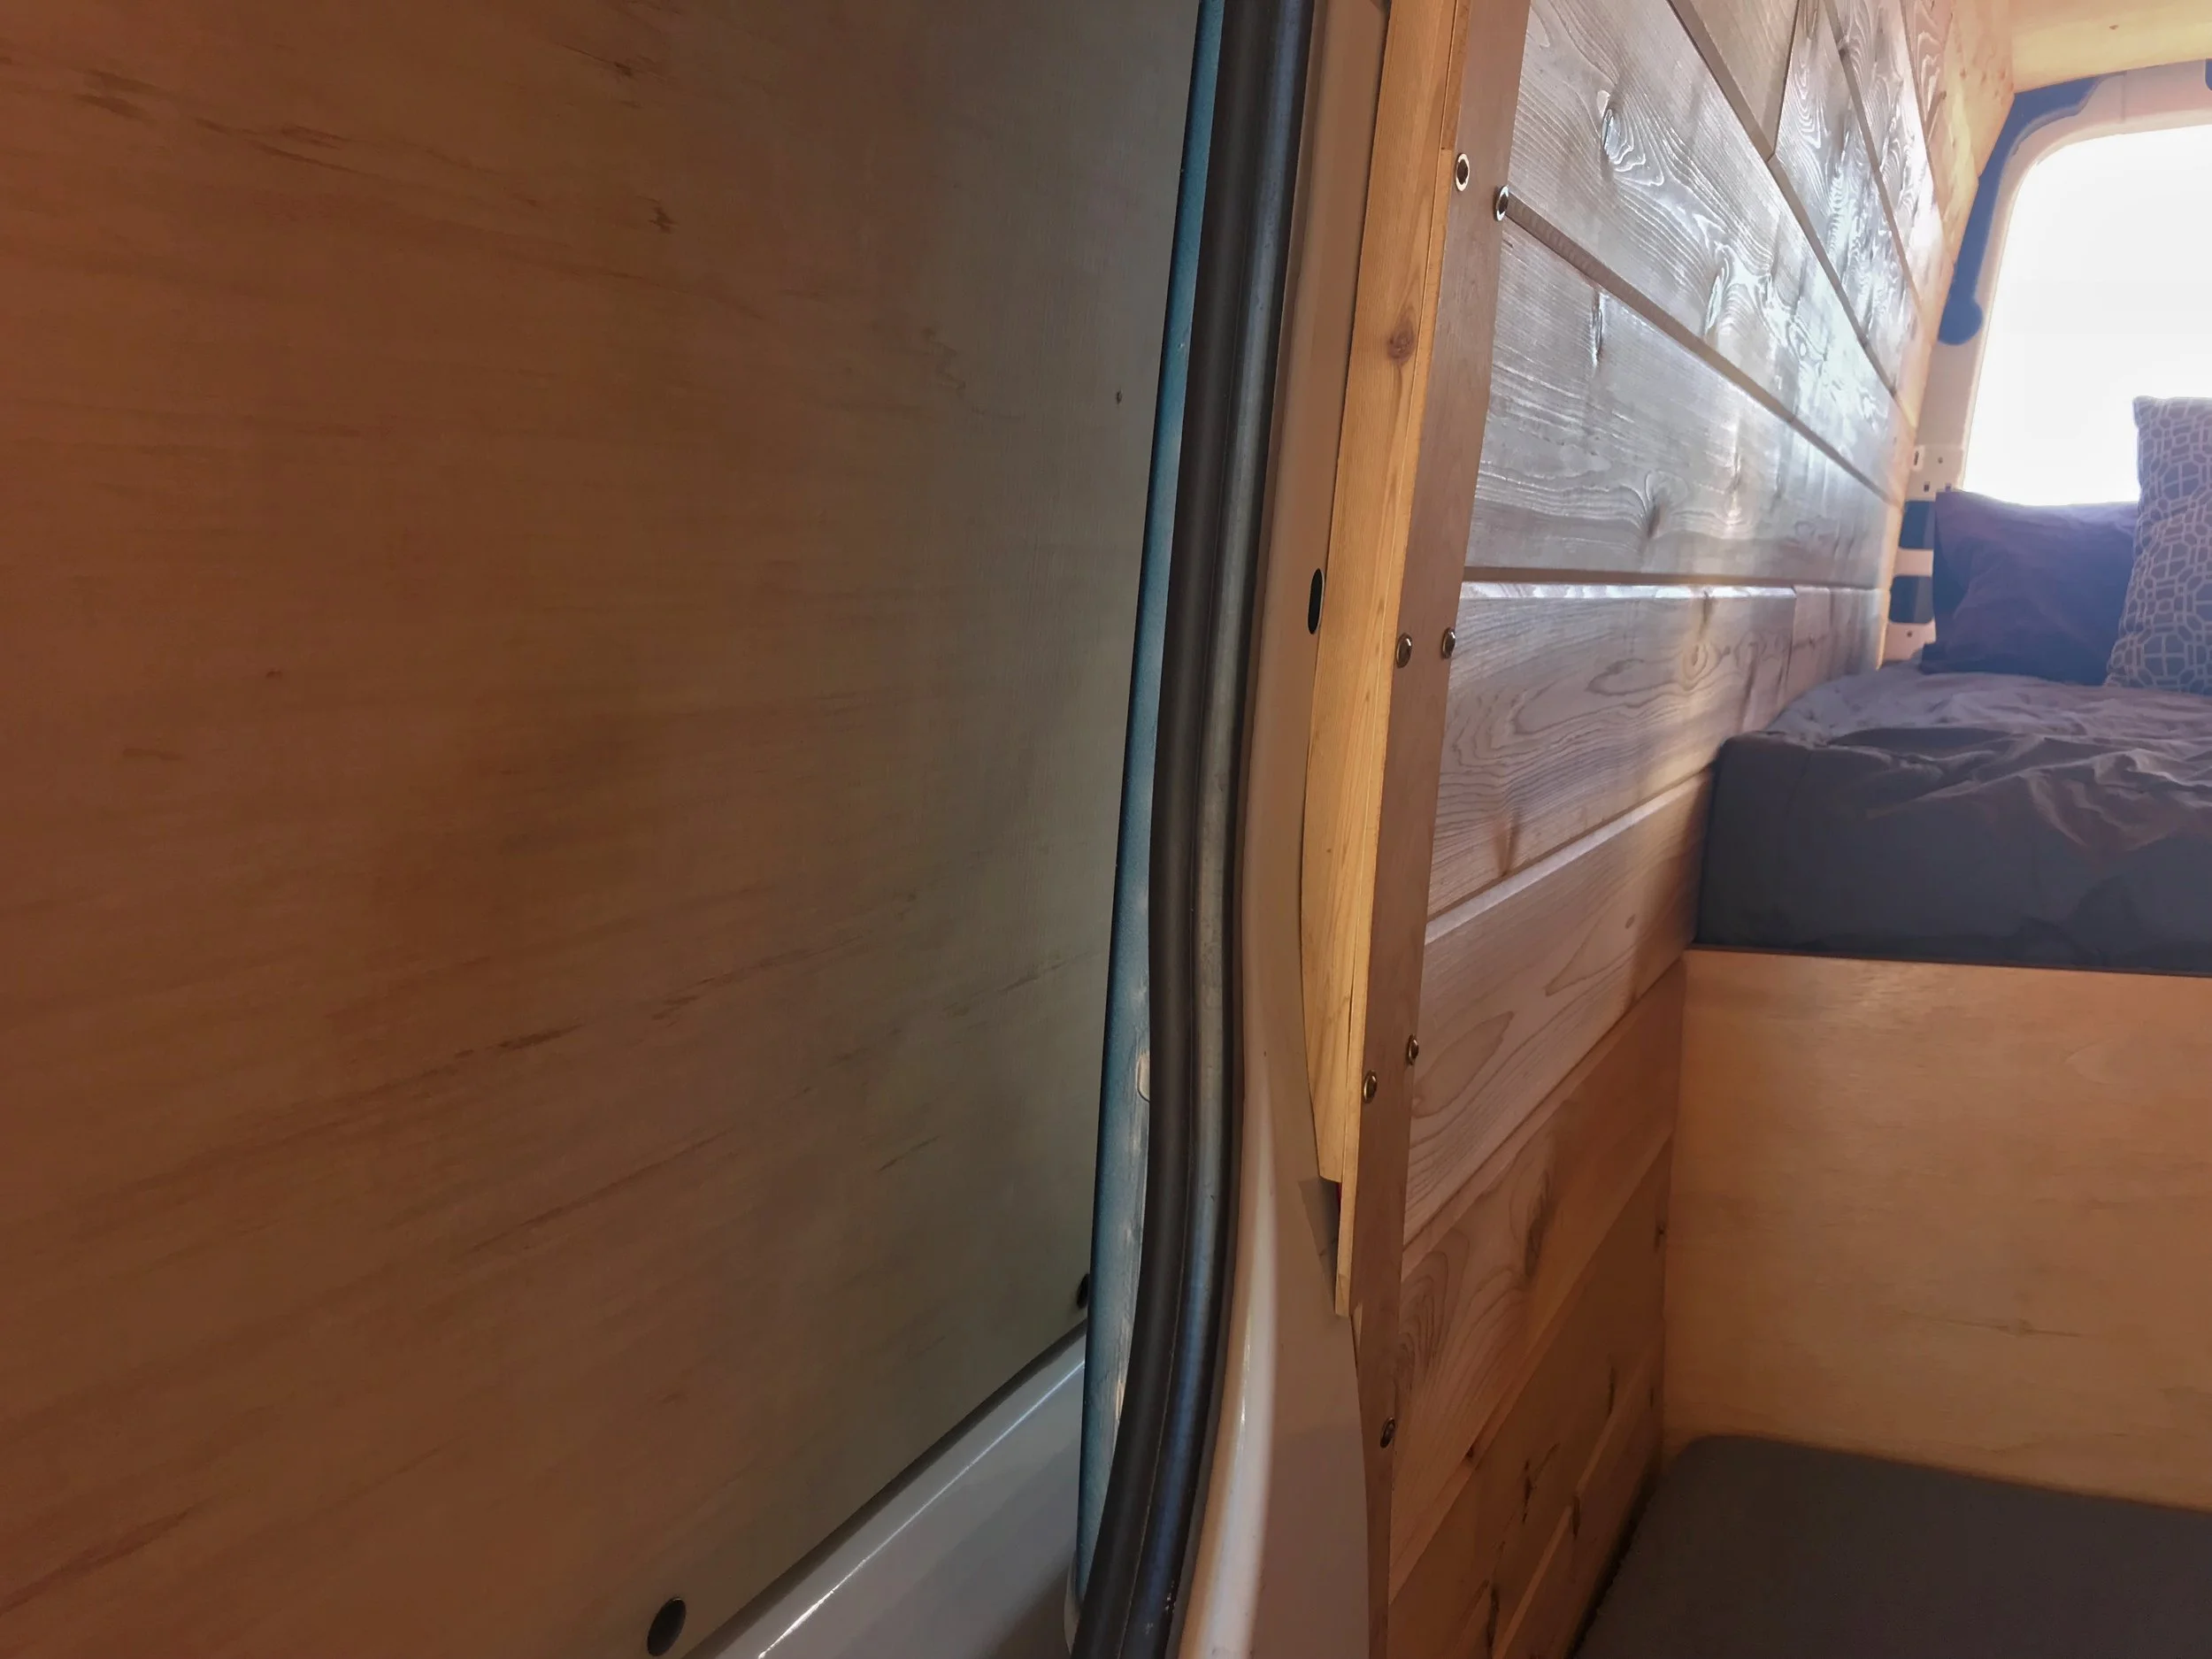
The wood stud peeking out behind the vapor barrier of the van. Installing these studs made installing the paneling simple.
Putting up the cedar tongue and groove itself was actually probably easier than making the decision to use it. Prior insulating, we had installed "studs" into the walls of the van, which we attached the cabinetry and the paneling to. The cedar paneling goes from the top of our counter and above our bed cabinets to the ceiling on the driver side. On the passenger side the paneling starts above our fridge bench and above bed platform and goes to the ceiling.
The first board on the driver side was one of the most critical pieces. We needed to make sure that it was level with the countertop and level with the van, because all of our all the other pieces would be attaching to this piece. Since our counter is more narrow than a traditional kitchen counter, we had to cut the 4-inch backsplash off the back of our laminate counter. We still wanted the transition between the counter and wall to look really clean, so we decided that the first piece of paneling should be behind the counter, rather than resting on top of it. When we installed our countertop, we put this first piece behind our counter separate from the rest of the paneling. The first piece isn't attached in anyway to the counter or wall, it's just wedged behind the counter. Because of it's tongue and groove, the piece above it holds it in place.
Above the initial "backsplash" board, we just cut each board as it was needed. In a house, all the walls are the same height and length, so you don't really need to measure for each individual plank. In the van, it was critical that we measure the length for each individual piece, because most the ribs of the van that that the wood butts up to were slightly angled or curved.

We had to carefully measure for each piece, because the van isn't square like a room.

We varied the length and the arrangements of the boards to give it a random look.
We also mixed in some of the shorter scrap wood through out the wall. We didn't want the seams to line up, so we just interspersed them at random. As we continued up, we made sure that each piece's tongue was totally locked into the groove of the board above it. If you don't make sure the pieces are straight, the problem will eventually magnify until all the boards are crooked.
To get the tongue and groove to fit together well, push the pieces together using your hands. Then put a short piece of scrap tongue and groove on top and pound on this piece with a hammer. Move the scrap piece along the plank you are installing until, the two pieces are very snug all the way across.
To secure the panels to the wall, we nailed them into the wood studs with small wire nails wherever we could. You can hide the nails by putting them through the tongue where they will be covered by the groove of the next piece.
We used self-tapping sheet metal screws, to attach the wood directly to the metal ribs of the van. We picked what we think is an attractive zinc-plated, wafer-head screw that matches the hardware on our cabinets.
We didn't want to put too many extra holes in the metal however. The studs helped us reduce the number of places we had to screw into the metal. Because it's tongue and groove, we also didn't have to fasten every piece, because they hold each other in place. We secured about every third piece, making sure that the screws were in line with each other as we went up.
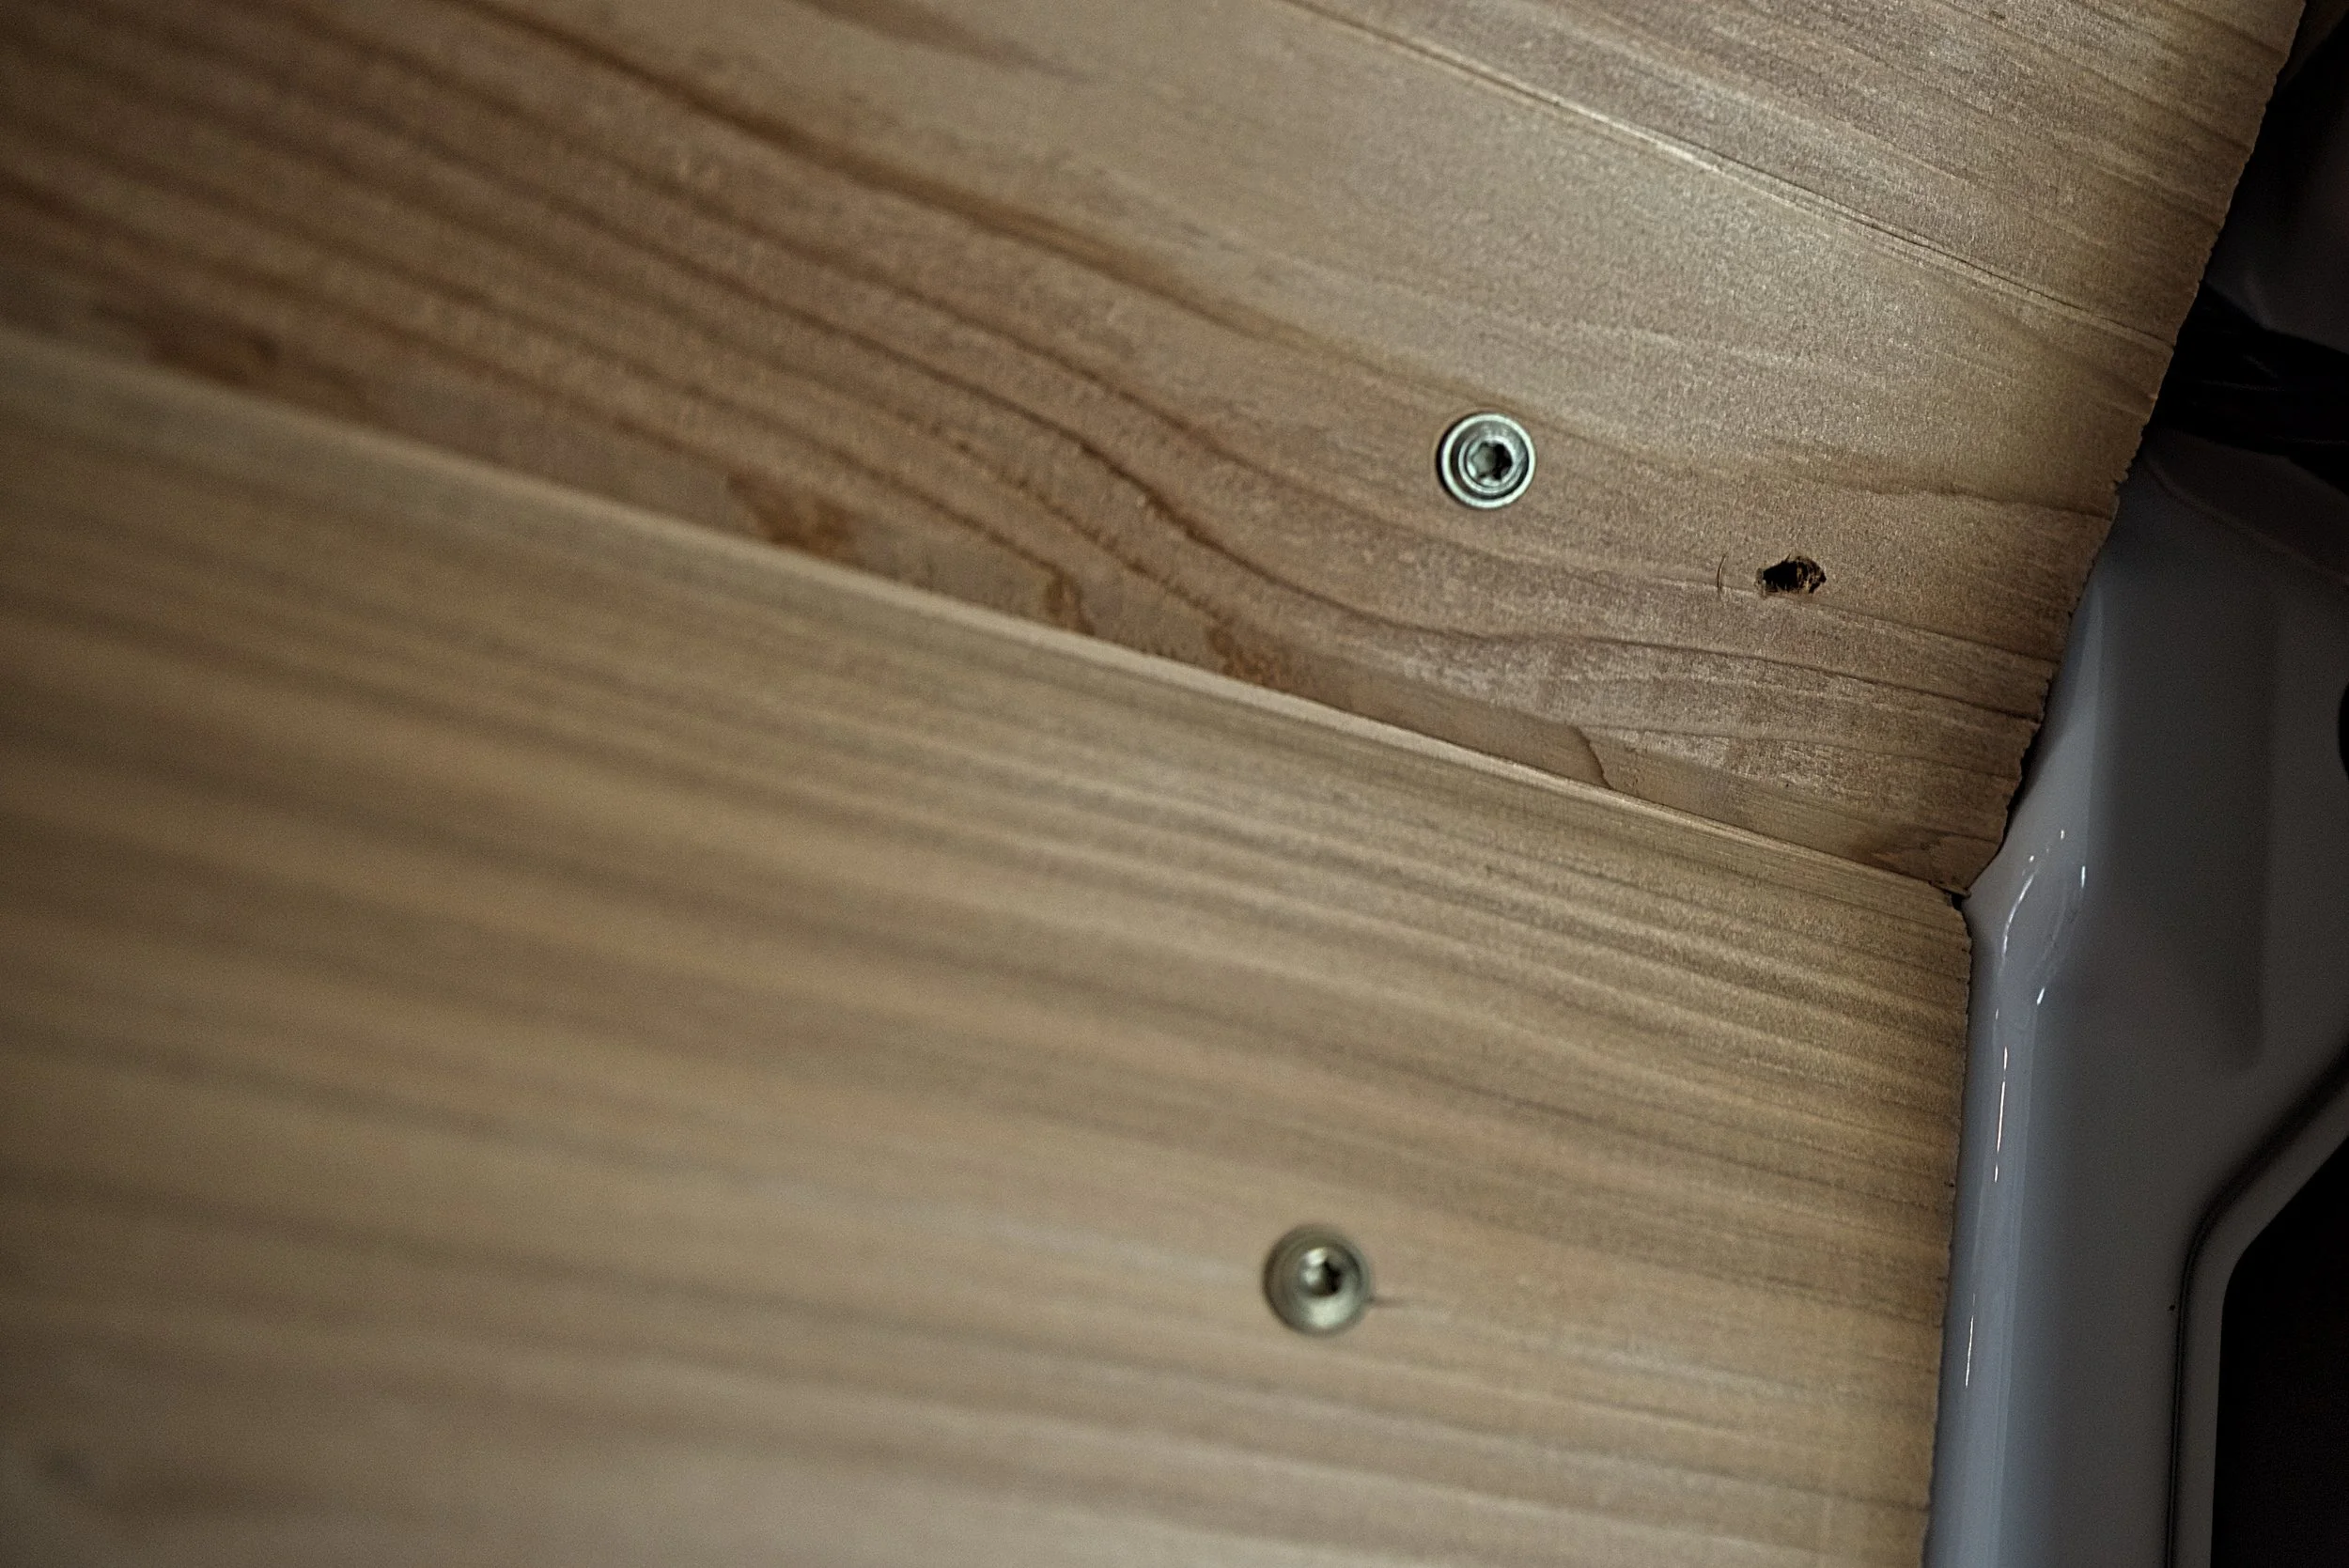
There is no way to hide these sheet metal screws, so instead we chose a zinc-plated screw that kind of matches our brushed bronze cabinet hardware.

We only fastened every third or fourth board, and we lined up the screws so that they would have a cleaner appearance.
Installing the paneling was pretty straightforward. Measure, cut, attach to wall. Of course, there were a few tricky areas where we had to go around cabinetry or where the panels met an angled rib of the van.
The board that goes over the top of the bed cabinetry was a little challenging. We had rip about three inches off the back end of the board using the trusty old circular saw and fence. Then where the face of the cabinet rose above the top shelf, we had to cut a small notch for this lip to fit in (see photo below, because this is difficult to describe). Ian cut the notch by hand, using a coping saw, a pull saw, a chisel and a file.
We had a similar challenge where the paneling goes over the front of our bed platform. Fortunately we only had to cut a notch here and didn't have to rip the board narrower.

The board above our bed cabinetry required a ripping half of the board and cutting a notch.
The board that goes over the bed platform was easier because we only had to cut a notch.
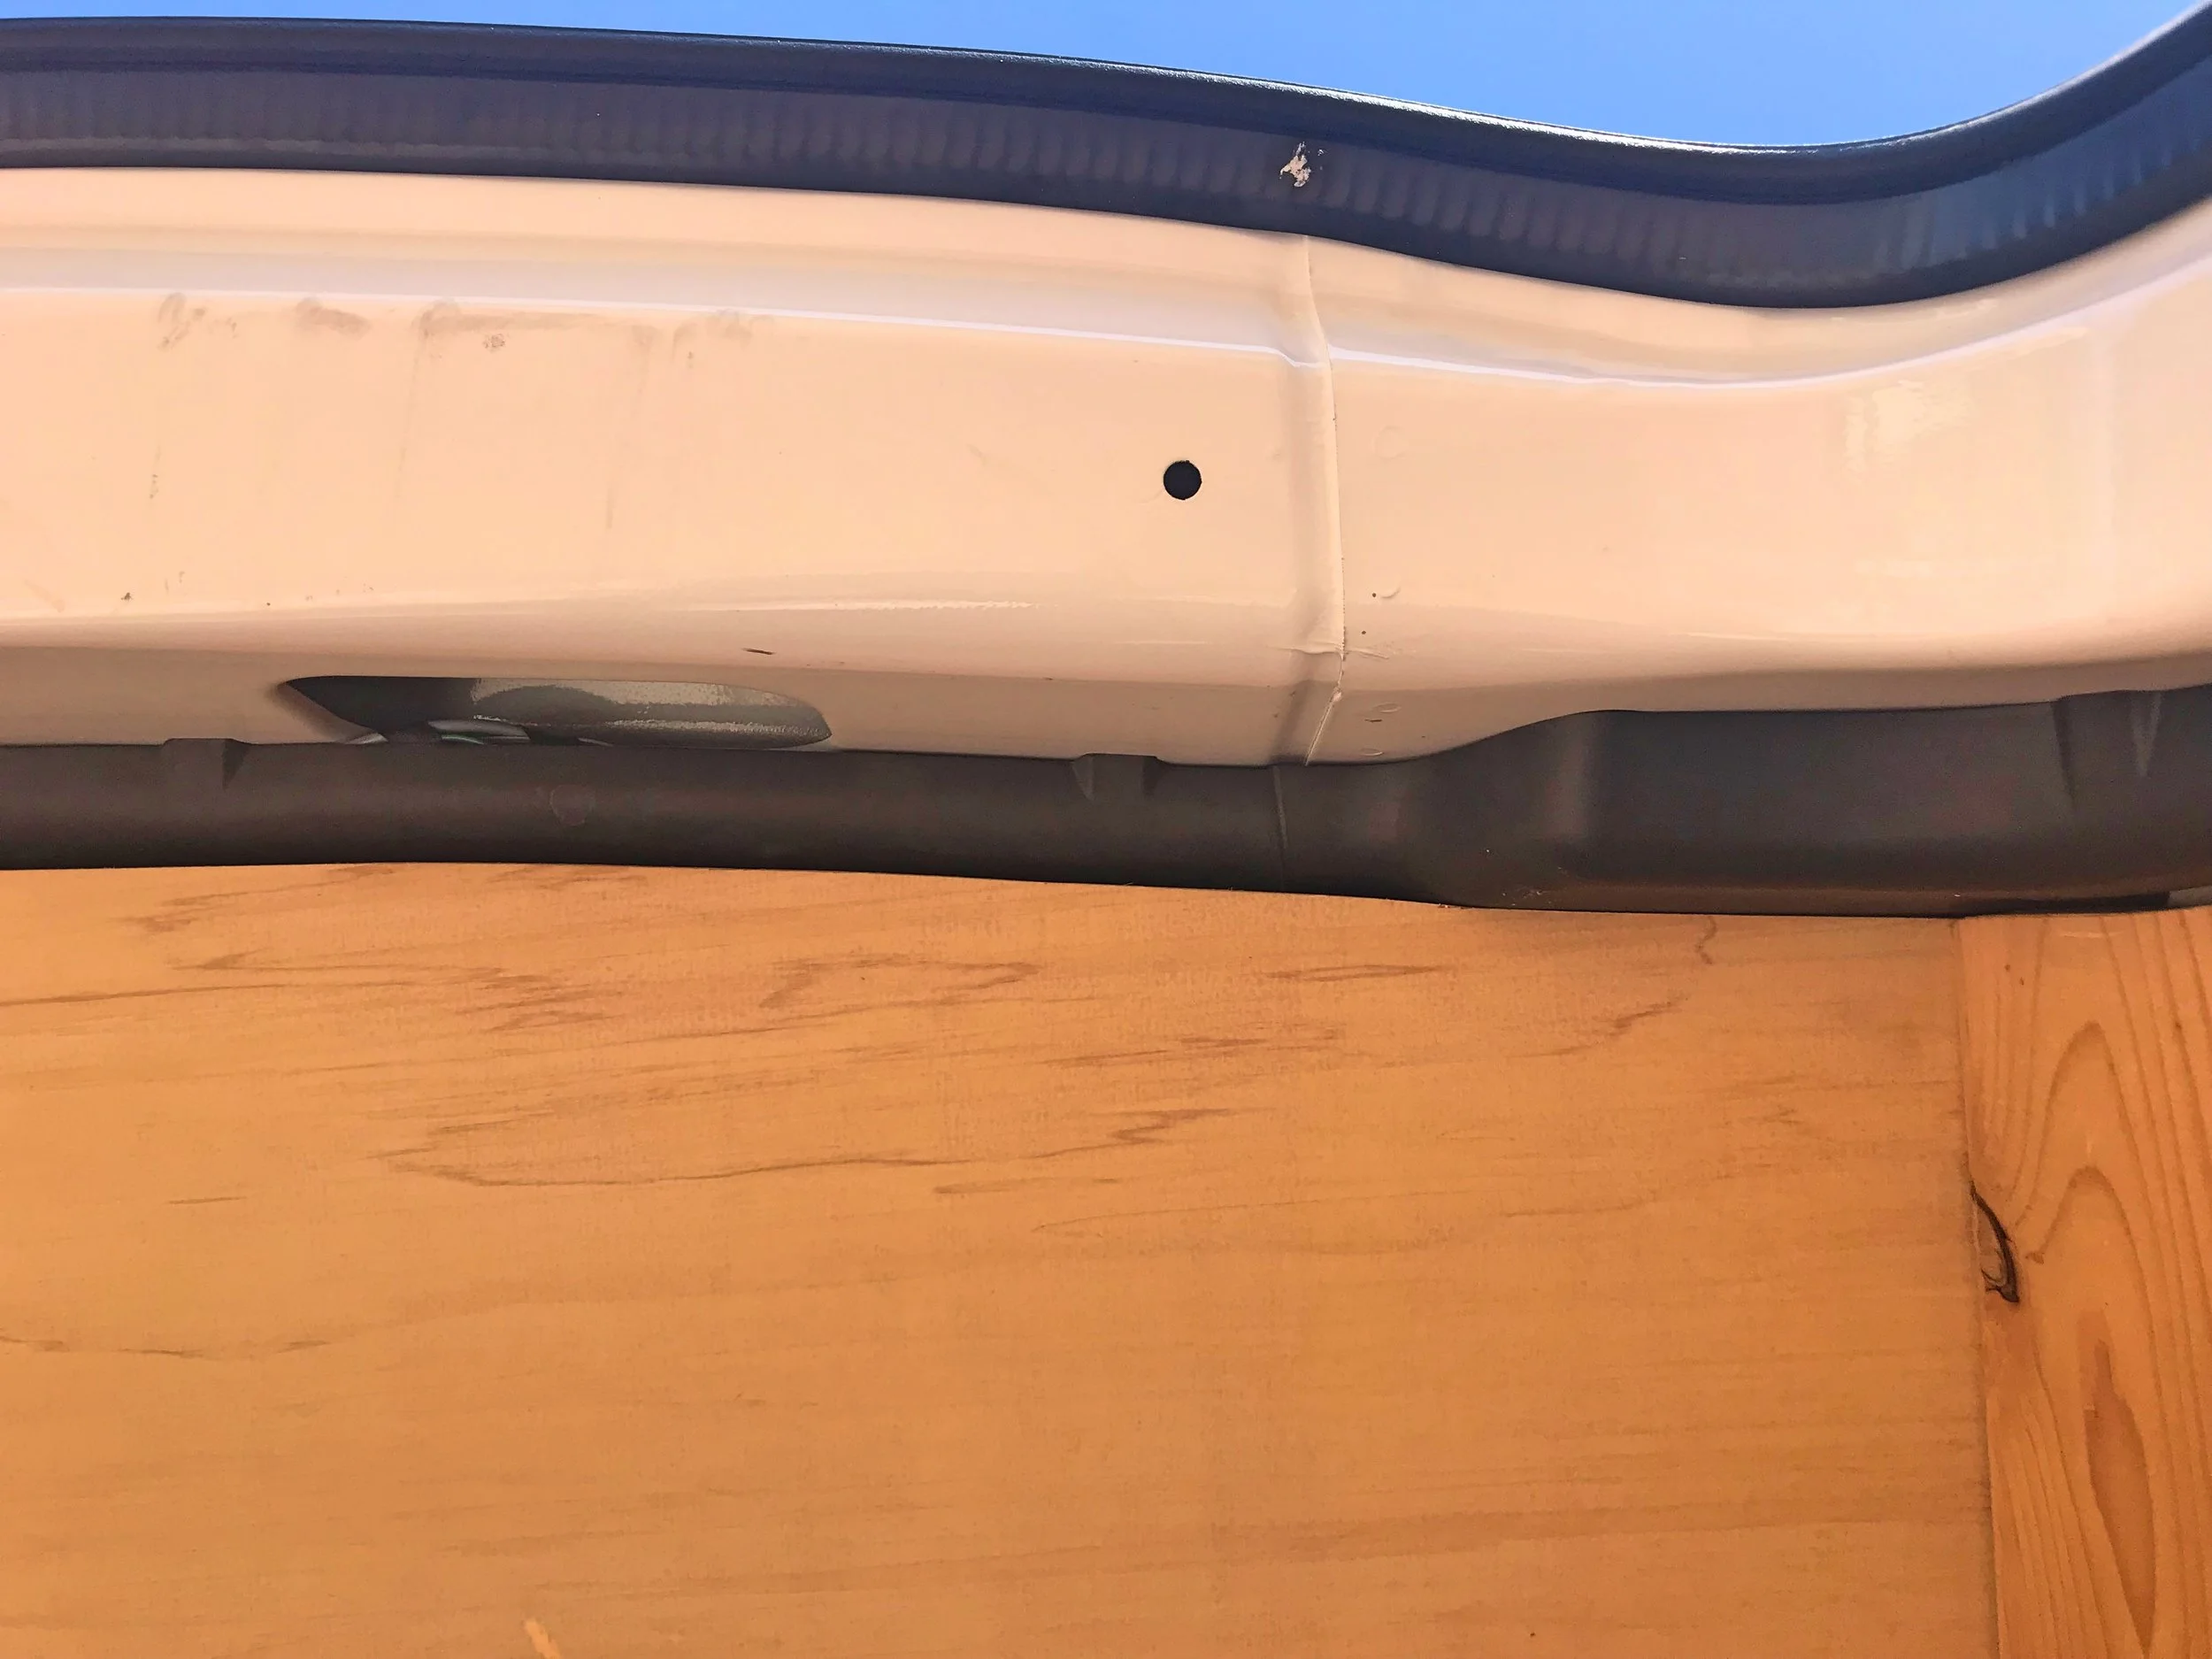
The final difficult spot was where the cedar boards butted up against the back rib of the van. The back of the van angles inward slightly. Instead of trying to perfectly match the angles perfectly on each piece, we decide to stair step the boards up. It saved us a ton of time, and because the angle is so slight, we think it turned out looking okay. There is also a plastic wiring harness cover on the back of each side. We wanted the wiring for our taillights and rearview camera to be protected, so we wanted to leave these in place. Fortunately the boards slipped right underneath the plastic covers. There was only one place at the top where we had to cut/file a notch into the board to make it fit.
Where the boards butted up against the back of the van, we "stair-stepped" the boards rather than trying to match the angle of the rib on each piece.

Most of the boards slipped right underneath these black plastic protectors.
The nearly finished cedar paneling, prior to installing the ceiling. We left the final piece off, until the ceiling was in because the ceiling was going to be tucked underneath it.
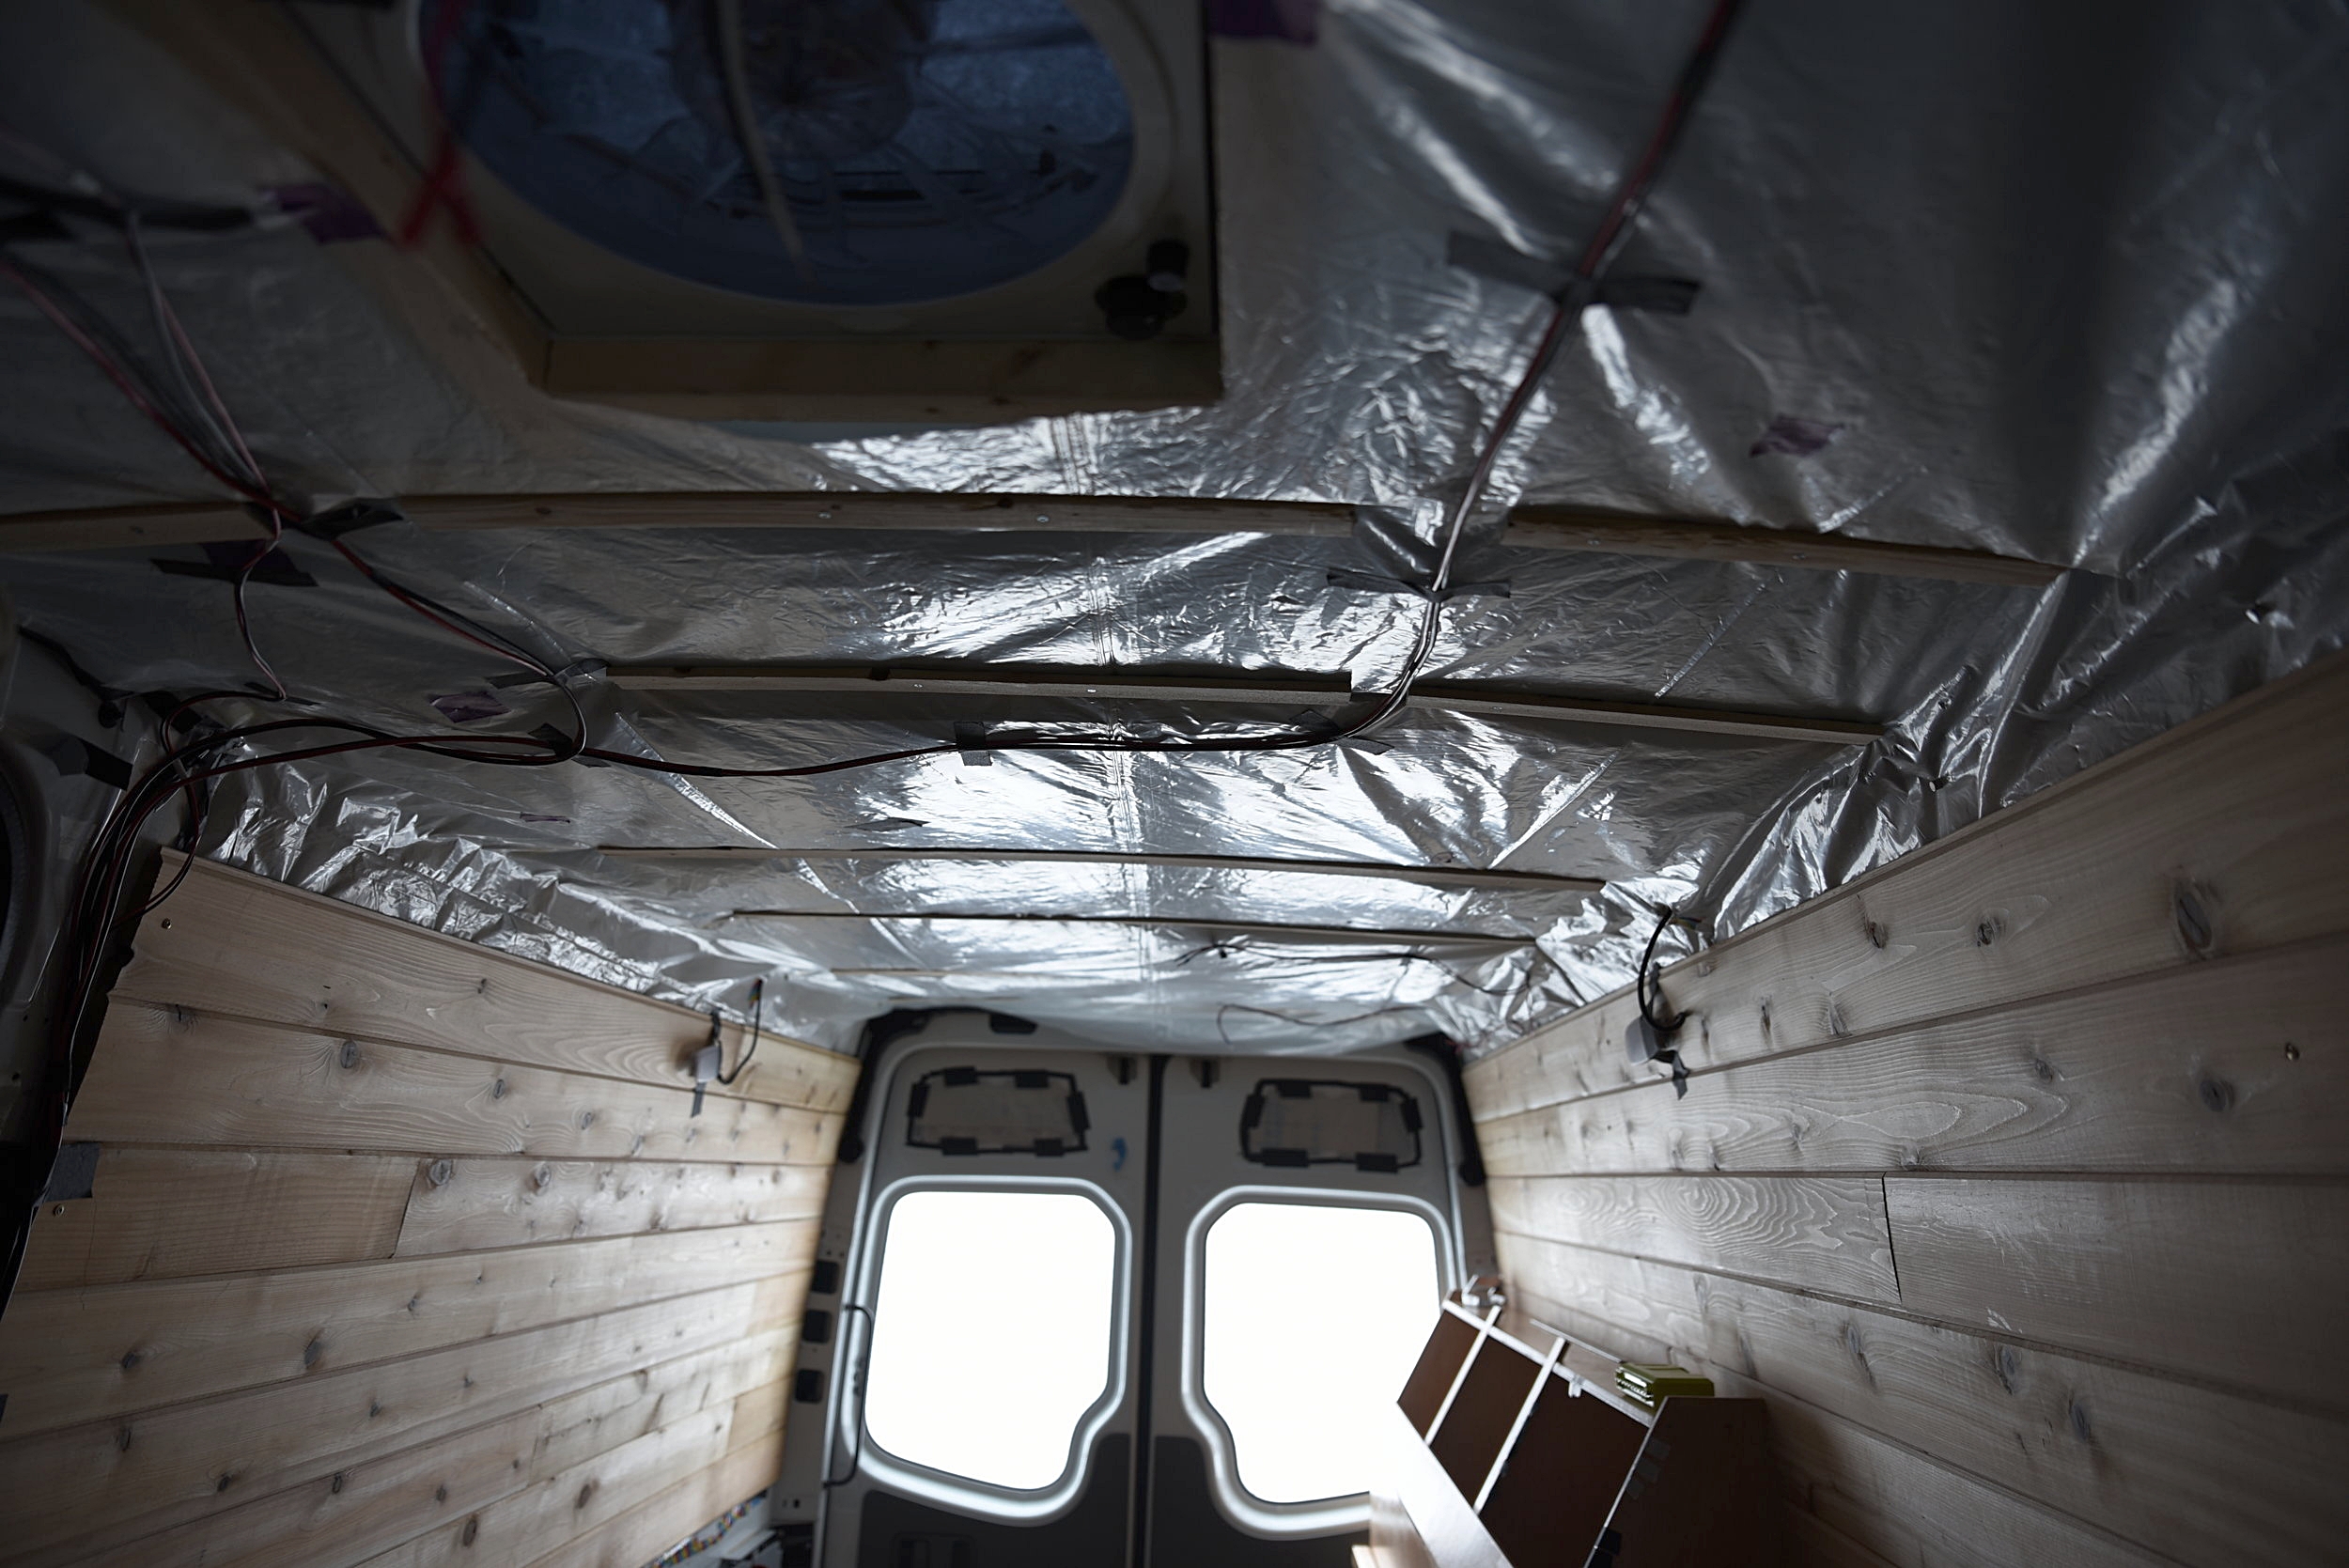
Ceiling
Prior to insulating, we installed small wooden "studs" to the metal ribs of our van. We secured the ceiling to the studs. Unlike the walls though, we had to leave a small gap under the ceiling panels to accommodate the wires to our solar-powered lights and fan. We first taped the wiring for the lights to our vapor barrier in the arrangement needed for the lights. To achieve the needed gap, we then screwed a piece of lath to the studs with basic countersunk screws to add about a 1/4" of space below the ribs of the vans and the studs.
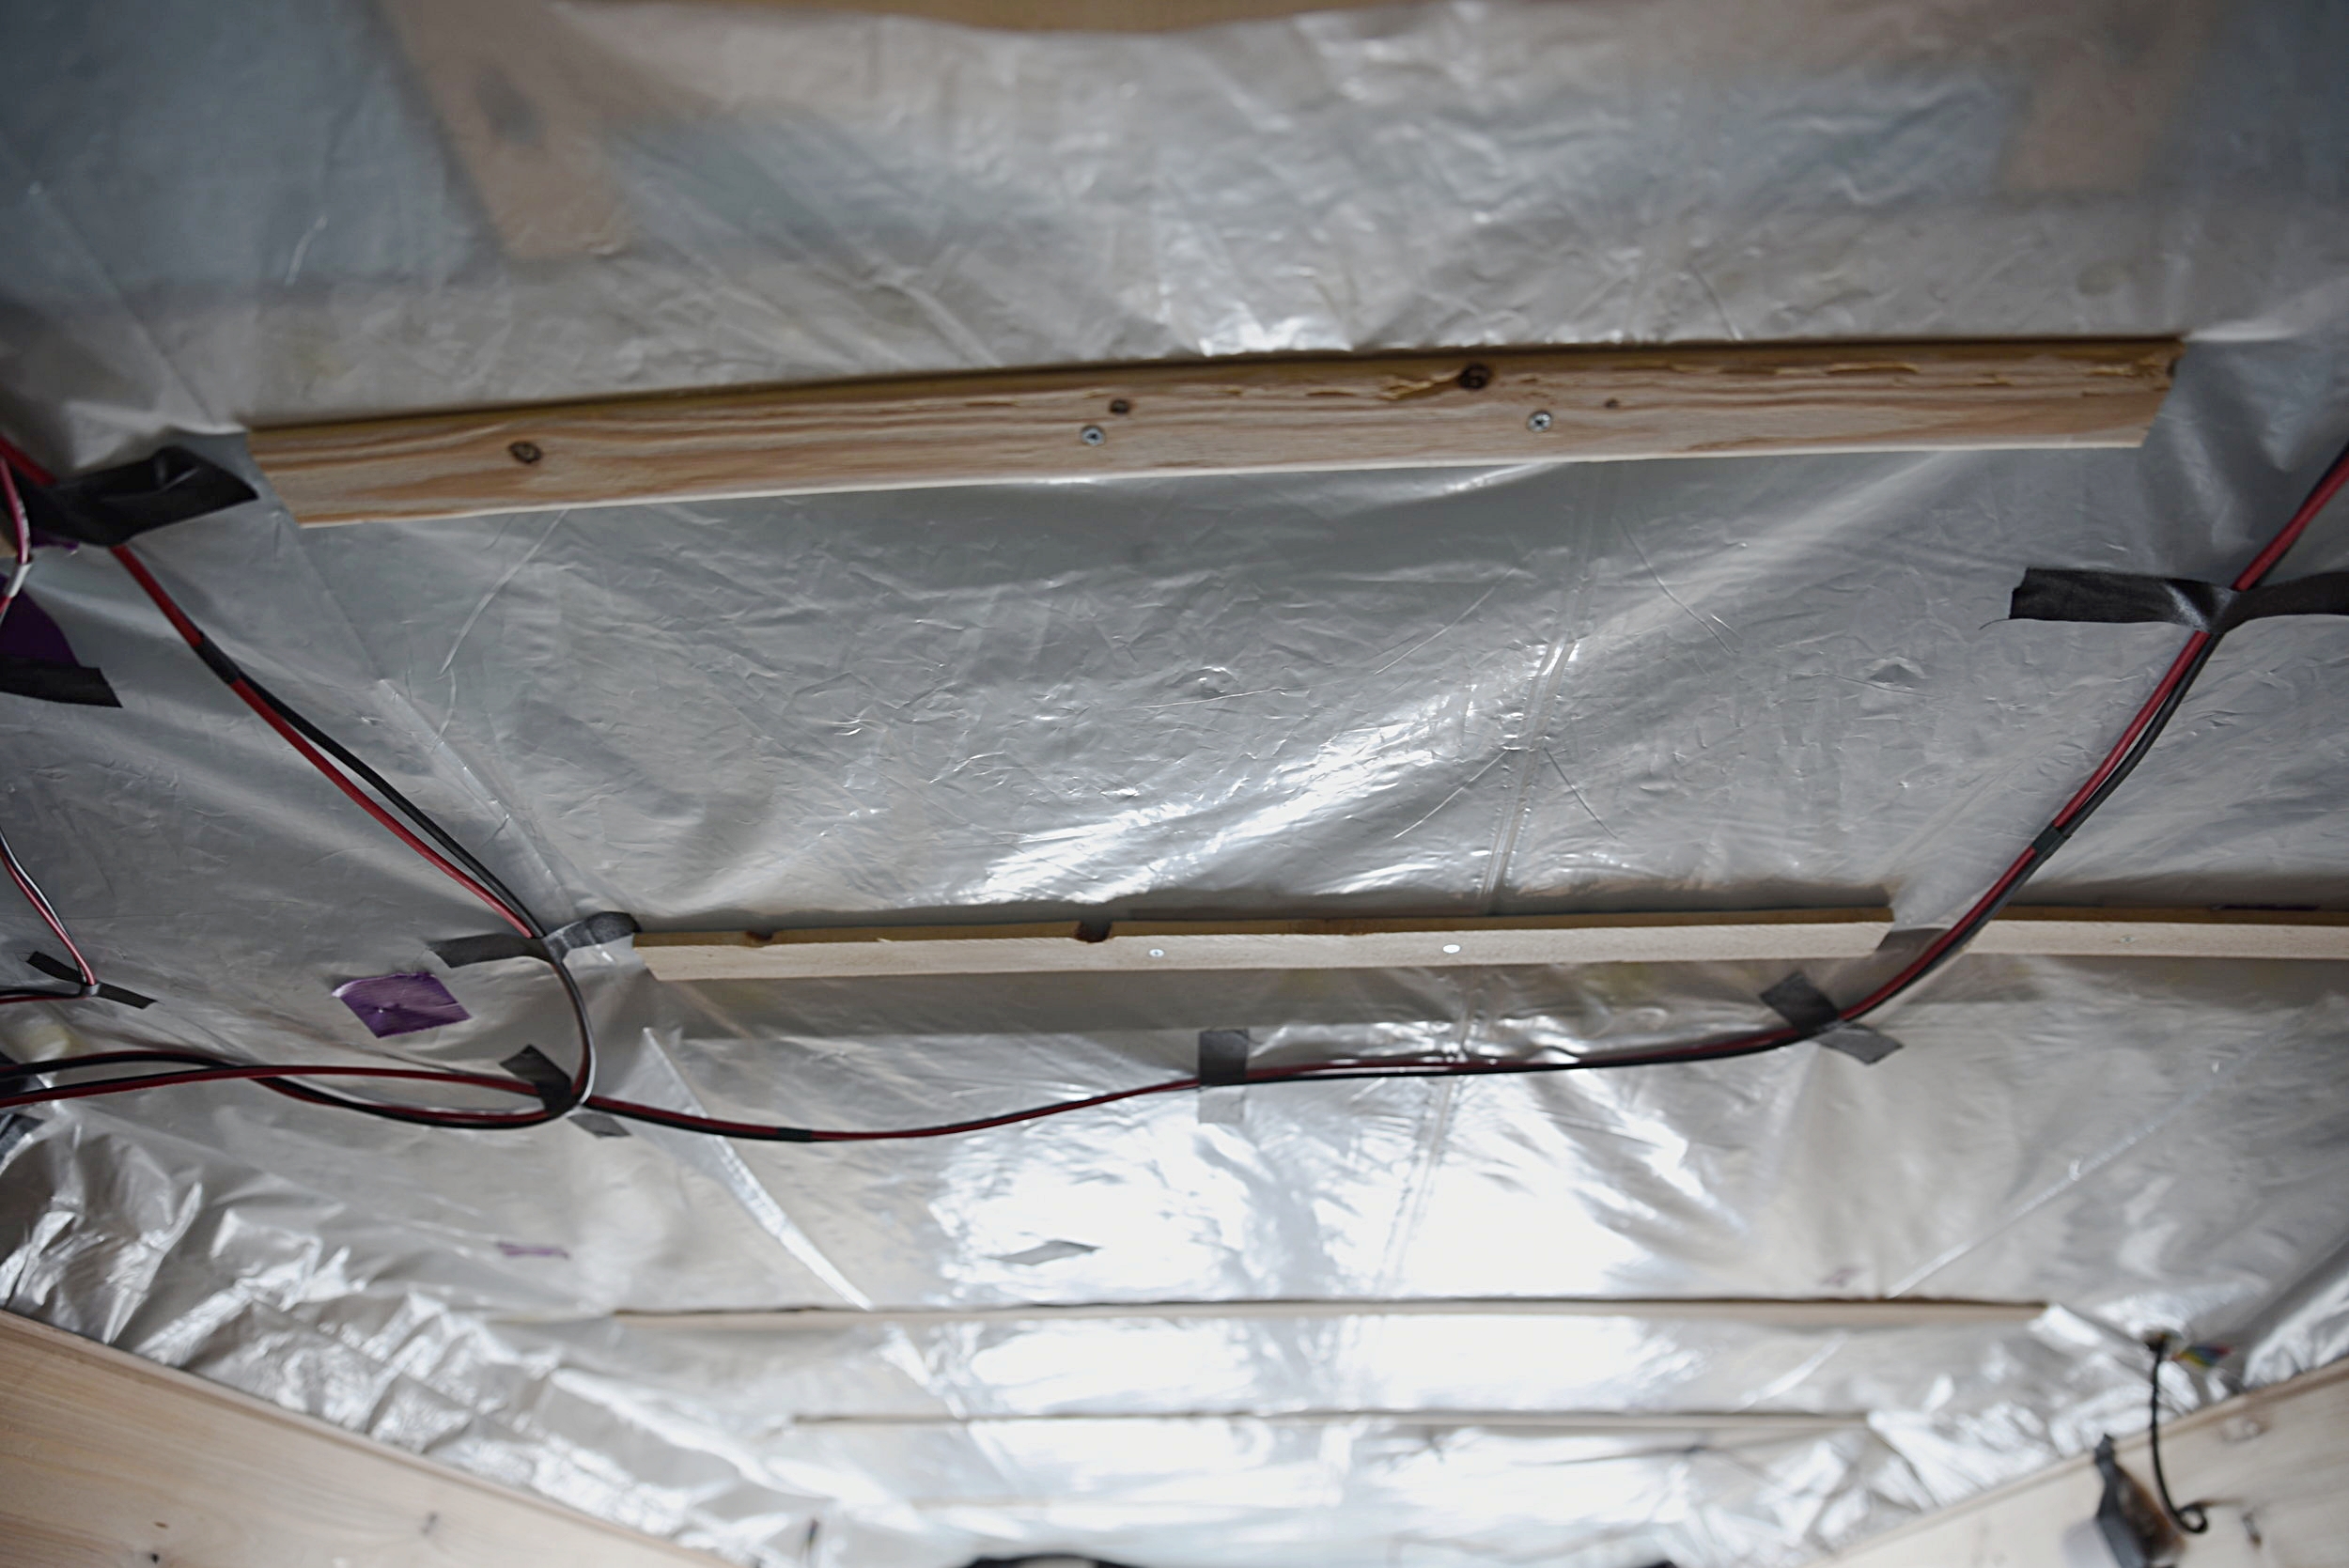
We used lath as a spacer to allow the wires to run underneath the ceiling paneling without being pinched at all. Lath is about 17 cents a piece so it's a lot cheaper than using a thin piece of trim.
Our Sprinter had three dome lights in it. Originally these dome lights were set into the plastic paneling that came on the walls of the van. We removed all the plastic paneling, but we kept the lights. The cedar paneling of the walls was too thick for the clips on the light to be installed in the wall. We decided to move the lights to the ceiling paneling. The ceiling paneling was about 1/8" thick, so the clips on the lights fit perfectly into the paneling once we cut the holes. We disconnected the lights from their wires and ran those wires under the paneling so that the lights could be attached after.
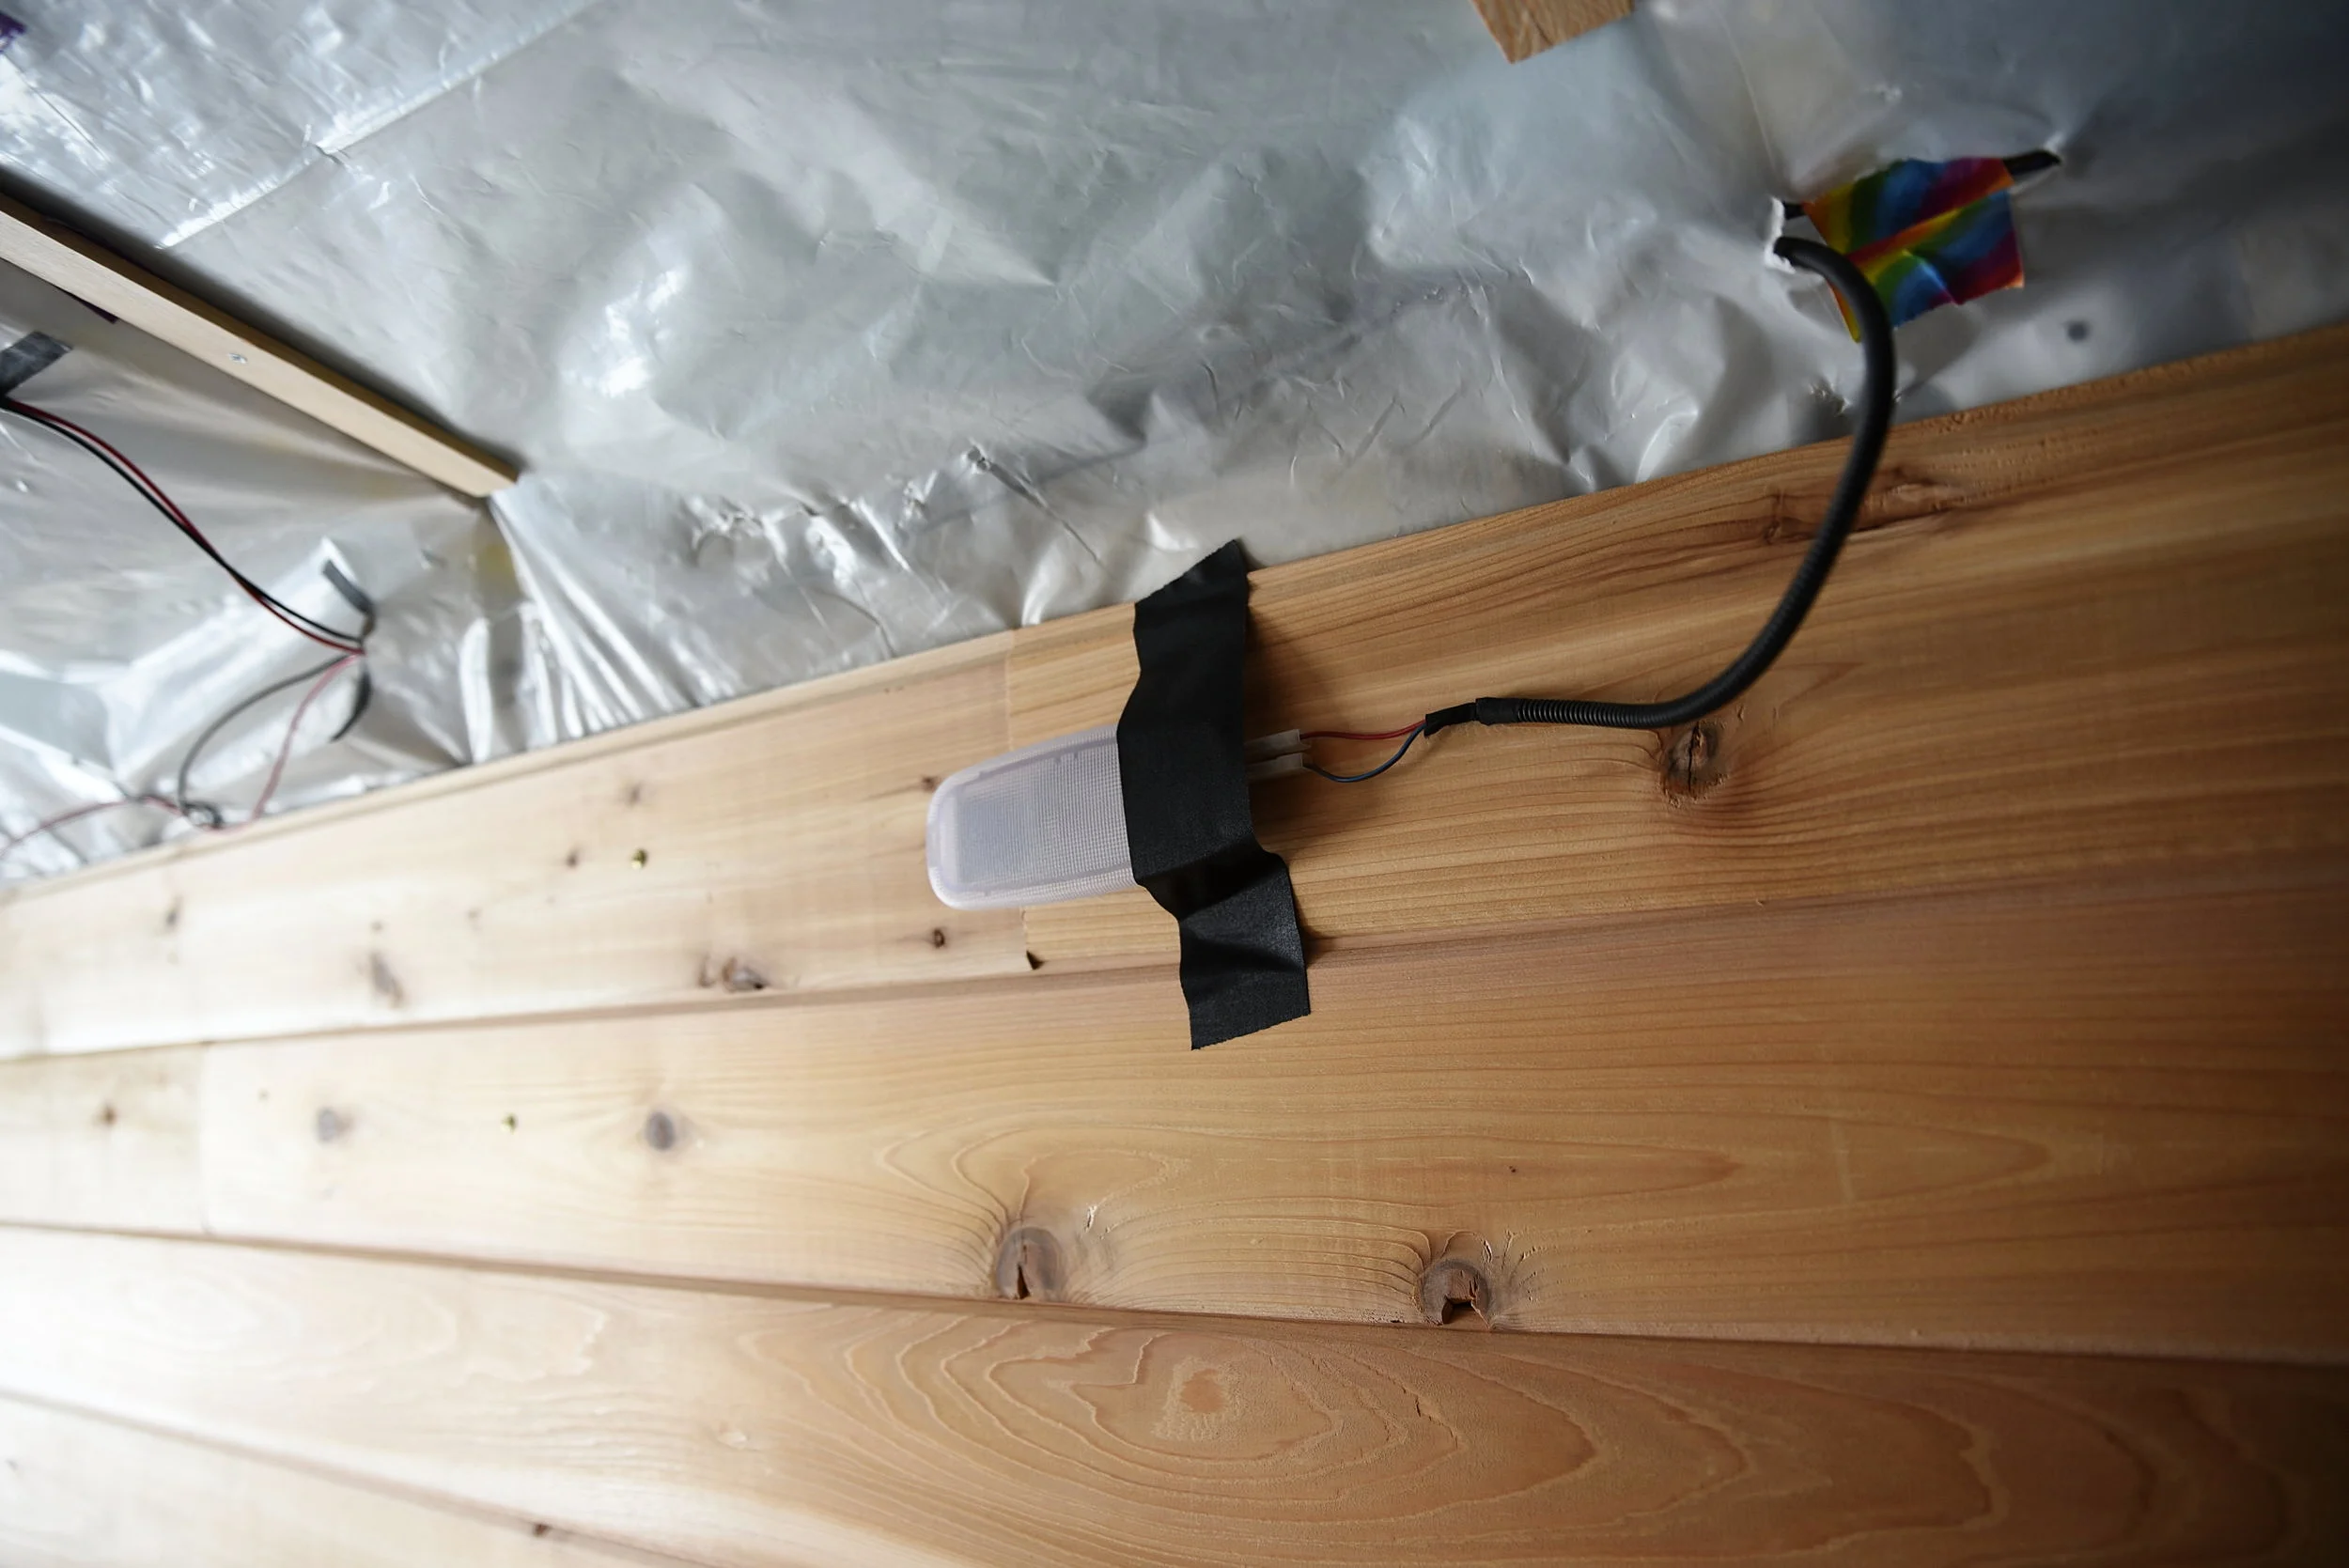
We wanted to keep the dome lights in our van, but they had too thin a profile to be installed in the cedar walls. We put them in the ceiling instead.

Ian disconnects the wiring from the dome light so that we could run the wiring underneath the ceiling panels.
After the lath spacers had been added, it was time to cut the panels for the ceiling. We decided to use a 1/8" lauan plywood on the ceiling. Originally, we had planned to use a 1/4" white melamine-coated particle board for the ceiling. We wanted to use the white for a nice finish that would make the van feel spacious and open. We purchased the melamine panels though and discovered that it was much too heavy for the ceiling. Each 4'x8' piece was just under 50 pounds.
We decided to return the Melamine and switch to 1/8" lauan plywood. We ended up loving our new material. It's a light color that makes our van feel spacious. Unlike the Melamine coated panels (a type of plastic coating), we decided to keep the naturally smooth texture of the lauan unfinished to match the rustic feel of our cedar. A 4'x8' piece of the lauan plywood was only 11 pounds, and it was half the price of the Melamine as well!
The lauan plywood has a naturally smooth, almost glossy, texture. It's lightweight, and it has a nice light color that reflects light when left unfinished.
We needed to figure out how many pieces of paneling we needed and how we would lay them out on the ceiling. The plywood pieces were the standard 4'x8' size. Since the van's ceiling is about 54" across, we had to use panels lengthwise because their 48" width wouldn't quite reach across the entire ceiling. We used four pieces cut down to about 54" across and 48" wide. The fourth panel that is nearest to our rear doors was then cut to about 21” long.
When we were figuring out the precise measurement for the width of the ceiling, we had to factor in that the roof is curved slightly. We intentionally used a flexible material so that we could keep the space added by the curve of the roof. We wanted to keep that lovely curved shape as well. We got a very close measurement of the curved ceiling using a tape measure, and then we added a little extra to that measurement. We cut the first piece of wood to that slightly too large size and then we cut it down twice more until it was precisely the right size. Then we were able to measure that first piece and use that as a measurement to cut the other three pieces.
Our ceiling has four pieces of paneling with the seams running widthwise across the van.
The van's roof has a slight curve that we wanted to retain, so we chose a flexible material.
The four pieces were arranged on the ceiling so that there were only three seams running widthwise across the roof that would later be covered with a thin flexible trim. There was quite a bit of extra scrap wood since we cut 42 inches off the end of each piece of plywood, but we used this wood to replace the plastic paneling on our doors.

The profile of the front piece of paneling before installation. We found this shape by creating a cardboard stencil.

There is a large pillar in front of the sliding door, and we had to cut the ceiling panel to match this shape.
Unlike a room in a house, our Sprinter is obviously not a perfect cube. We had to cut a curved profile on the front and back pieces of paneling.
In the front there is a large curved pillar where the sliding door's frame meets the ceiling. To find the shape we would need to cut into the paneling where it buts up against the pillar, we created a cardboard stencil, which we then traced onto the plywood. It's much easier to make small adjustments with a scissors in cardboard than in the plywood with a saw.
The metal frame of the rear doors of the Sprinter is curved so we had to match the ceiling to this.

We had to cut some notches in the back piece of the ceiling to accommodate these plastic wiring covers.
The rear piece of paneling is not only narrower than the other pieces, it also had to have a curve cut into it where it met up to the frame of the van's rear doors. We didn't think that the cardboard stencil method would be the easiest way to find this curve. Instead we measured about 10 evenly spaced points from the end of the third piece of paneling to the curved rear of the van. We transferred these points on to the fourth ceiling panel and then connected the points to approximate a curve. (Think high school geometry.)
Ian used mostly hand tools such as a pull saw, coping saw, and file to cut the notches and curves needed for these shapes. A jigsaw could be used for a task such as this, but we found that it ripped up the cut too much and made unsightly splinters. The circular saw actually made the cleanest cuts, so we tried to use that as often as possible.

Ian uses a hole saw to cut the holes for the solar-powered, 12-volt lights.

The hole for the fan would later be finished with plastic trim that came with the fan.
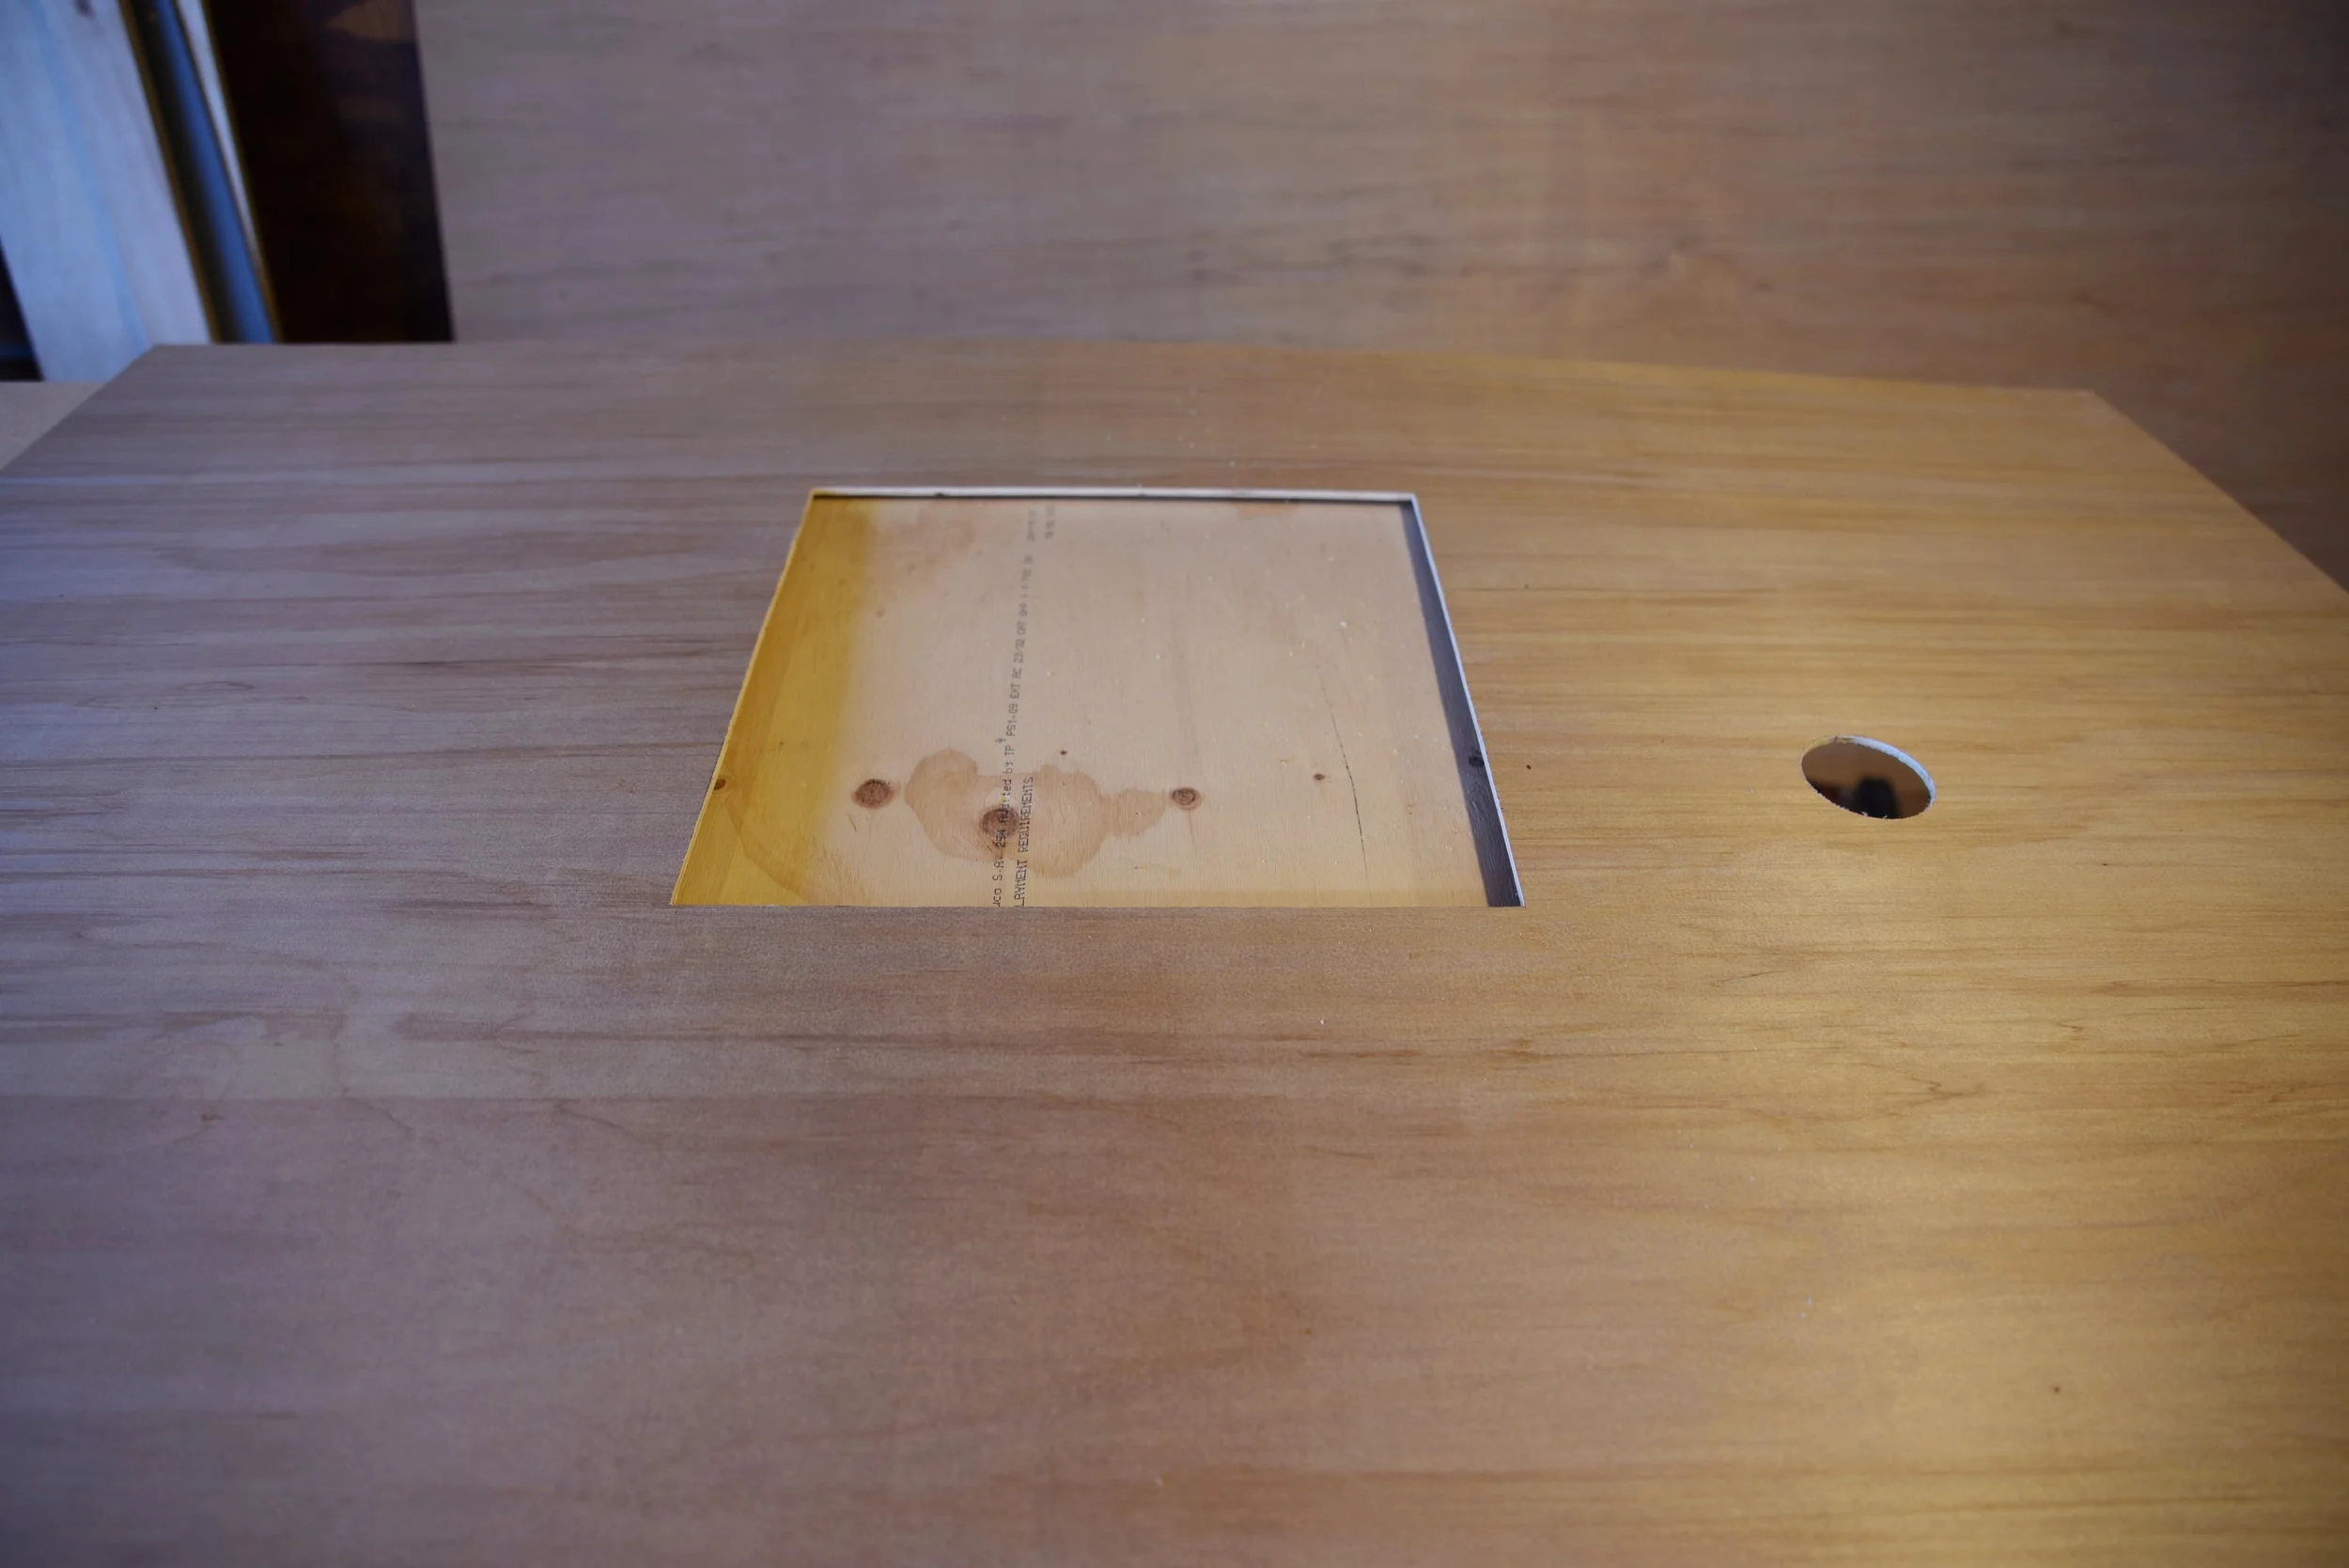
After all the panels had been cut to the correct shape we had to cut the holes for our solar-powered lights, dome lights, and our Fantastic Fan.
We cut the fan hole first. The fan was already installed in the roof of the van, so we had to make sure we got the whole in precisely the right place. (Find out how we installed our roof vent.) There was a lot more wiggle room with the lights, because they are simply attached to the ceiling and not to the metal roof of the van. We measure the fan's distance from either wall, and from the front edge of the headliner. We then transferred these measurements onto the piece of plywood.
You always want to cut the plywood with the good side facing up, because the side of the cut that faces down will chip. When we transferred the measurements onto the good side of plywood we had to make sure that we had our measurements arranged correctly, since the board was facing the opposite direction it would be when installed on the ceiling. After getting the positioning correct we drew the square shape of the fan, which we had also measured, onto the board.
After double checking all the measurements, Ian used plunge cuts with the circular saw to cut the square hole. Fortunately when we test fit it, we found that the hole was exactly where we wanted it.

We taped the wiring into place above the ceiling where the lights would be.
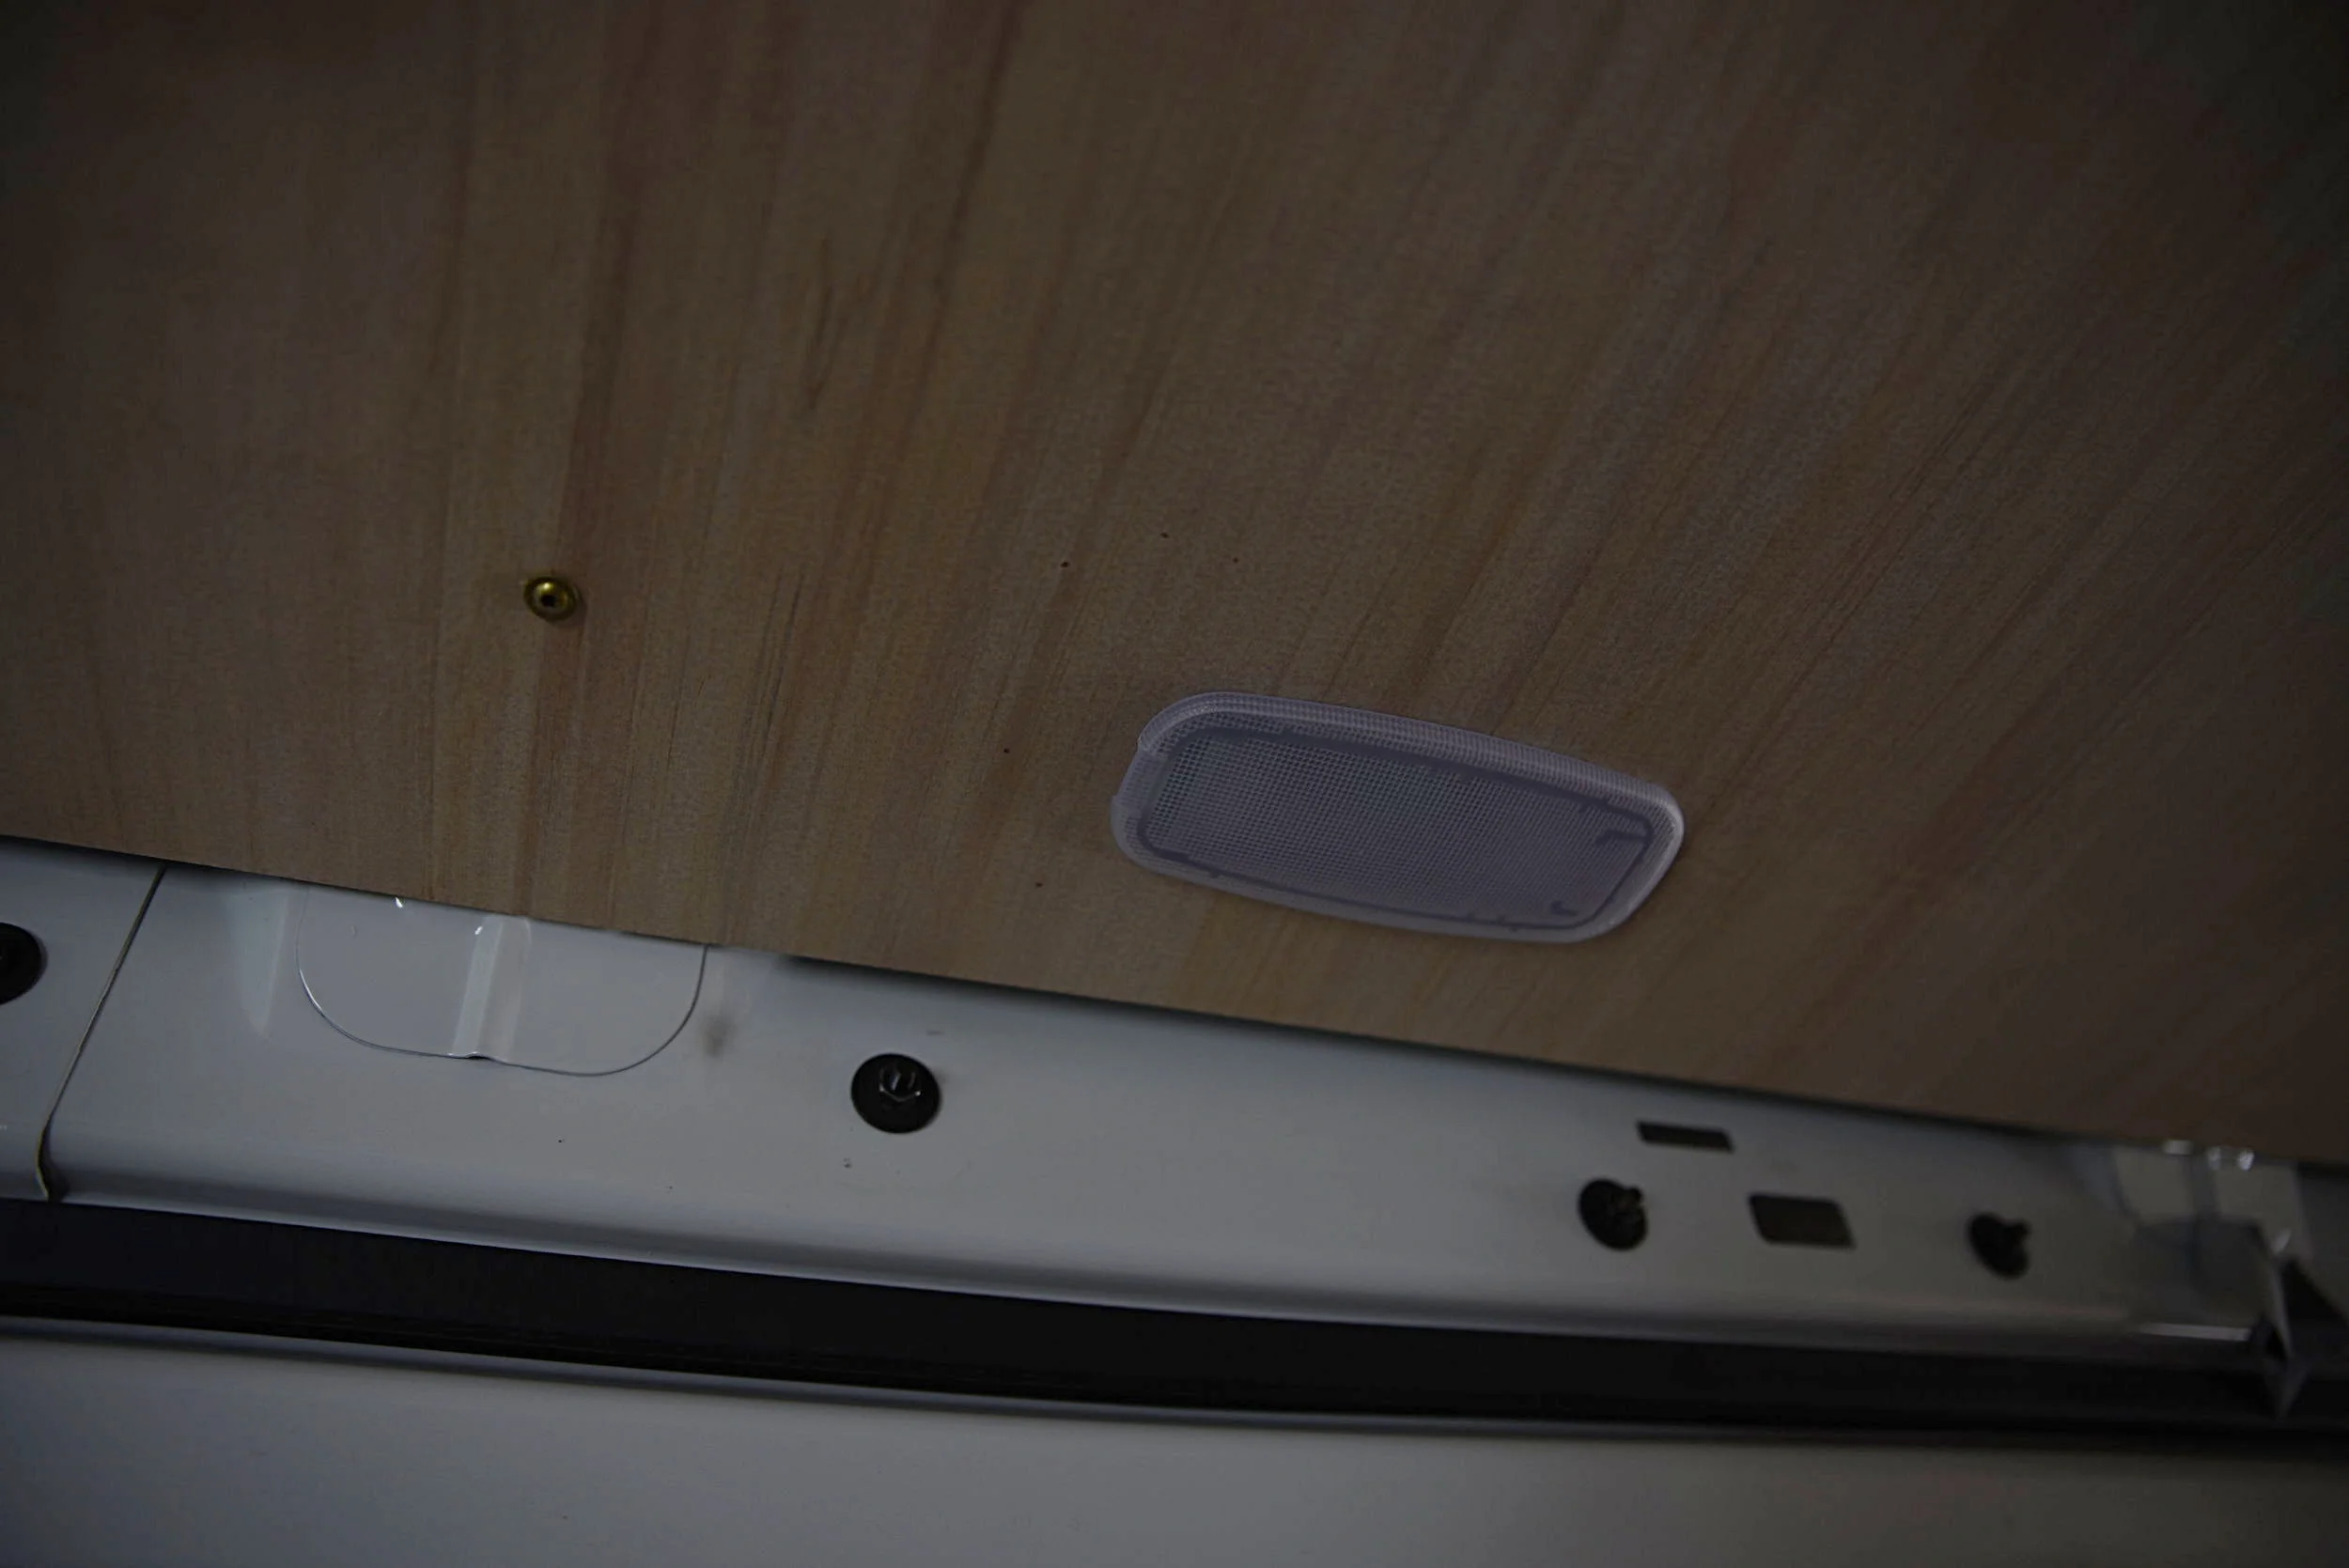
We put the dome lights that came with the van into the ceiling.
We then cut the holes for the lights into the plywood. When we installed the wiring in our wiring we had to decide where to put our solar-powered lights. We have two lights over our counter, a bank of lights over our living space and bench, and two lights over bed. Our lights are 12-volt lights that are designed for RVs. We love them, because they create a bright yet soft light and they are so easy to install! They just pop into place with simple spring-loaded clips that go behind the ceiling panel. The instructions that came with the lights specified the size hole needed for the lights, so we bought a hole saw attachment for our power drill in that size.
Once we were ready to cut the holes we measure the places where the wires were on our ceiling and then we transferred those measurements to the panels. We were careful to keep the banks of lights straight with each other. Again, when we cut the holes, we made sure to cut from the top down, because the hole saw makes an especially big mess of the back of the plywood.
For the dome lights, we conveniently had a stencil of the shape needed for the hole from the old plastic paneling. We traced that shape onto our plywood in the places on the ceiling above where they the lights had formerly been in the walls. We cut the holes for these using jigsaw. The dome lights had a large bevel on the edges that would cover up any chips made by the jigsaw.
Like the solar-powered lights, installing the dome lights once the holes were cut was simply a matter of reconnecting the wires and popping the metal clips behind the paneling.

Ian installs a piece of the ceiling paneling. It was helpful to have one person hold the panels while the other person screwed them in.
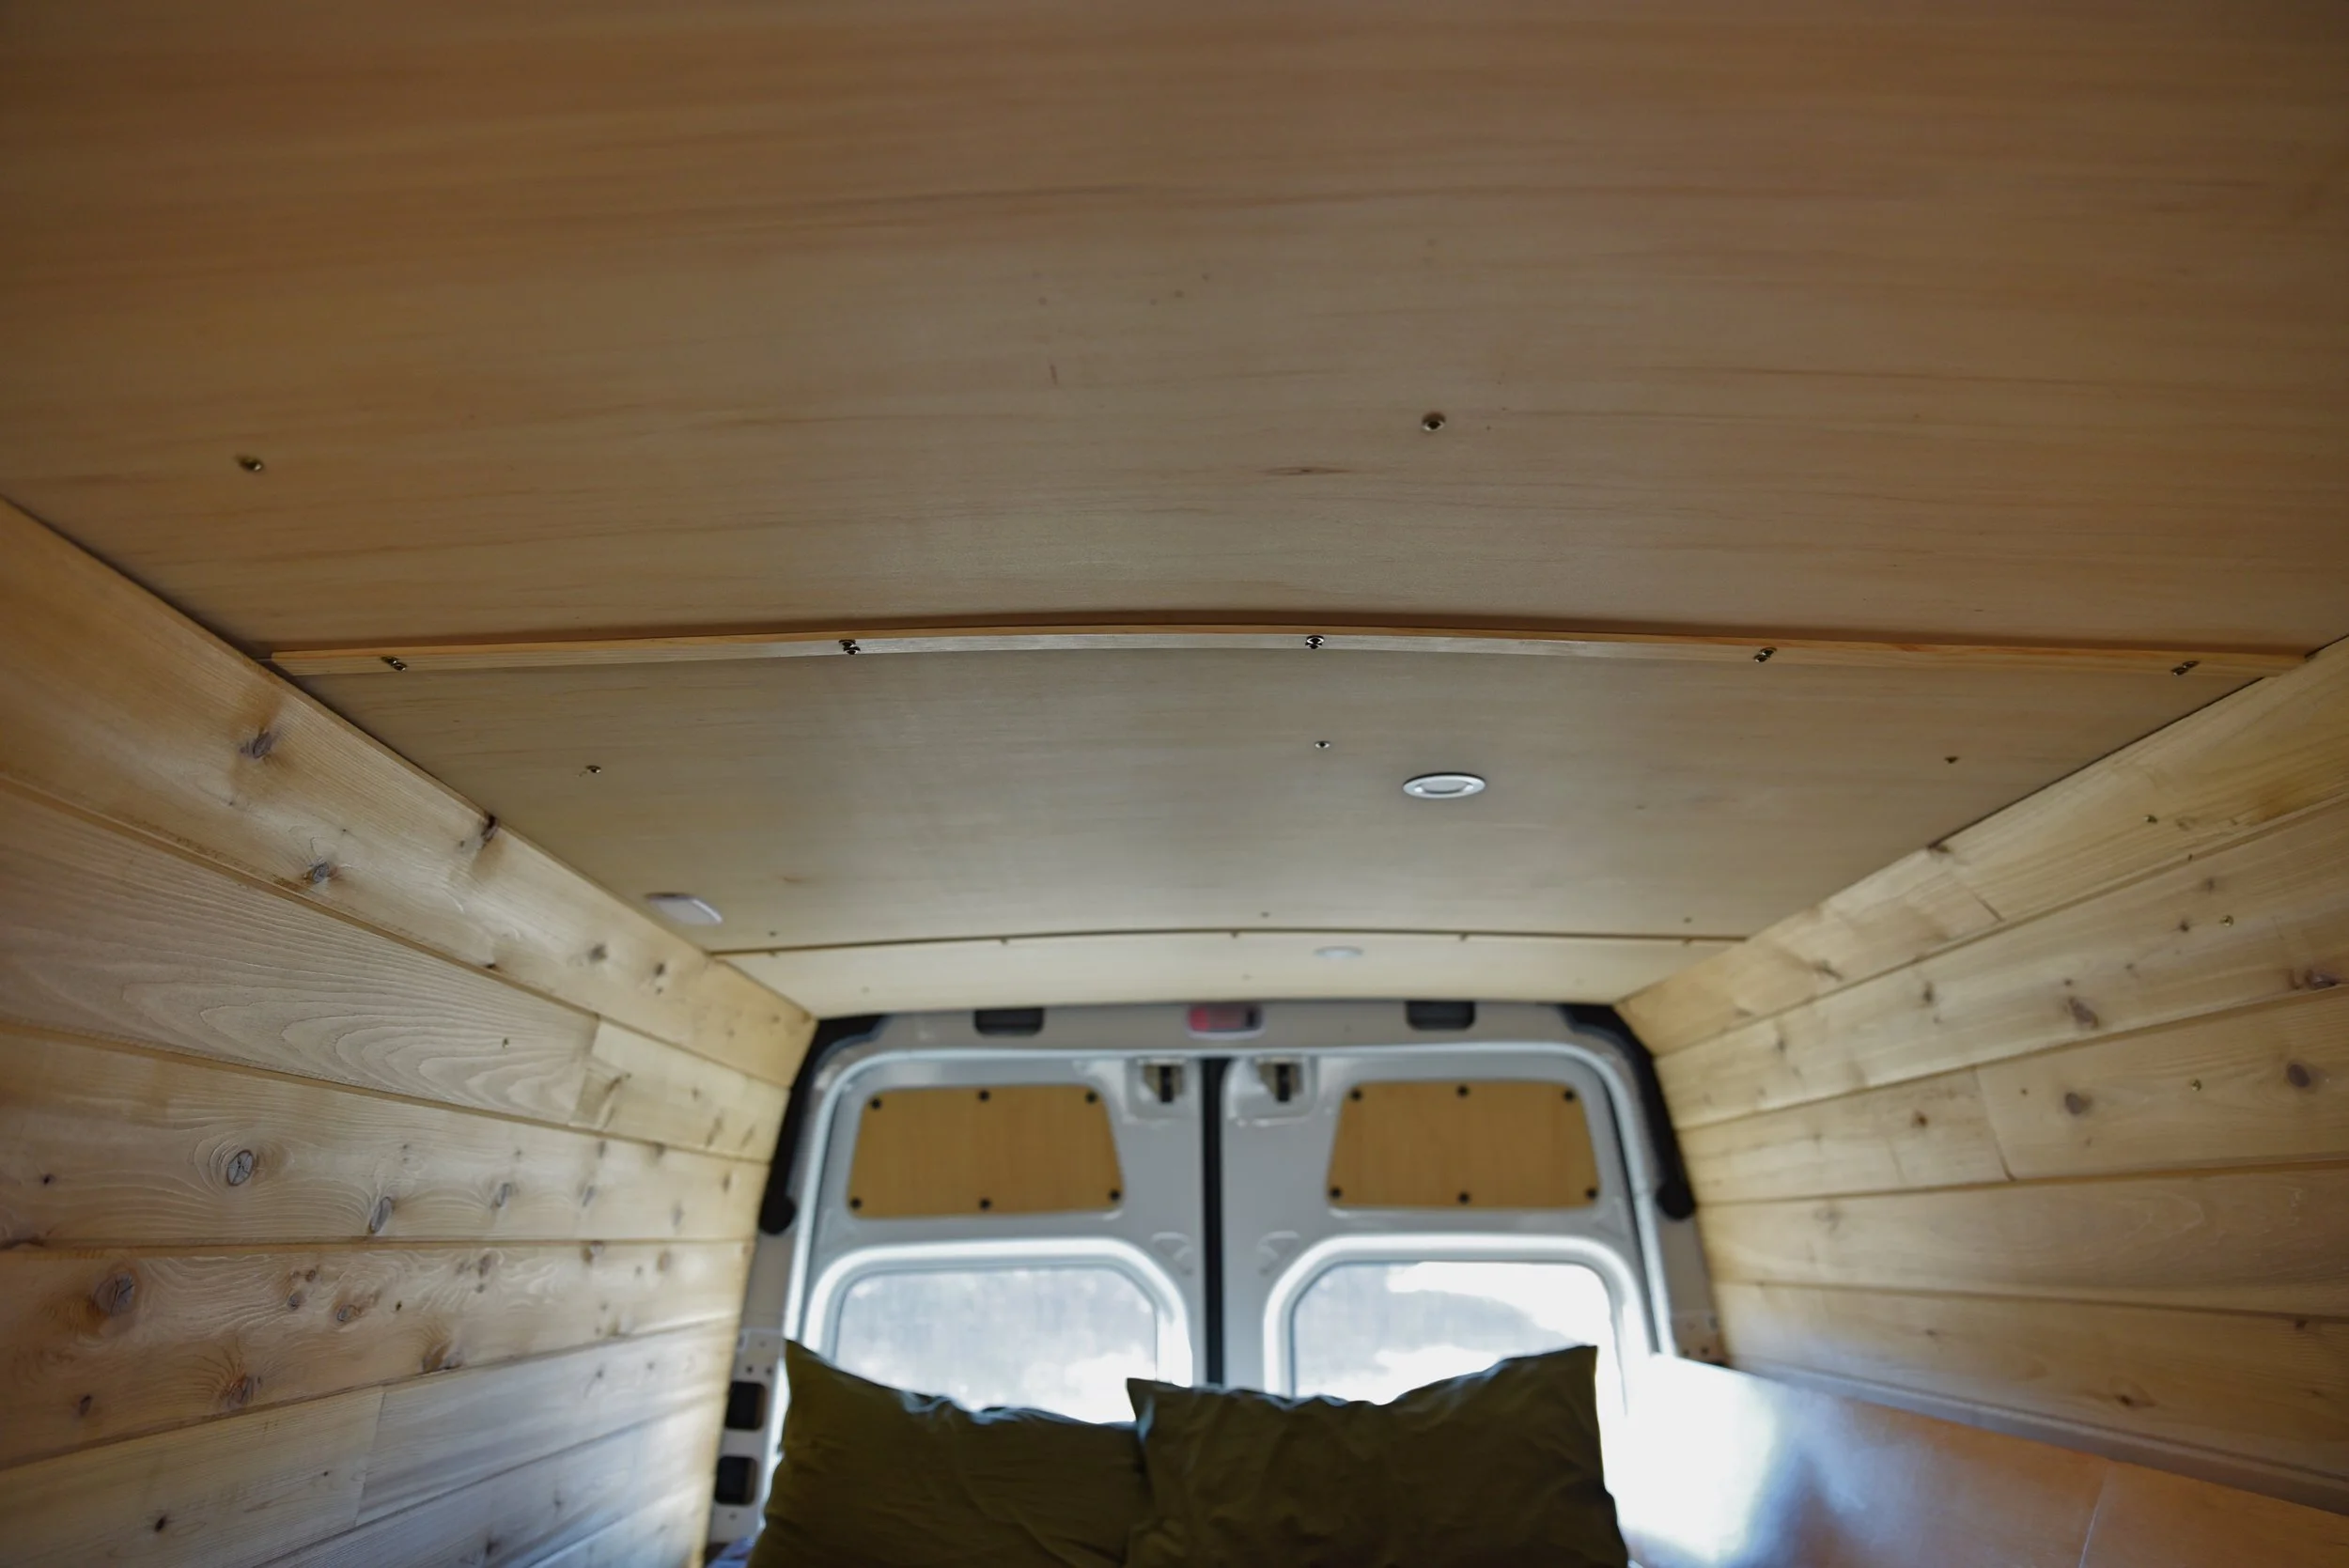
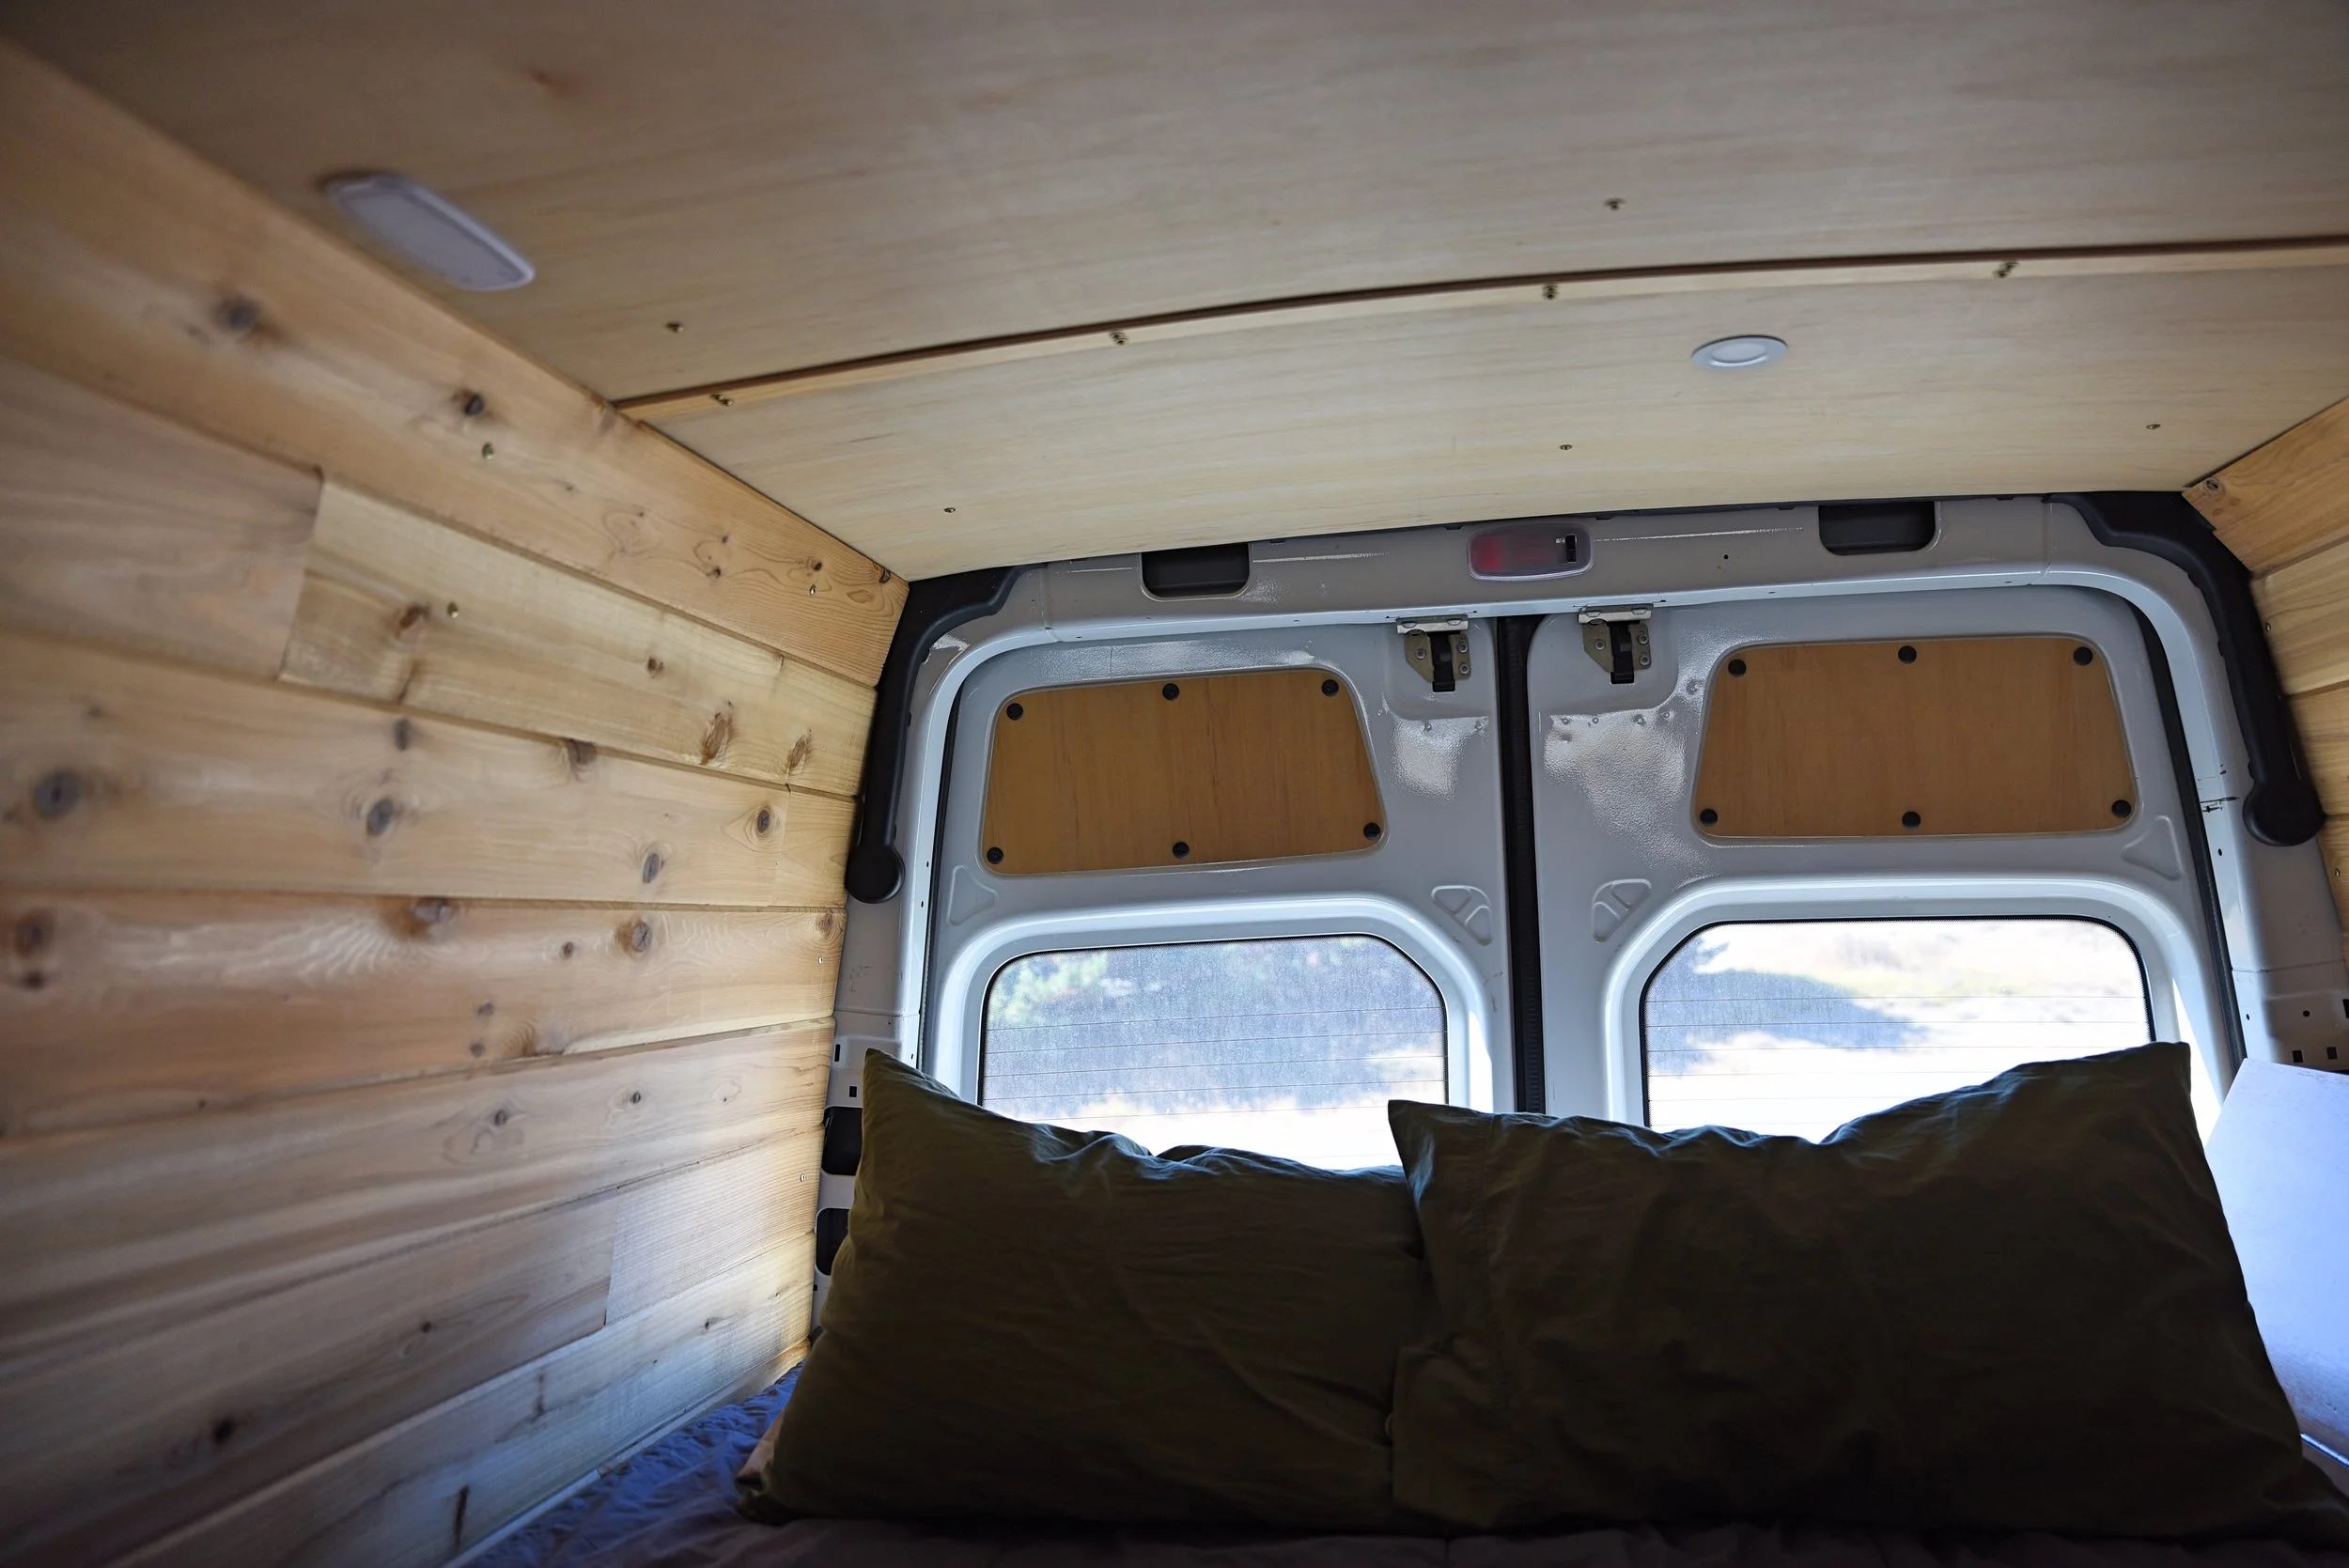
Finally we were ready to install the ceiling. We started at the front, working our way back, screwing the panels into each stud. When we placed the studs, we had planned them so that there would be studs near the end of each piece of plywood. We put one screw into each stud, so there are only six screws holding these extremely light panels up. We used the same zinc-plated, self-tapping sheet metal screws even though we were only driving them into wood because we wanted the ceiling to match the walls.
Trim and Finish
Our next step was to finish the place where the wall meets the ceiling. Since the van is not square like a room, we couldn't use a typical piece of molding. On the driver side, we also had to create a channel for the large harness of wires that run to our tail lights and rearview camera.
Instead of using a piece of trim, we decided to just install the final piece of tongue and groove at about 60-degree angle to the ceiling so that it would leave a space behind for the wiring harness. We did the same thing on the other side, and the angled pieces echo the curved roof of the van, adding a nice transition between wall and ceiling.
We ripped the desired angle into the top of the pieces of tongue and groove with the circular saw and fence, adjusting the blade first to about a 60-degree angle. This cut off the tongue of the board. We installed the groove as we normally would have into the tongue of the previous piece, and then we screwed the final "trim" board into the top of the metal ribs of the wall. Admittedly this "trim" piece is not the most attractive part of the van's interior in our opinion, but it does the job of hiding the wires connecting the ceiling to the wall.
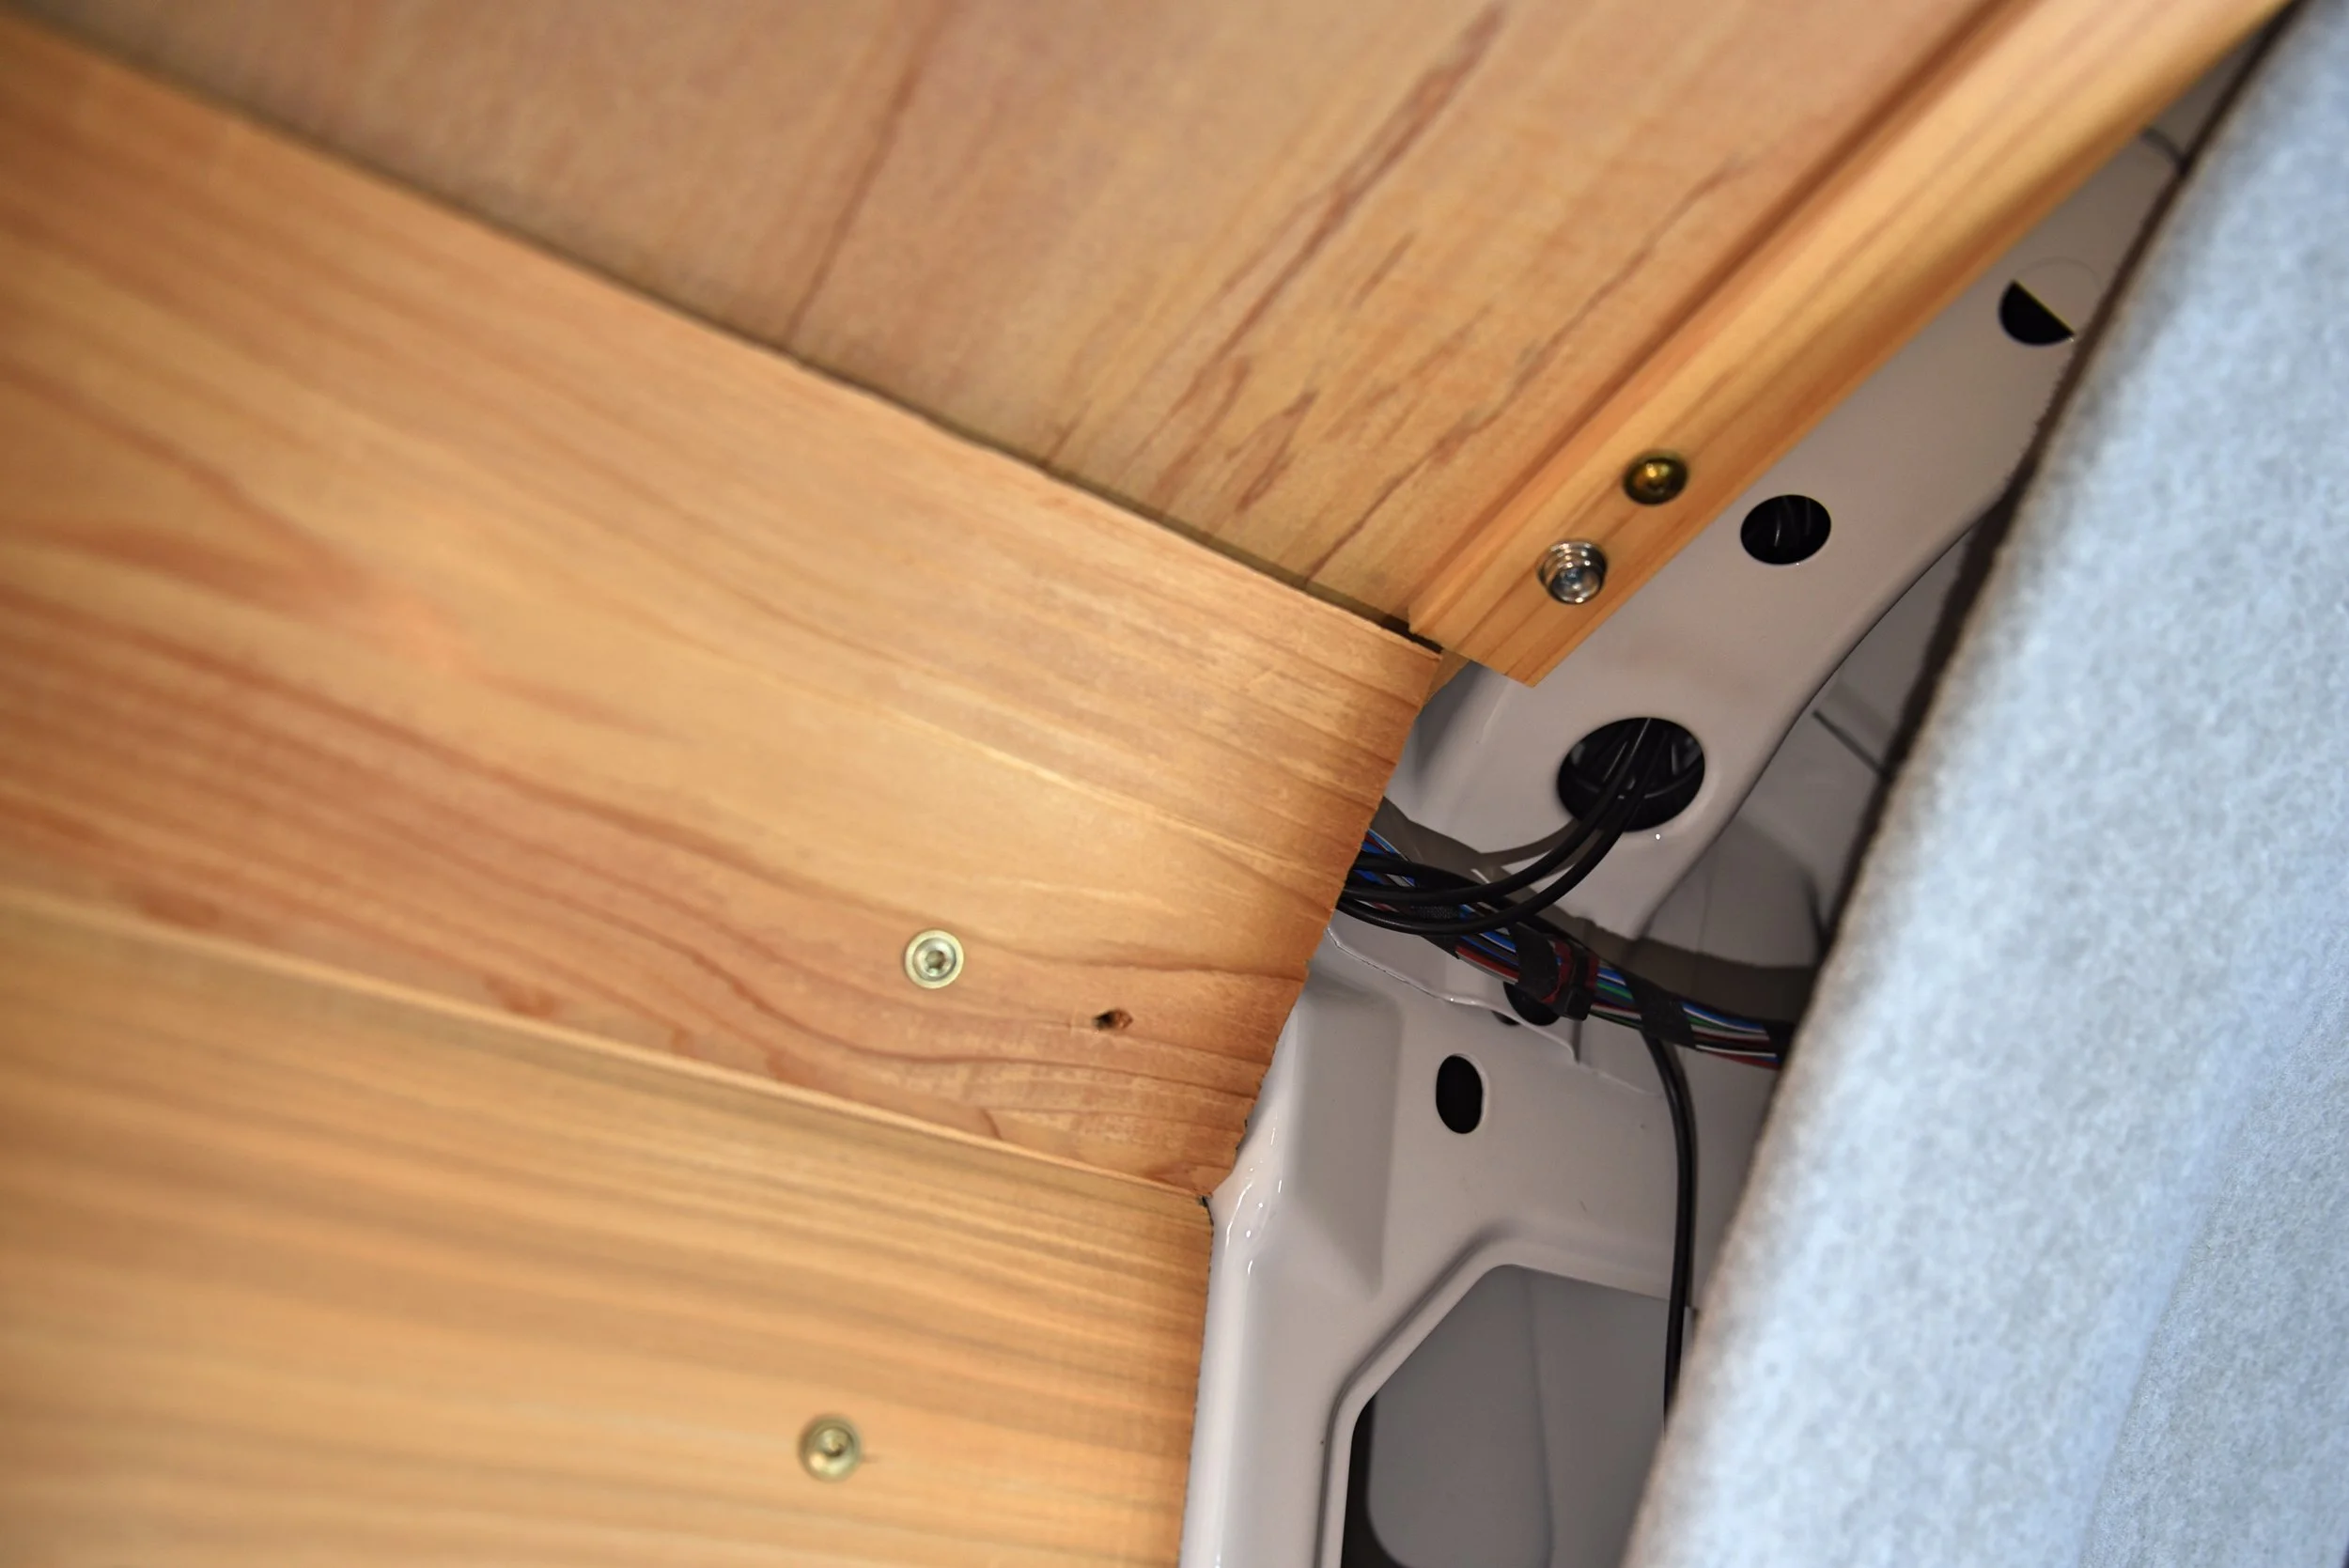
The angled piece of tongue and groove hides the wiring harness that runs across the driver side of the van.

The angled piece of tongue and groove at the top of the walls echoes the curve of the ceiling.
We also covered the seams between the ceiling panels with a thin strip of 1/4" x 1-1/8" flat pine trim. The trim is really light and flexible so it's easy to work with, it was also wide enough to put two screws into it next to each other.
Since these pieces needed to be curved like the ceiling, we used the same method of measuring the distance with a tape measure and then cutting the piece down a little bit at a time until we found the precise measurement.
After we had cut the three trim pieces to the correct length we screwed them up using the same zinc-coated sheet metal screws, even though they were only going into two thin pieces of wood. We put two screws into each place we fastened the trim, one screw into each piece of ceiling panel. In a house a small trim nail or staple would easily do the trick, but in our van where the body has to endure a great deal of vibrations and twisting, we used screws for almost everything.
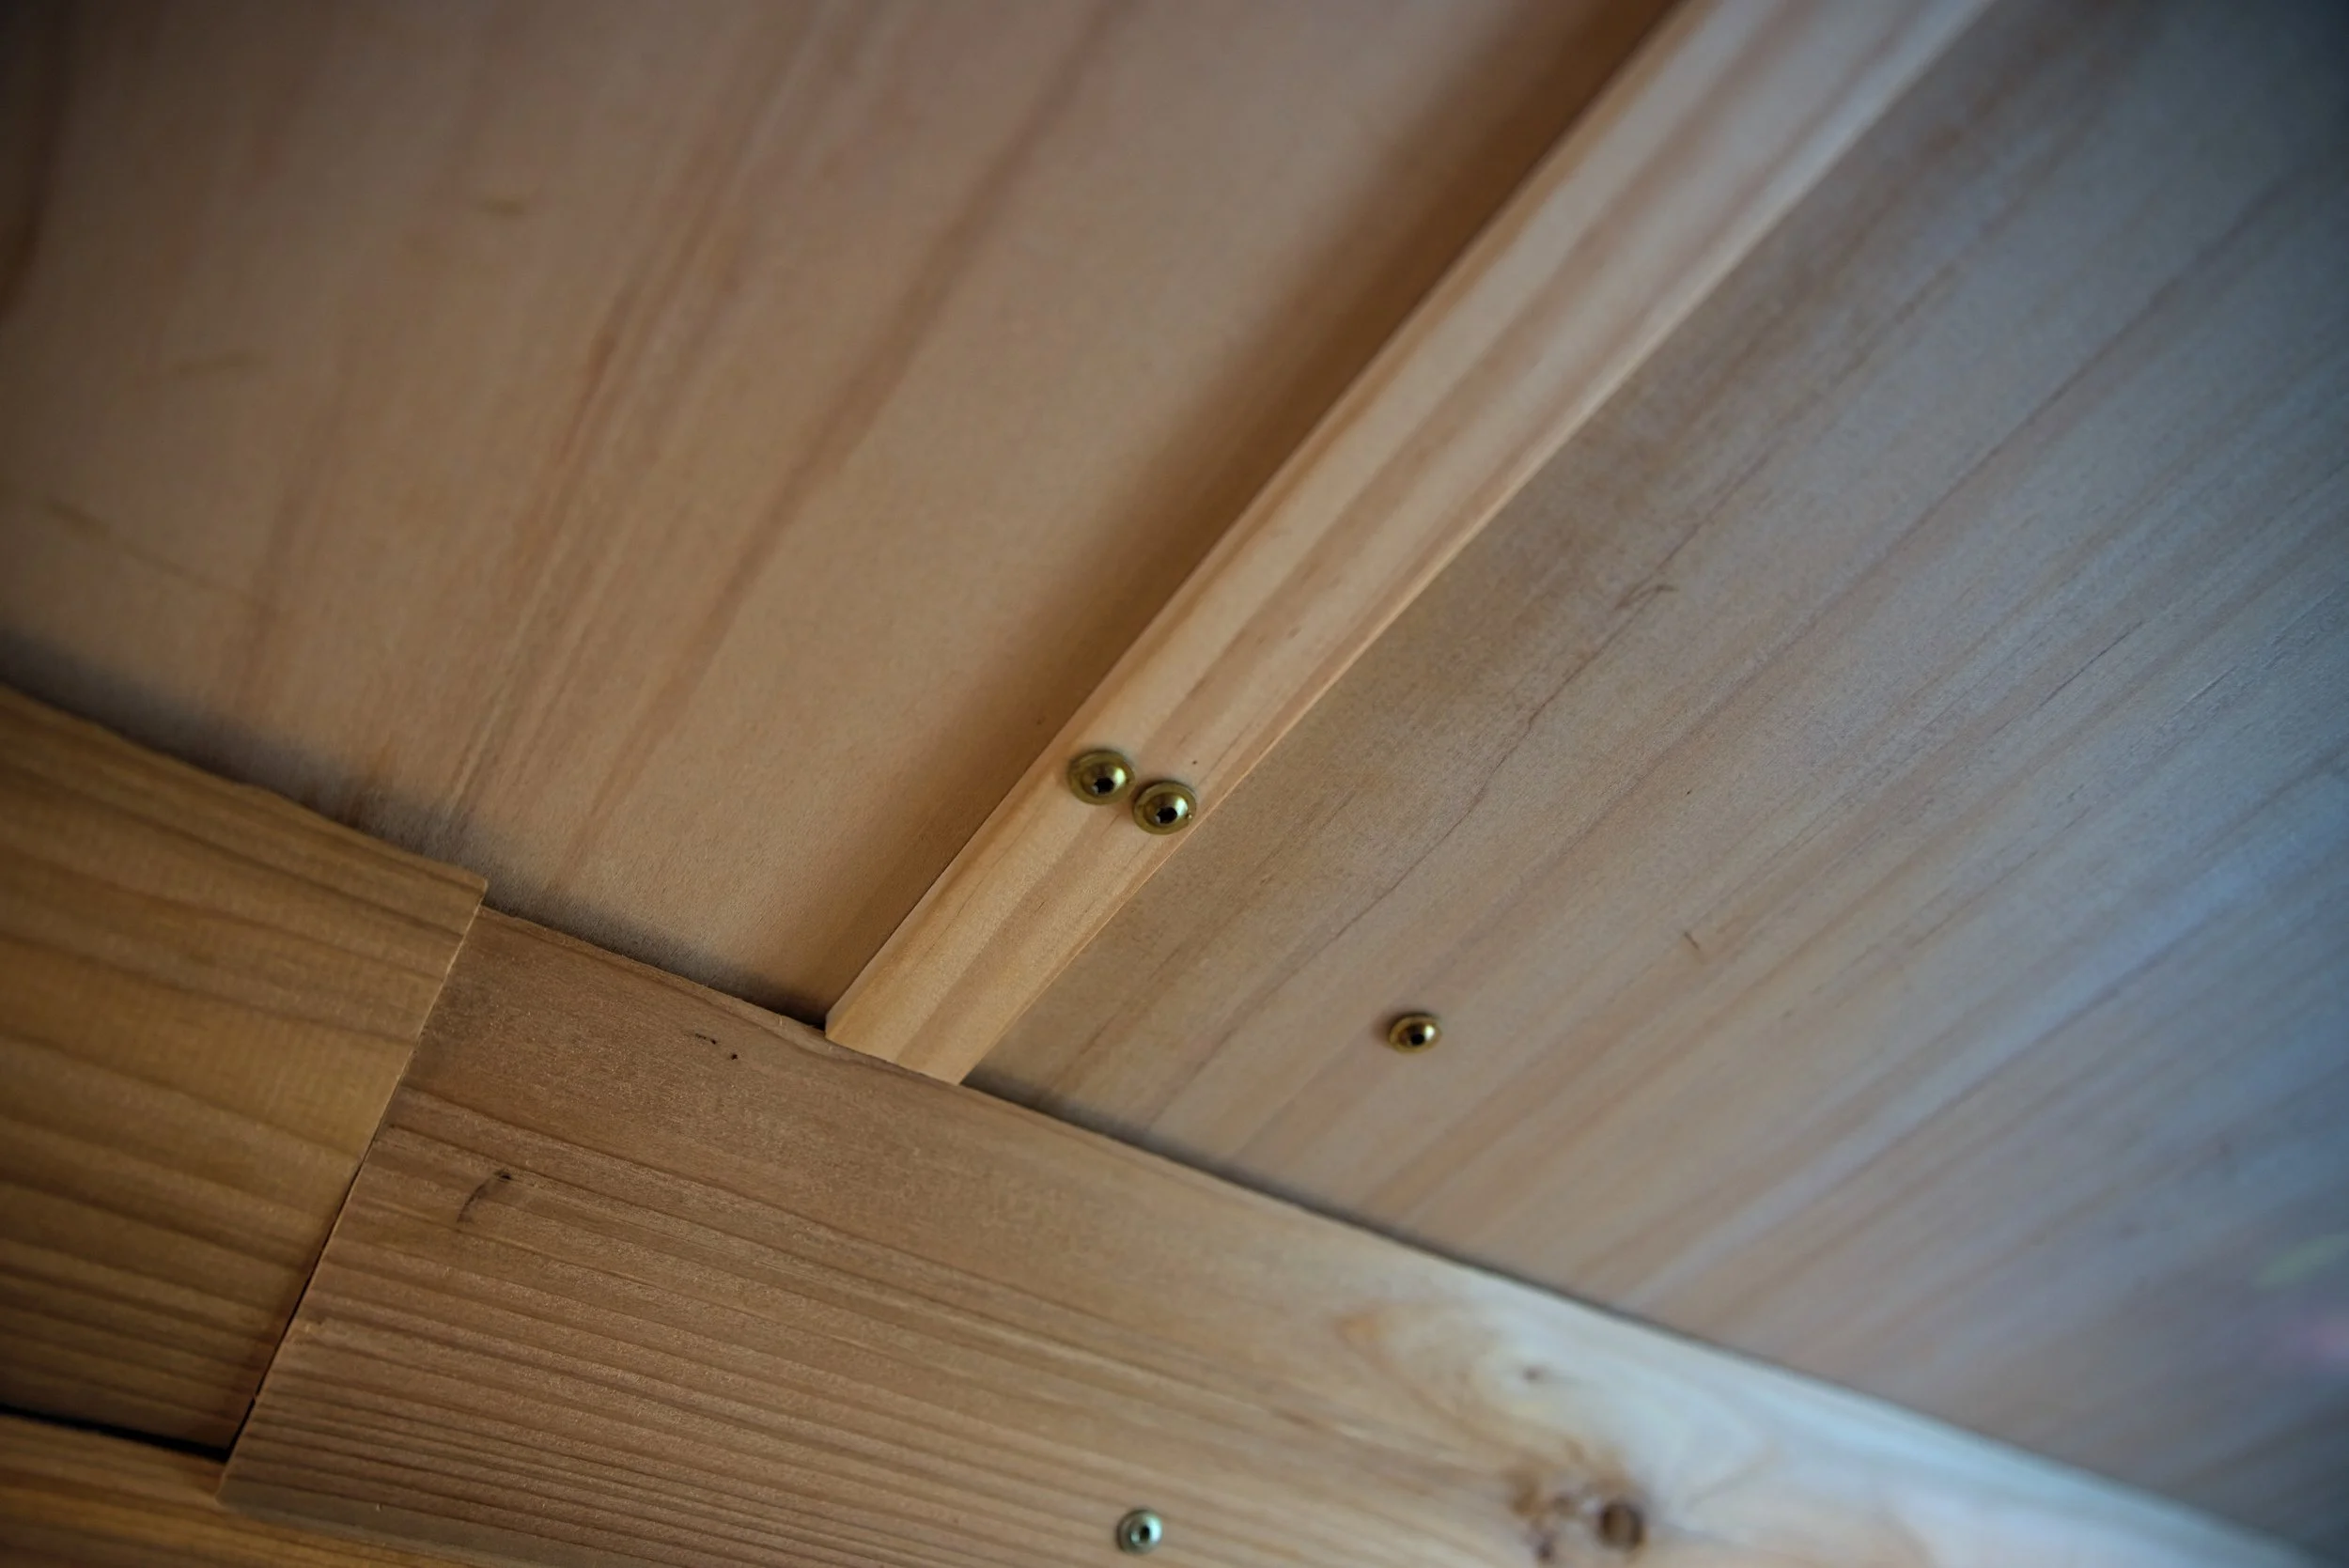
We put the screws in pairs, one into each ceiling panel, lining them up with the pairs in the other pieces of trim for a uniform look.
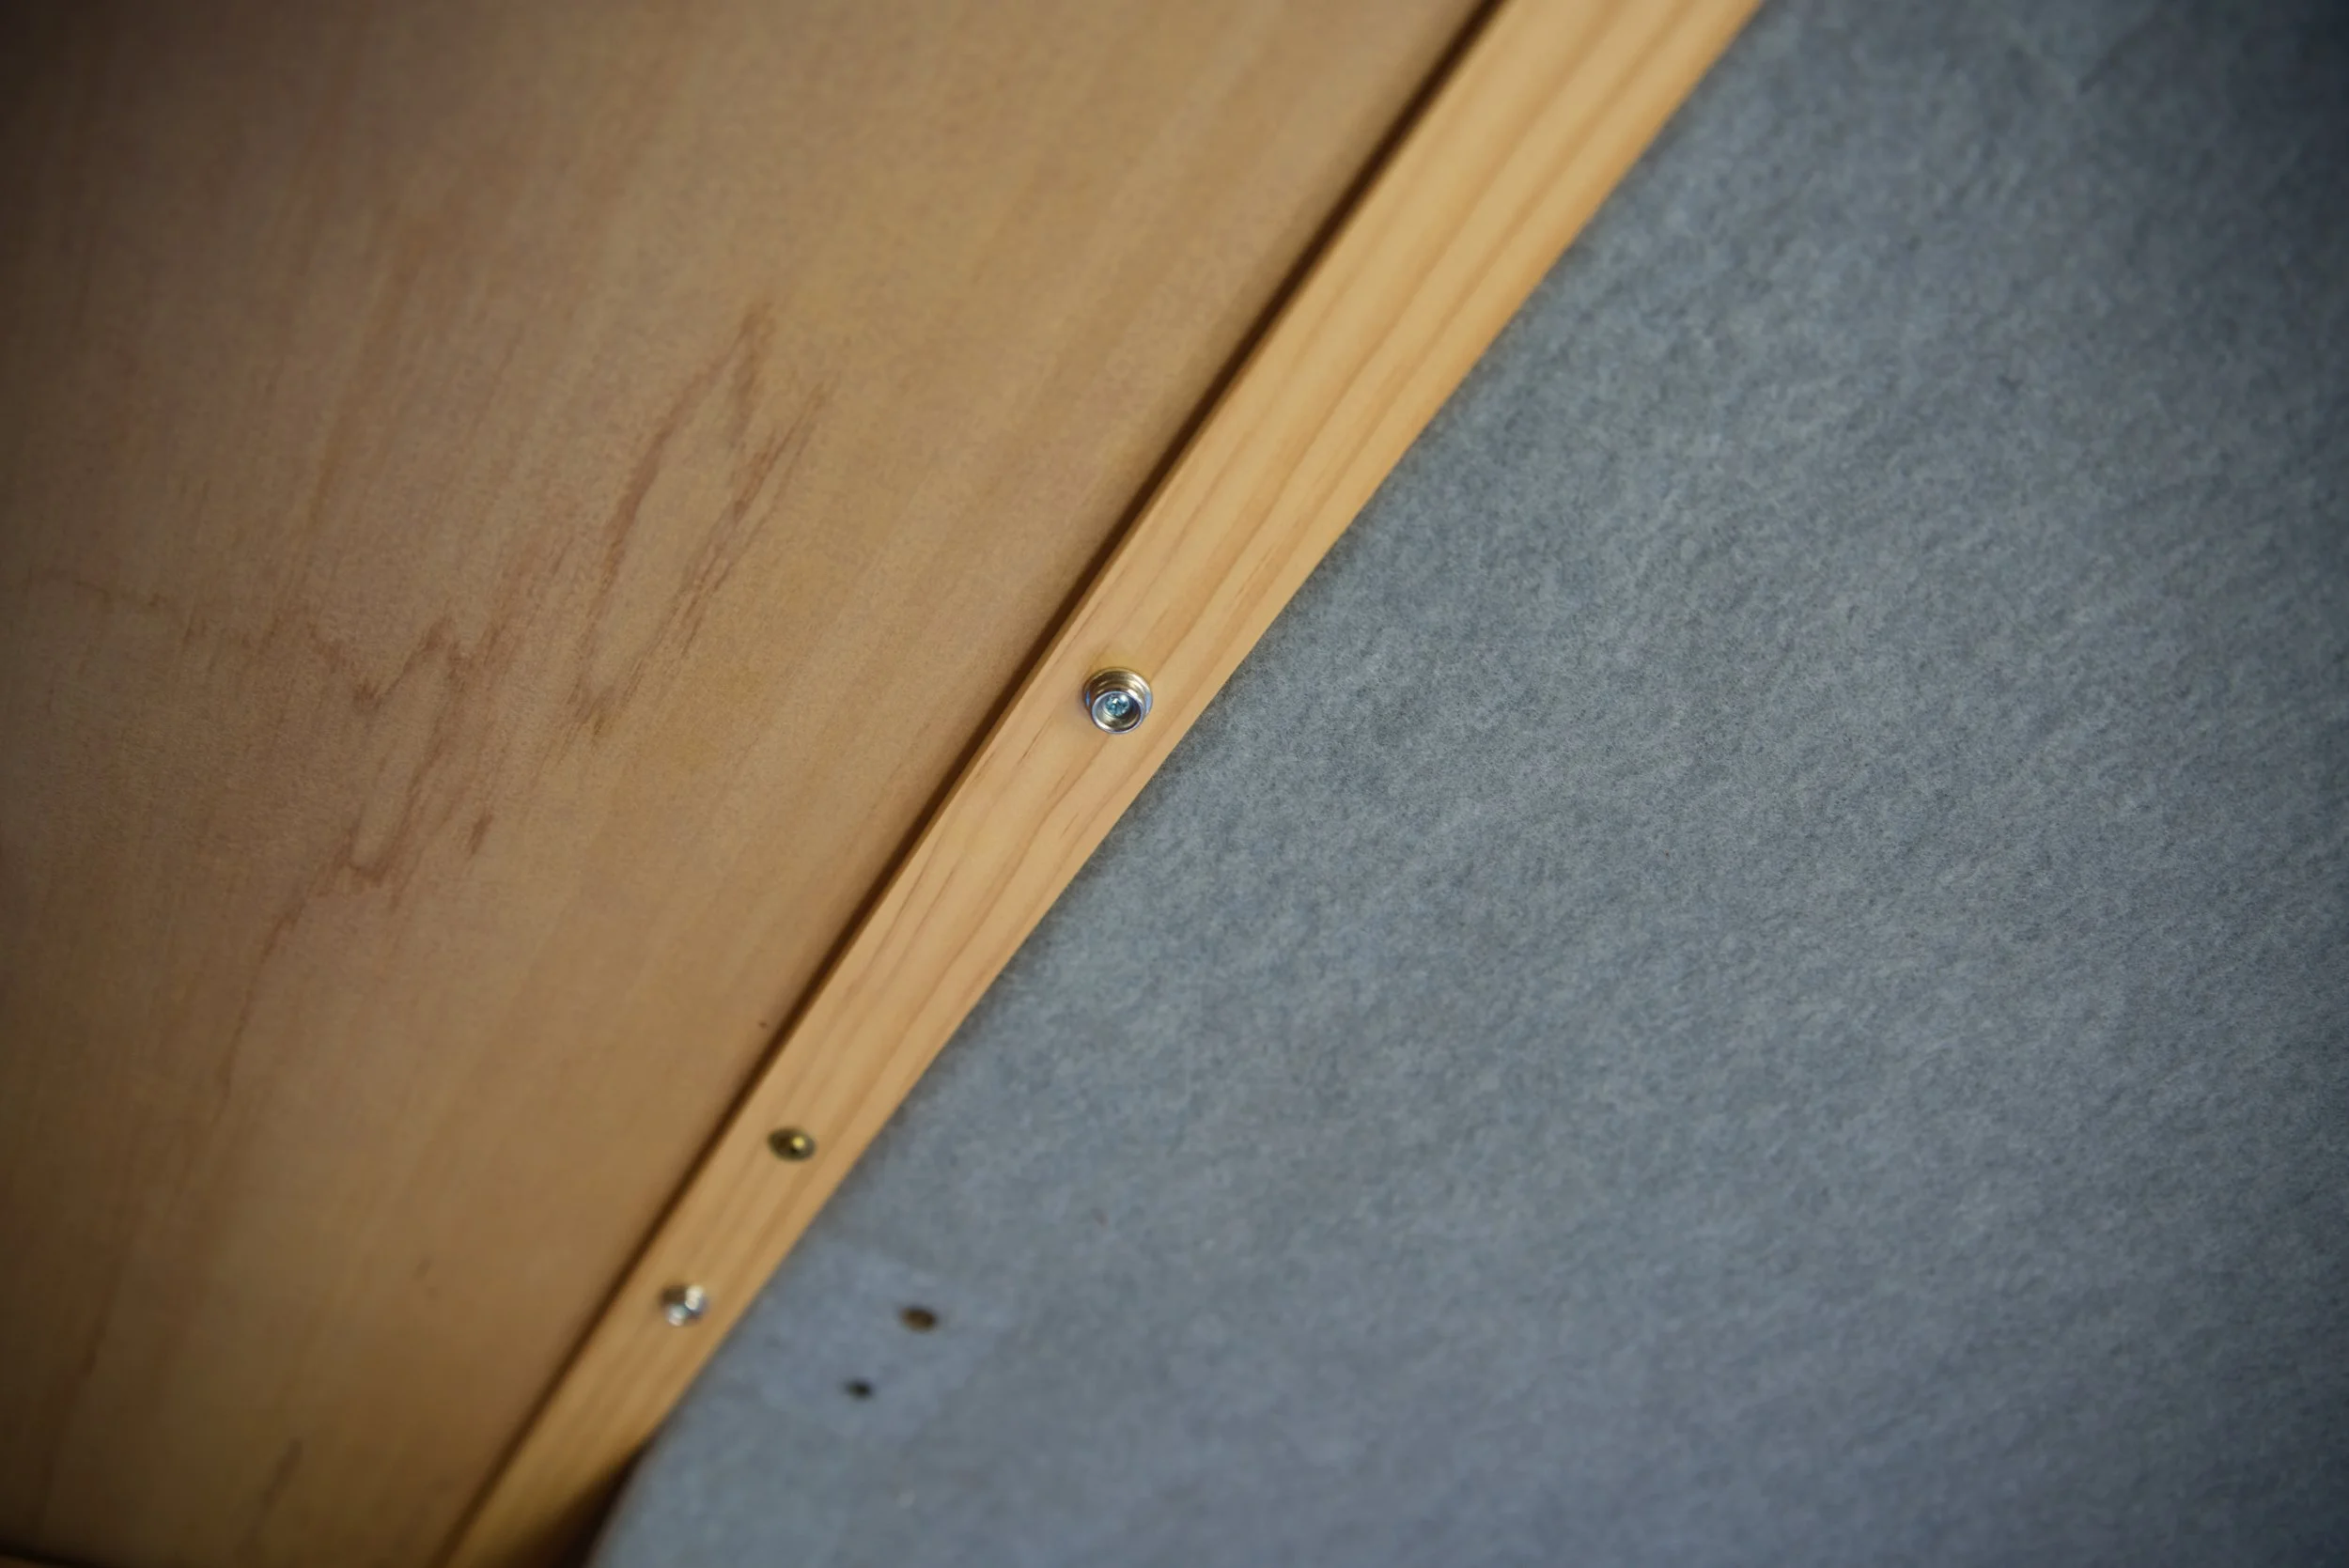
We added a piece of trim where the panels meet the headliner, and this is the piece we used to attach the snap fasteners that we hang our insulated curtains from.
Each piece of trim has five sets of two screws in it. Two at either end and three in between. We spaced the screws evenly and we made sure that the screws on each piece of trim were lined up with the screws of the other pieces. We think that this resulted in a very clean look, even though the screws are very apparent.
We also added a piece of trim where the ceiling panel meets the headliner in the cab. We needed a little extra meat for our screw-in snaps that allow us to hang up our insulated curtains. This piece of trim also helps clean up the somewhat abrupt transition from the cab to the living space of the van.
Finally we added the plastic trim for our Fantastic Fan vent. It has a deep collar that you cut to the same thickness as your vehicle's roof. Again we used the trusty circular saw for this task. It came with white screws to match the trim, and we used those to attach it to our new ceiling.
We think the final ceiling with the trim going across looks very clean. We are very happy with the lauan plywood and how it matches the rest of the van.

The final plastic trim on the Fantastic Fan vent.
Our final bit of finishing was to hide the huge bundle of wires bringing down from the solar panels and our roof and running up from our fuse box to the lights and the fan. We cut a strip of cedar that matched the curved metal of the van to serve as spacer on the door side of the wires. Then we put a strip of lauan over the top of the cedar tongue and groove and the spacer.
We put many screws into this piece to fasten it, because we didn't want there to be any gaps showing the wire, since the piece is curved. We also like the exposed look of the zinc-coated screws, and they tied the "wire access panel" into the rest of the van.
We cut this piece of cedar to approximately match the profile of the metal rib of the van.

This panel hides the thick bundle of wires that run from our solar panels to our battery and from the fuse box to the lights and fan.
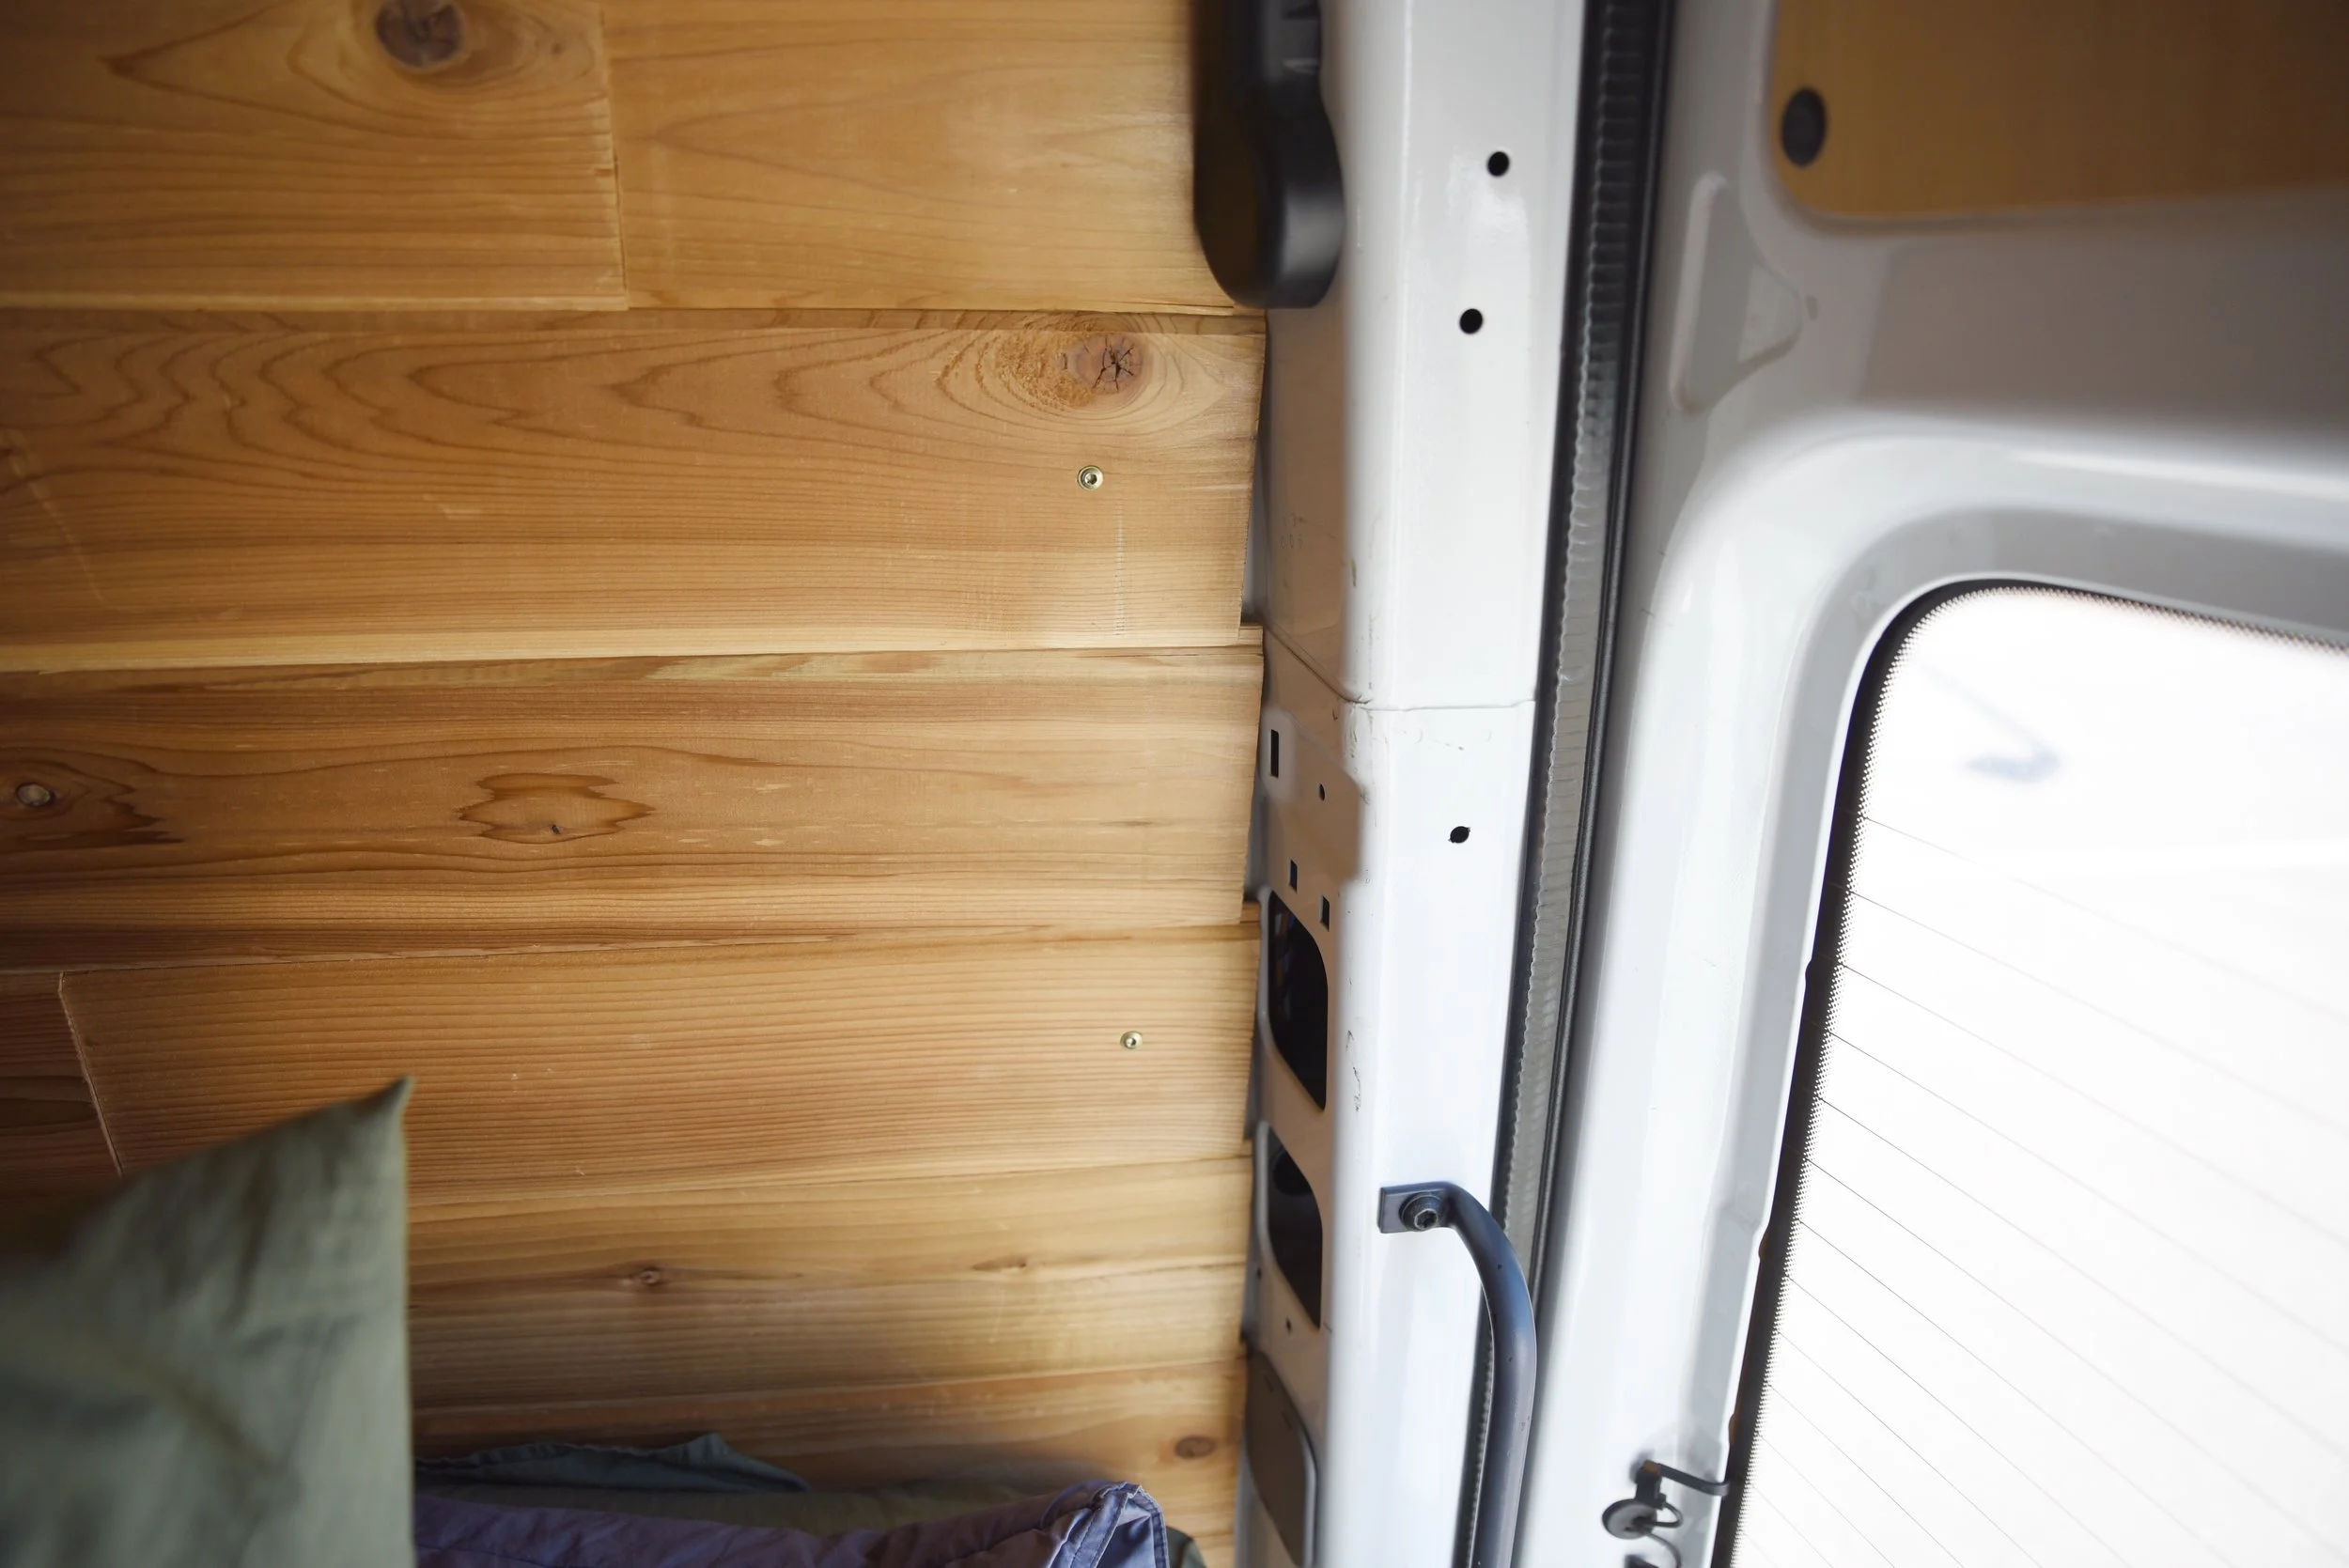
Paneling the Doors
We used the scrap plywood left over from the ceiling to panel our sliding door and our rear doors. The doors came with the same plastic paneling as the walls originally had. We removed these plastic panels and insulated in the cavities behind them when we insulated the van.
We traced the plastic panels onto the lauan plywood and cut the shapes out. We used the circular saw to cut the straight edges and a jigsaw or hand tools to cut the curved corners and edges. Since the edges would be very visible, we also sanded them with the power sander.
We also traced the holes for the fasteners from the plastic panels onto the wood panels. We drilled the same size holes in the same positions on the wood as on the plastic, and we were able to use the same plastic clips to attach the wood to the doors. These fasteners get brittle over time, and you may need to replace them.

We were able to replace the plastic on the sliding door with the extra lauan.
We used the same plastic clips from the doors' original plastic panels to attach the wood panels.
Once the pieces were cut, it was simply a matter of attaching them to the door by pushing the plastic fasteners into place.
With our doors paneled, the interior walls and ceiling of our van was complete. We love the look of the cedar and we think the lightweight lauan plywood was a good choice for the ceiling, because it has held up well over time.