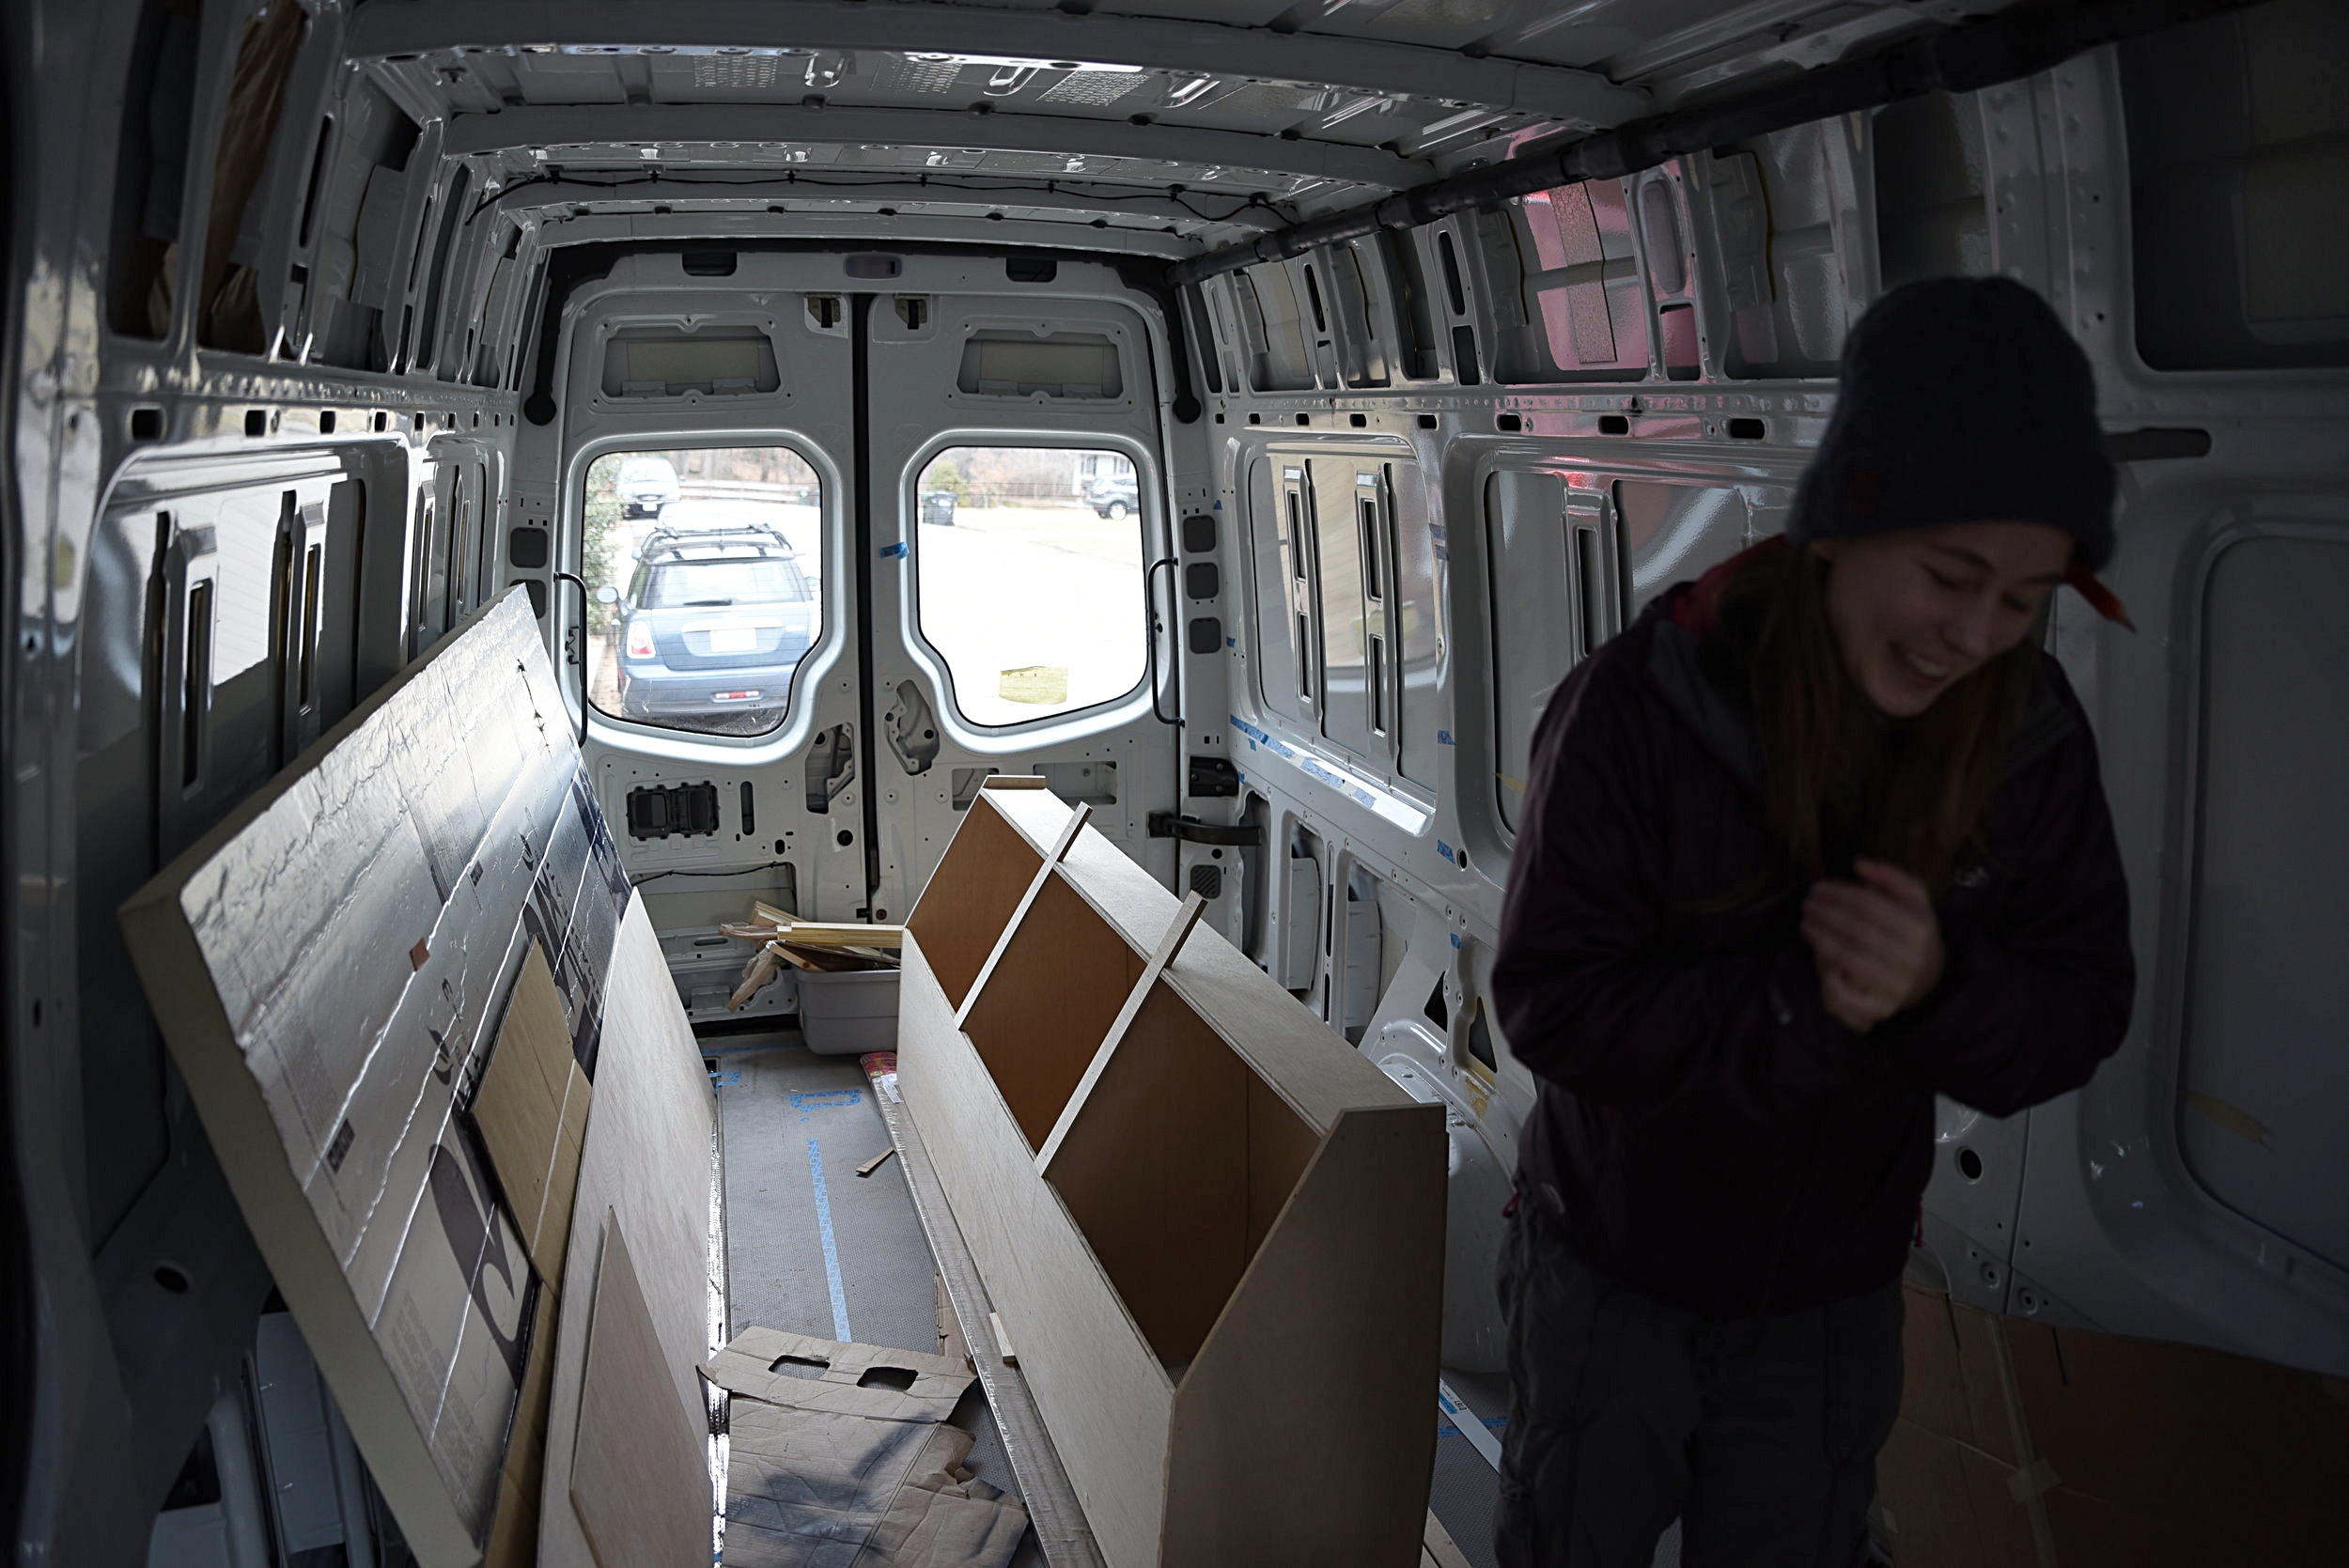
Building Our Bed Platform
Part way through building the bed platform
Our bed platform, as with nearly everything in our van, serves several purposes. It obviously holds our full-size mattress. Part of its design is a cabinet for clothing, extra blankets, and other items. This cabinet also serves as a backrest that we can lean on while relaxing in bed. Under our bed we have a very large storage area for our bikes, camping gear, and tools. The front of the bed platform gives us access to our under-bed storage and includes a small table that folds up (Read more about our table design.) This simple and multi-functional design adds a ton of usable space to the van and is a comfortable area for sleep.
Tools
Table saw (if you have access to one)
Materials
1/2" sanded plywood (3- 4’x8’ sheets)
Screws (various sizes)
1/4" sanded plywood (1- 4’x8’ sheet)
2x4 boards (5- 8’ boards)
2x2 boards (3- 8’ boards)
Angle brackets (3)
Varathane One Step water-based stain and polyurethane (Honey Pecan)
1x2" boards (2- 8’ boards)
Piano hinge (1/2”x 90”)
Bolts and washers (sized to holes in van walls)
3/4", 7-ply, sanded plywood (2- 4’x8’ sheets)
Bed Cabinetry
As a part of our bed platform, we built cabinetry for the storage of our clothes, extra bedding and other items. The cabinets are split into three compartments, and they have angled doors that we can lean back on like a couch.
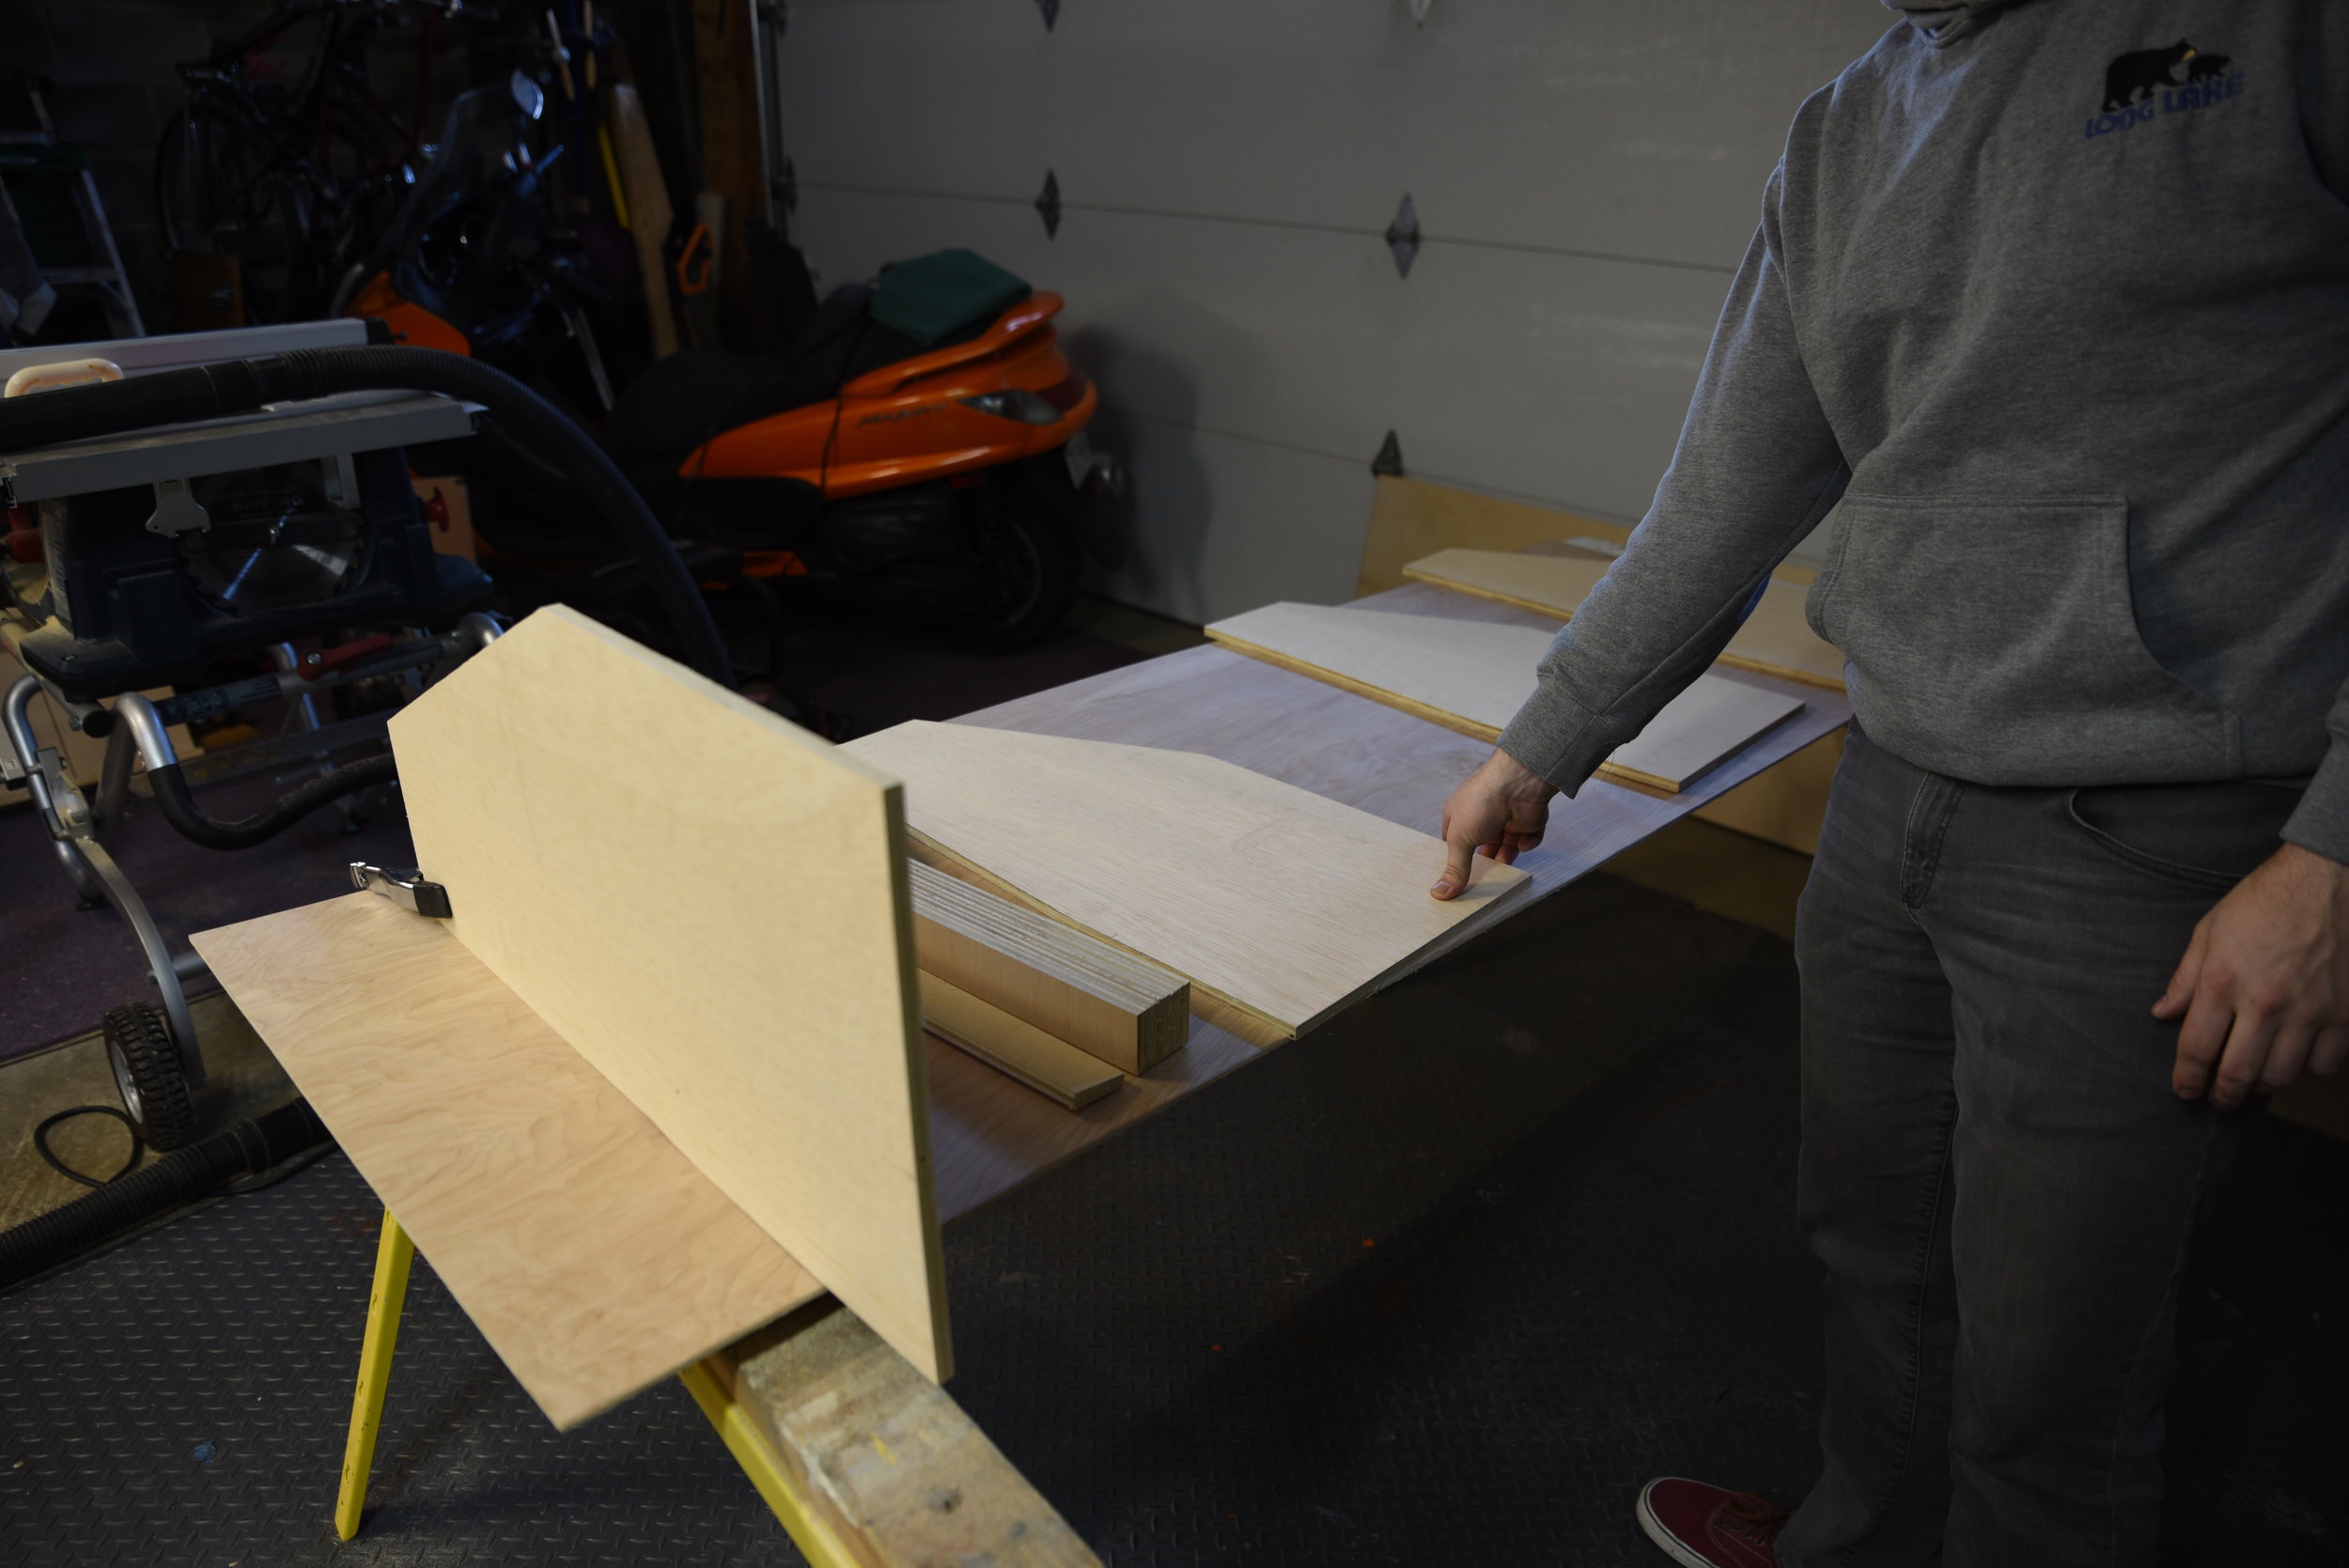
The bed cabinetry has four upright pieces--two interior dividers and two end caps. These uprights had to match the curved profile of the van wall and have the correct angle for a backrest on the front. We used a cardboard template to match the profile of the van wall. We measured the angle of a comfortable couch backrest to find the angle needed for the front of the cabinets.
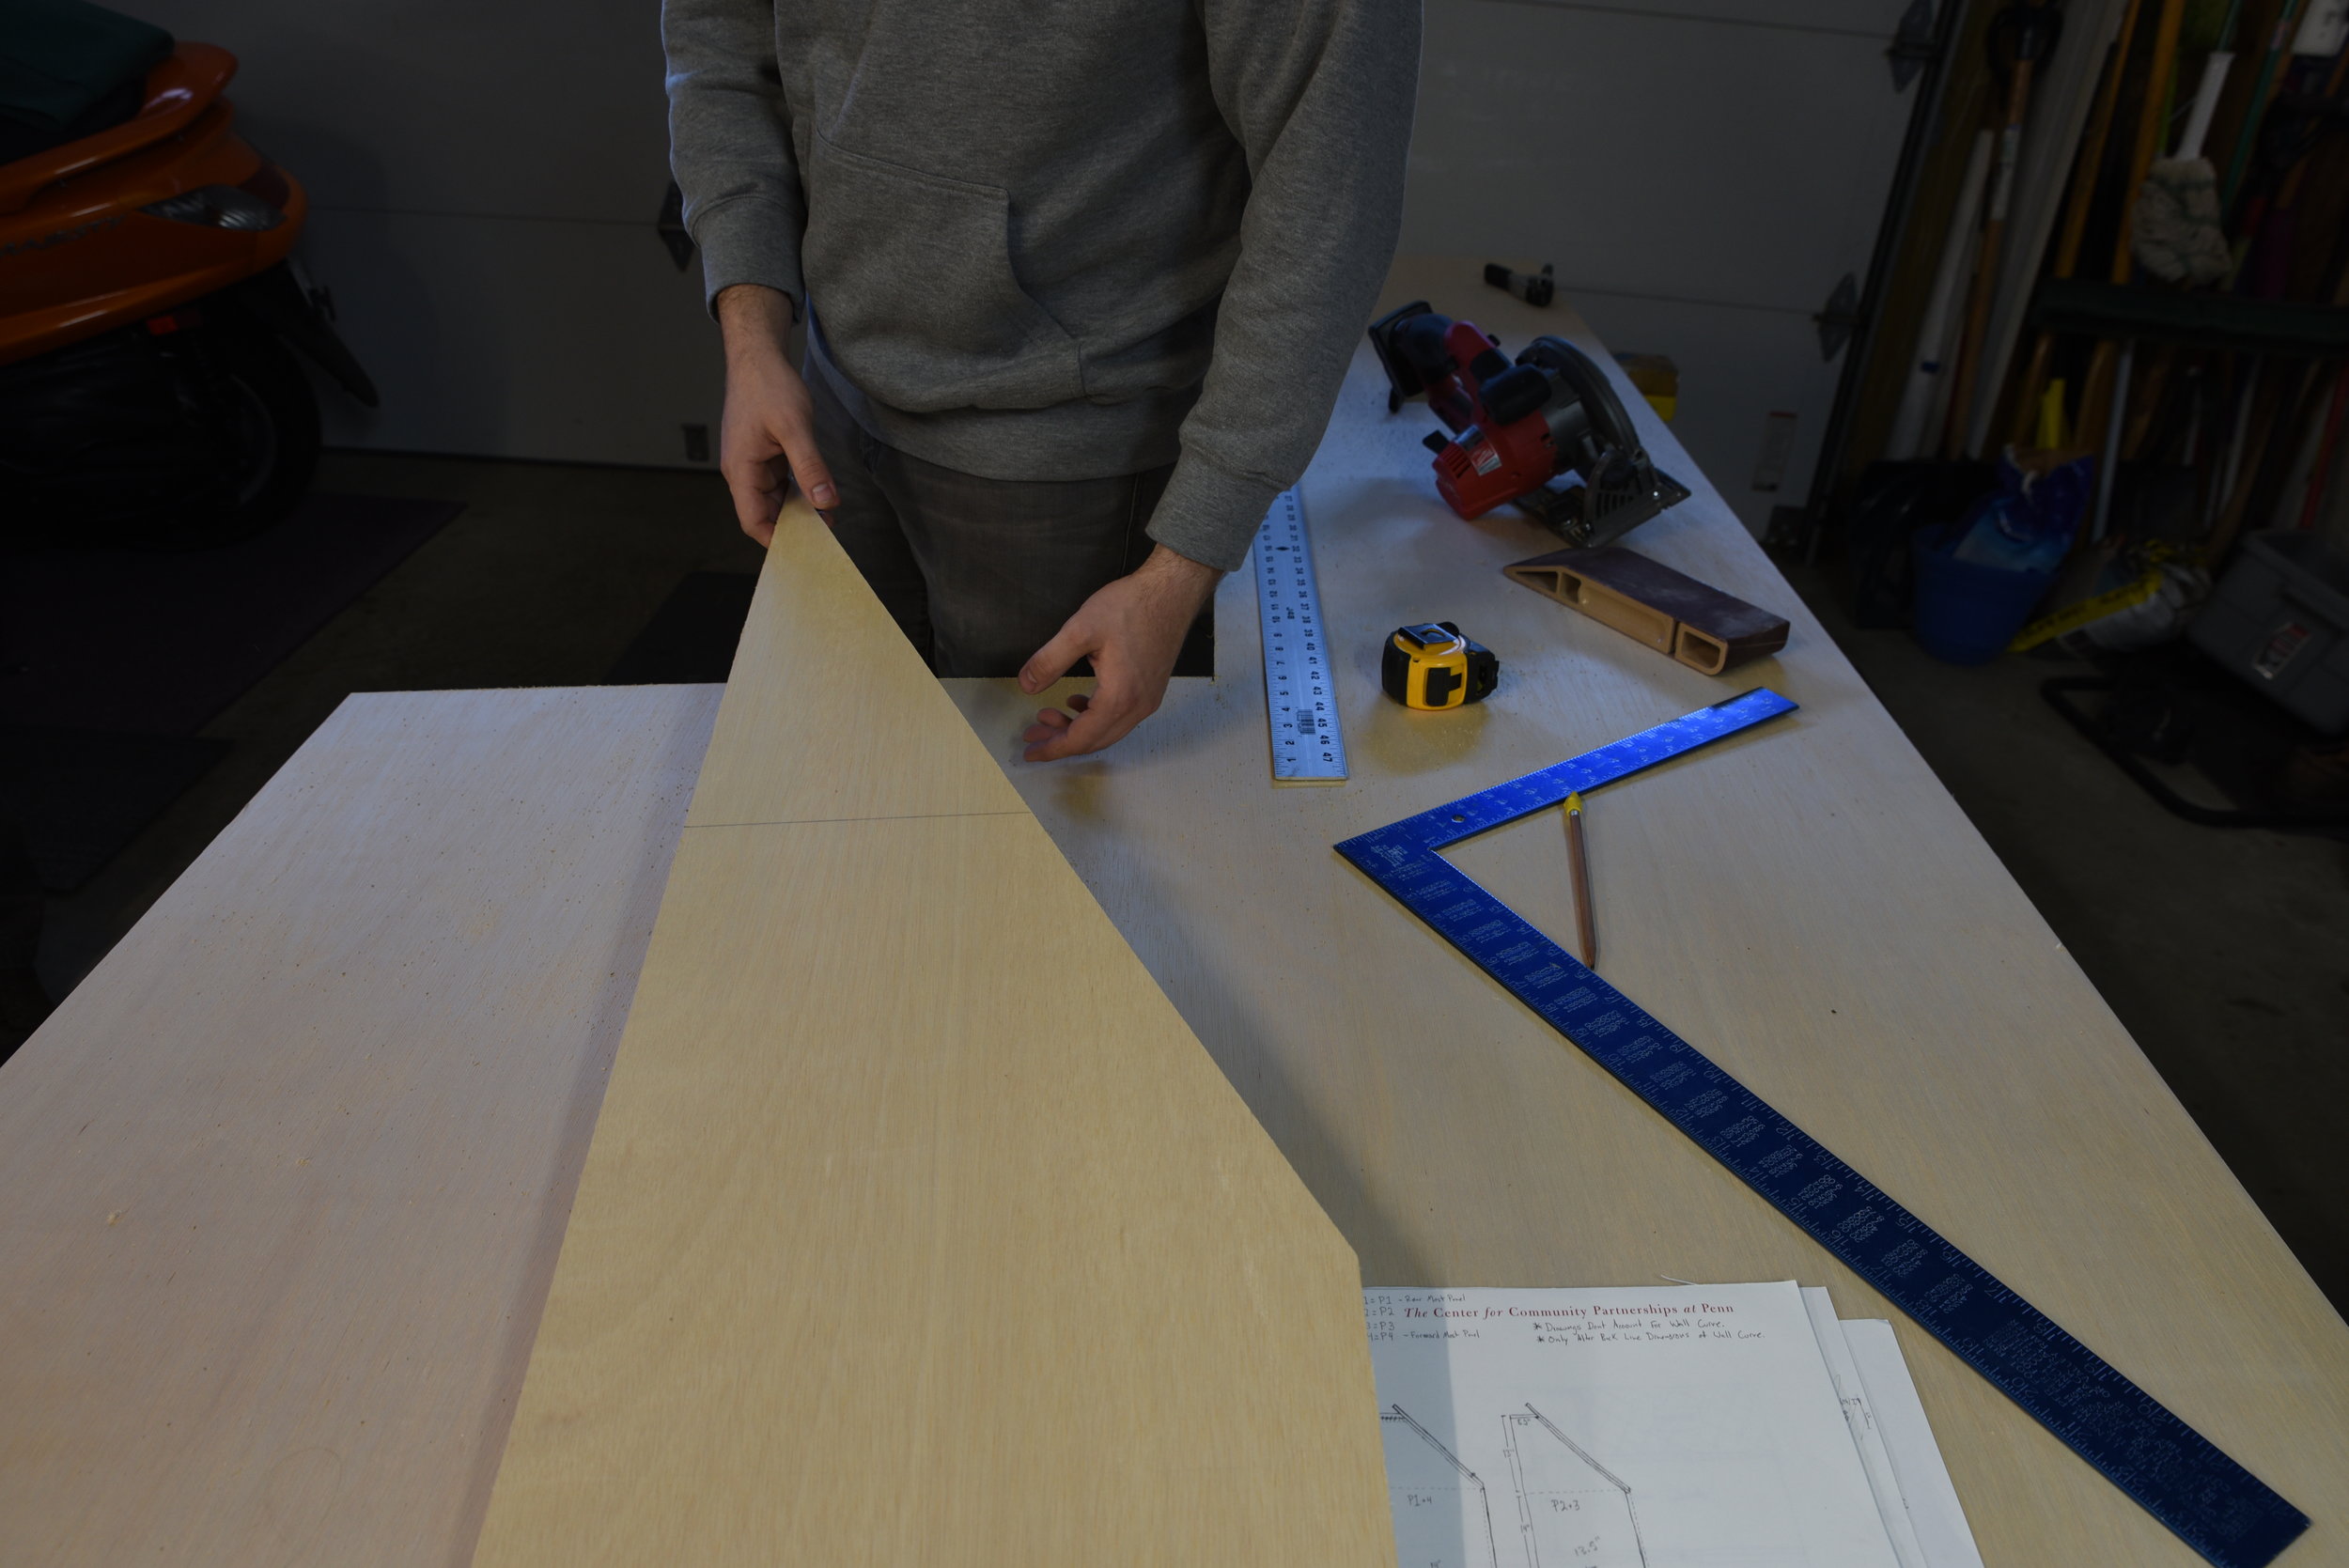
Ian shows the uprights that separate the cupboards of our bedside cabinetry. The left side of the board matches the curve of the van wall, and the right side is angled to provide the shape for a comfortable backrest.
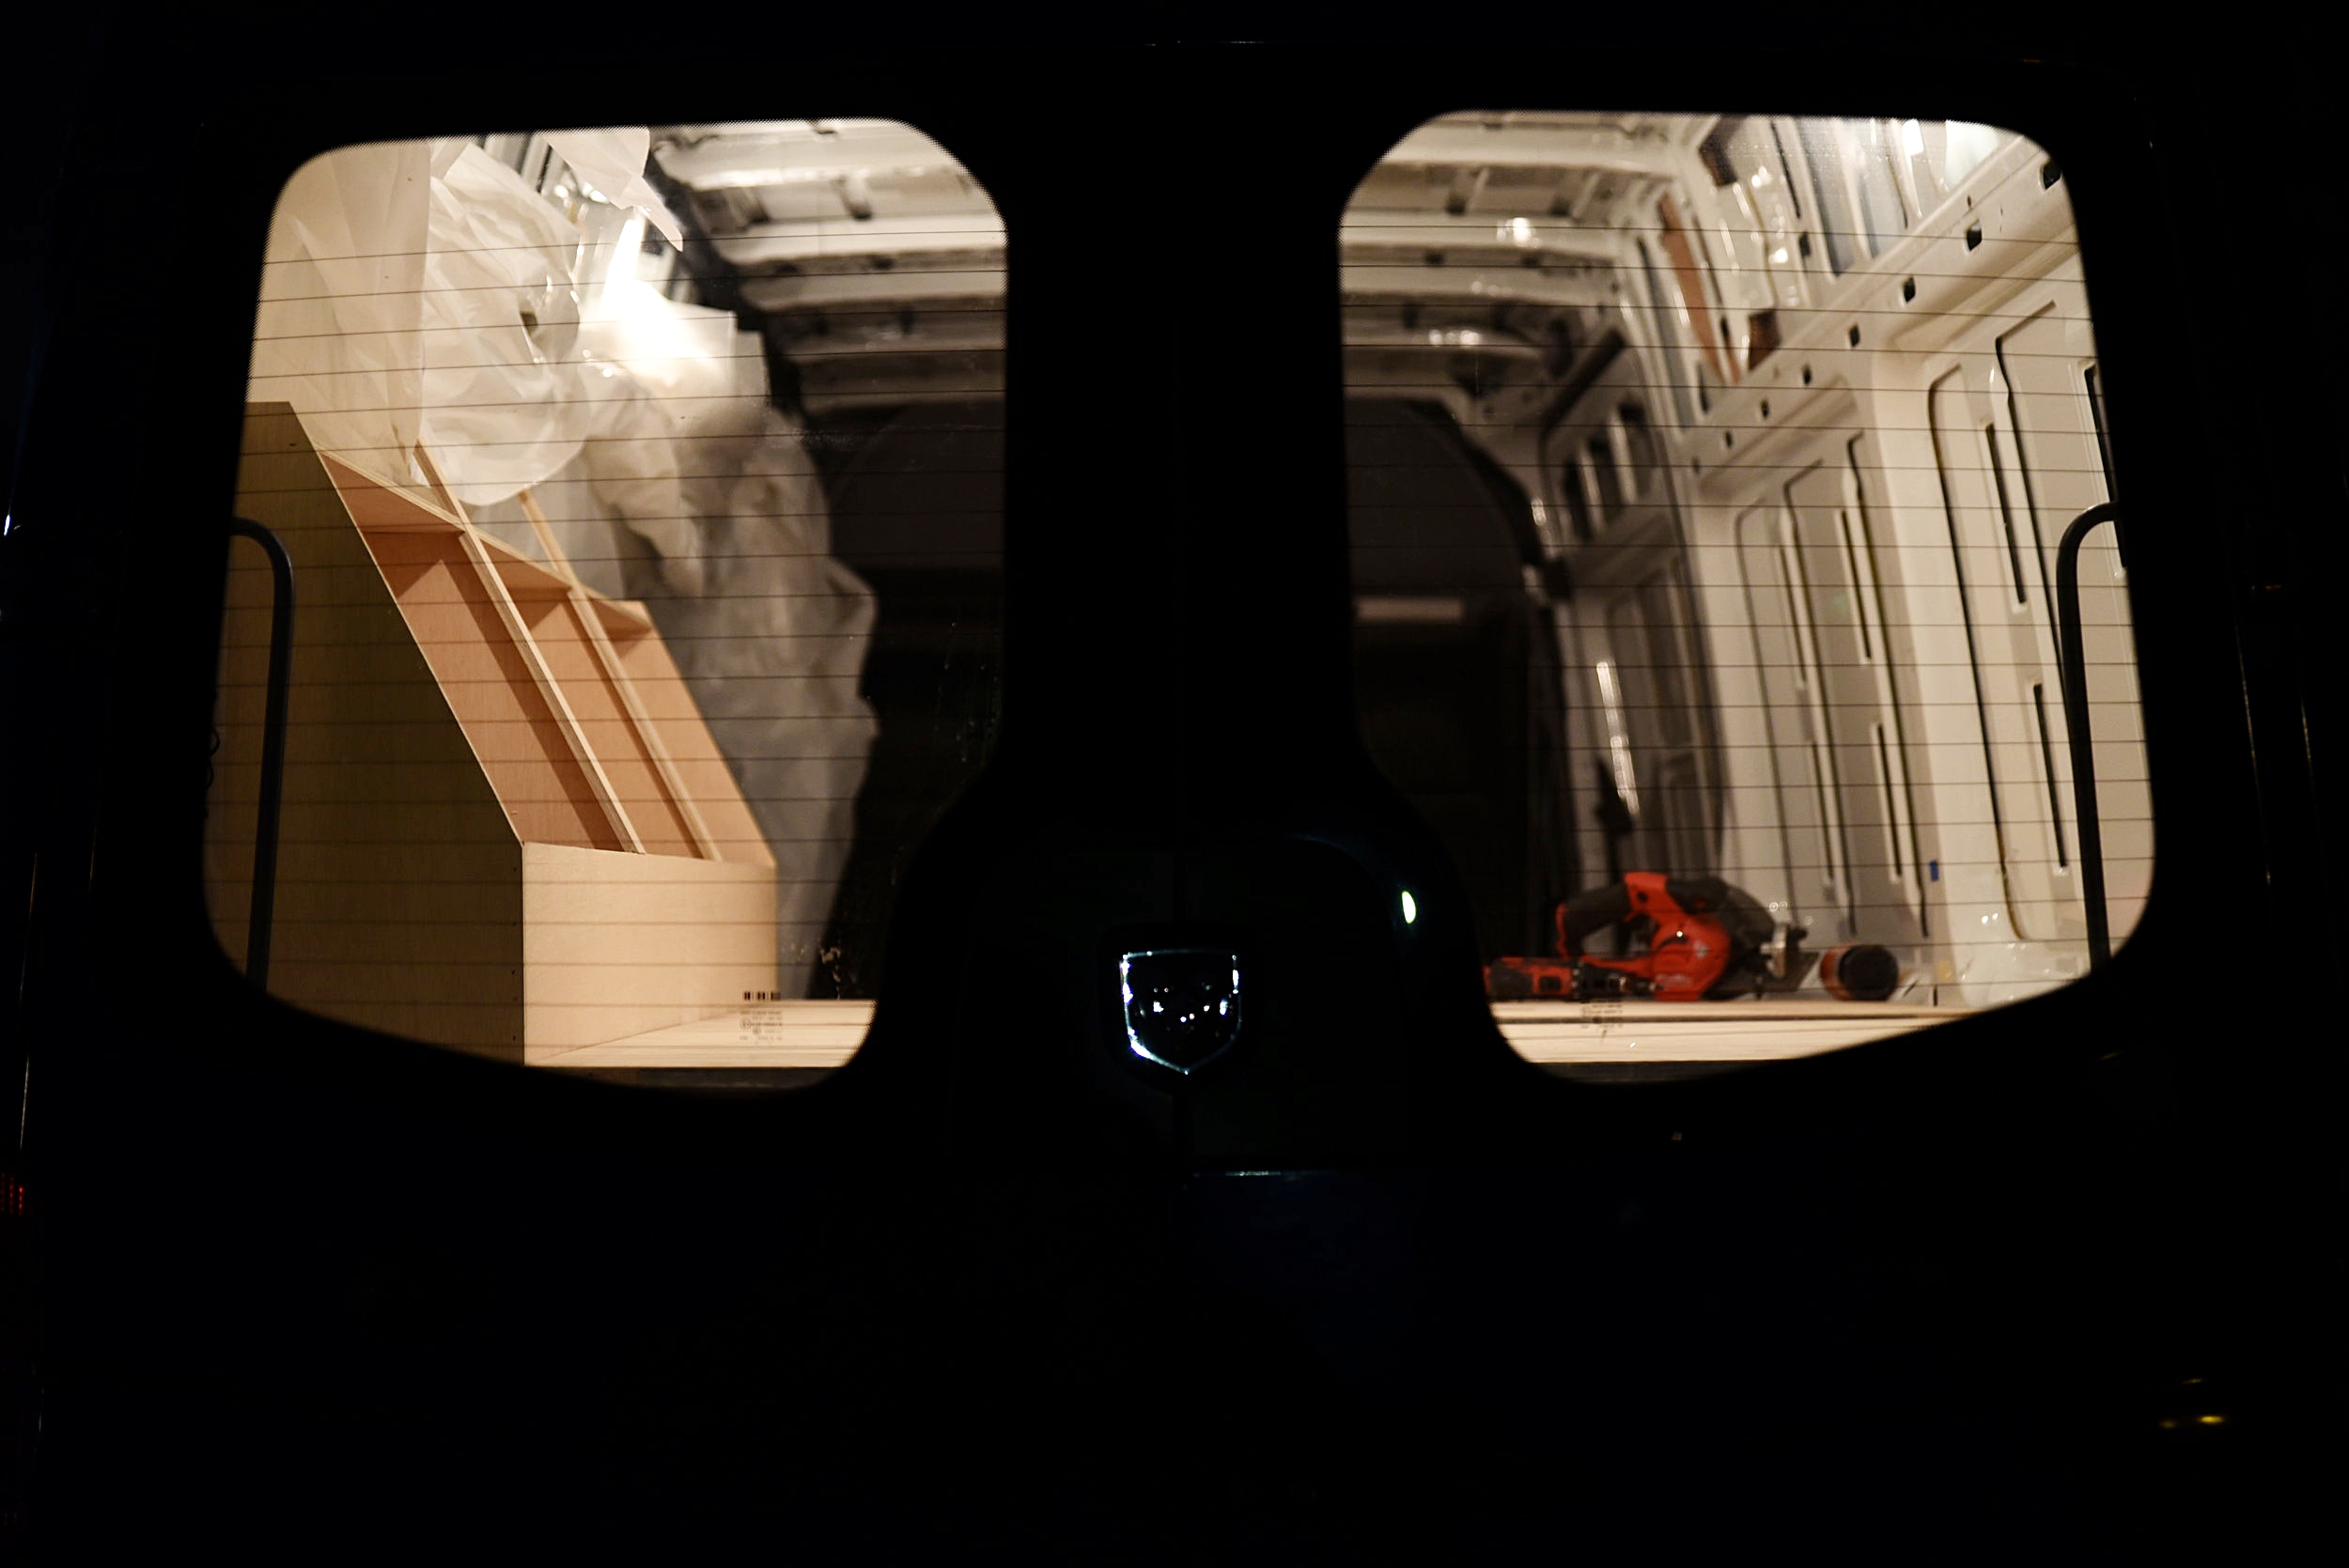
Ian lays out all of the wooden pieces of the cabinetry, while planning the best way to fasten them.

Corner clamps came in handy to keep the bed cabinets square, because they were a fairly odd shape.

Ian joins the 1/4 inch cabinet back to the 1/2-inch plywood uprights.
Corner clamps were so incredibly helpful to keep this large piece of cabinetry square while the glue was drying. We also made many of the cuts using a table saw so they would be perfectly square and straight. (Many thanks to our friend, Paul, for the use of his workshop and help with building these complicated cabinets.)
A bit of humor is required when building a van home.
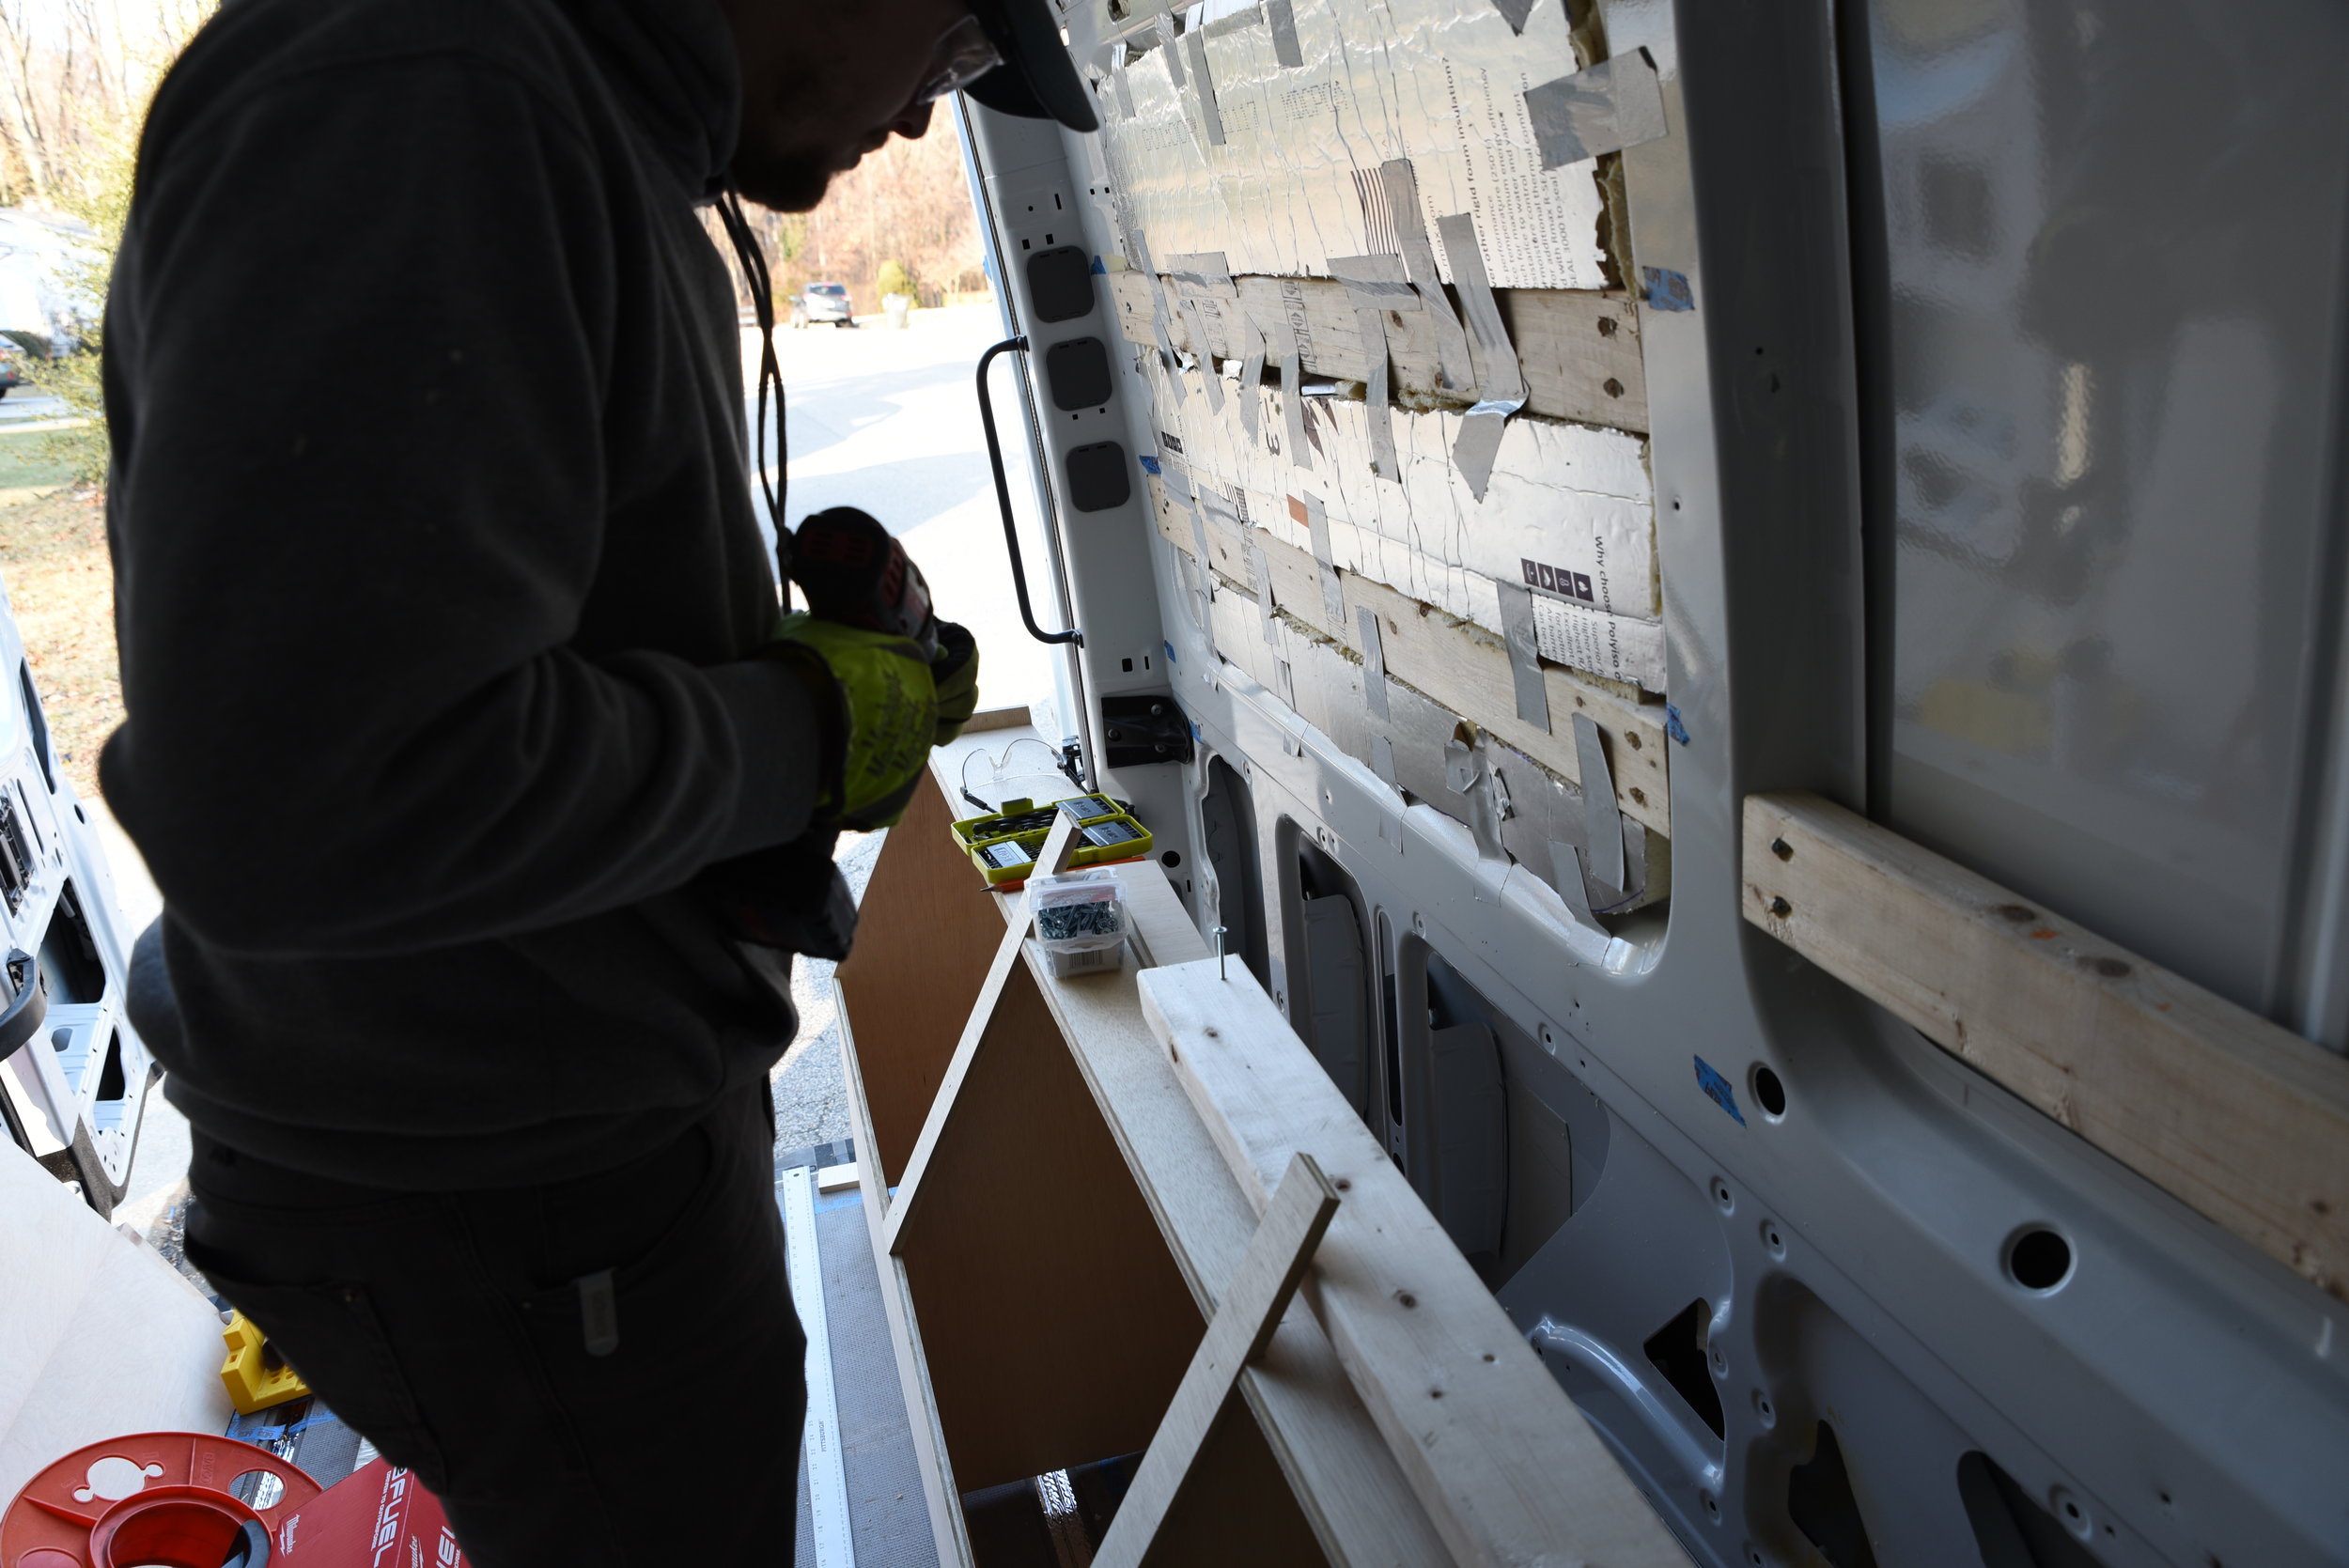
Ian attaches the studs to the van's metal ribs. Later we screwed the back of our bed cabinets to these studs.
These cabinets hold up half of the platform for our mattress, so they needed to be attached to the van in a very sturdy manner. When it came time to attach these cabinets to the van, we installed 2x4s horizontally between the ribs of the van to act as "studs" (For more on the studs in our wall, read our post Framing the Van).
(A quick note: The bed cabinetry was some of the first of the "furnishings" that we installed in the van. We even installed it before we insulated the entire van, because we needed to be able to travel during the van build. However, we added insulation and put the vapor barrier behind the cabinets before attaching them to the wall.)

Ian attaches the 2x4 legs that support our cabinetry and the rail that supports our bed platform.
We screwed into the van's wall studs through strips of wood reinforcements, often called nailers, that we added inside the back of the cabinetry. We then attached three legs made of 2x4s to the front of the cabinets and a 2x2 rail to support our bed platforms. These legs and rail support both our mattress and the cabinetry as well.
We used a speed square to make sure the legs were perpendicular to the floor of the van and to prevent this large piece of mounted cabinetry from racking and twisting due to poor installation. To fasten the legs to the plywood floor, we used three angle brackets for added strength.

The angle brackets help prevent the three legs of our bed platform to shift out of place when we drive on bumpy, gravel roads.

We nailed through these reinforcements in the back of the cabinetry and into the studs inside our van wall.
Later we finished this cabinetry to match the rest of the finished wood in our van. We chose a warm "Honey Pecan" color, that goes nicely with our the unfinished cedar.
First we gave the cabinets a thorough sanding, using a handheld orbital sander. For the first coat we used Varathane One Step Water-based Stain and Polyurethane (in Honey Pecan). Using a stain-poly combo allowed us to skip a coat of the finishing process. It was really an added convenience to us, since finishing and sealing was one of the more time consuming aspects of the build. Polyurethane is most easily applied with a nylon-bristle brush.
After the stain/poly layer had dried, we sanded the stained surface of the cabinet lightly with a medium grit sanding block. Then we applied a coat of clear water-based polyurethane. Once the second coat had dried, we sanded lightly again and applied the third and final coat.

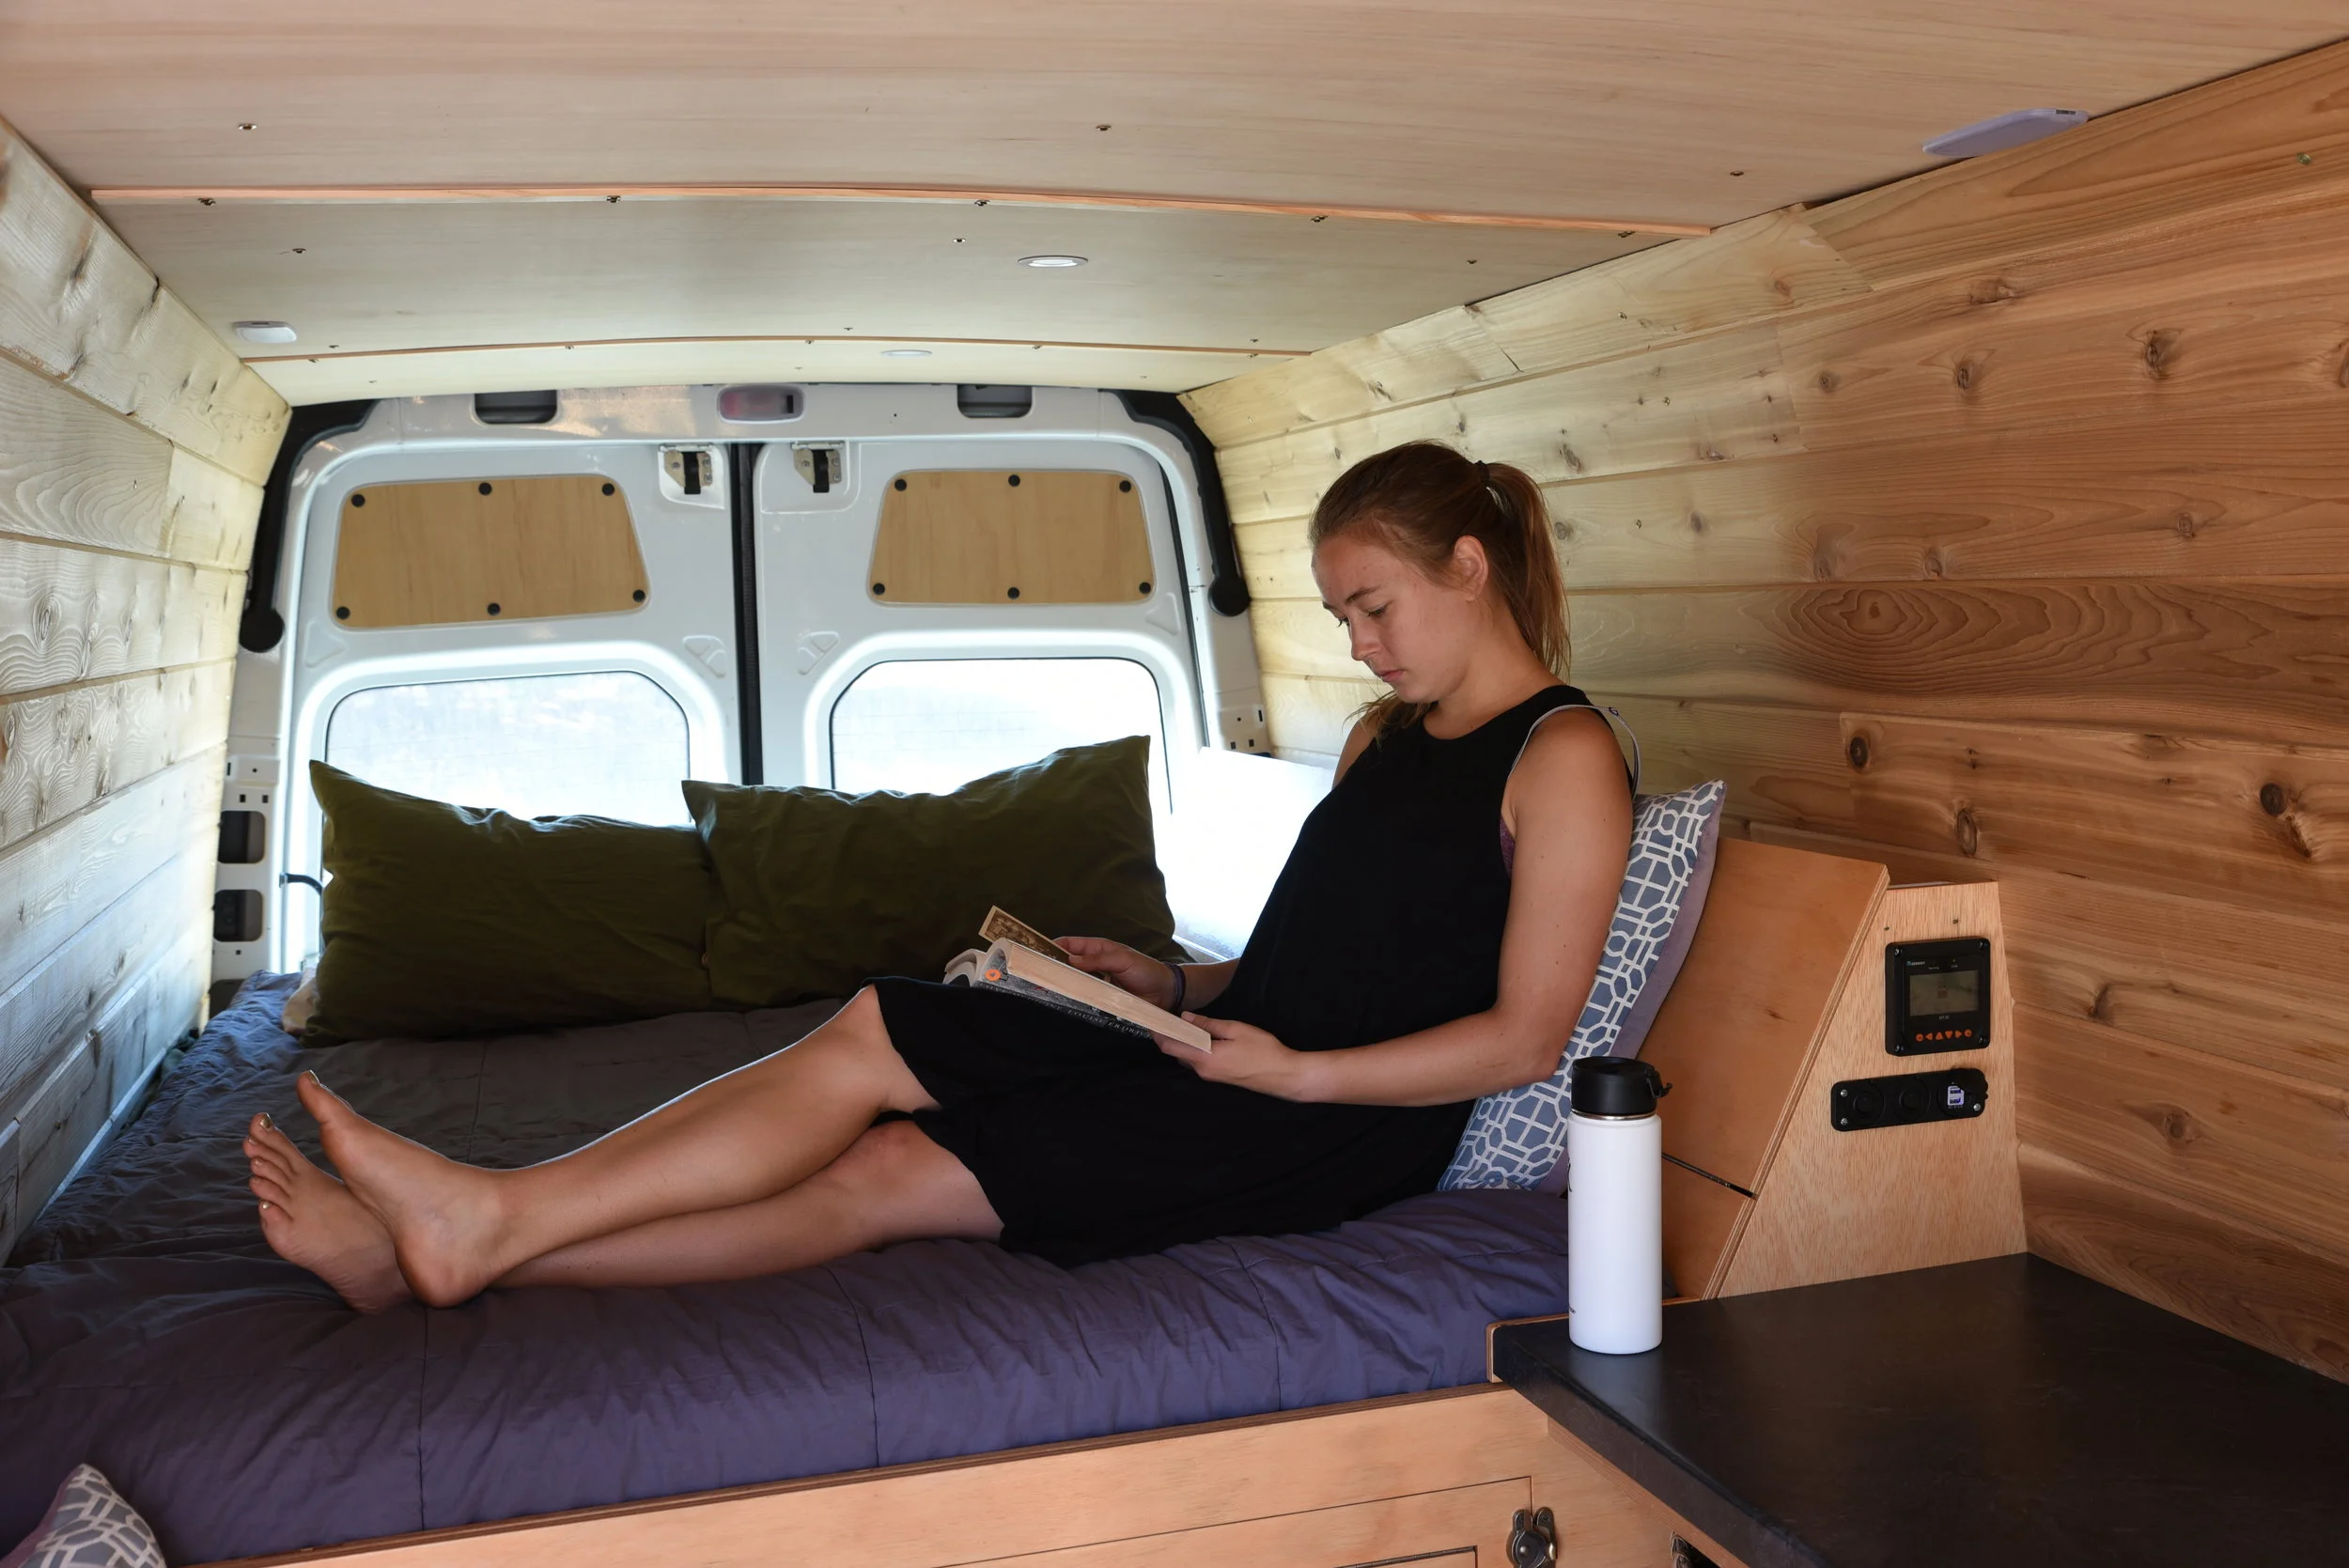
Kaylee applies the third and final coat of water-based polyurethane to the bed cabinetry. The top sill of the bed cabinetry is the perfect size for holding a Nalgene water bottle, or in this case a Hamms!

We used one coat of the poly/stain combo, followed by two coats of a clear polyurethane.

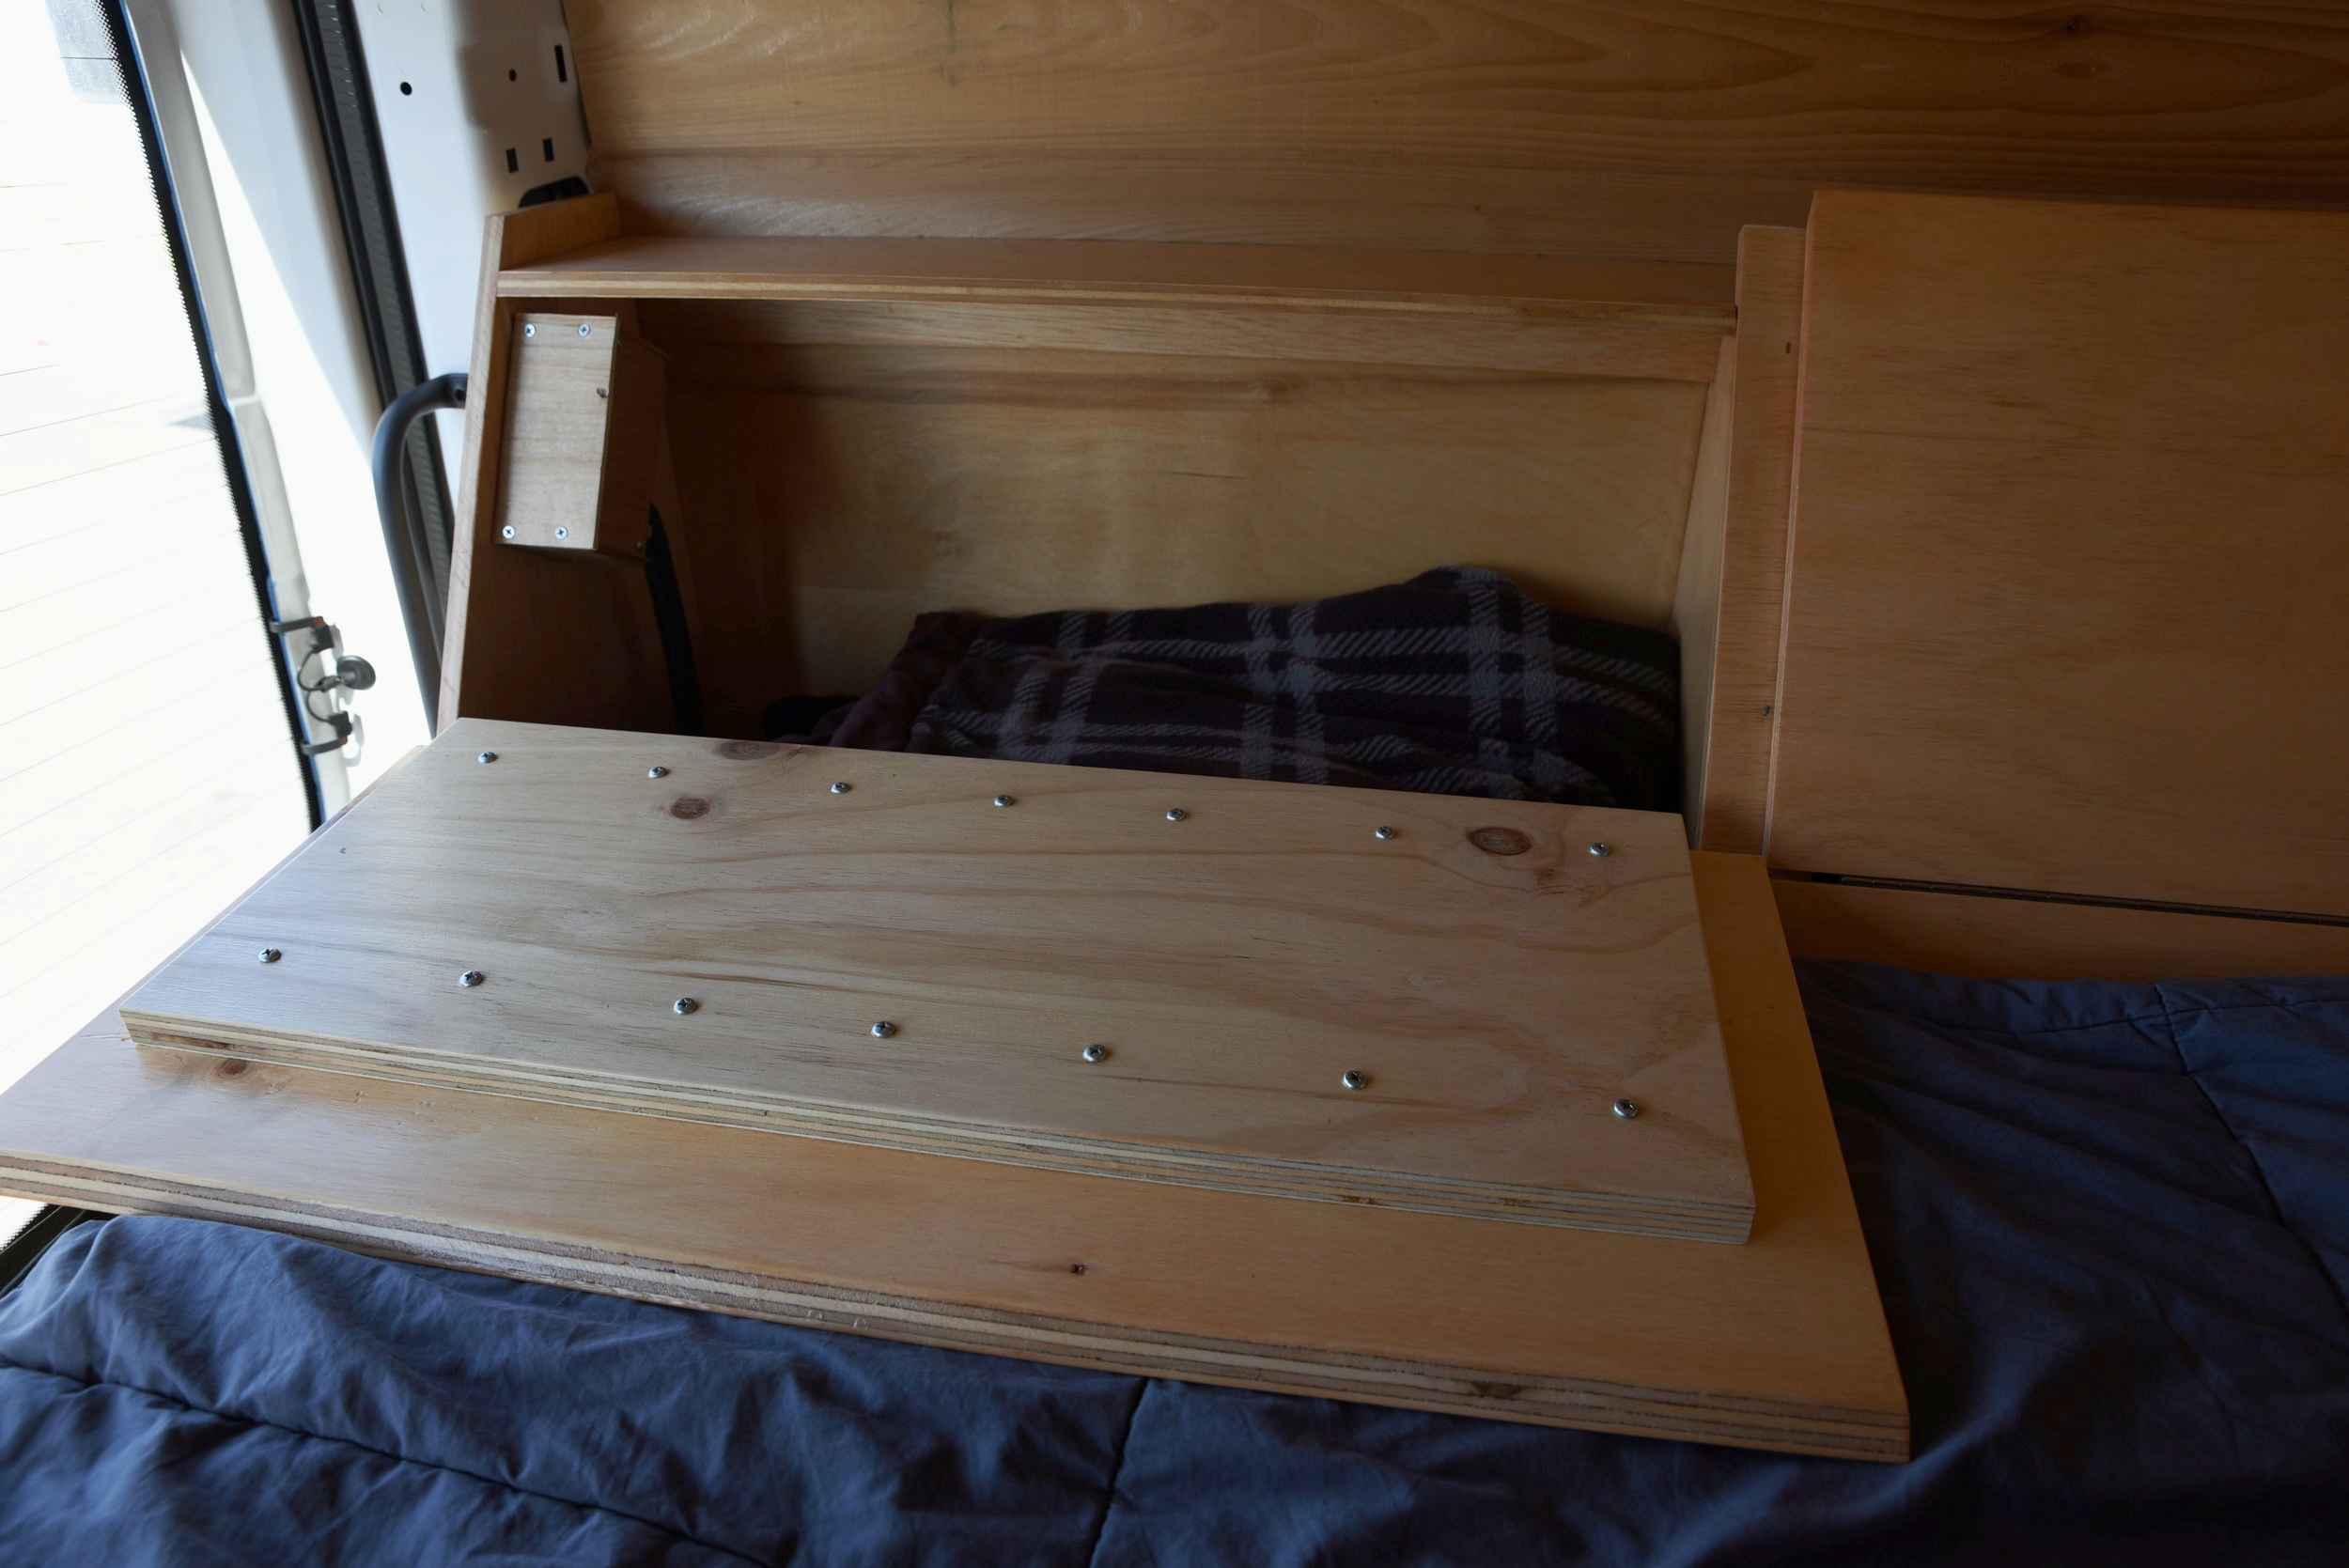
A mounting board was added along the length of the cabinet's front to raise the hinges to the same level as our mattress. When the doors fold down, they rest flat on the mattress and can be used a sort of tray to hold a cup of coffee or other dishes while in bed.
A note on the best finishes for inside vans: Polyurethane is essentially a liquid plastic that can be applied as a finish to wood surfaces. It comes in oil- and water-based varieties, and it is just about the most durable wood finish around. Oil-based polyurethane penetrates the wood giving a bit richer finish, whereas water-based polyurethane just sits on the wood's surface.
Water-based polyurethane has very little odor in comparison to oil-based, and it provides a nearly as durable a finish. Water-based polyurethane also has fewer VOCs (Volatile Organic Compounds). It's definitely healthier for you and the environment than it's oil-based counter part, especially for a small space like a van where there isn't a great way to avoid inhaling it. Moreover, the water-based polyurethane dries much more quickly. Not only is this more convenient, your VOC exposure is also reduced based on the dry time, since the fewer chemicals are released after it has dried.
There are some more "natural" options such as linseed oil or tung oil. These finishes can take weeks to cure even in well ventilated spaces, and perpetually have a "wet" look to them. These oil finishes or a product like Shellac, which is made from beetle secretions, do not offer the same durability as polyurethane, and they can be easily scratched or stained. Often the modern versions of these age-old finishes are mixed with other high-VOC solvents anyway.
For these reasons, we believe that water-based polyurethane is the safest and best choice for woodwork inside van conversions.

Our cabinet bottoms are made from a 1/4-inch plywood. While it bows a little, it's plenty sturdy for storing our clothing.

The cabinet bottoms are removable in case we ever need to access the things we store underneath.
The final step of our bed cabinetry was to add doors and bottoms to the three compartments.
The bottoms of the cabinets are removable, meaning that we could access the camping gear that we keep underneath them without going outside the van. This feature has not proved to be that useful. Actually, we have never once used it. It is much easier to simply open the very large door on the front of the bed platform, rather take all the clothes out of these cabinets and then try to wrestle a sleeping bag or backpack out. Although it was not really extra work, were we to build the van again, we'd probably just attach the bottoms to the cabinets rather than making them removable.
Our removable cabinet bottoms are made from lightweight 1/4-inch plywood, which is plenty sturdy since these cabinets only hold our clothes and other light objects. We used a 1-1/4 inch hole saw to drill a hole into them which can be used in the case that you need to pull them out. The bottoms are unhinged, and they rest on a 1x2 rail at the front and back of each compartment.
The doors to the cabinetry are made of 1/2-inch plywood reinforced with 3/4-inch plywood behind.

Piano hinges are almost totally hidden once installed.
The doors of our bed cabinets are made of 1/2-inch plywood which is then reinforced by a smaller piece of 3/4-inch plywood. The 3/4-inch plywood reinforcement serves two purposes. It was used to prevent the doors from warping--a challenge when working with plywood. The weight of the reinforcement also makes the doors heavy enough that they do not swing open while we are driving, despite having no latches.
We used a piano hinge (also called a continuous hinge) to attach the bed cabinet doors. These types of hinges are great for van conversions. They can be bought in lengths of up to 90 inches and then you simply cut them to your desired size. Ian used a hacksaw to cut a 90-inch hinge into three pieces of the correct length. He used an iron file to deburr the cut ends.
Because they are attached to your cabinets along their entire length, piano hinges can withstand the bumping and rattling of life on the road. Even if one screw becomes loose, there are 20 more to hold the door. They also are a good choice for plywood cabinetry because when screwing into the the end grain of plywood you may not get a great hold at every spot, so more screws have a better chance of holding over time. We also think they look great, because only the knuckle of the hinge is visible once installed.

The cabinet doors make a tray when folded down and you can set a cup of coffee or snacks on them while reading and lounging in bed.

Kaylee uses the "bed couch" while reading a book on a fall day in Oregon.
We first attached a mounting board to the cabinetry that brings the hinge to the same level as the top of the mattress, and then the hinged doors were mounted to this board. When the doors fold down, they rest on top of our mattress as can be used as sort of a tray for food or drinks while we are relaxing in bed.
We have found our angled cabinetry to be super comfortable as a backrest, and we have even taken to calling it "the couch."
Bed Platforms
People we meet always ask us, “Don’t you ever want to sleep on a real bed?” And the answer is that we do! Every night!
We have a full-size, 10-inch, innerspring mattress in our van. While a lot of van conversion use smaller or thinner foam mattresses, we think foam mattresses are dreadfully hot to sleep on. We’ve seen some pretty uncomfortable looking beds in other conversions that are some Tetris arrangement of cushions taken from benches in the van. We also already had this mattress, so we didn't want to spend the money to replace a perfectly functional mattress.
A challenging calculation in our van build was to try and figure out what materials would be strong enough to hold our weight and the weight of our mattress, close to 400 pounds, without any supports underneath the bed in the middle of our “garage” storage area. We wanted to be able to store our bikes underneath, so we didn't want any posts to obstruct this storage area.
The design we landed on has two removable platforms that rest on two rails on either side. On one side the rail is attached directly to the metal rib in the wall of the van. On the other side the rail is a 2x2 attached to our cabinetry. This rail is supported by the three legs of the cabinetry.
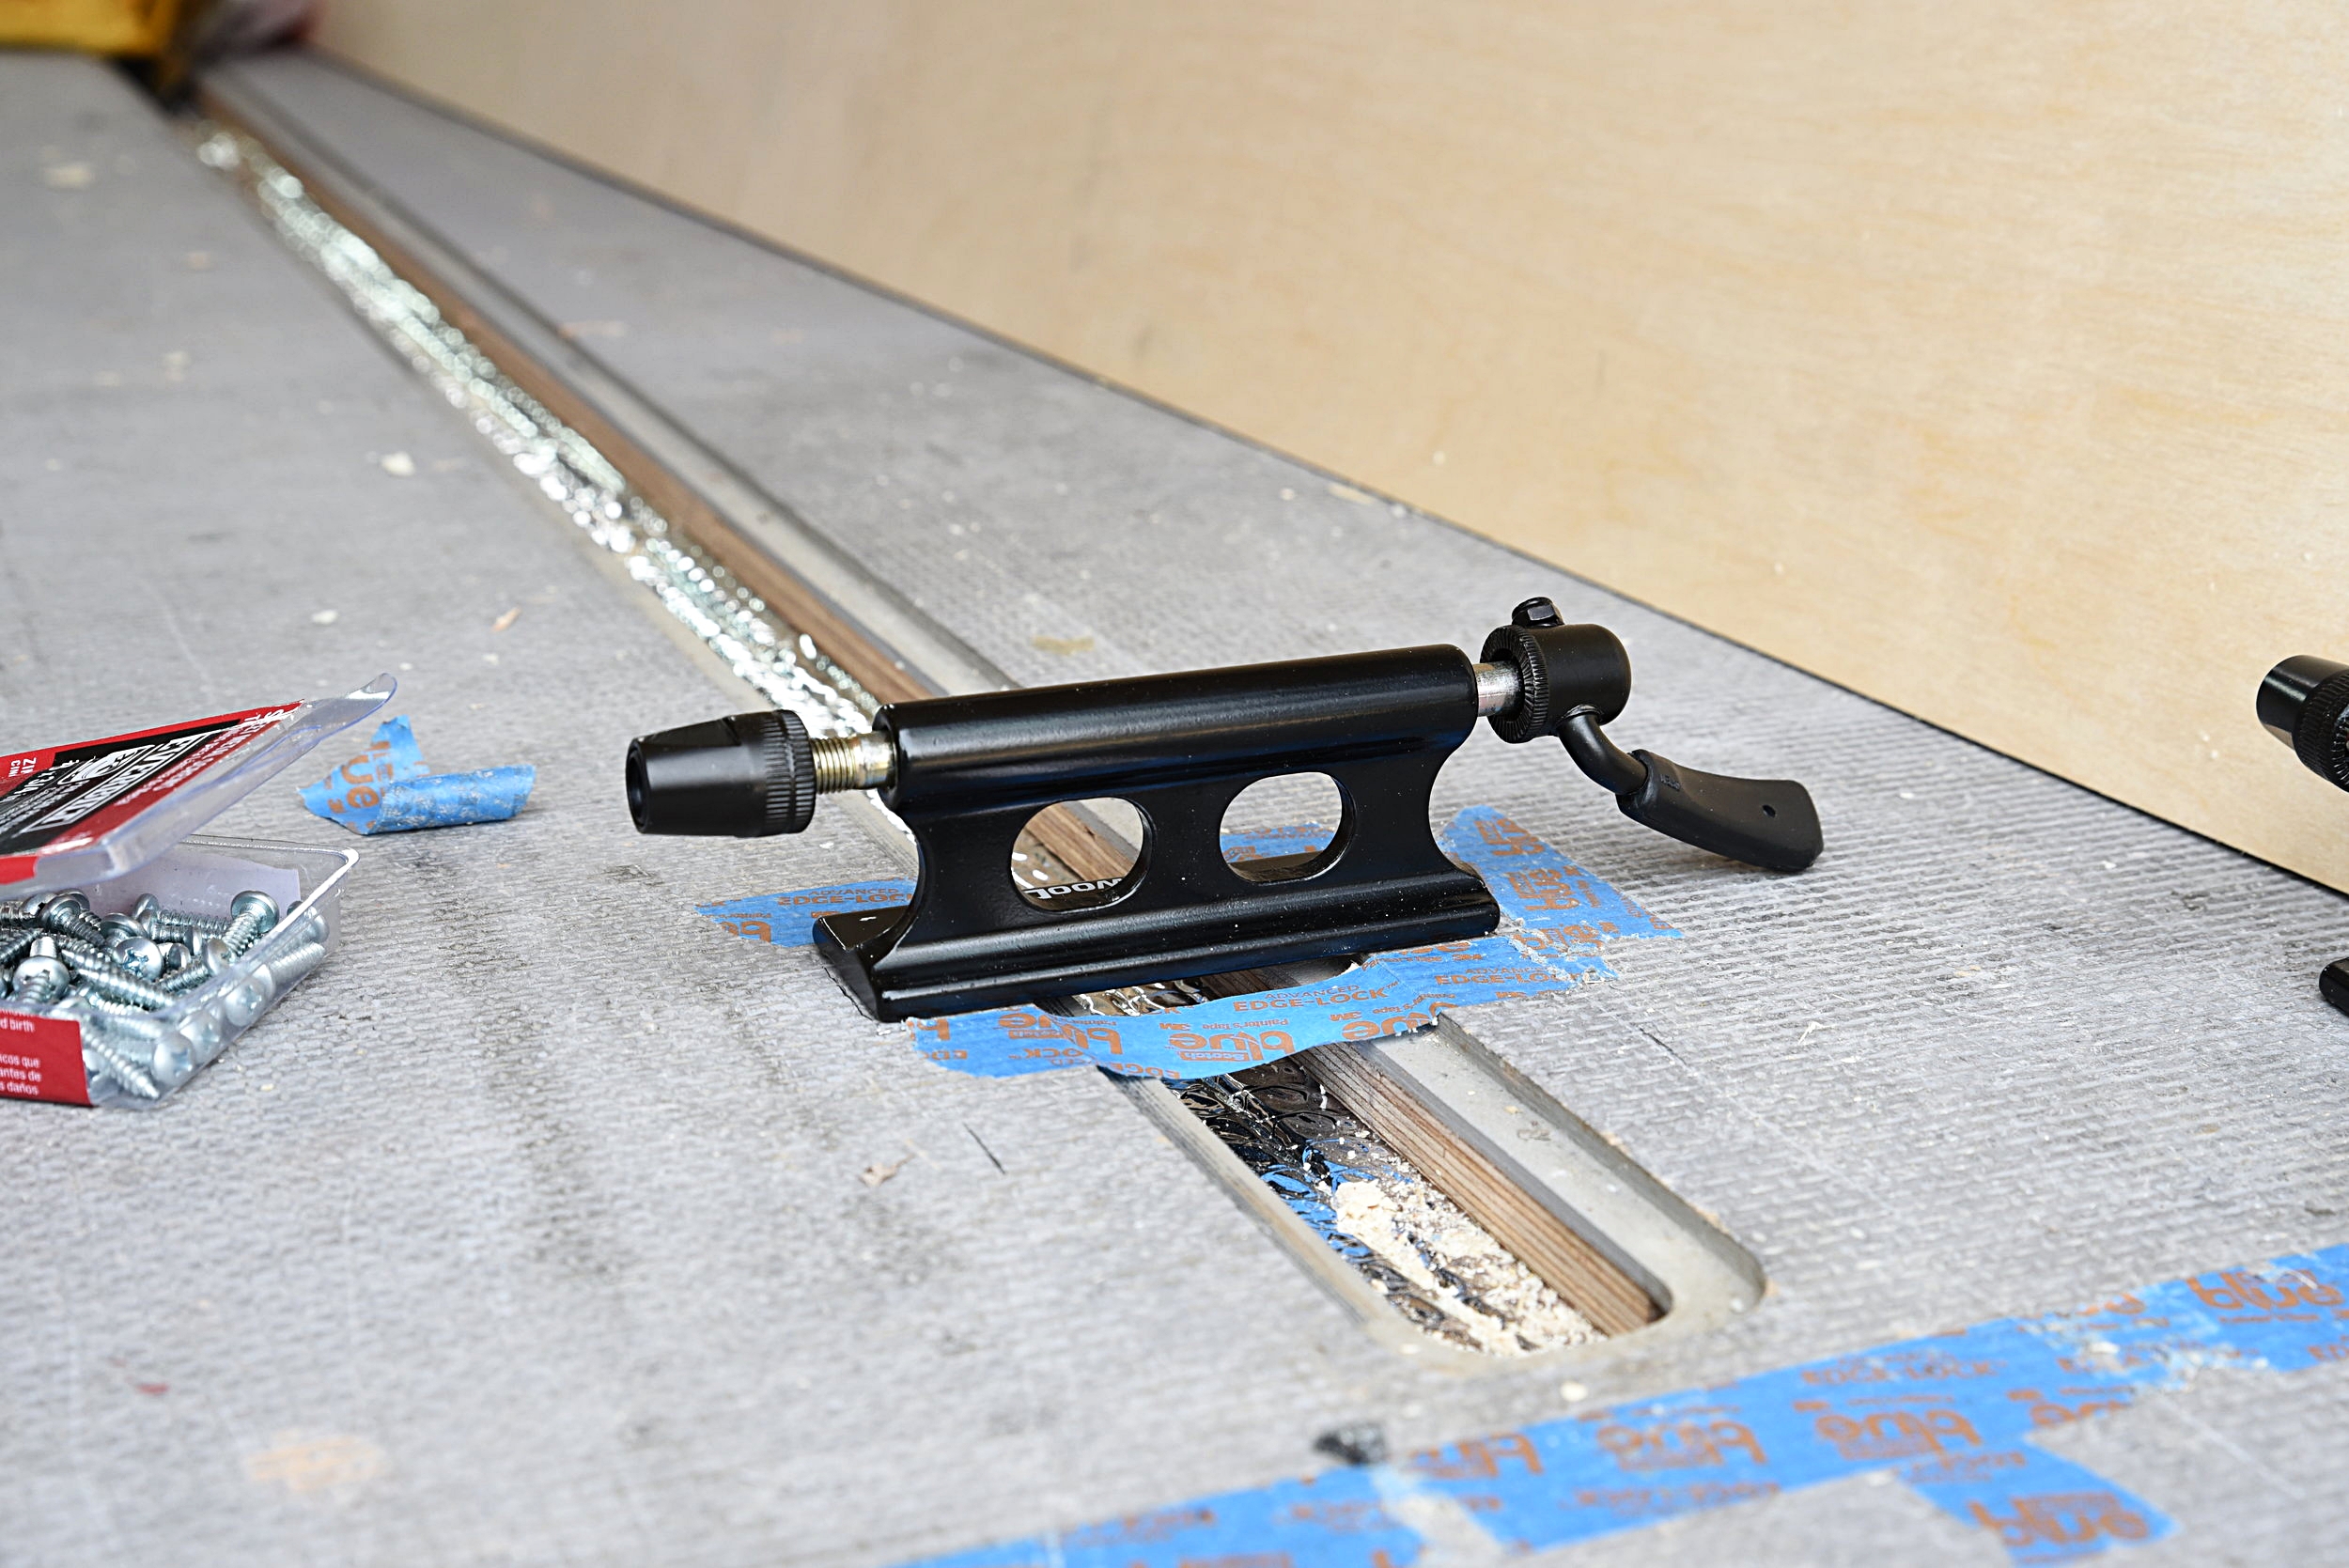
On the other side the rail is attached directly to the metal rib in the wall of the van. These rails are made from three large pieces of aluminum angle. The angle rod that we chose was 1/8-inch thick, 1-1/2 inch wide, and 48 inches long. We used a reciprocating saw to cut the aluminum angle to three lengths of about 16 inches.
The ribs of the Sprinter have large holes that are pretty much evenly spaced along their length. We were able to fish bolts and washers in behind the rib and through these holes, so that we didn't have to drill extra holes in our van wall. We then drilled corresponding holes into the aluminum angle. We put the bolts through these holes in the aluminum angle and then fastened each piece with washers and nuts. If you are going this route, it's critical to use bolts rather than just something such as sheet metal screws. A rivet or a plus nut could be used if you don't have conveniently accessible holes for bolts in your van ribs.
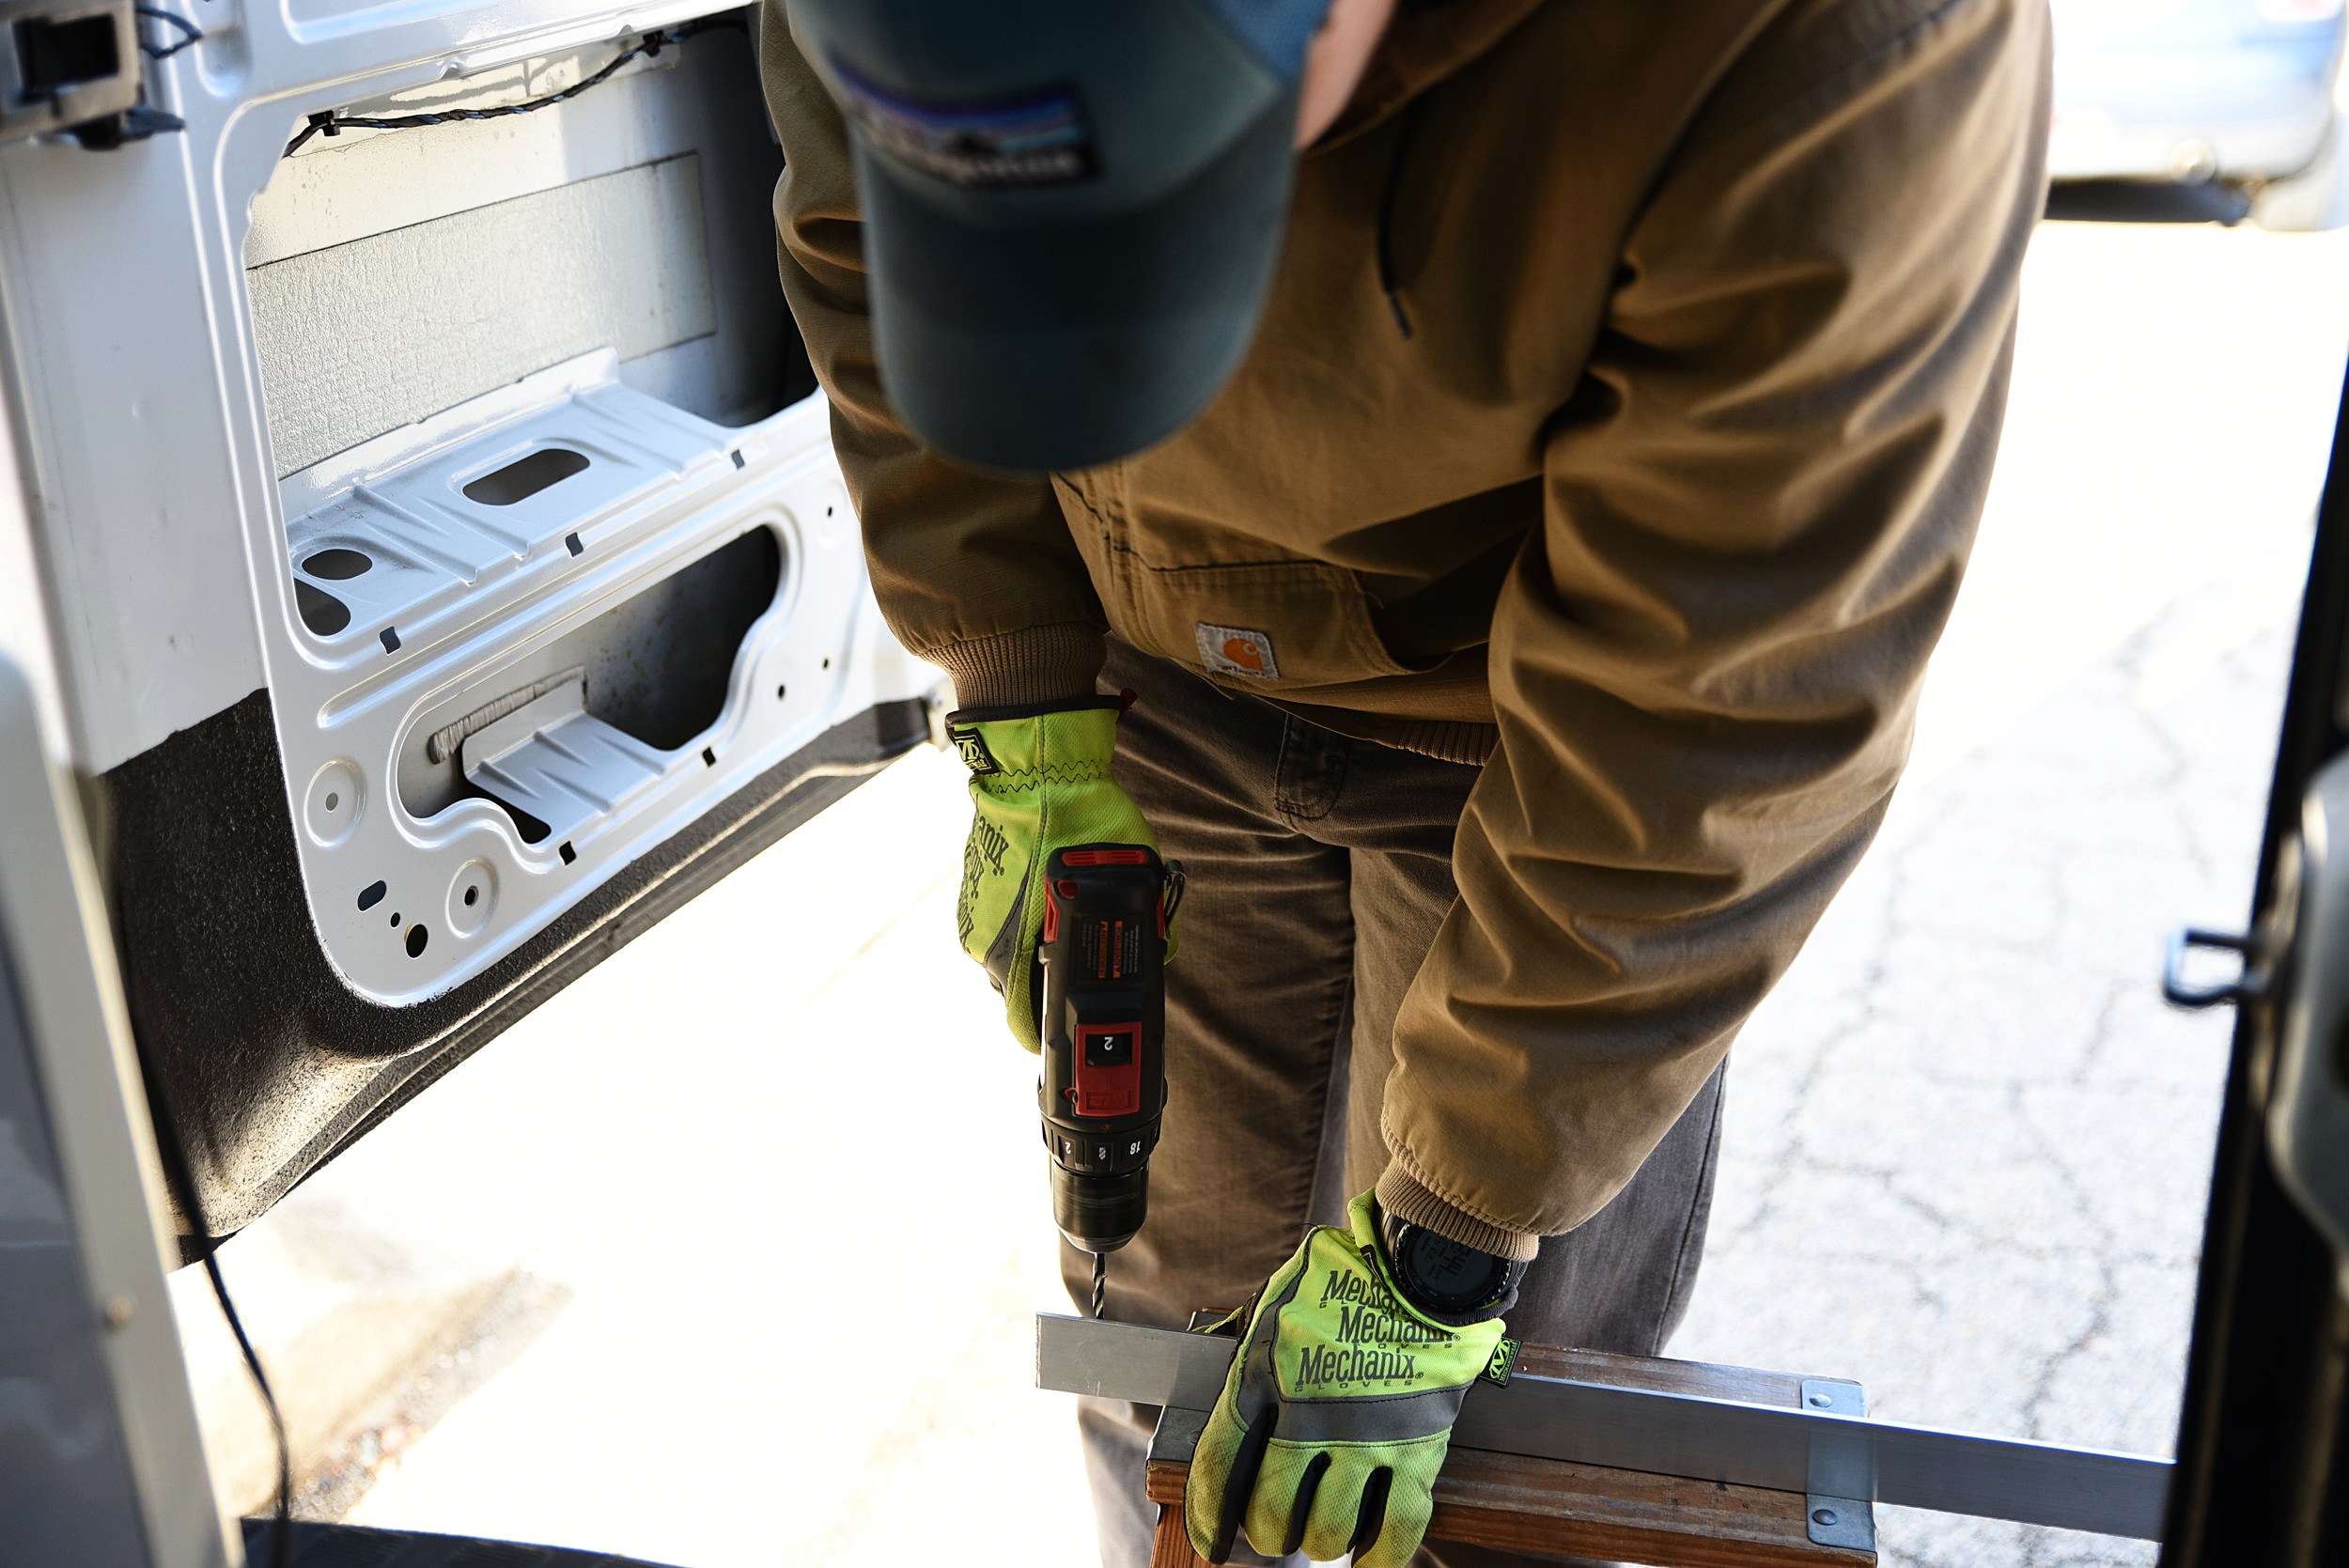
Ian drills holes in the aluminum angle spaced to match the holes that are already in the sprinter van ribs.
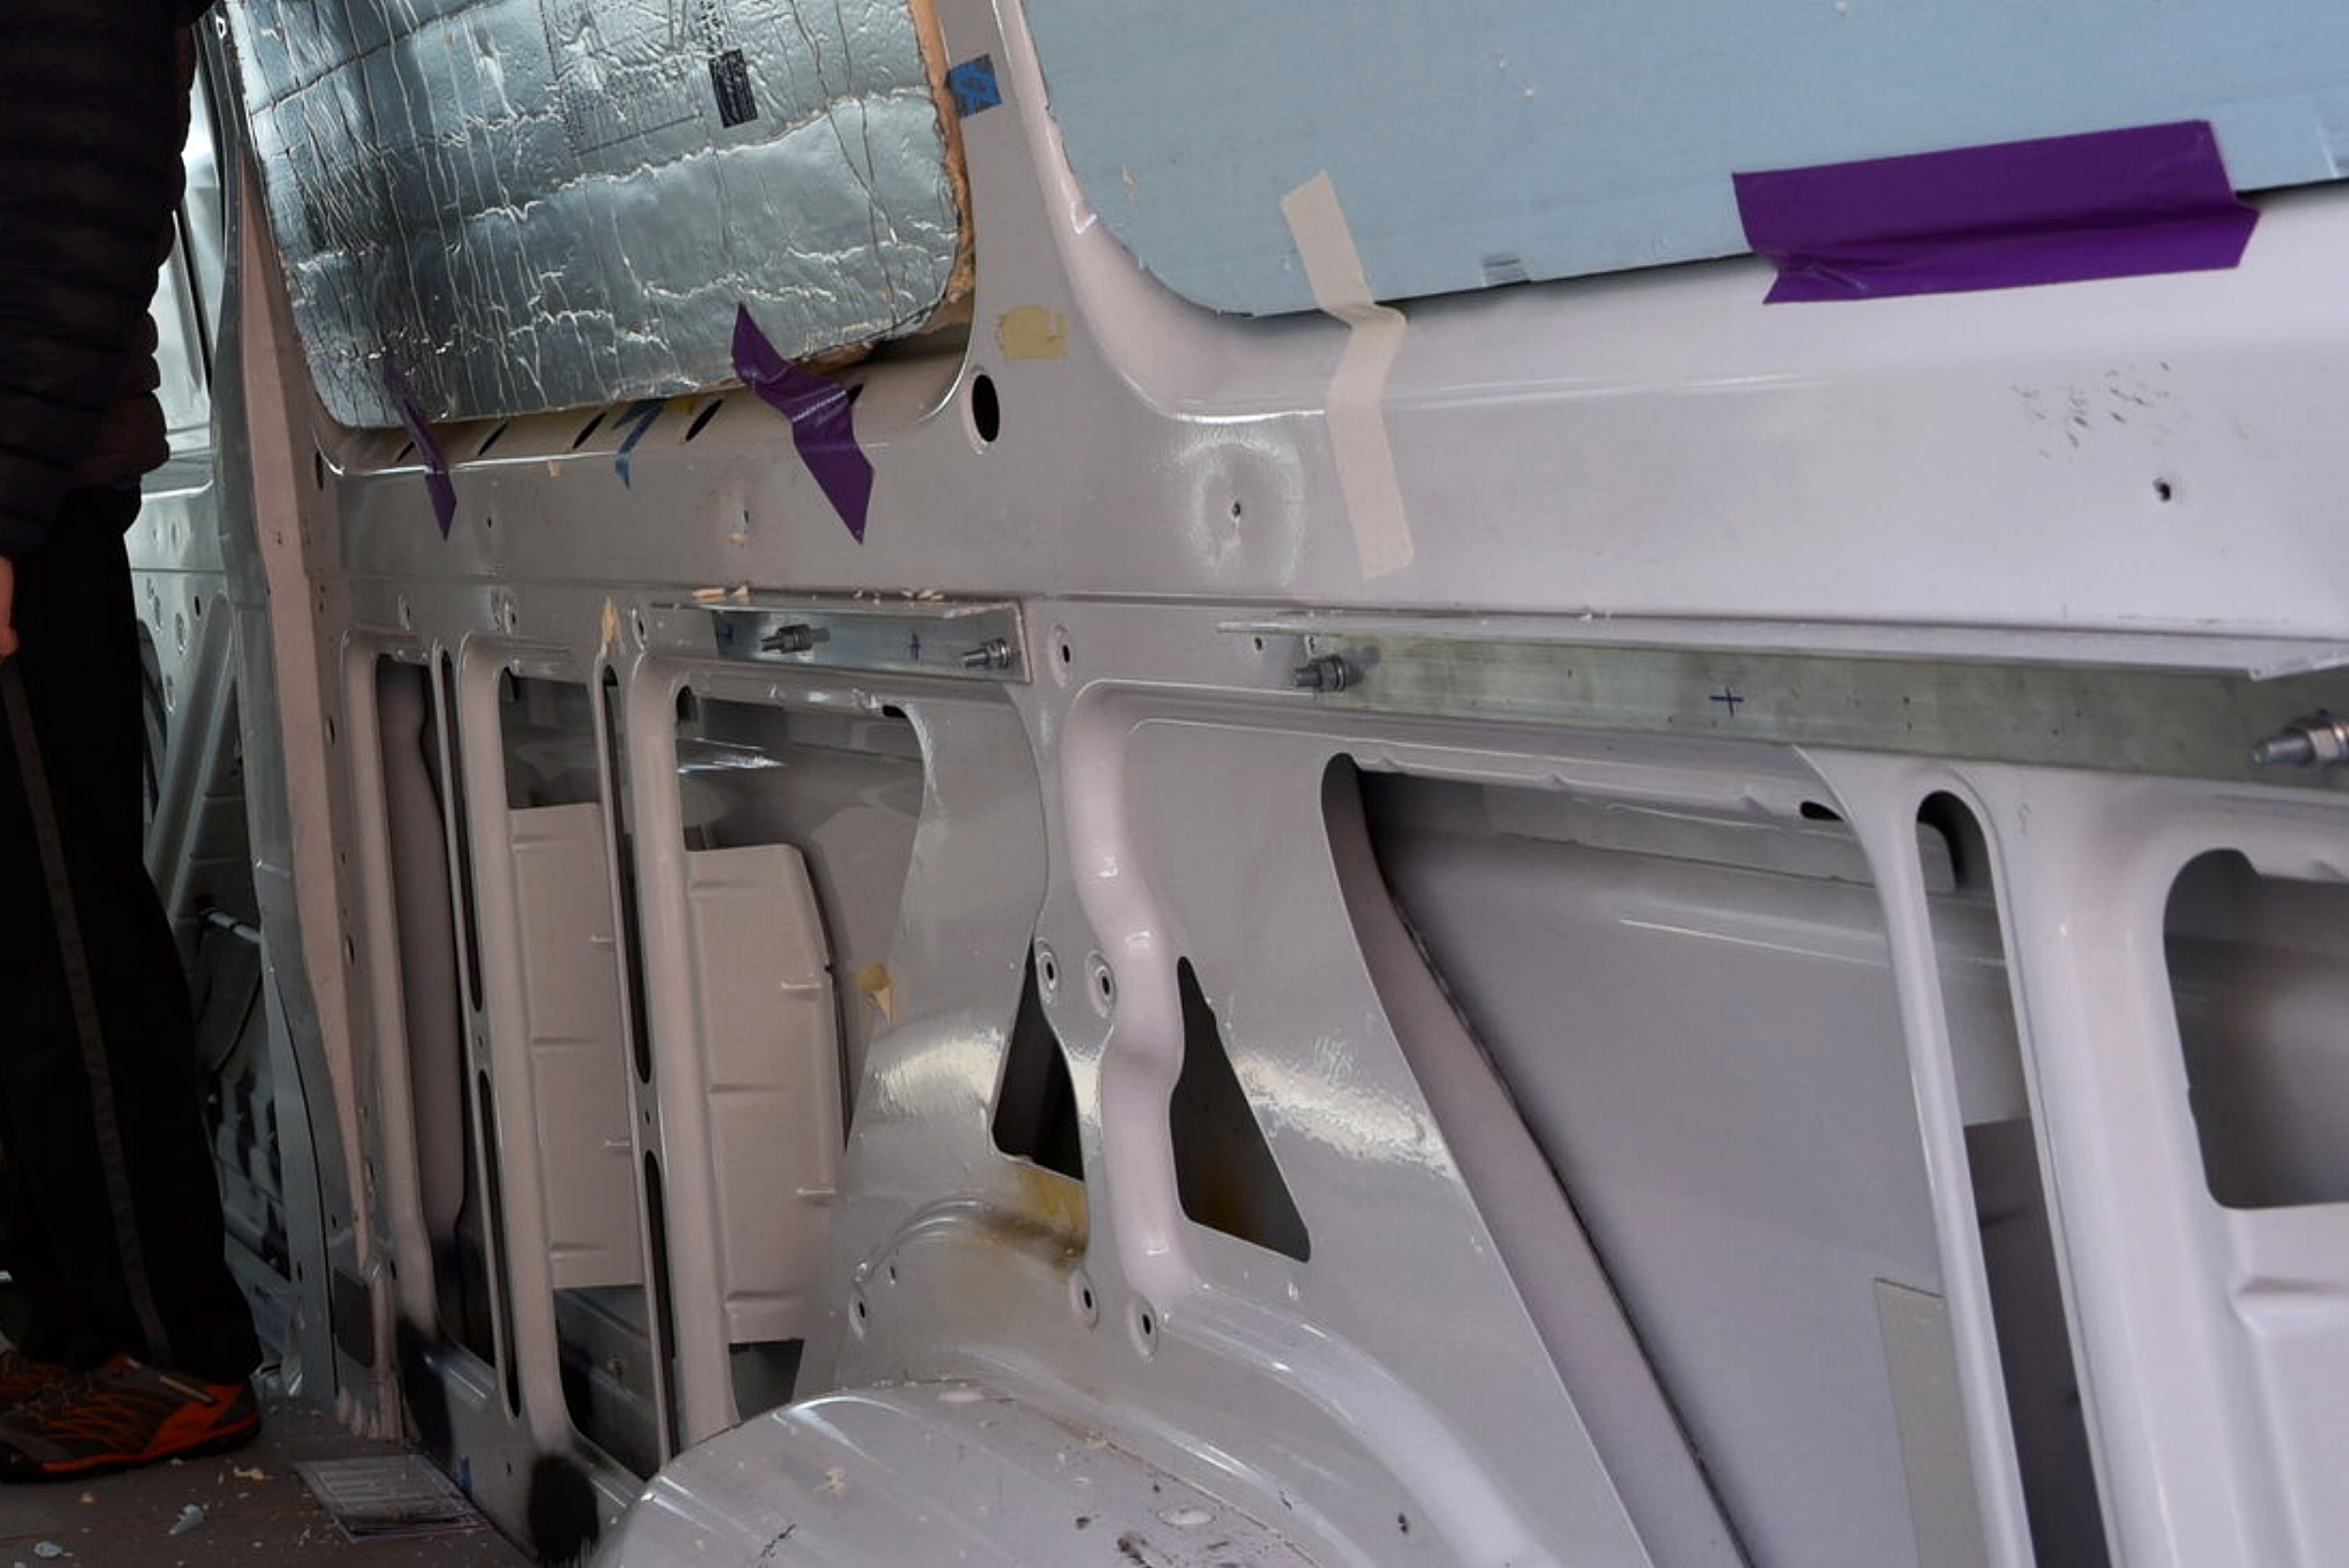
In this photo you can see two of the pieces of aluminum angle that support our bed platforms on the passenger side. You can also see some of the holes where we pushed the bolts through and the spaces in the wall that we fished them through.
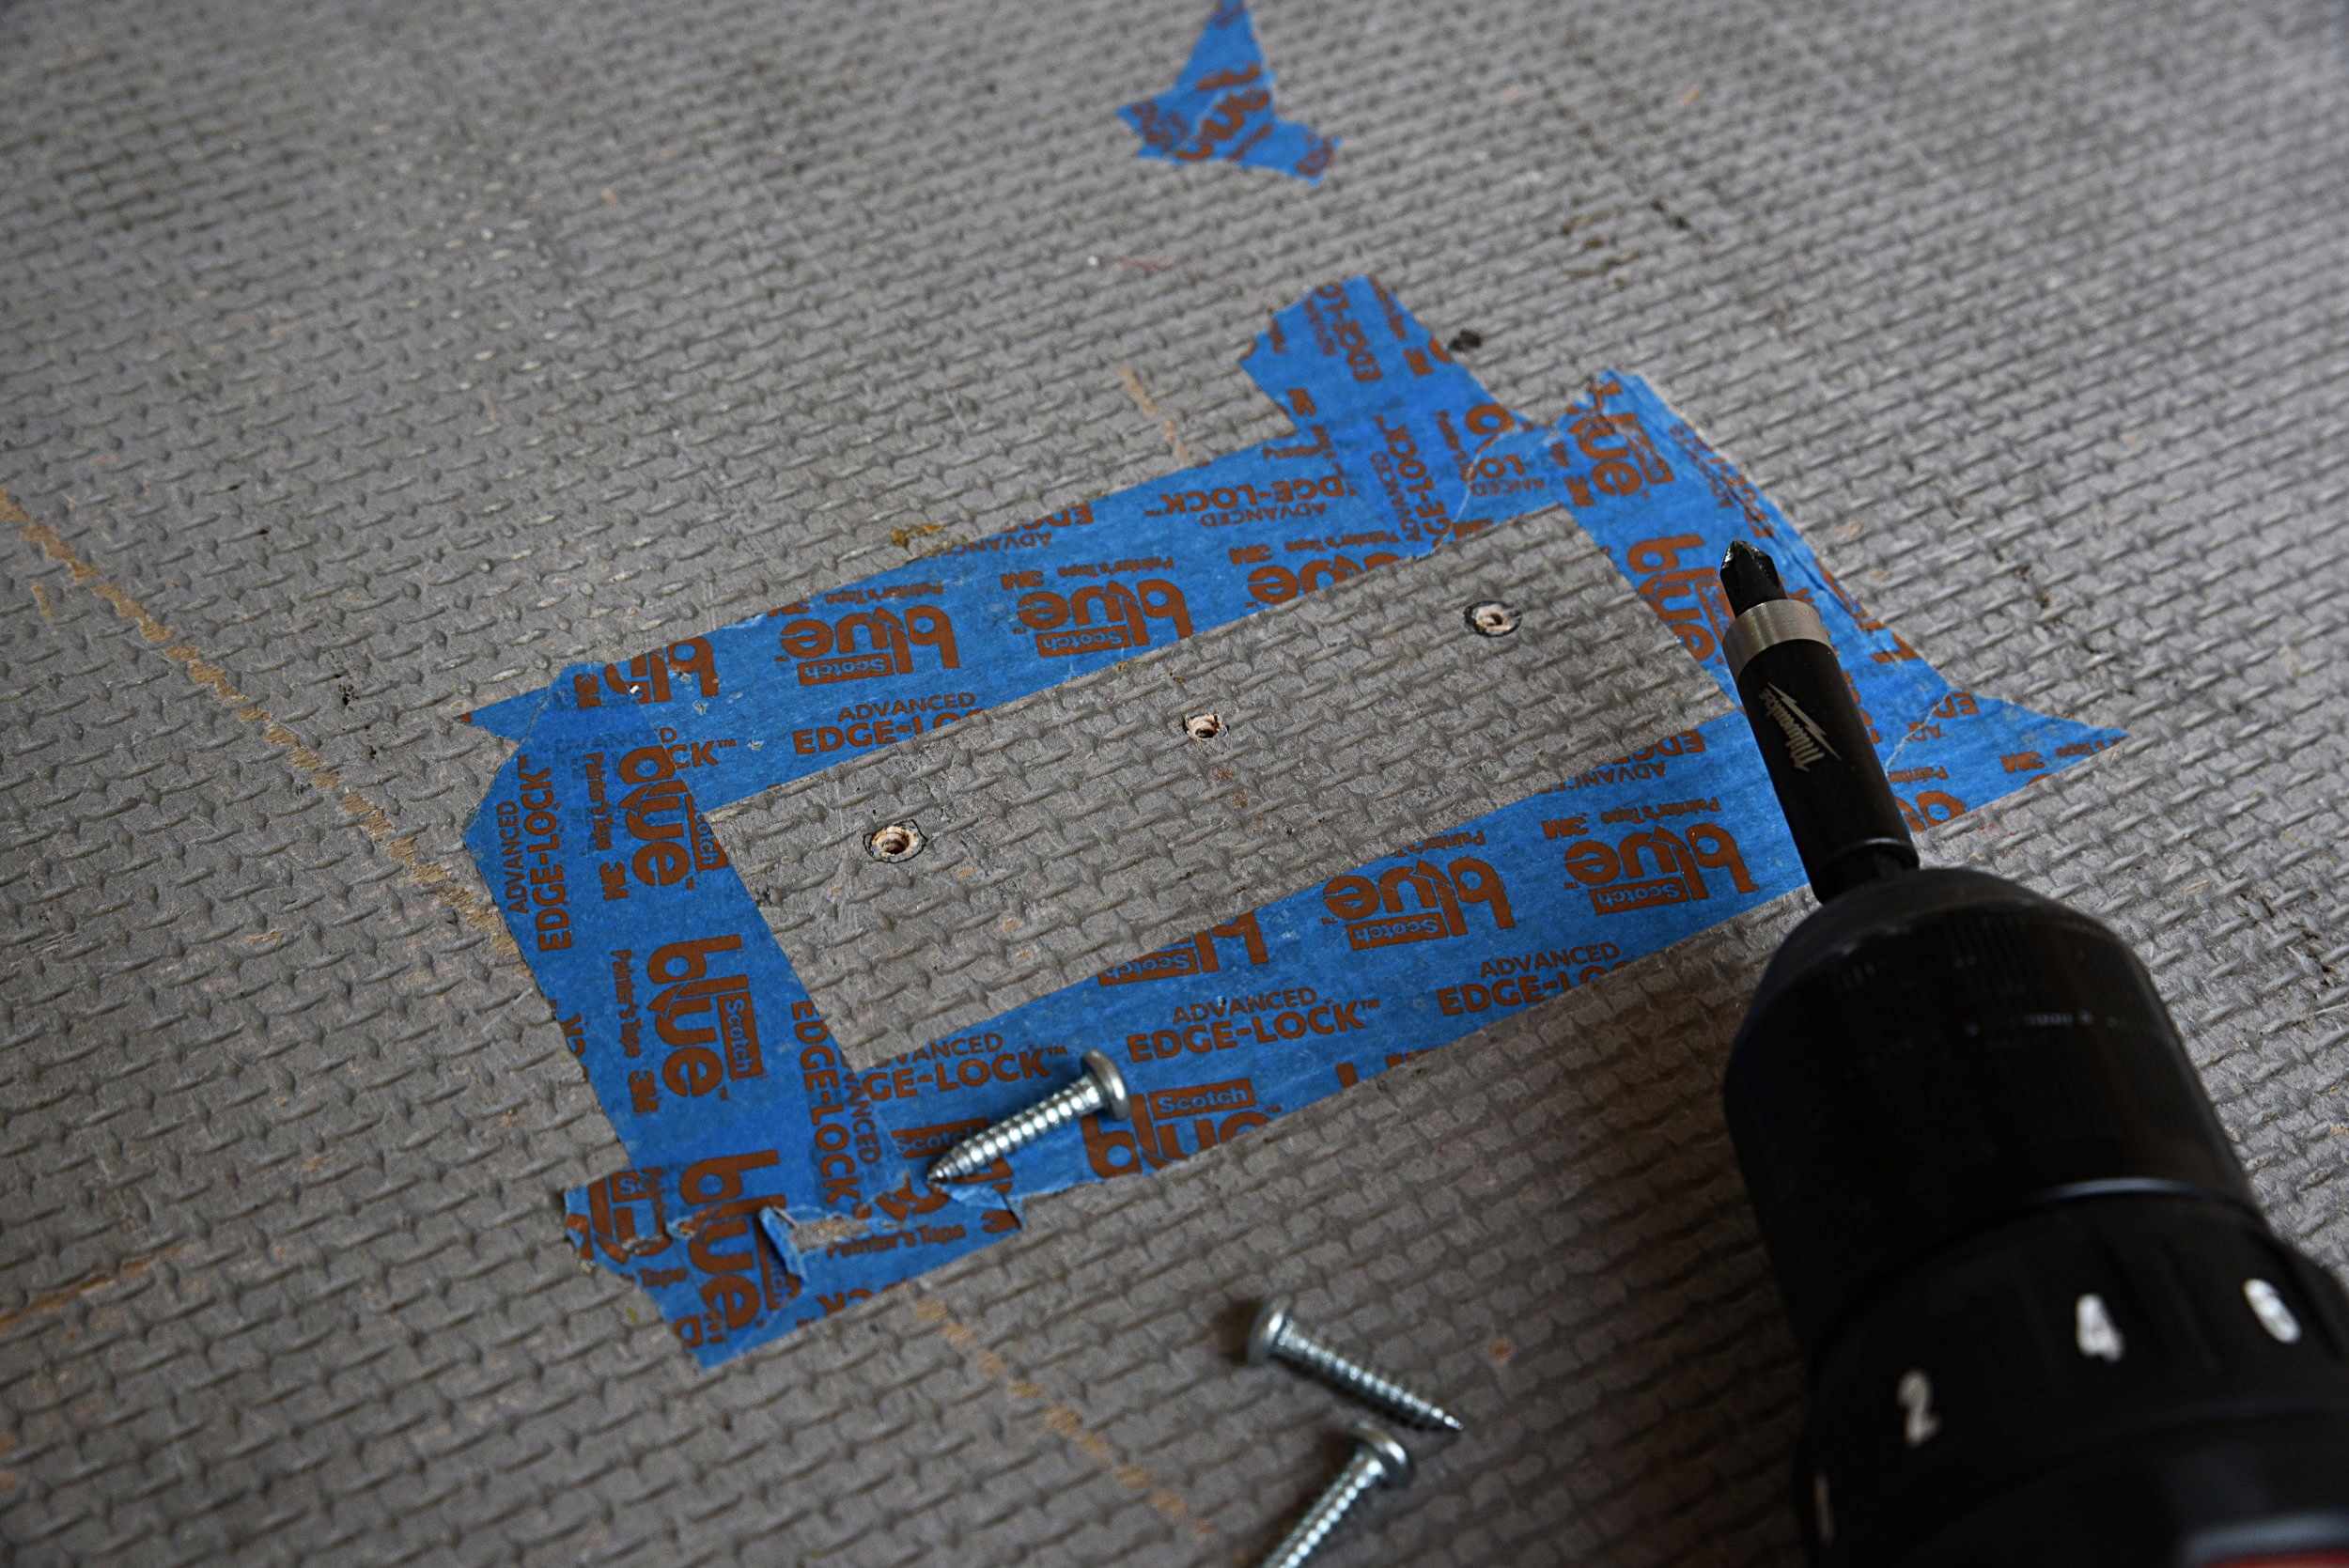
The platforms are made from 3/4-inch, 7-ply, plywood. This stuff is pretty expensive at about $50 a sheet, but by using this for a bed platform, you can avoid using a lot of extra materials as reinforcement. All we did to reinforce our bed platforms was screw some 1/2” angle iron onto each side of the bed platforms. We screwed the L-shape to the side and bottom of the plywood.
We attached 2x4s to the other sides of the platform that rested on the rails. These boards raise the platforms to the correct height (31 inches) so that our bikes would fit underneath (with the seats and front wheels removed). The 2x4s also provide some extra structure to the plywood.

The steel angle iron is attached across the width of the platform to prevent bowing. Even when we sit on the edge, the platforms barely bend. The 2x4s also lend some strength in the opposite direction, completing a frame around the platform.
One of the best features of these bed platforms is that they are removable. This meant that throughout the rest of the van build we could take them out so that we could stand up inside the van through the entire build. We were also able to haul lumber, a countertop, flooring, and other large materials for the build. Even with the van finished, we could still take the platform and our mattress out and haul a couch if we wanted to lend a hand to a friend.
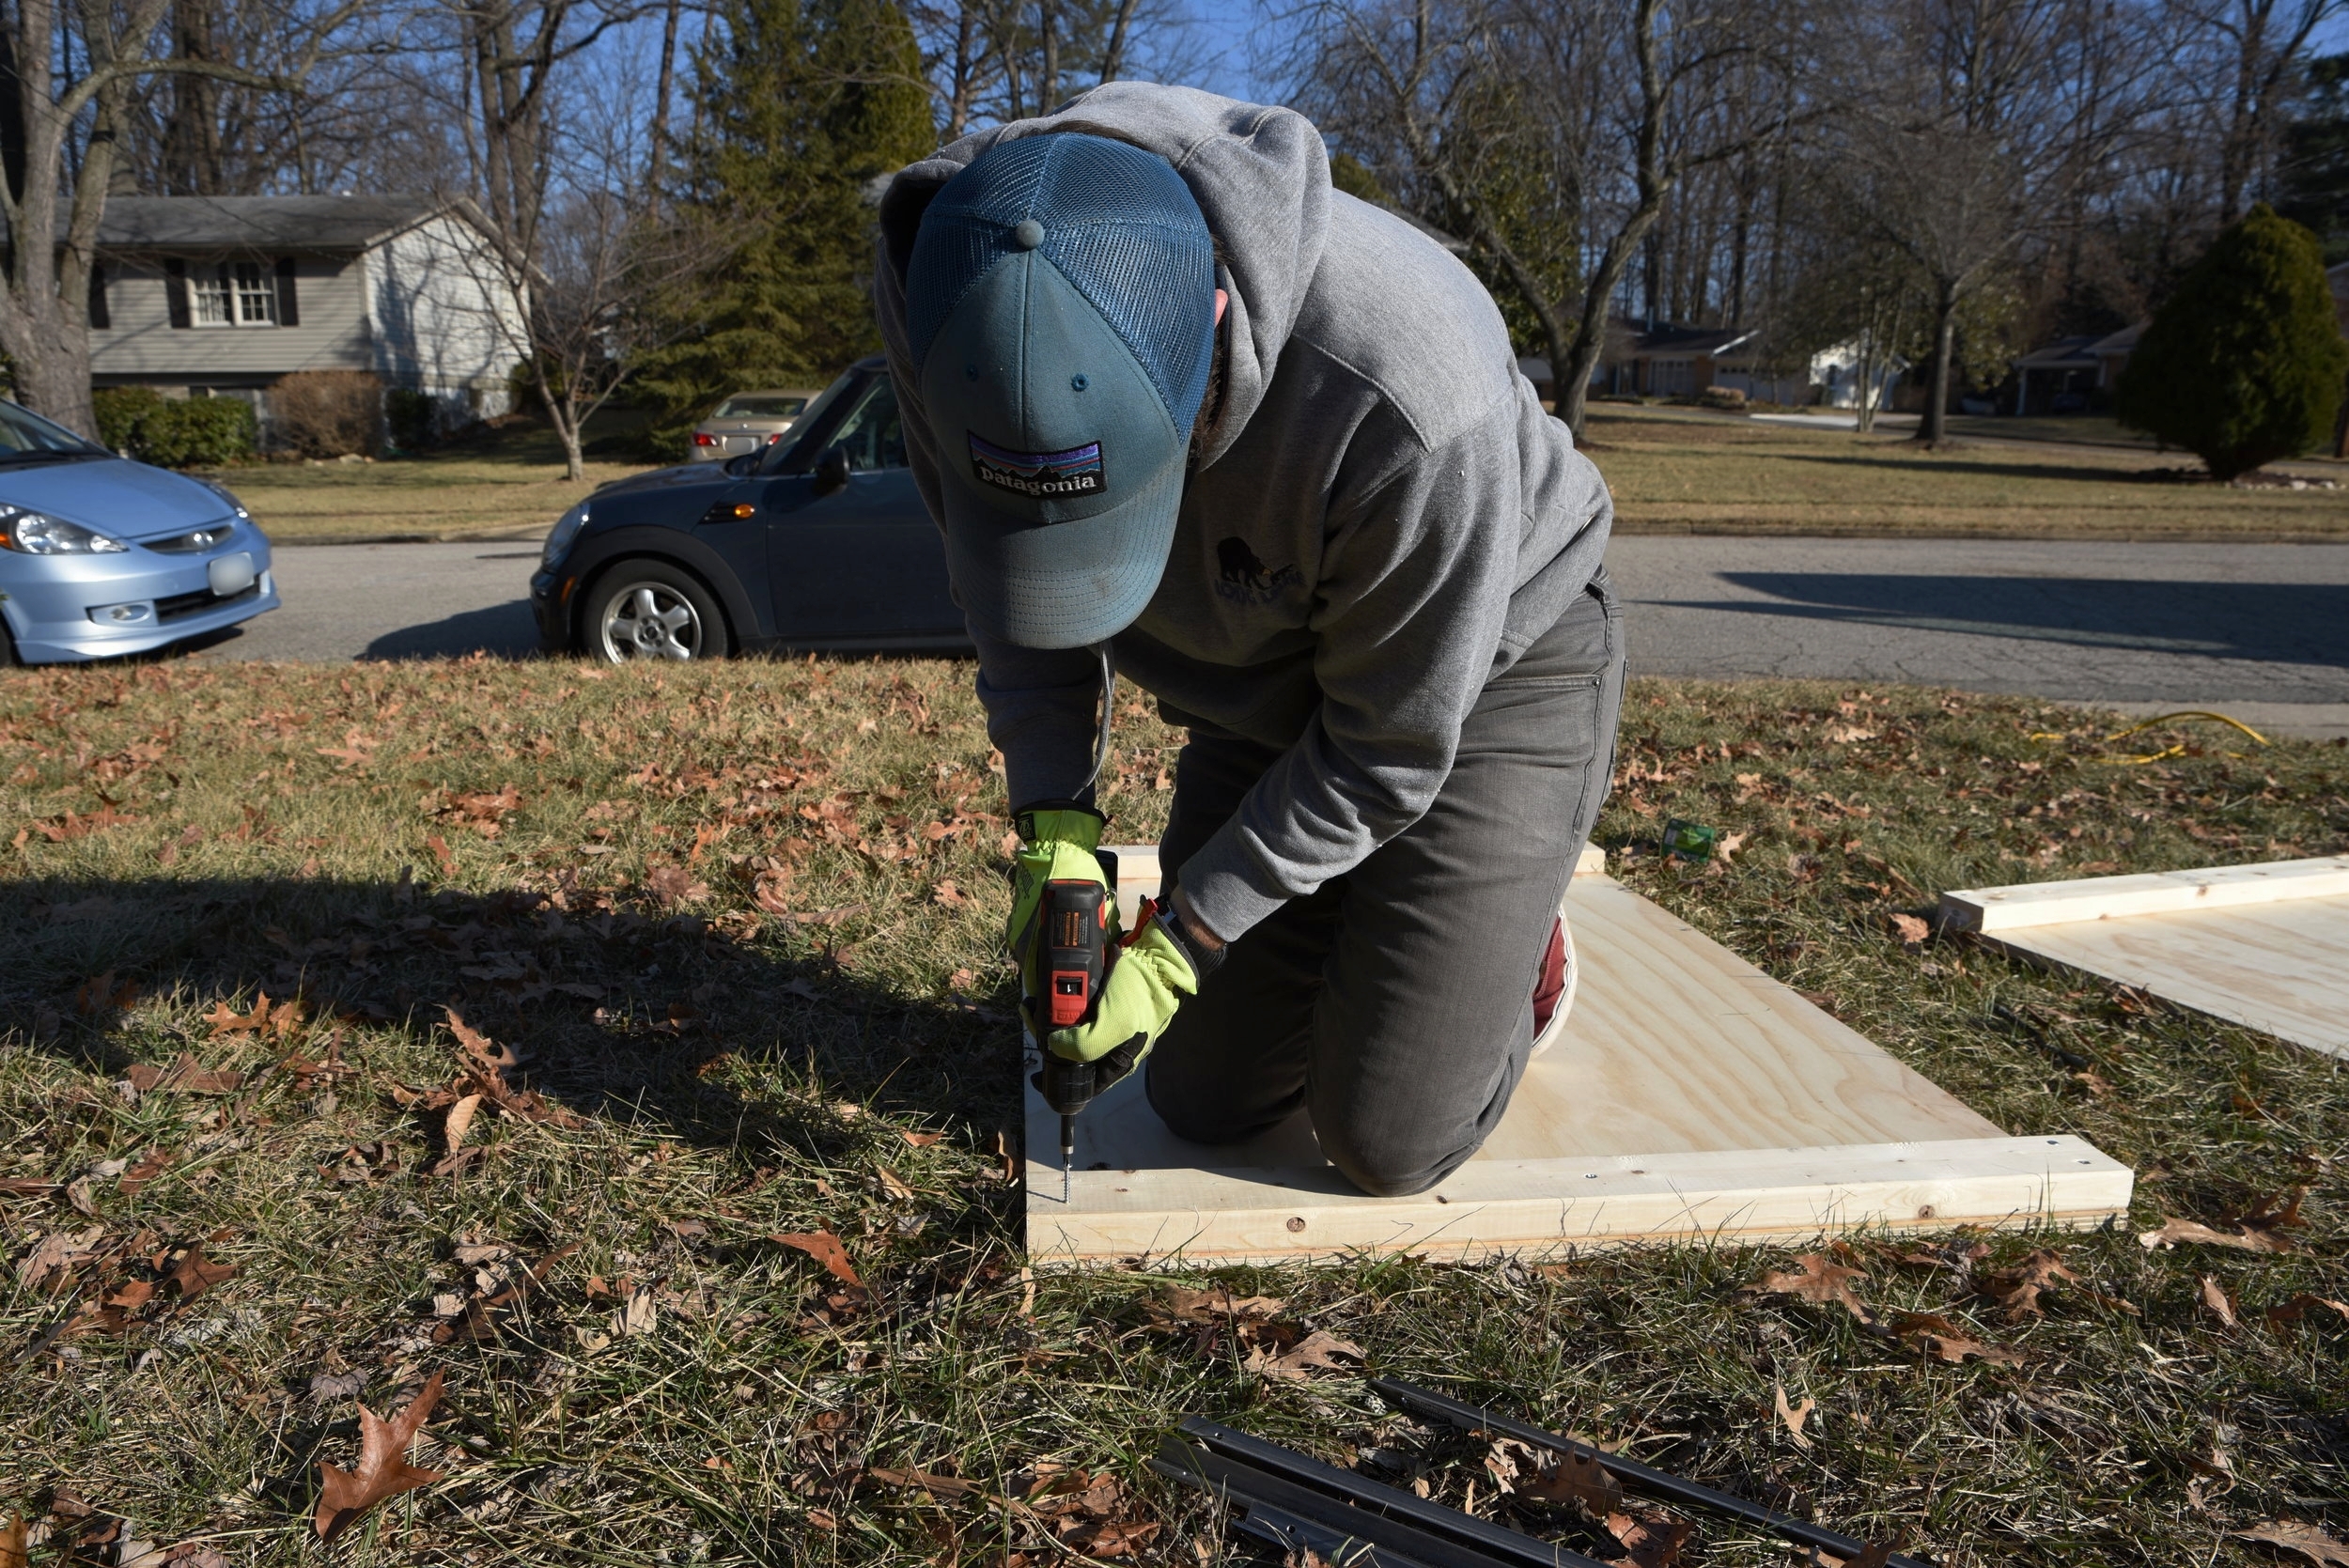
Ian attaches the 2x4s to the plywood pieces of our removable mattress platform.

This bed is just the right size!

The removable bed platforms resting on the 2x2 rail on the cabinets and the aluminum angle iron on the other side.
Bike and Gear Underbed Storage
Underneath our bed platform is the largest storage area in our van. We store our bikes, backpacking gear, and tools underneath the bed, along with a bunch of other miscellaneous items and some food as well. Our platform is 31 inches high and even with our 10-inch mattress we still have room to sit up totally straight in bed.
Our bikes are held in place under the bed with fork clamps. All we have to do to store our bikes is take the front wheels and seats off, roll them in, and clamp the front fork down.
We used blue painters tape to mark out where the bikes should be installed in the van.
You can purchase bike clamps like these online for storing your bike in your camper van.
To pick the most space efficient location for our bikes, we attached the clamps to them and arranged them in the best way. Ian's bike takes advantage of the hole in our floor that remained when we removed the tie down rails that came with the van. Since his bike is the bigger one, putting the back wheel down in this slot gives us a little extra wiggle room when pulling it in and out.
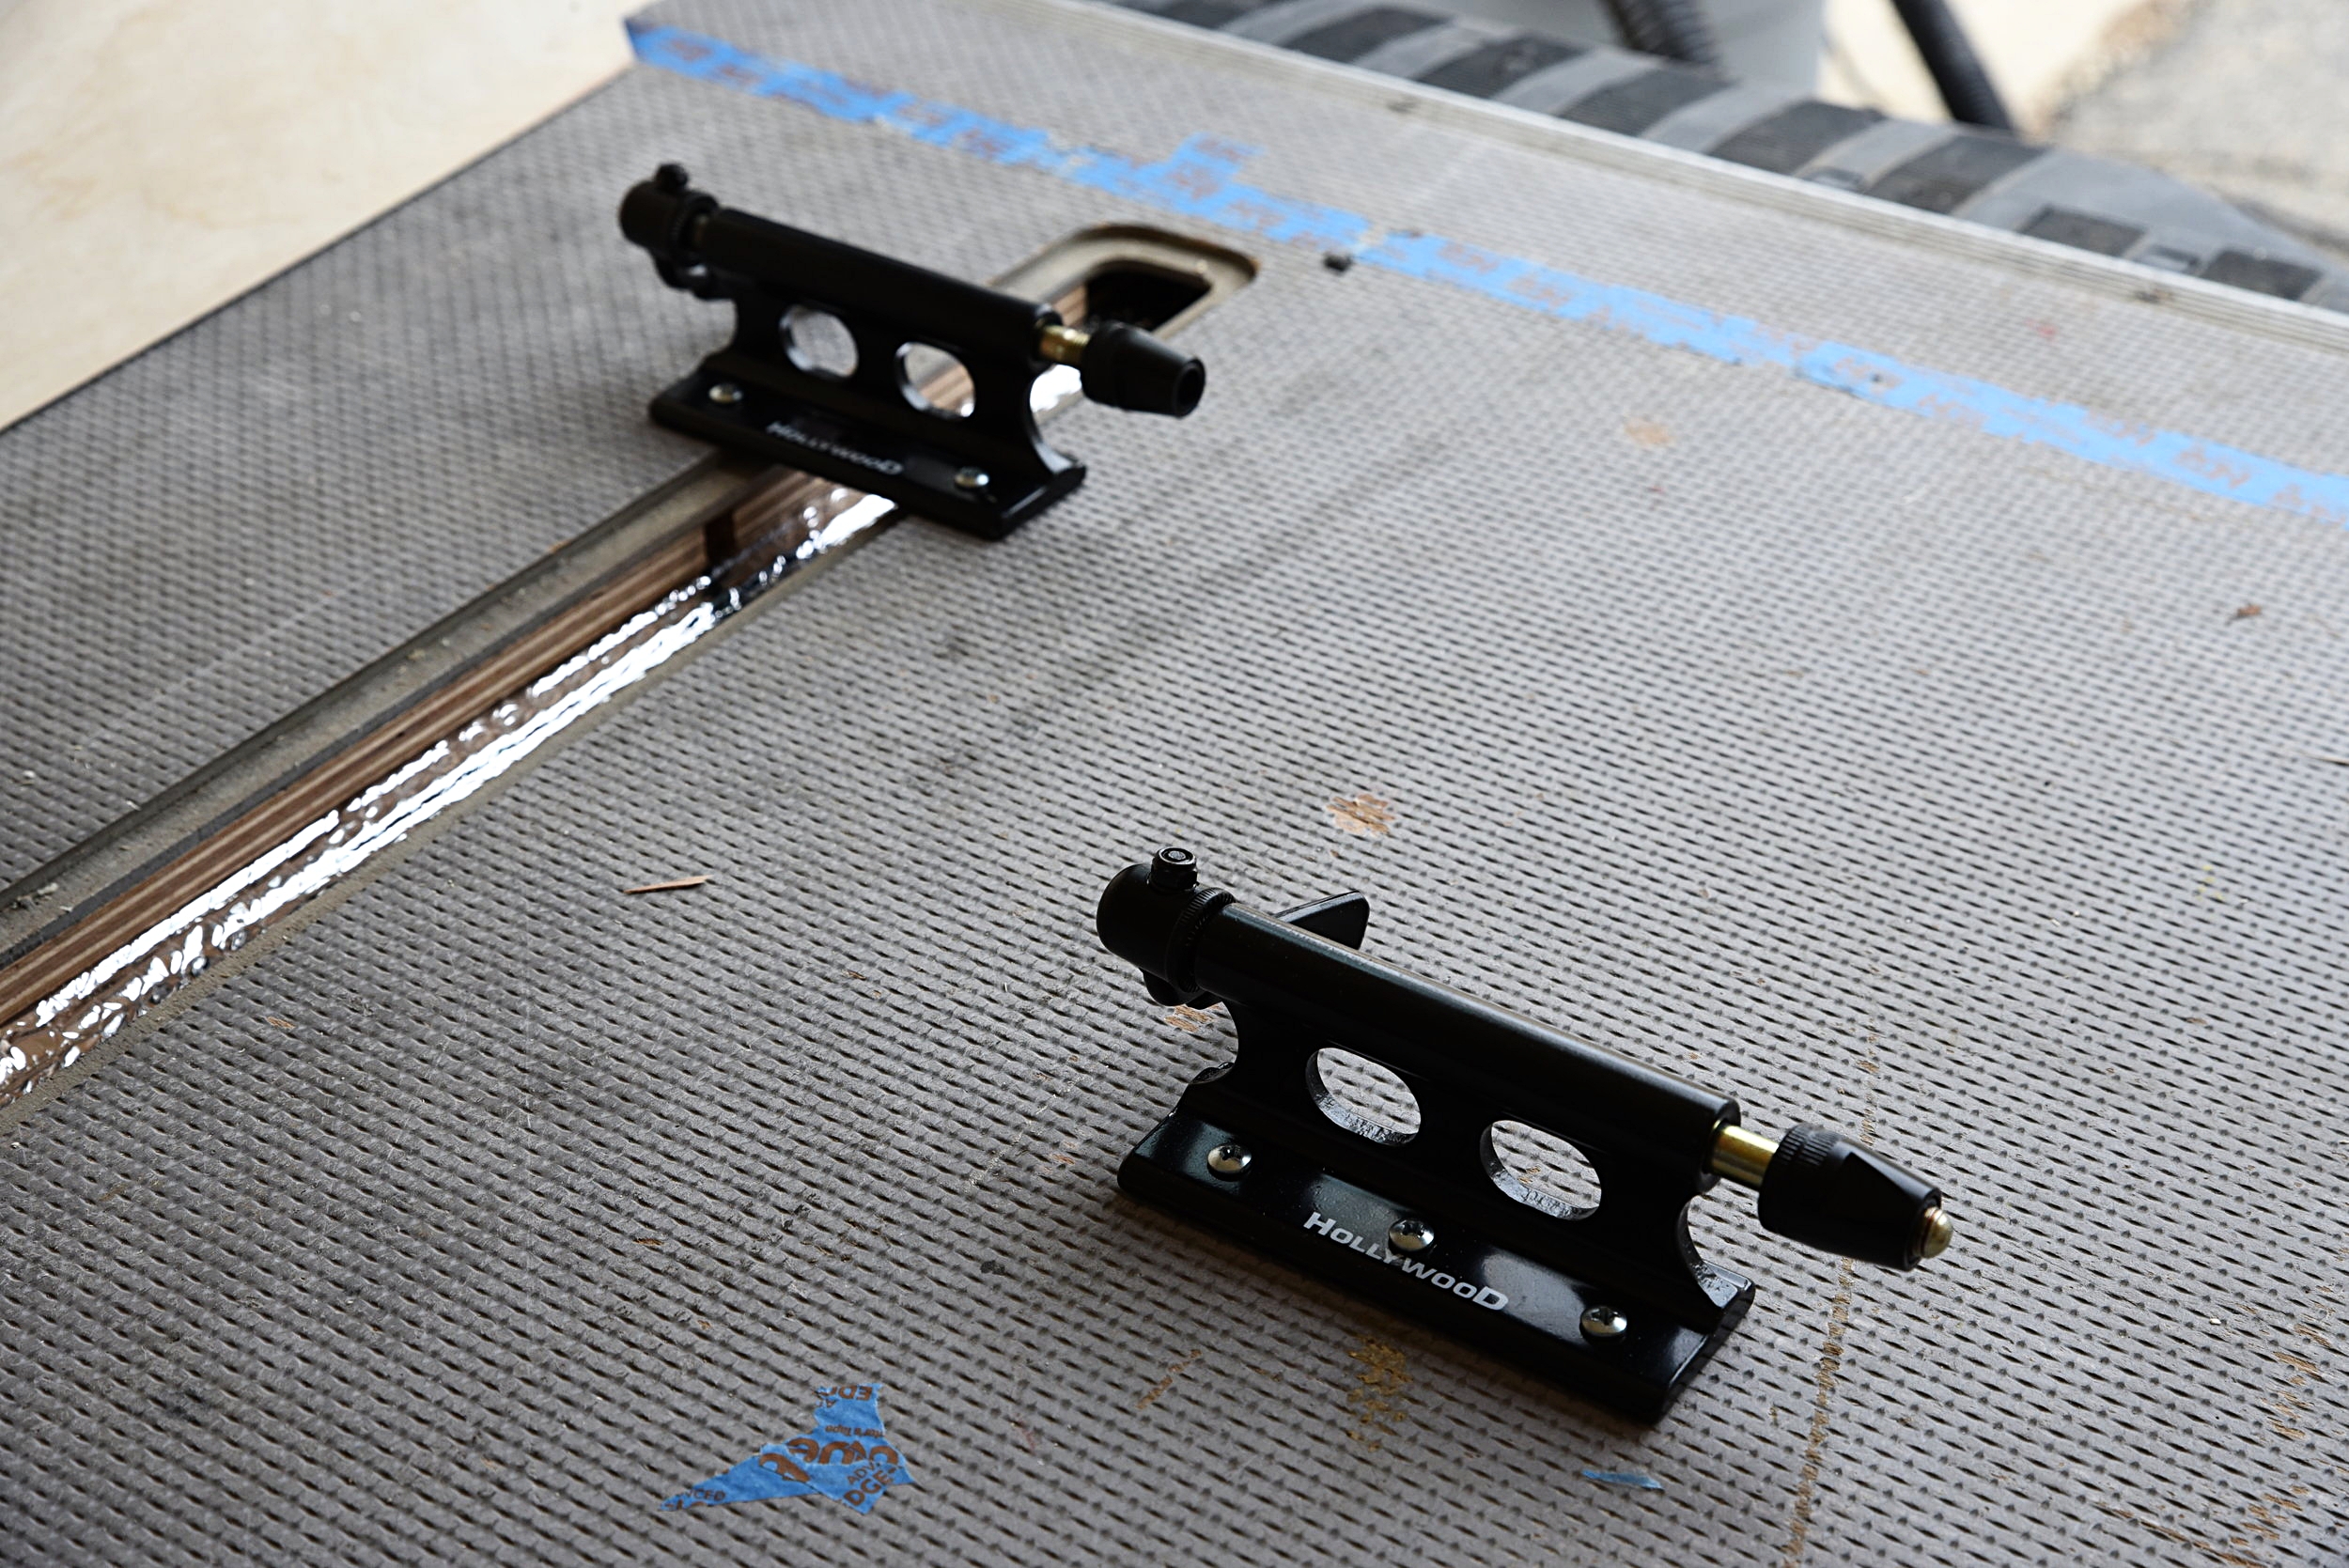
The fork clamps are probably the easiest way you can store road bikes in a van.

Our bikes easily stored in the “garage” under our bed.
Once we found the correct position, we marked it with blue painter's tape and screwed the fork clamps in place. By offsetting the handle bars we are able to keep the bikes in a narrower space.
We store the wheels alongside the bikes in large cloth storage bags that we made, so that if the knock around, they don't damage our bikes. (Kind of like a really low tech version of this.) We store the seats in large plastic bins with a bunch of other bike and exercise gear.

With the bikes in place under the bed platform, large storage areas on the driver's side, and our mattress on top, we were pretty satisfied with our work.
The rest of the gear under our bed is stored in large plastic tubs. Another option is to install heavy duty drawer slides for under bed storage. While these are handy, they are expensive and have a tendency to break. By arranging our stuff by how often we use it, we have found the plastic tubs are a simple and fairly convenient storage method.
We also keep our massive deep-cell battery under our bed along with other aspects of the electrical system. The fusebox and solar controller are mounted to the back of the bed platform's front, while the battery is mounted above the wheel well.

The fuse box and solar charge controller are mounted to the back of the bed platform's front.

The front of the bed is finished with plywood with a large door in the front with a table within it.
We finished the front of the bed platform with a large piece of 1/2-inch plywood. We added a large door to the front of the bed so that we can access our under-bed storage area. We have some food storage under the bed, but if we moved this, we could also crawl underneath to access our battery, fuse box, and charge controller. The door is also large enough to pull camping gear through as well.
Besides just being a door on the front of our bed platform, it's also a small fold up table. (For more on how we designed our table, see our page, Fold-up Van Table for Two.)

The large door in the front of our bed cabinetry gives us a place to store food and a little hobbit door if we want to get underneath.

This fold up table, which is built into the door on front of the bed platform, is a great place to eat a home cooked meal.
Our multi-functional bed platform makes the space in our van way more useful! It's a great place to sleep, eat, and relax. And most importantly, we get to come home to a “real bed” every night.

The finished bed platform, complete with the quilt made by Kaylee's grandma. (Thanks Grandma Boni!)