Our Finished Van
It’s time to reveal our finished van! We take you through all the details of the interior of our completed camper van!
When we purchased our Sprinter Van in 2018, we had no idea of all the incredible places that it would take us. We knew we had just started one of the biggest adventures of our lives. We took a completely empty van and transformed it into a fully functional tiny home that could take us anywhere. We designed a living space that met all of our needs, but was simple and uncluttered.
Along the way we documented each step of the build and wrote detailed guides about the build. At the end of 90 days, we had a finished camper van conversion.
We love the end result of our camper van build out.
After several years, we are a still over all happy with the way we designed our van.
Over the last few years, we’ve been asked to share more pictures and of our completed van and to give a verdict on the way we built the van. On this page, we discuss our finished van build and what we think about our van conversion several years later.

It took us about 90 days to build out our camper van build. We share every step of our build right here on TheVanimals.com.

On this page, we discuss each aspect of our van build and what we like and what we’d change.
Starting with an Empty Van
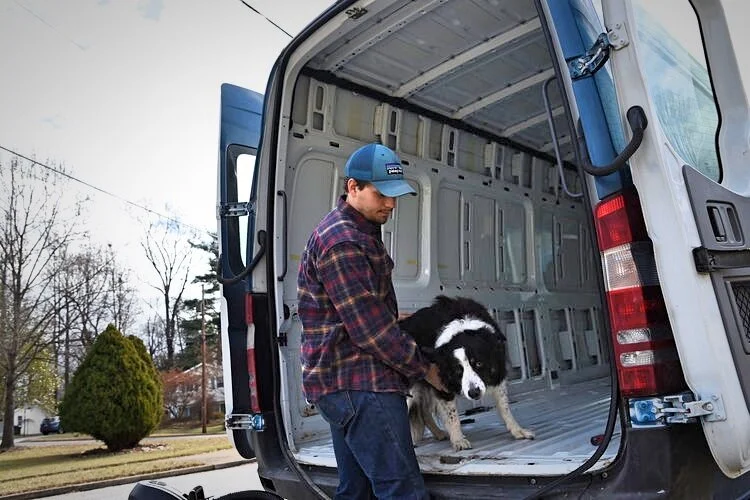
We began with an empty 2008 Dodge Sprinter van with a 170-inch wheelbase and a high roof so that we could stand up. This was a former electrician’s van, so there were windows on the back doors but not on the sides, which was perfect for us. The inside was completely empty except for some plastic paneling. The last owner had painted it blue, which was a lot more fun than a plain white van.
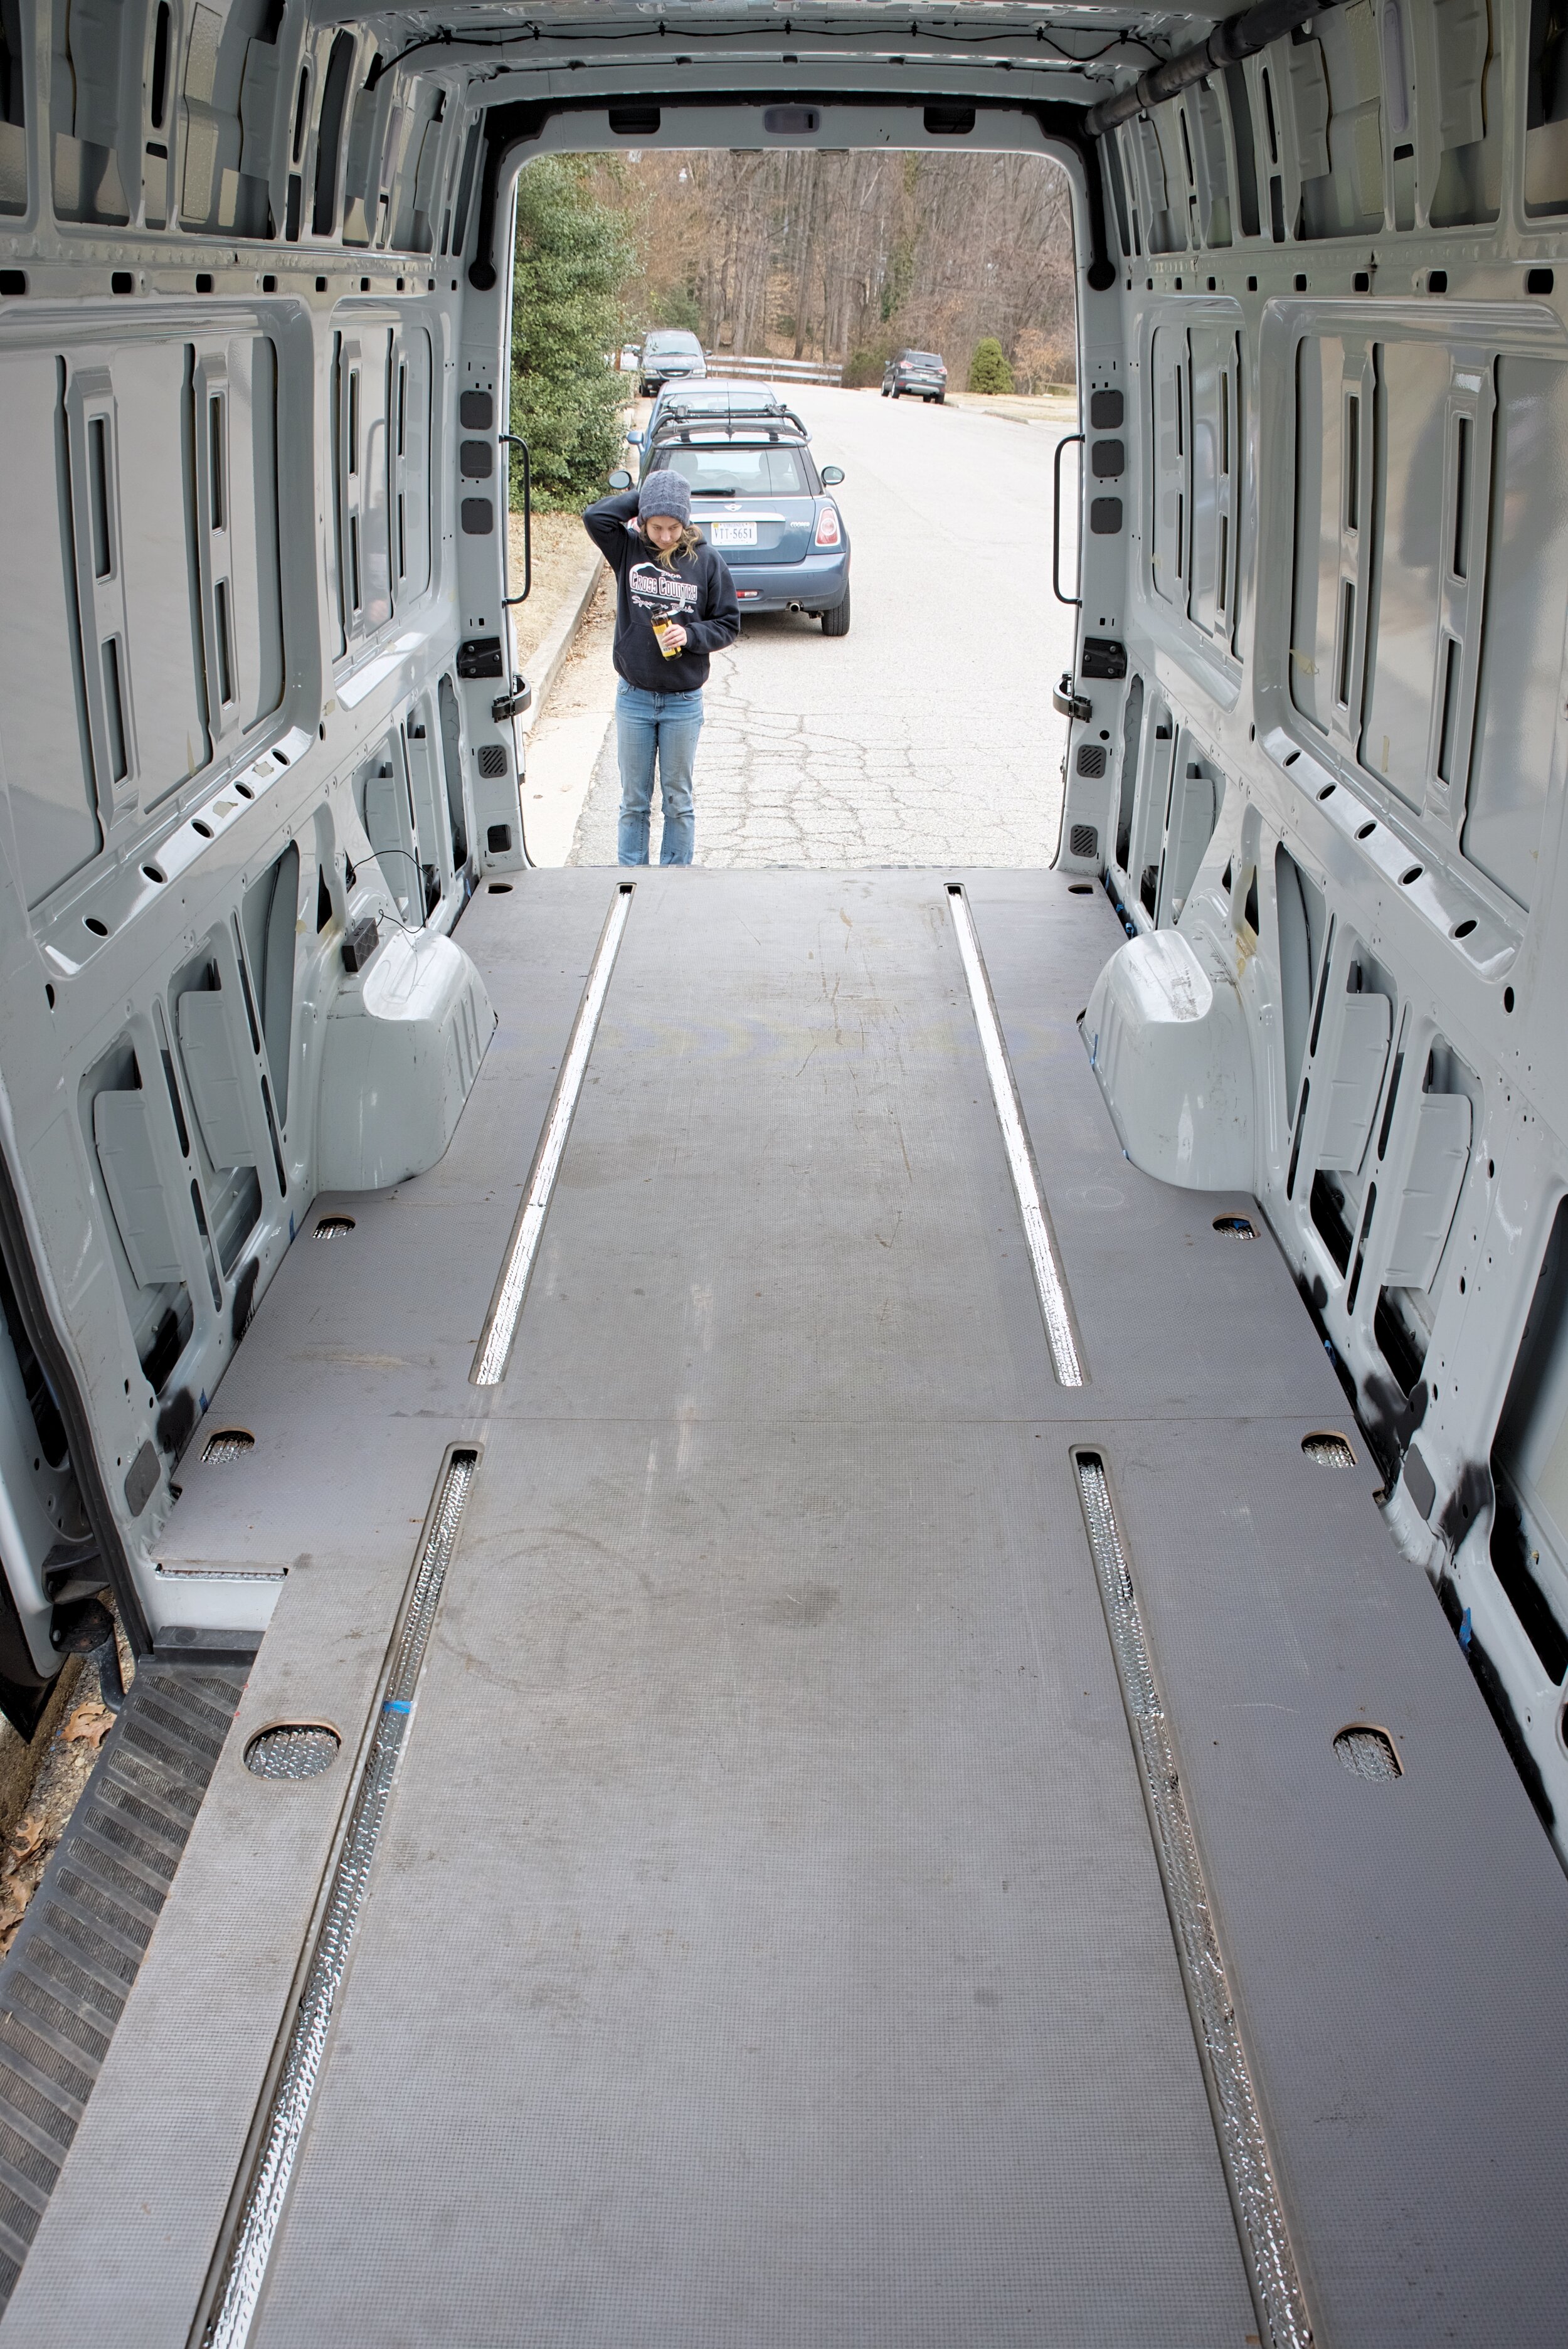
We started from a totally empty Sprinter van.

The van came with tis plywood floor which we used as our base flooring.

Our van also came with some terrible plastic paneling in it.
Our van came from Minneapolis, MN, there was a fair amount of rust on the body. We decided to address this rust as much as we could. We used a black truck bed liner along the bottom of the van to protect it.

We were so happy to fine a great van for our camper van conversion in Minneapolis.
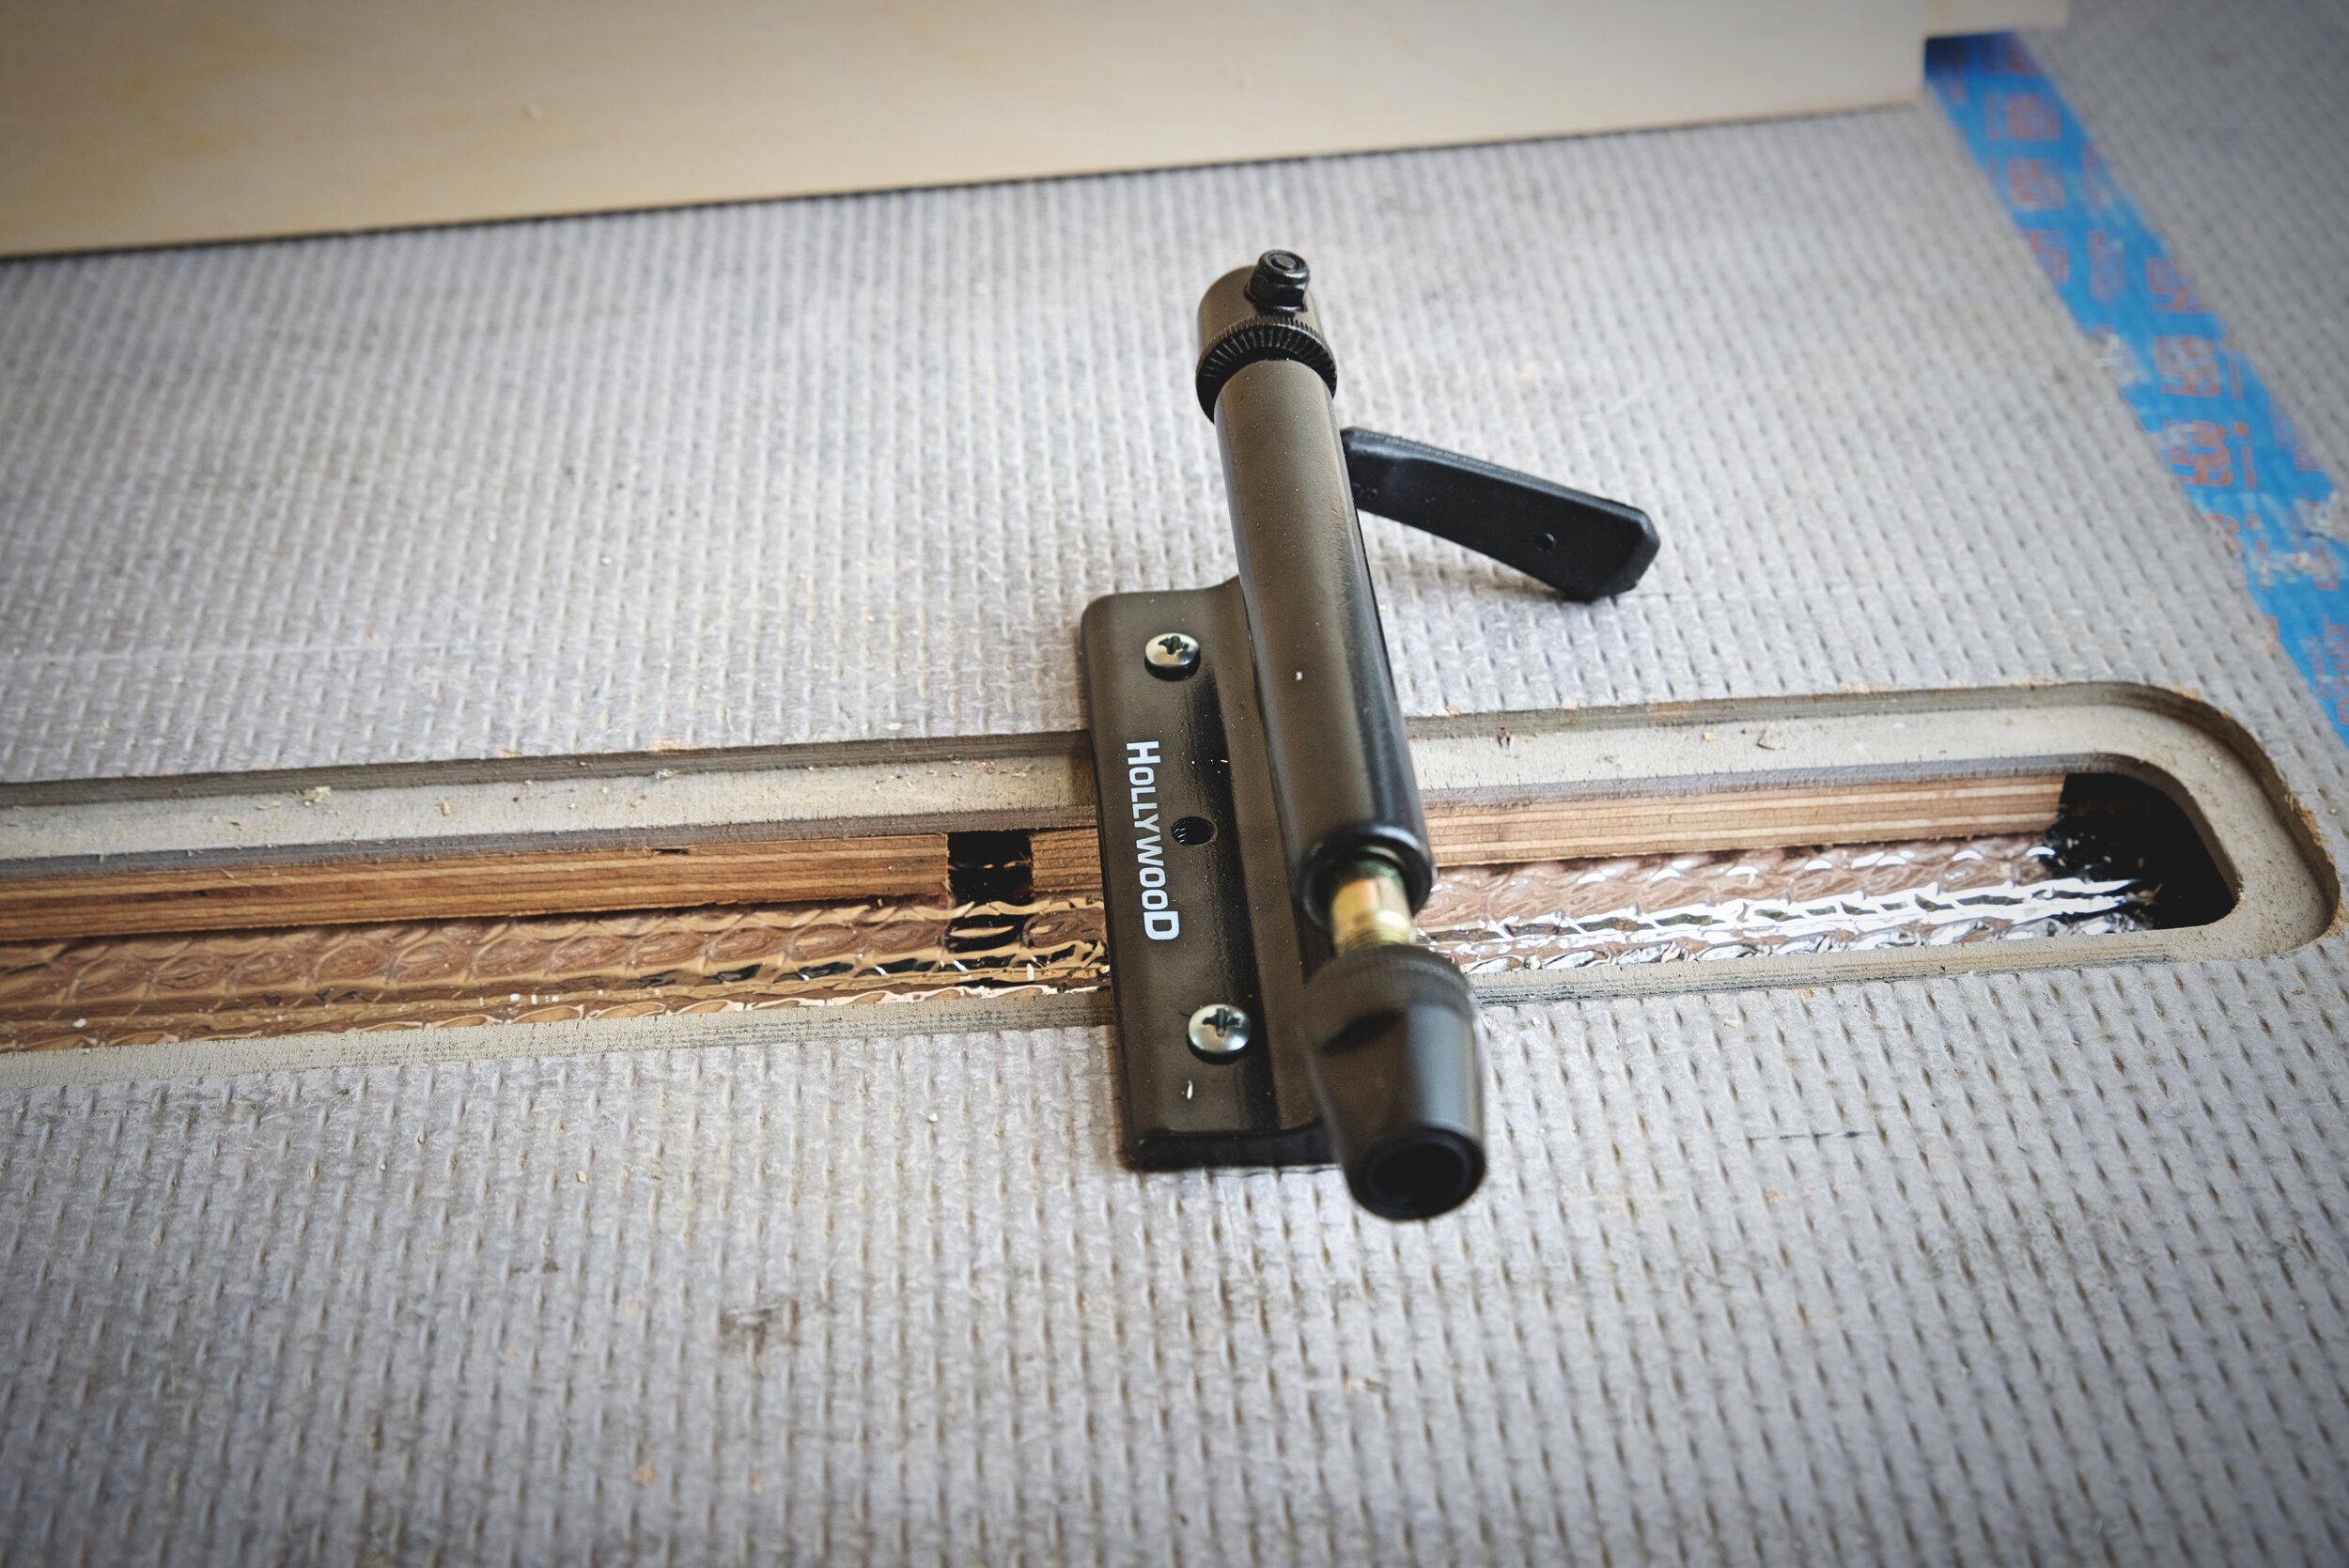
After getting rid of the rust on our Sprinter Van, we “framed” the walls and ceiling with wood so we’d have something to drill into. We also added a Fantastic Fan to our ceiling. Then we insulated the walls, floor and ceiling of our van. We installed a head unit and a rearview camera. We added a solar panels, a gel battery, and electrical system in our van. Our solar panels power our 12-volt lights, USB outlets, propane detector, and fridge.
Read about framing out our van, installing our fan, and insulating the walls.
You have to have friends with you when you are building out a van.

There were many steps we had to take in our van, such as rust abatement, that we had to think about before we could even start on our build.
What We Think of Our Van Several Years Later
After several years, we are still very happy with our DIY camper van build. We’ve found our van build to be durable and the layout works well for us. We are still happy with our design and for the most part would only make minor changes.

Our Sprinter has taken us so many amazing places, and it allows us to travel so conveniently—no more packing and unpacking!
Durability
Aside from minor cosmetic issues, nothing in our van has broken, even though we’ve driven our van over 50,000 miles since building it and taken it on some of the roughest roads you can imagine a 24-foot van driving on. We built our van to last, used durable materials, and considered how our van would be used and the movement that it would undergo while traveling.
Functionality and Design
In terms of functionality, we love our van. We designed our van to be open and comfortable to live and move in. Rather than trying to fit all the belongings that we might have while living in a house or apartment into our van, we slimmed down our belongings to the necessities.
We tried to make the design for our Sprinter build out as uncluttered as possible, while at the same time finding little storage spots where we could.
Many vans are overly cluttered with storage and every little gadget to meet every whim and desire. In reality, you will quickly become accustomed to living more simply as soon as you don’t have access to the extra stuff.
Below we go in depth on each section of our van conversion—what we like and what we’d change about the way that we built our van.
Kitchen
For most people, the kitchen is the heart of the home. Even though our camper van is all one space, the kitchen is still probably the most used portion of our van and the area we spent the most time designing.
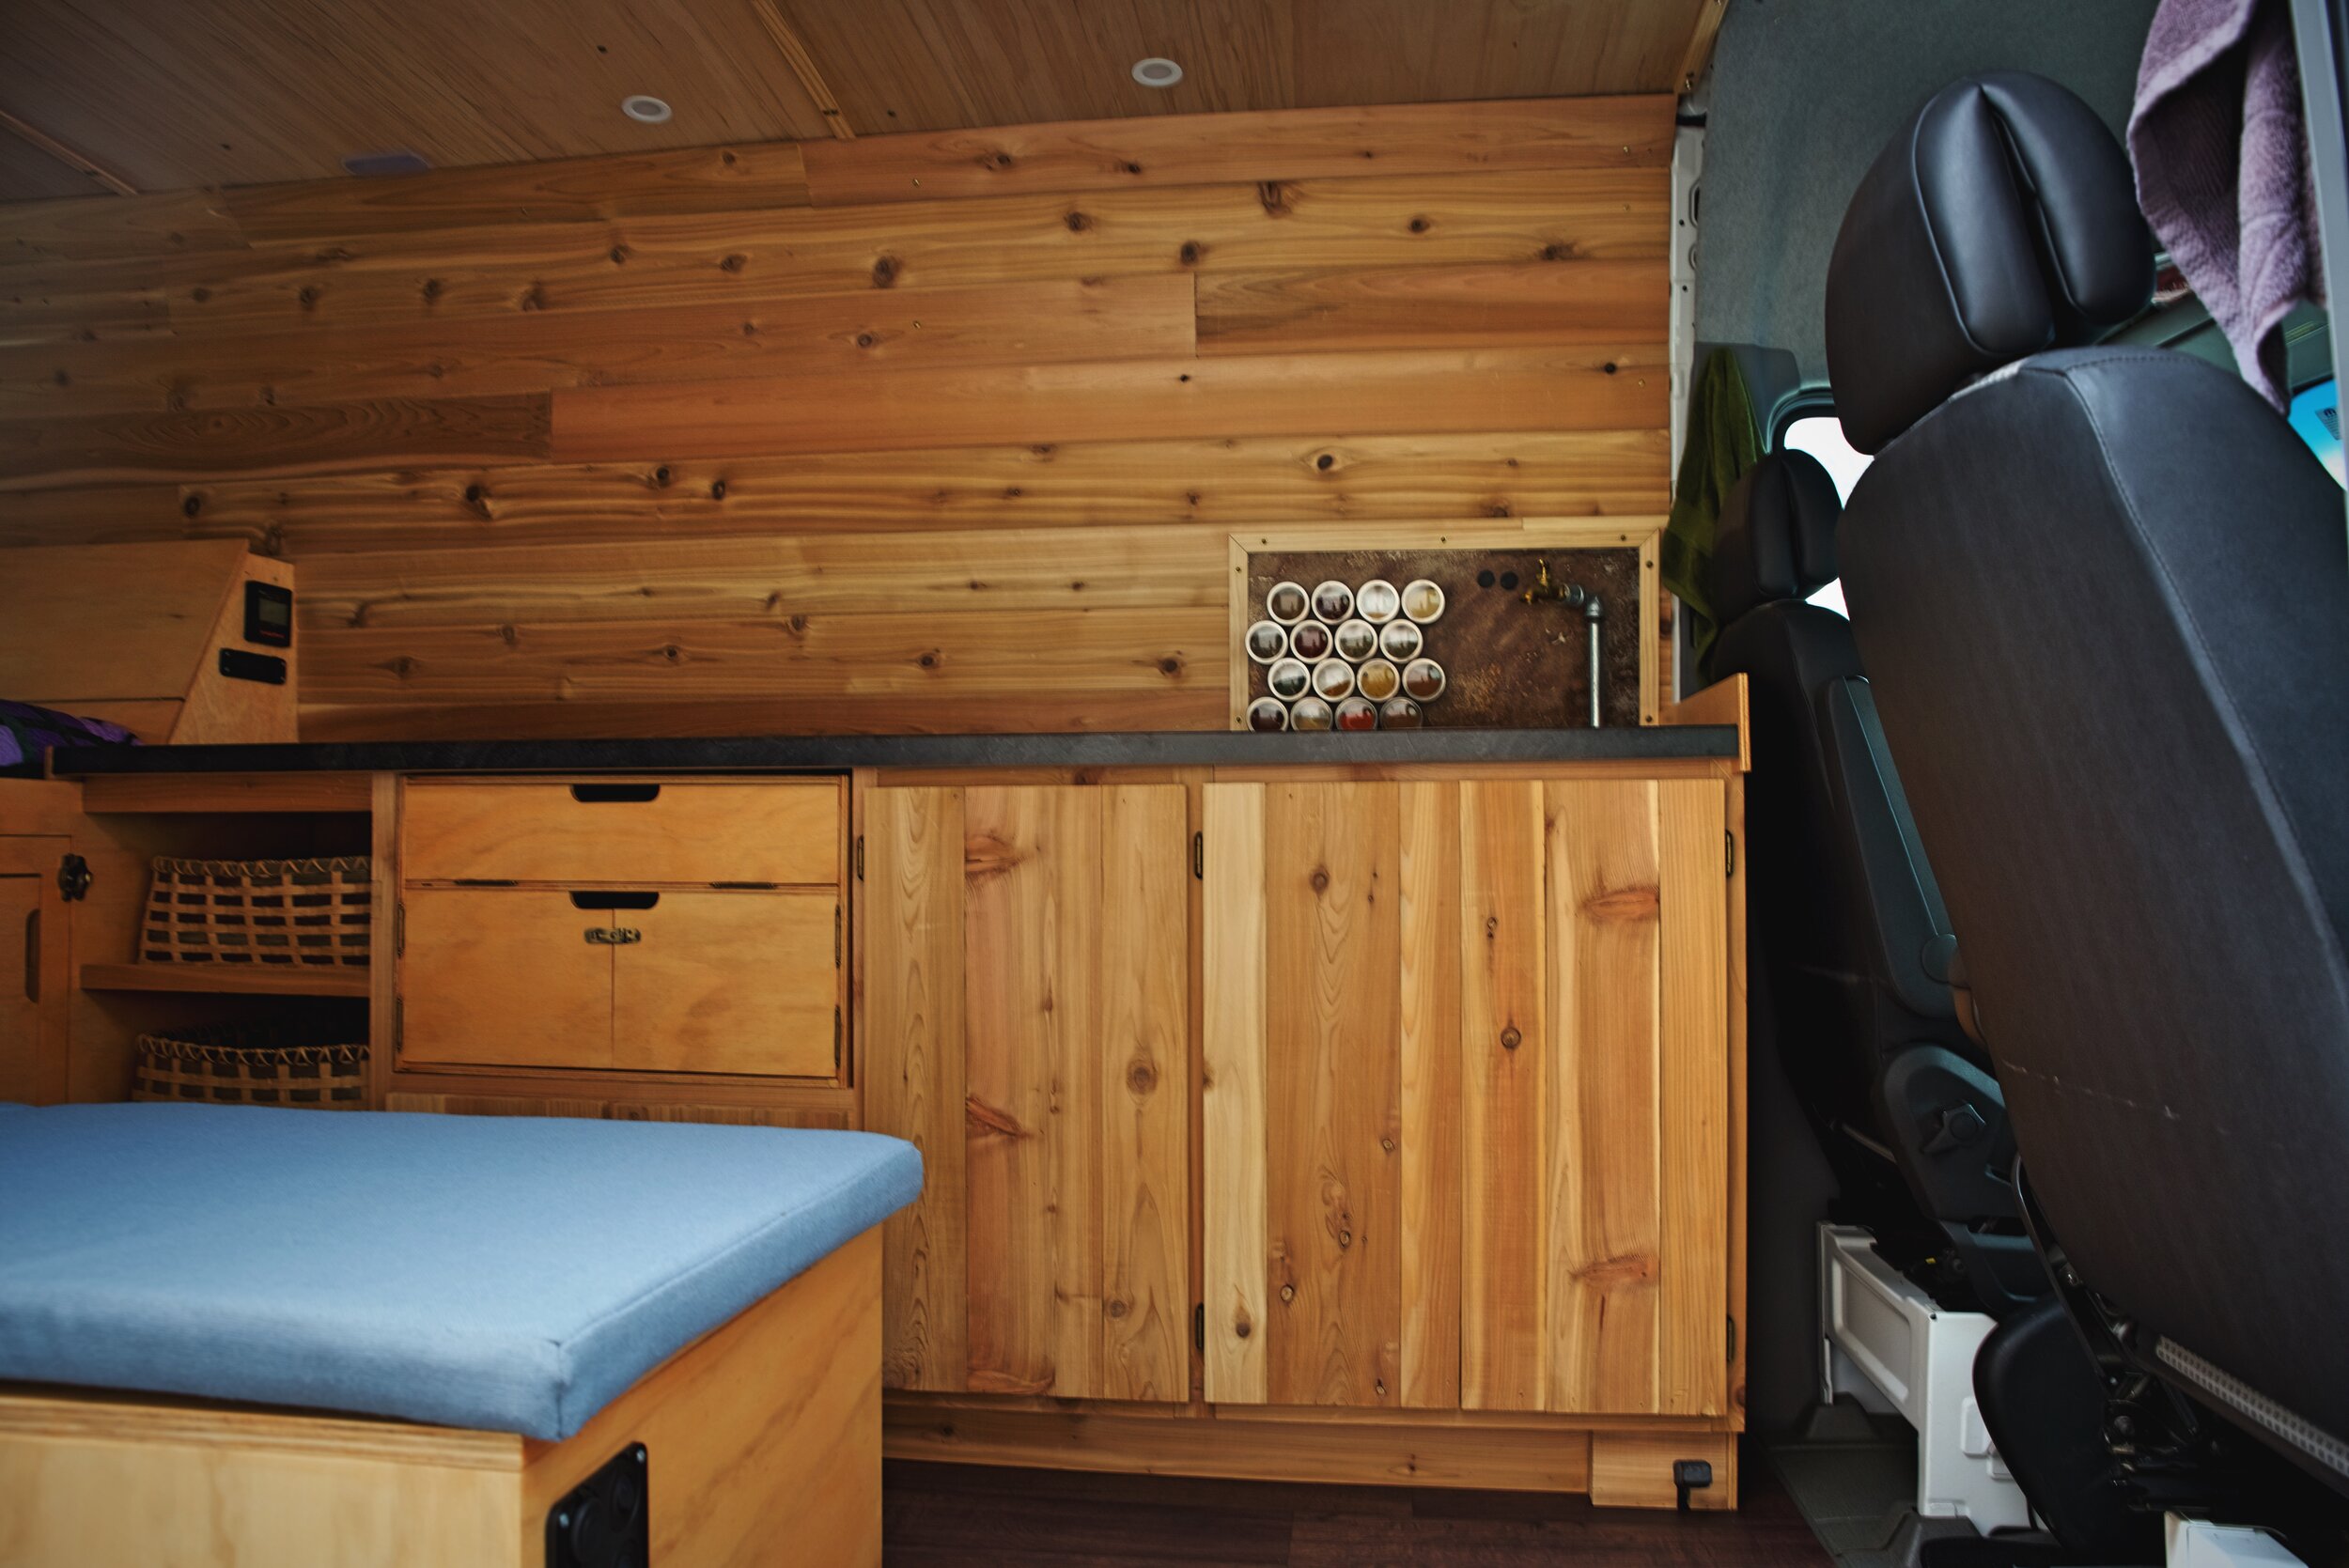
We opted for mostly wood materials in our van, and we love how cozy it makes it feel.

We have been very satisfied with our camp stove and kitchen set up in our van.

Being able to cook in our van is one of the things that makes our van a functional living space.
Our camper van’s kitchen is open and spacious with lots of counter space. You maybe could call the design of our kitchen “galley style.” There’s a large counter top on one side and a bench on the other, with a walkway in between.
Our countertop is 90 inches long and 20 inches in depth. It runs along one side of our van opposite the door with cabinets underneath. This large amount of open countertop made cooking in our van pleasant.

We prioritized having a long, extended counter space in our camper van and we do not regret it. I’ve had apartments with less counter space!
Sink and Water System
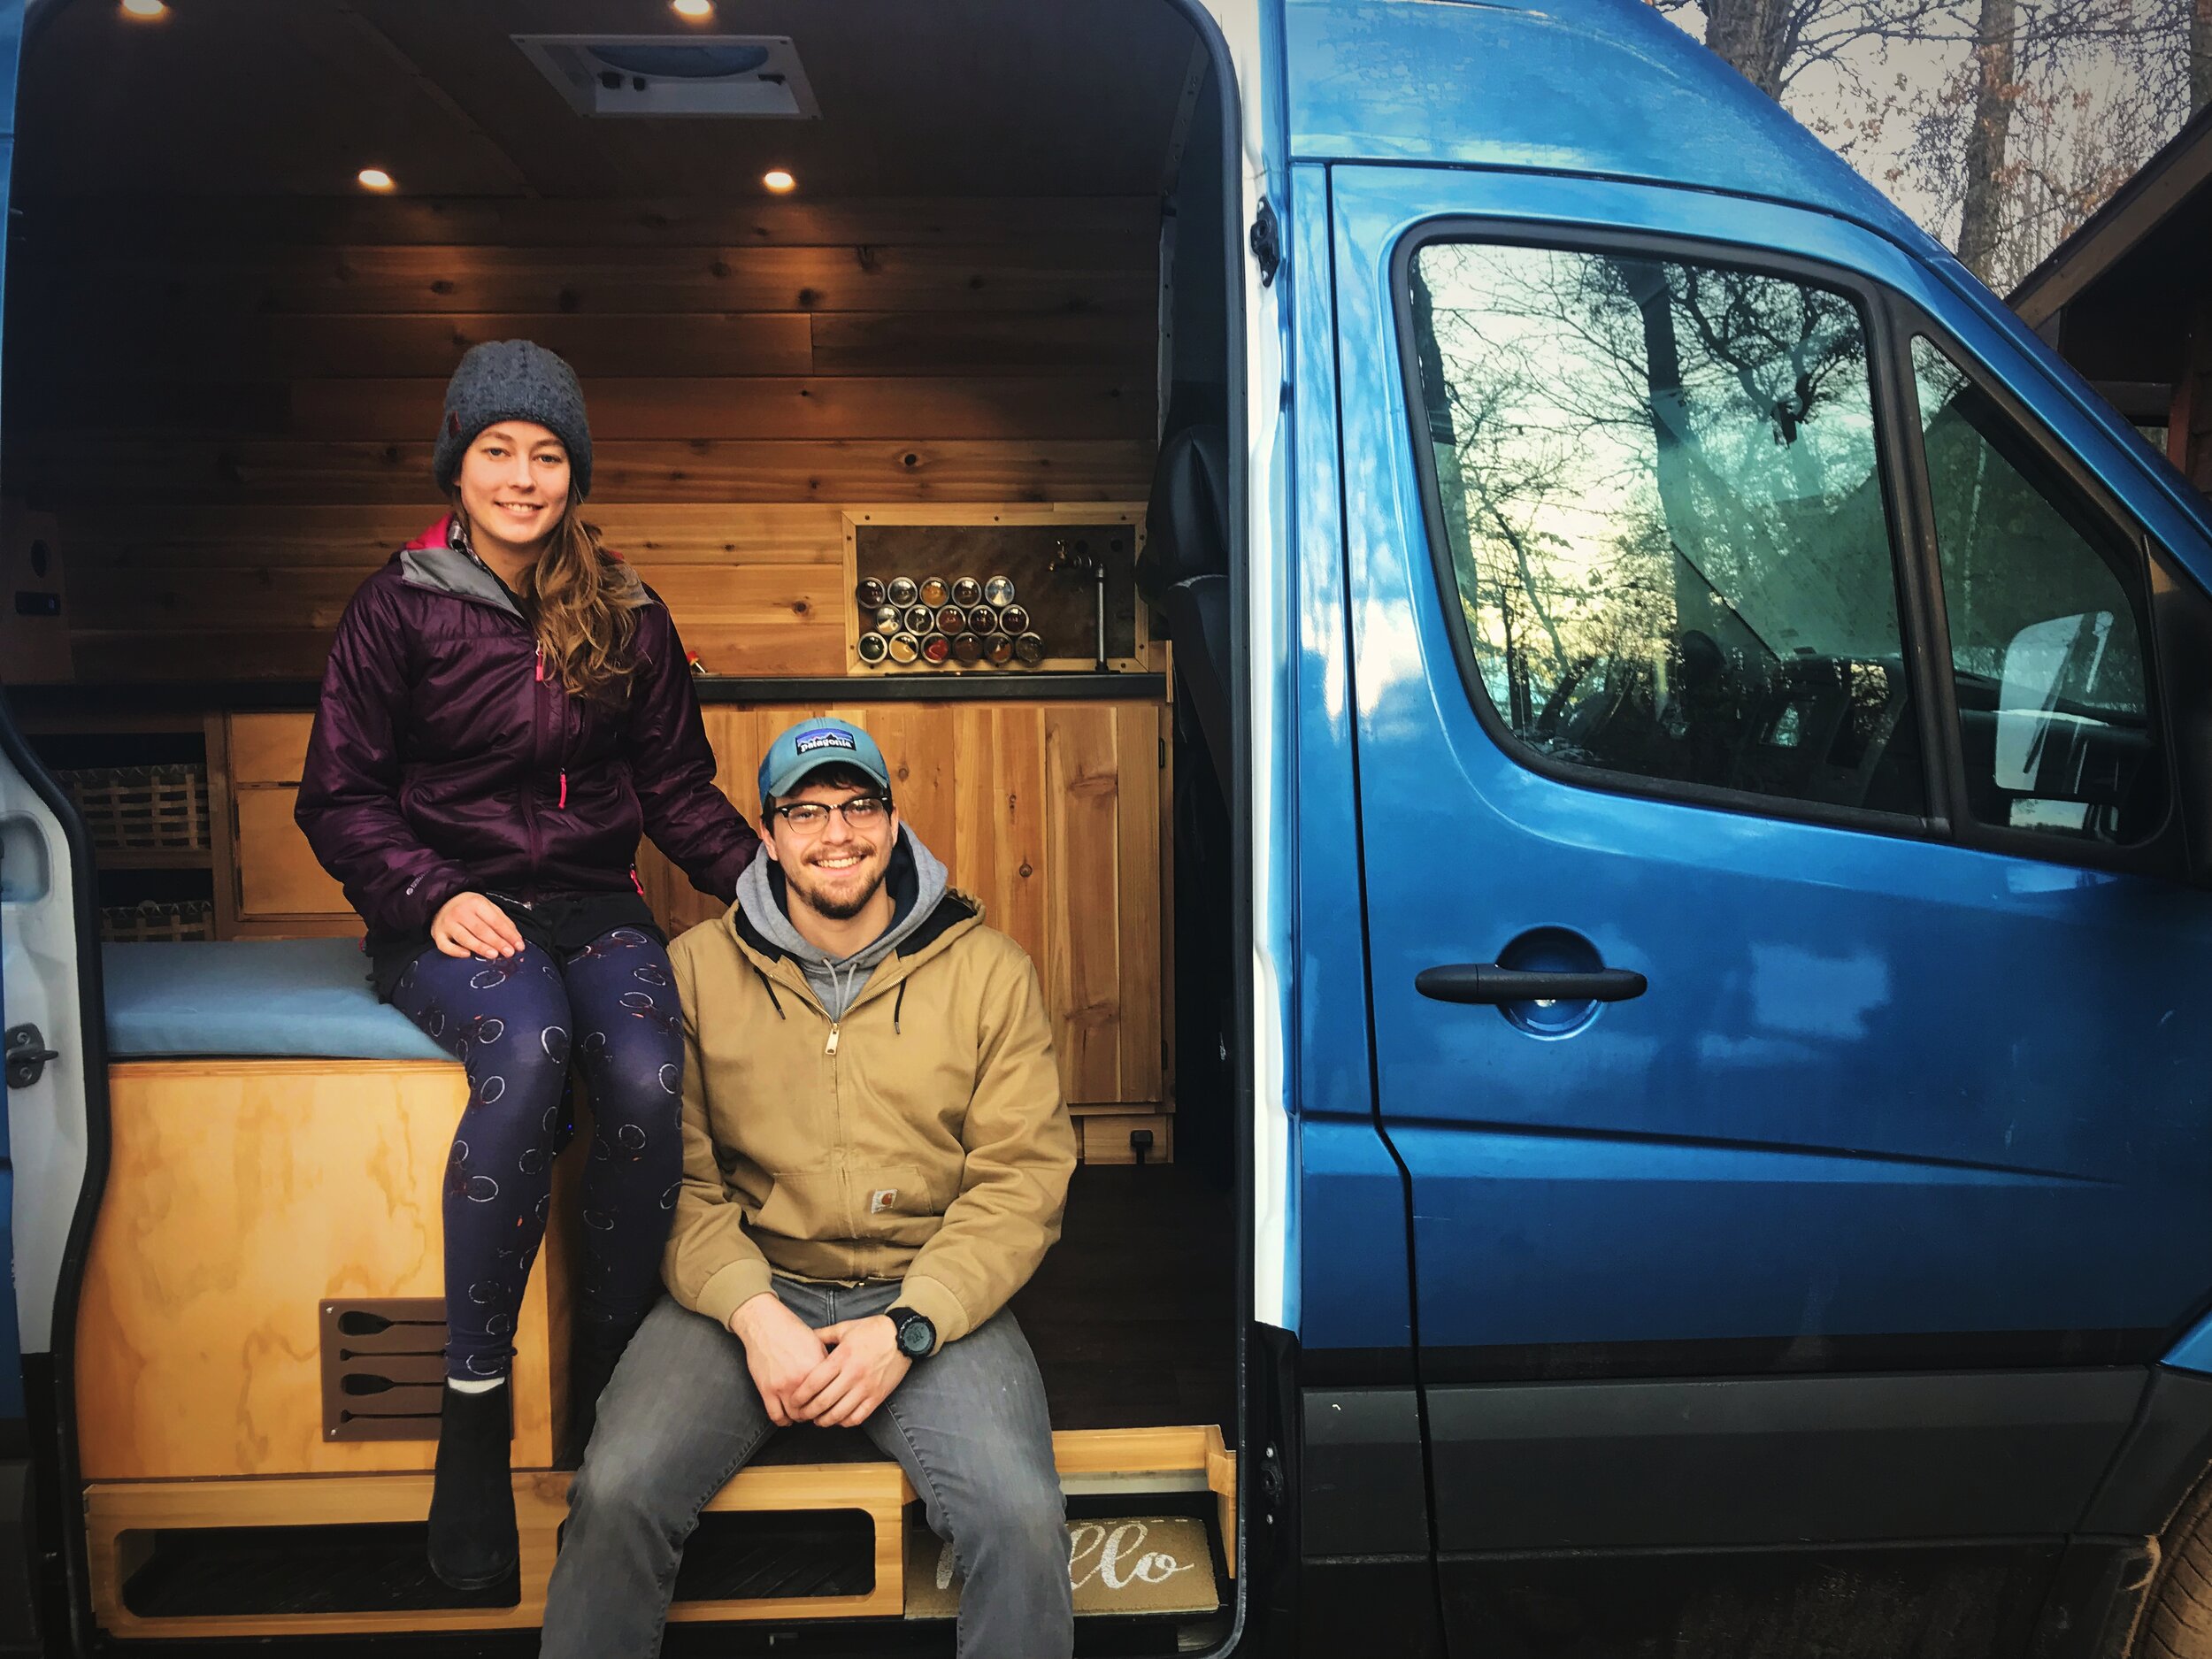
On the end of the counter closest to the cab, we have a round stainless steel sink. It was important to us to have a full-size sink in our van rather than something very small that is made specifically for a van or RV. We are so glad we made this decision because it made cleaning up after cooking so much easier. Behind the sink we installed a metal backsplash that protects the wall behind the sink. We can also stick our magnetic spice tins to the backsplash.
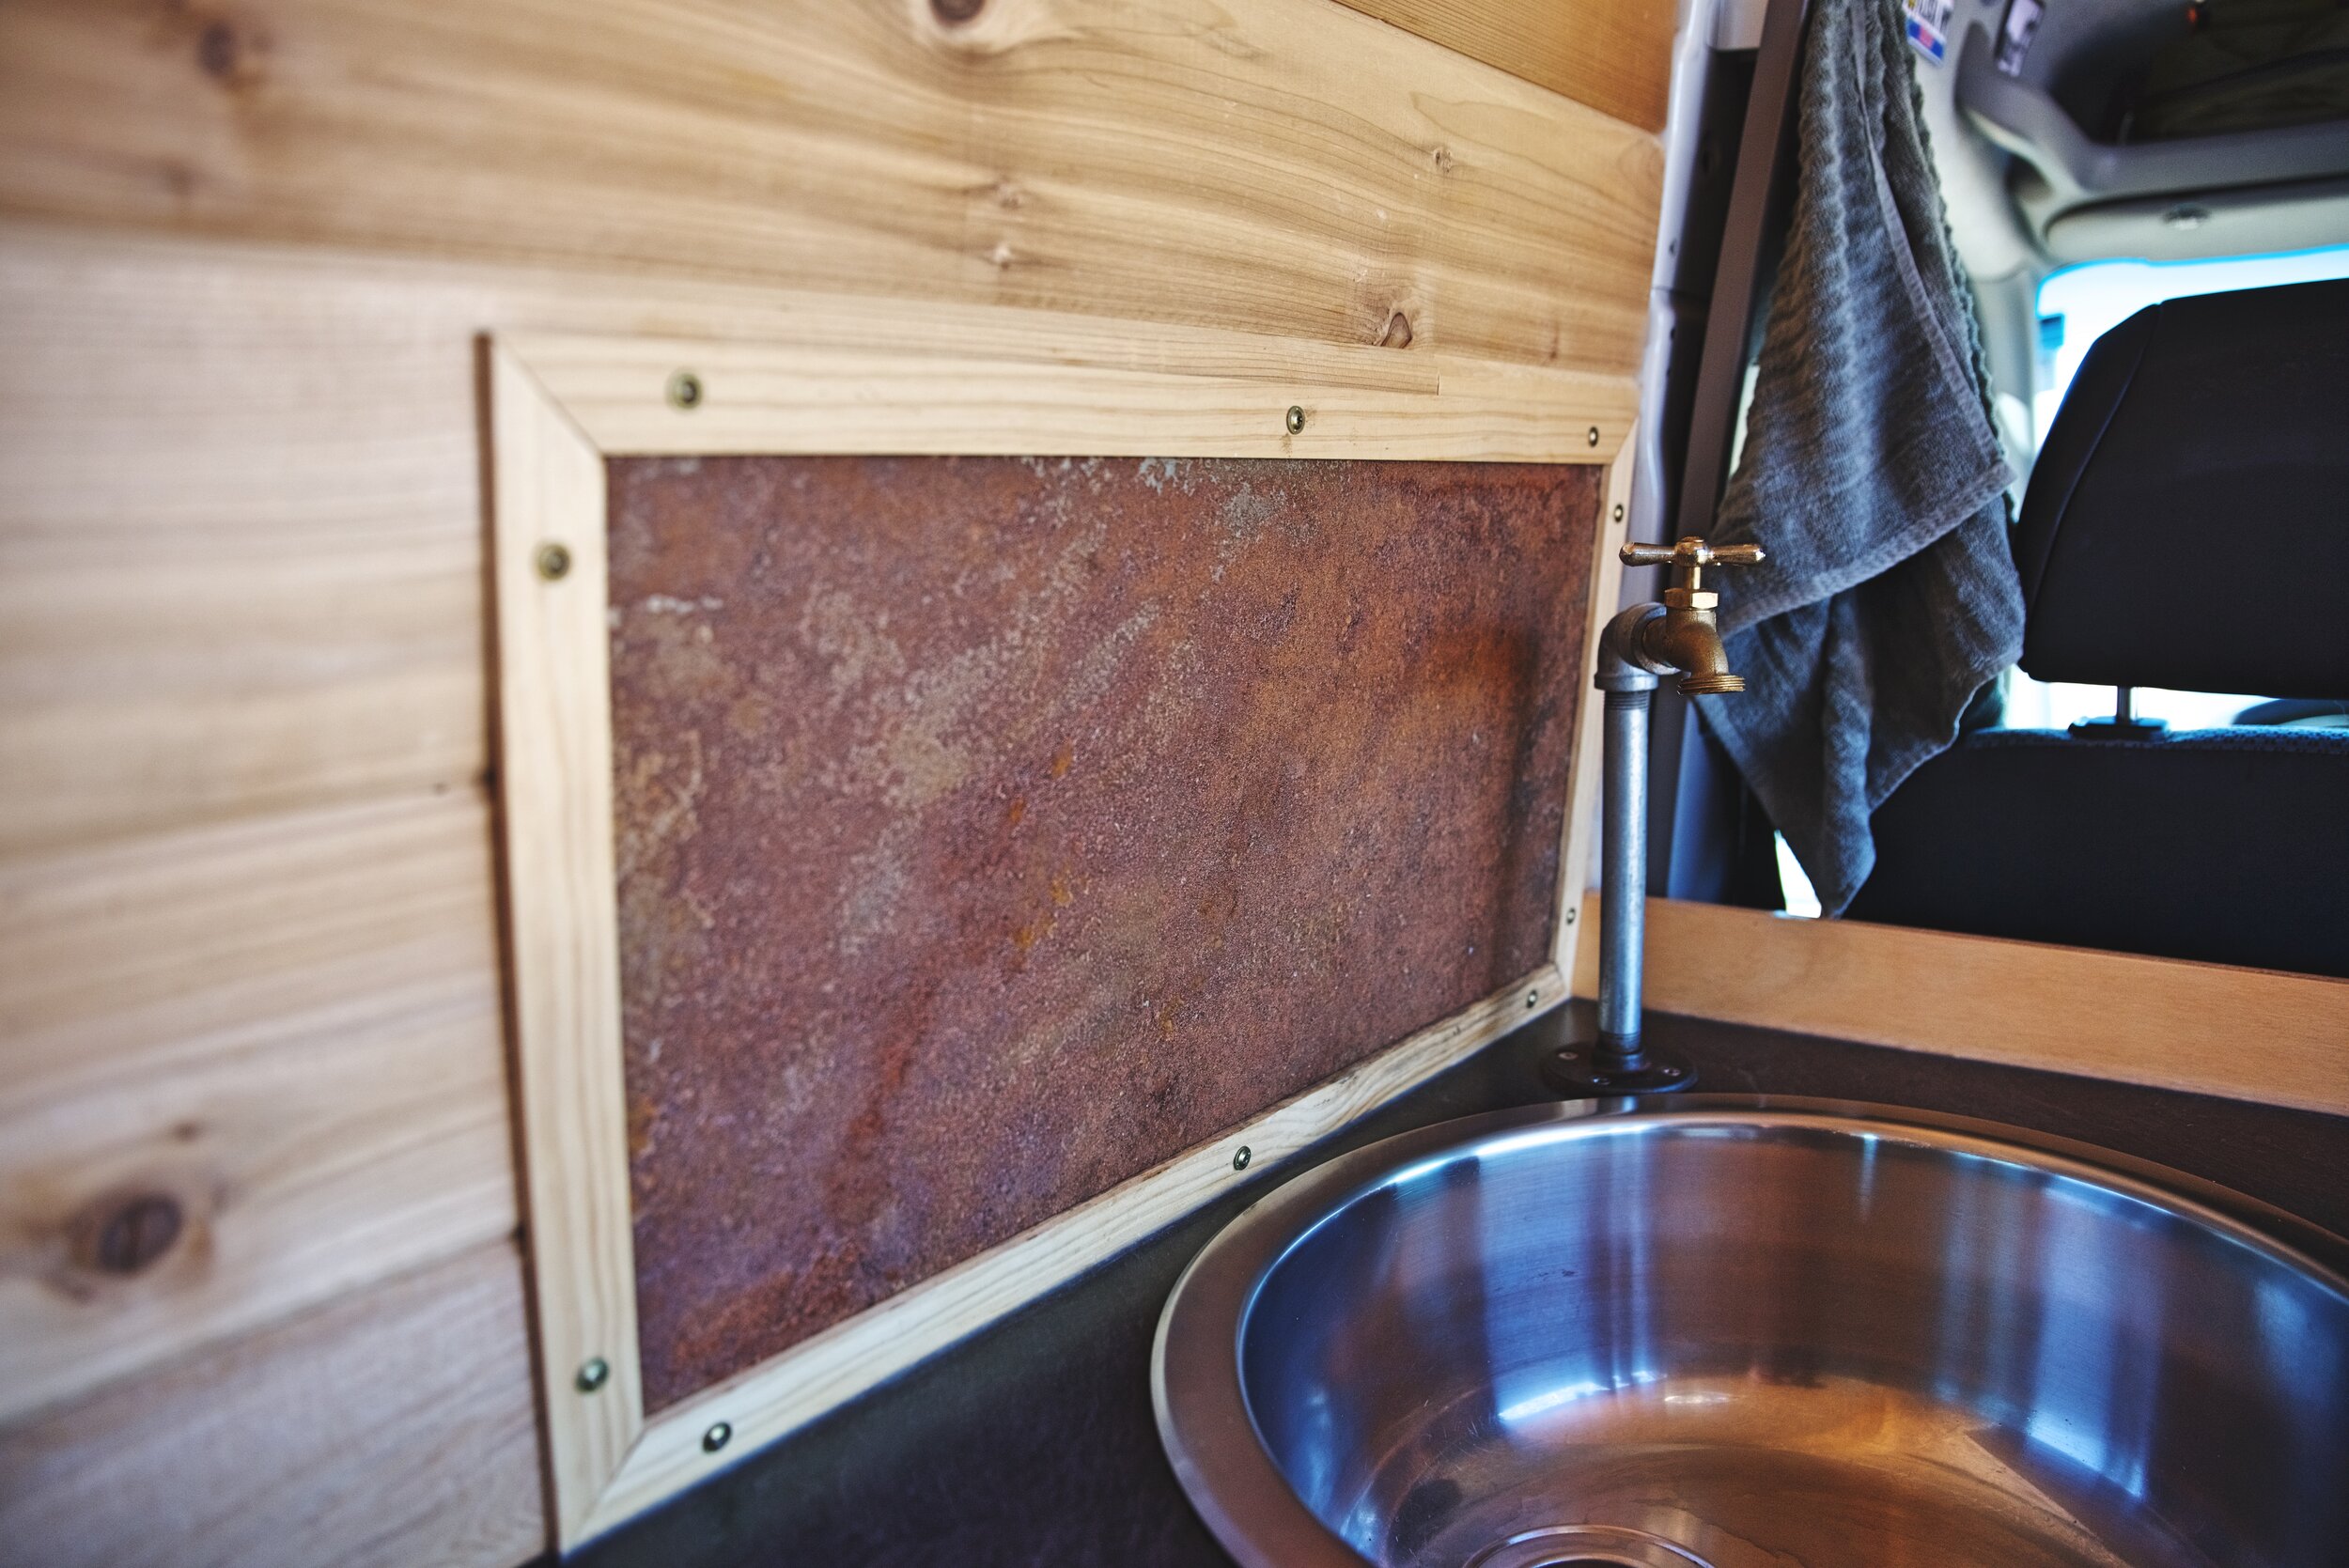
We added this rusted, rolled steel panel as a backsplash to protect the wall behind our sink.
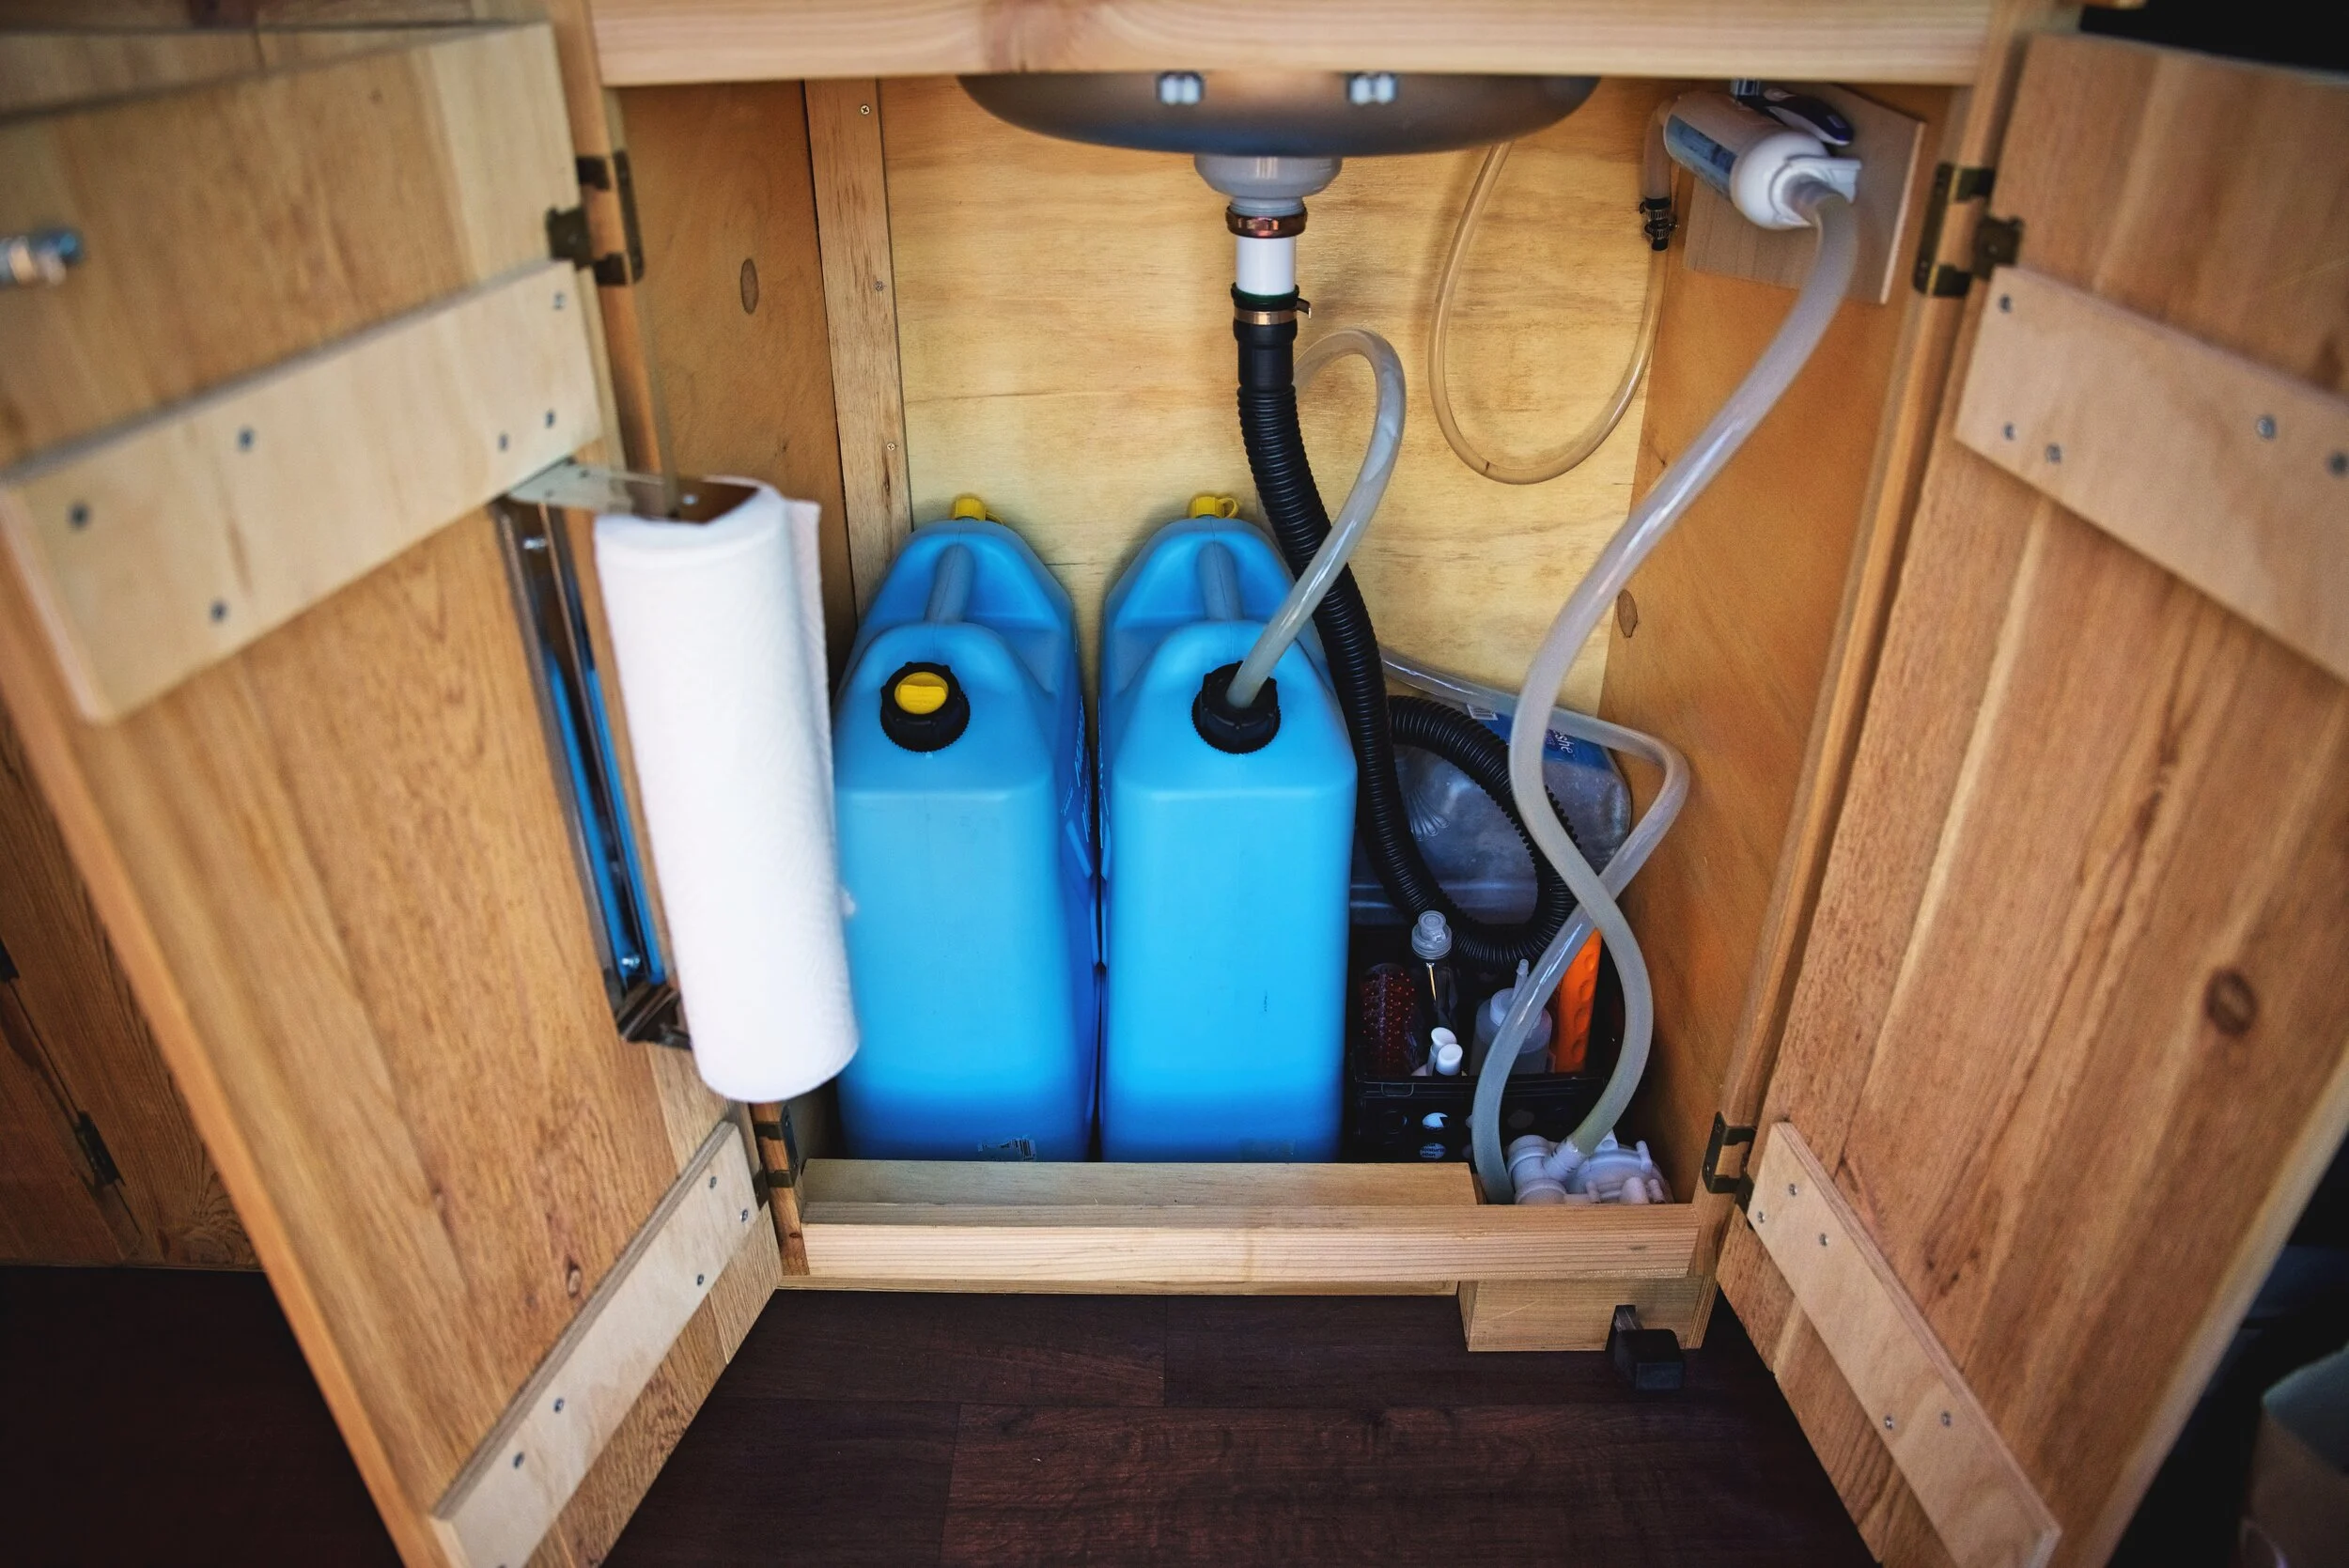
Under the sink, we have two 5-gallon jerry cans that hold fresh water. We located the sink near the door because wrestling the full jugs of water into cabinet could sometimes be a pain. This location at the end of the counter also made it a little bit roomier when we were doing dishes.
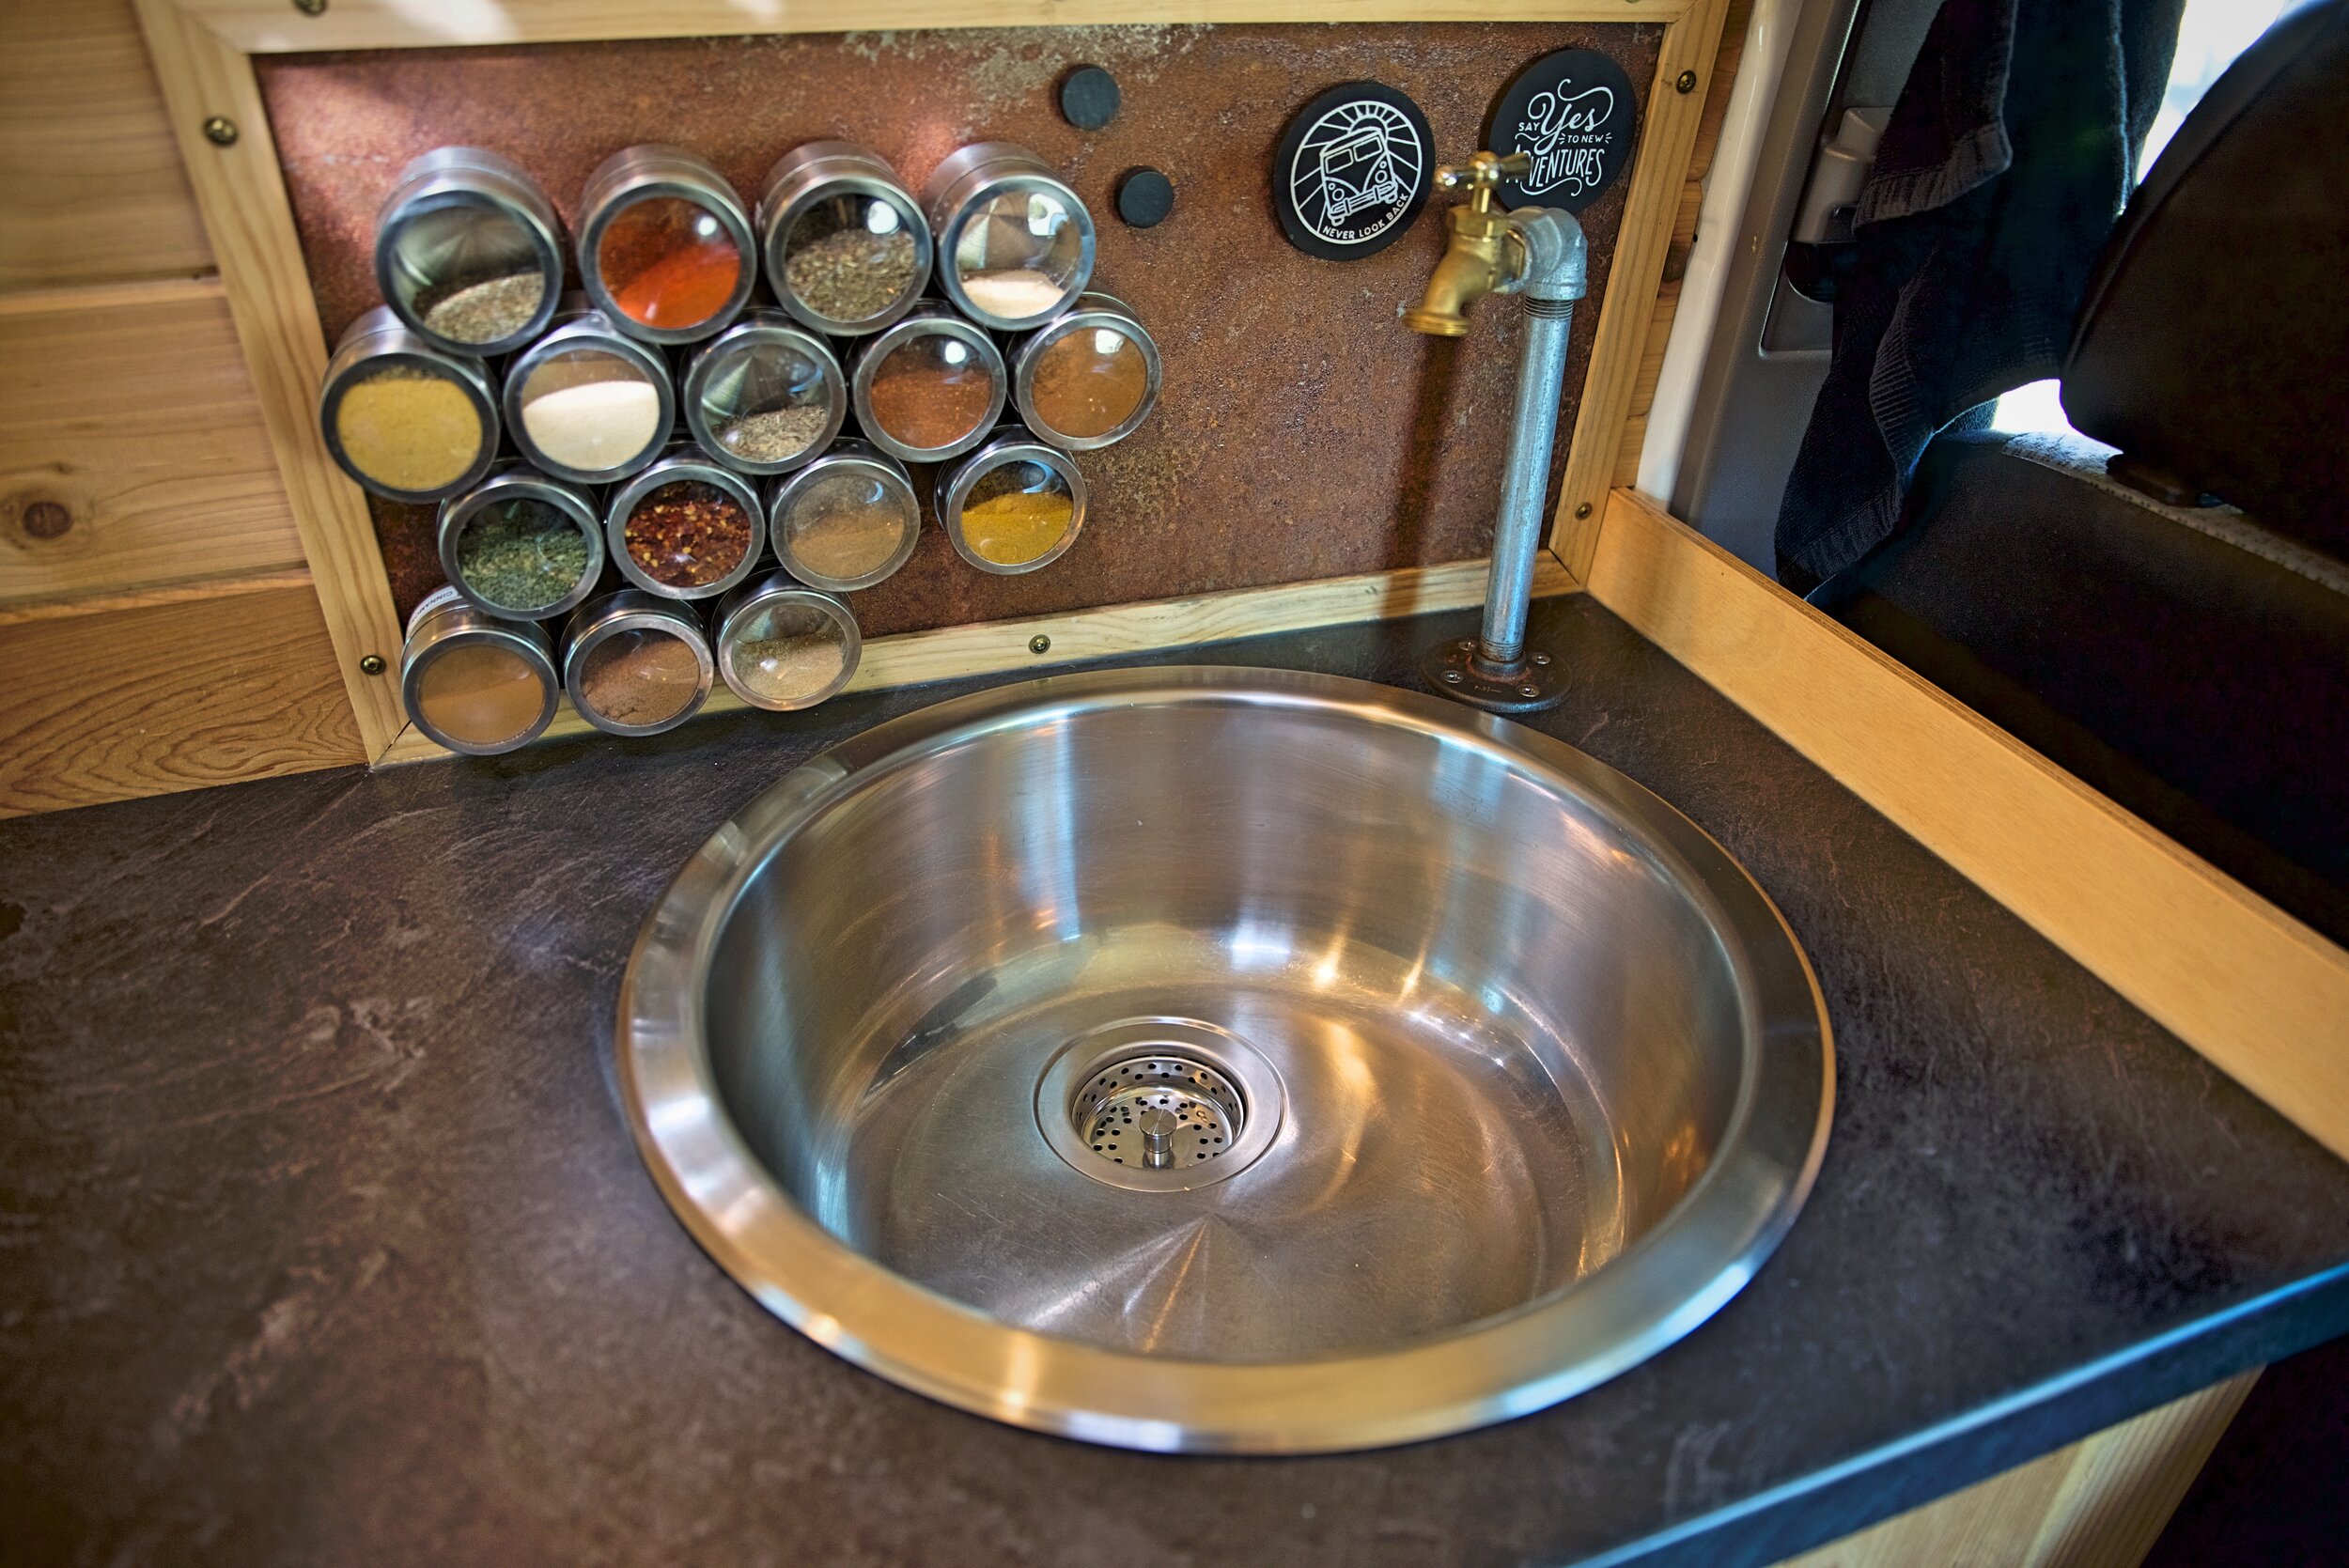
We found this super cute round sink at Ikea. We considered going with a bar sink, but I’m glad we went with a larger sink.
The fresh water is pumped up through food-grade hose to a faucet we made from galvanized pipe using a Whale Gusher galley pump. We are happy with our selection of a manual pump rather than an electric pump. Electric pumps can be noisy or have mechanical issues. With our manual pump we even had it freeze and thaw in cold weather with water in it, and we have never had an issue.

Our Whale galley pump was definitely the right choice for our “low tech” build.

Our water system is operated with a simple foot pump. It prevents us from using too much water.
Our gray water drained through a sump hose into a 2.5-gallon water jug that you can pick up at any grocery store. We put a loop in the sump hose, which acts as a P-Trap to prevent any smell from escaping from the gray water. When the jug filled, we could easily empty it. If it got too dirty or stinky it could easily be replaced.
Read about our sink and fresh water system in our camper van.
Our water system allows us to easily get water whenever there is a pump available at a park or rest area.
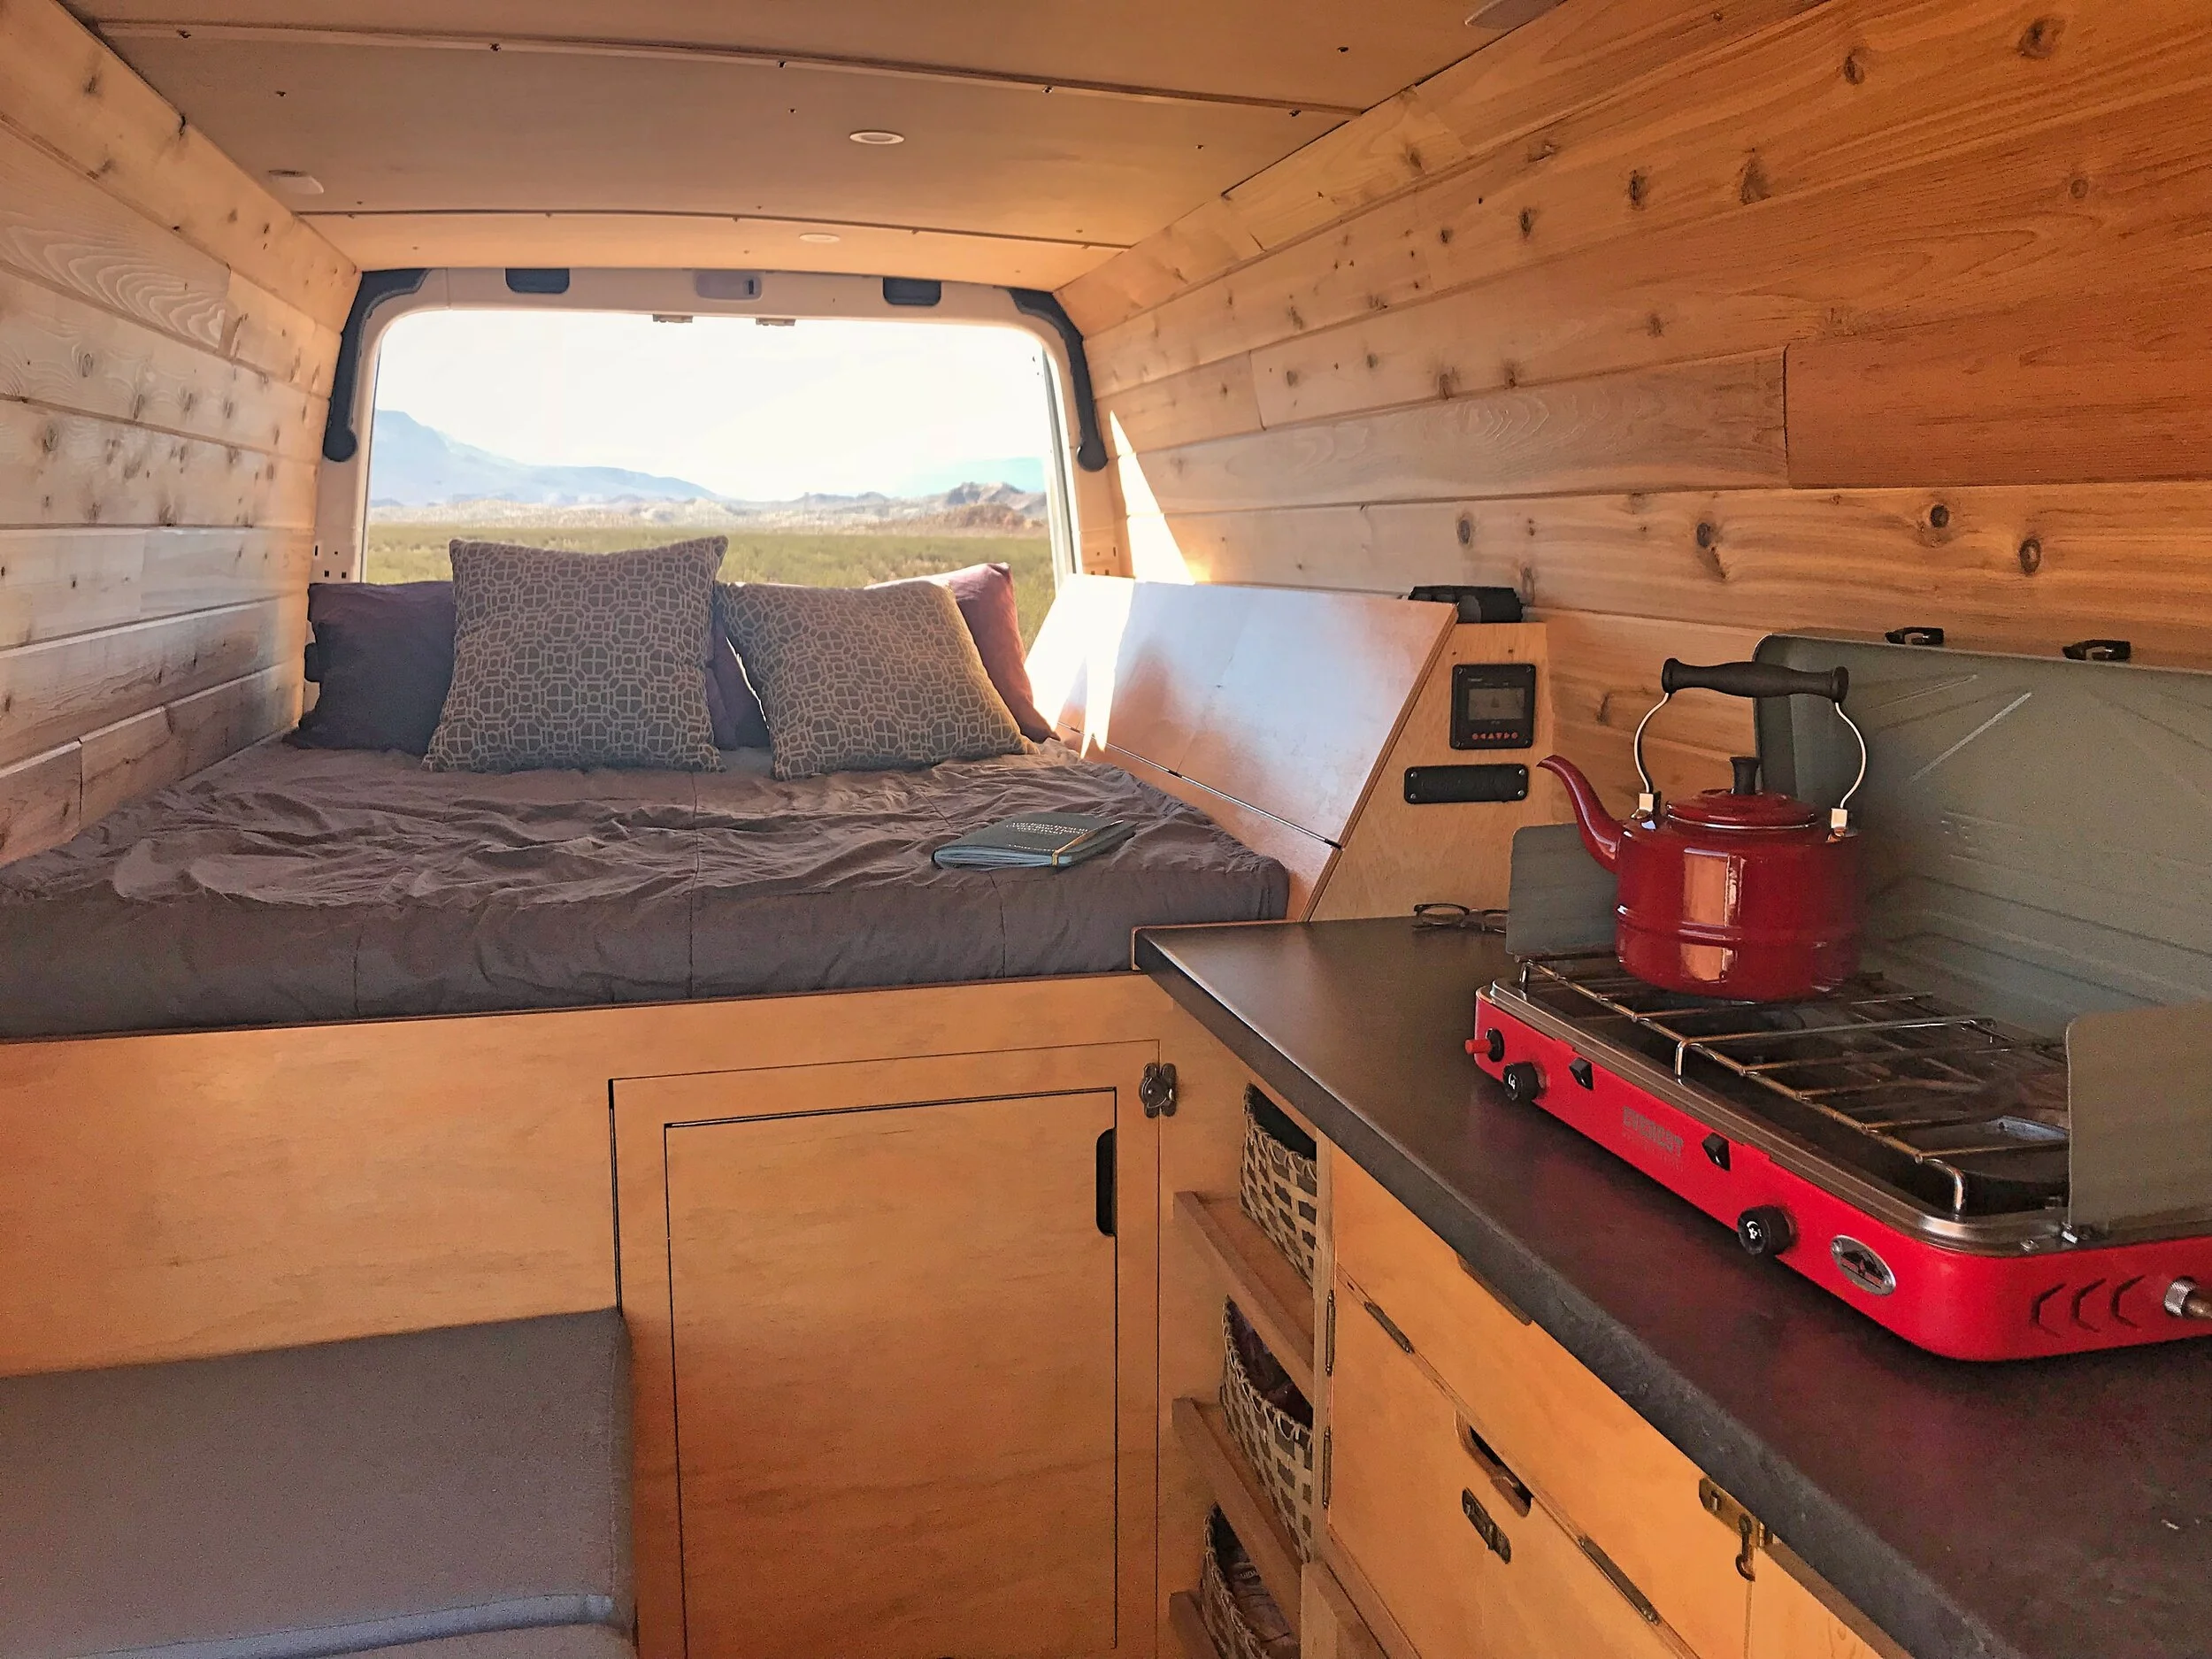
Stove and Propane System
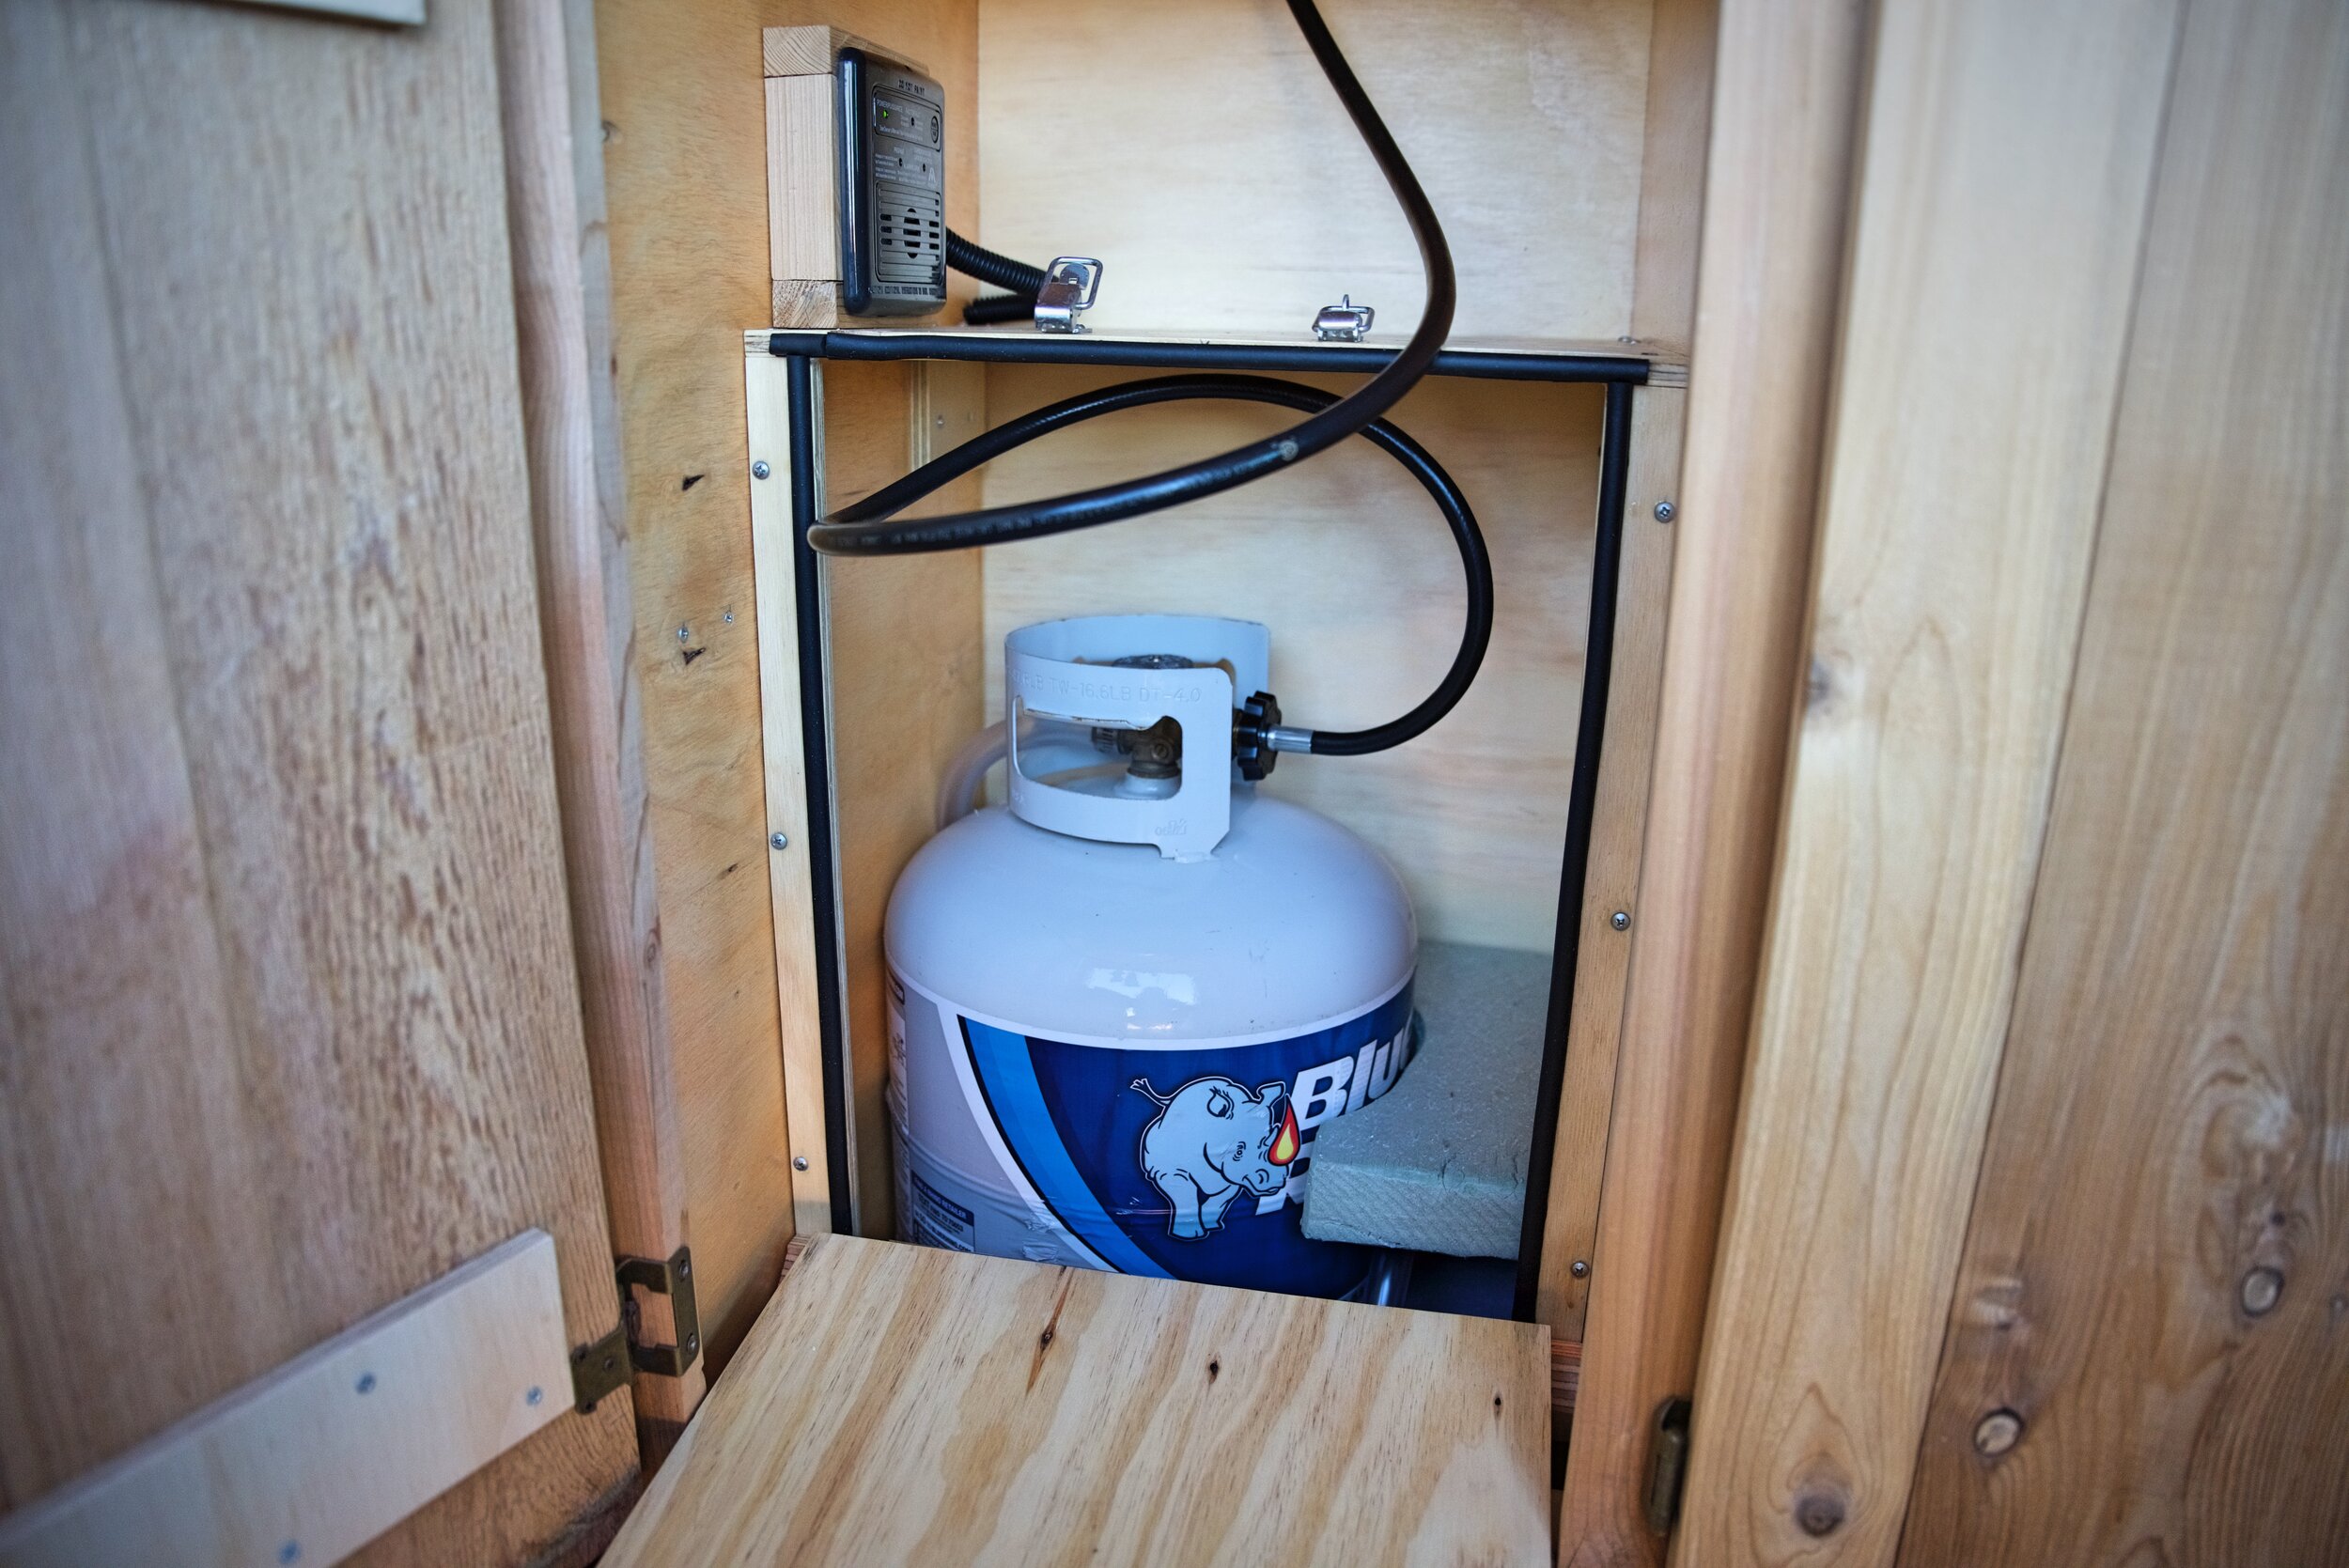
Next to our water system, we have a cabinet that stores our full-size propane tank. We are so happy that we decided to opt for a full size propane tank. Our 20-lb propane tank can last 5-6 months, whereas the small green camping propane cans often only last for 5-6 meals.
Building a way to store a 20lb propane tank into our camp van allows us to go months without replacing our propane tank.
We built our sealed locker for our propane system. The locker was sealed with caulk and weather stripping, with a hinged door to allow us to take the tank in and out. A hose connects the over pressure valve to a hole in our van floor that would allow propane to be released if the valve was ever tripped. In side this cabinet, we also installed a propane/carbon monoxide detector to let us know if there was ever a leak.
A hose with a regulator goes from the propane locker through a hole in the countertop (held in by a desk grommet). From there, we can easily connect our Camp Chef two burner stove. This stove has been a great choice for vanlife. It has great temperature control, and it gives us enough space for cooking without taking up too much space.

Instead of adding a built-in stove top, we went the much cheaper and more flexible route of using a high-quality two burner stove in our camper van build out.
Portable Camping Chuck Box
We are happy that we opted to go with a camp stove for cooking in our van rather than a built in stovetop, because it allows us to cook outside whenever we want. After all, vanlife for us was about being able to travel and live outdoors.
To make cooking outdoors a simpler process, we built a chuck box that we could take in and out of our van’s cabinetry and bring out to a picnic table to cook. Inside our chuck box we can store the following items: Camp Chef camp stove, big cast iron pot, small sauce pan, non-stick frying pan, plates, bowls, a potholder, salt and pepper, and hot sauce.

Our portable camping chuck box stores all the essentials for cooking in our van.

Adding a chuck box to the cabinetry in your camper van also allows you to cook outside whenever you want.
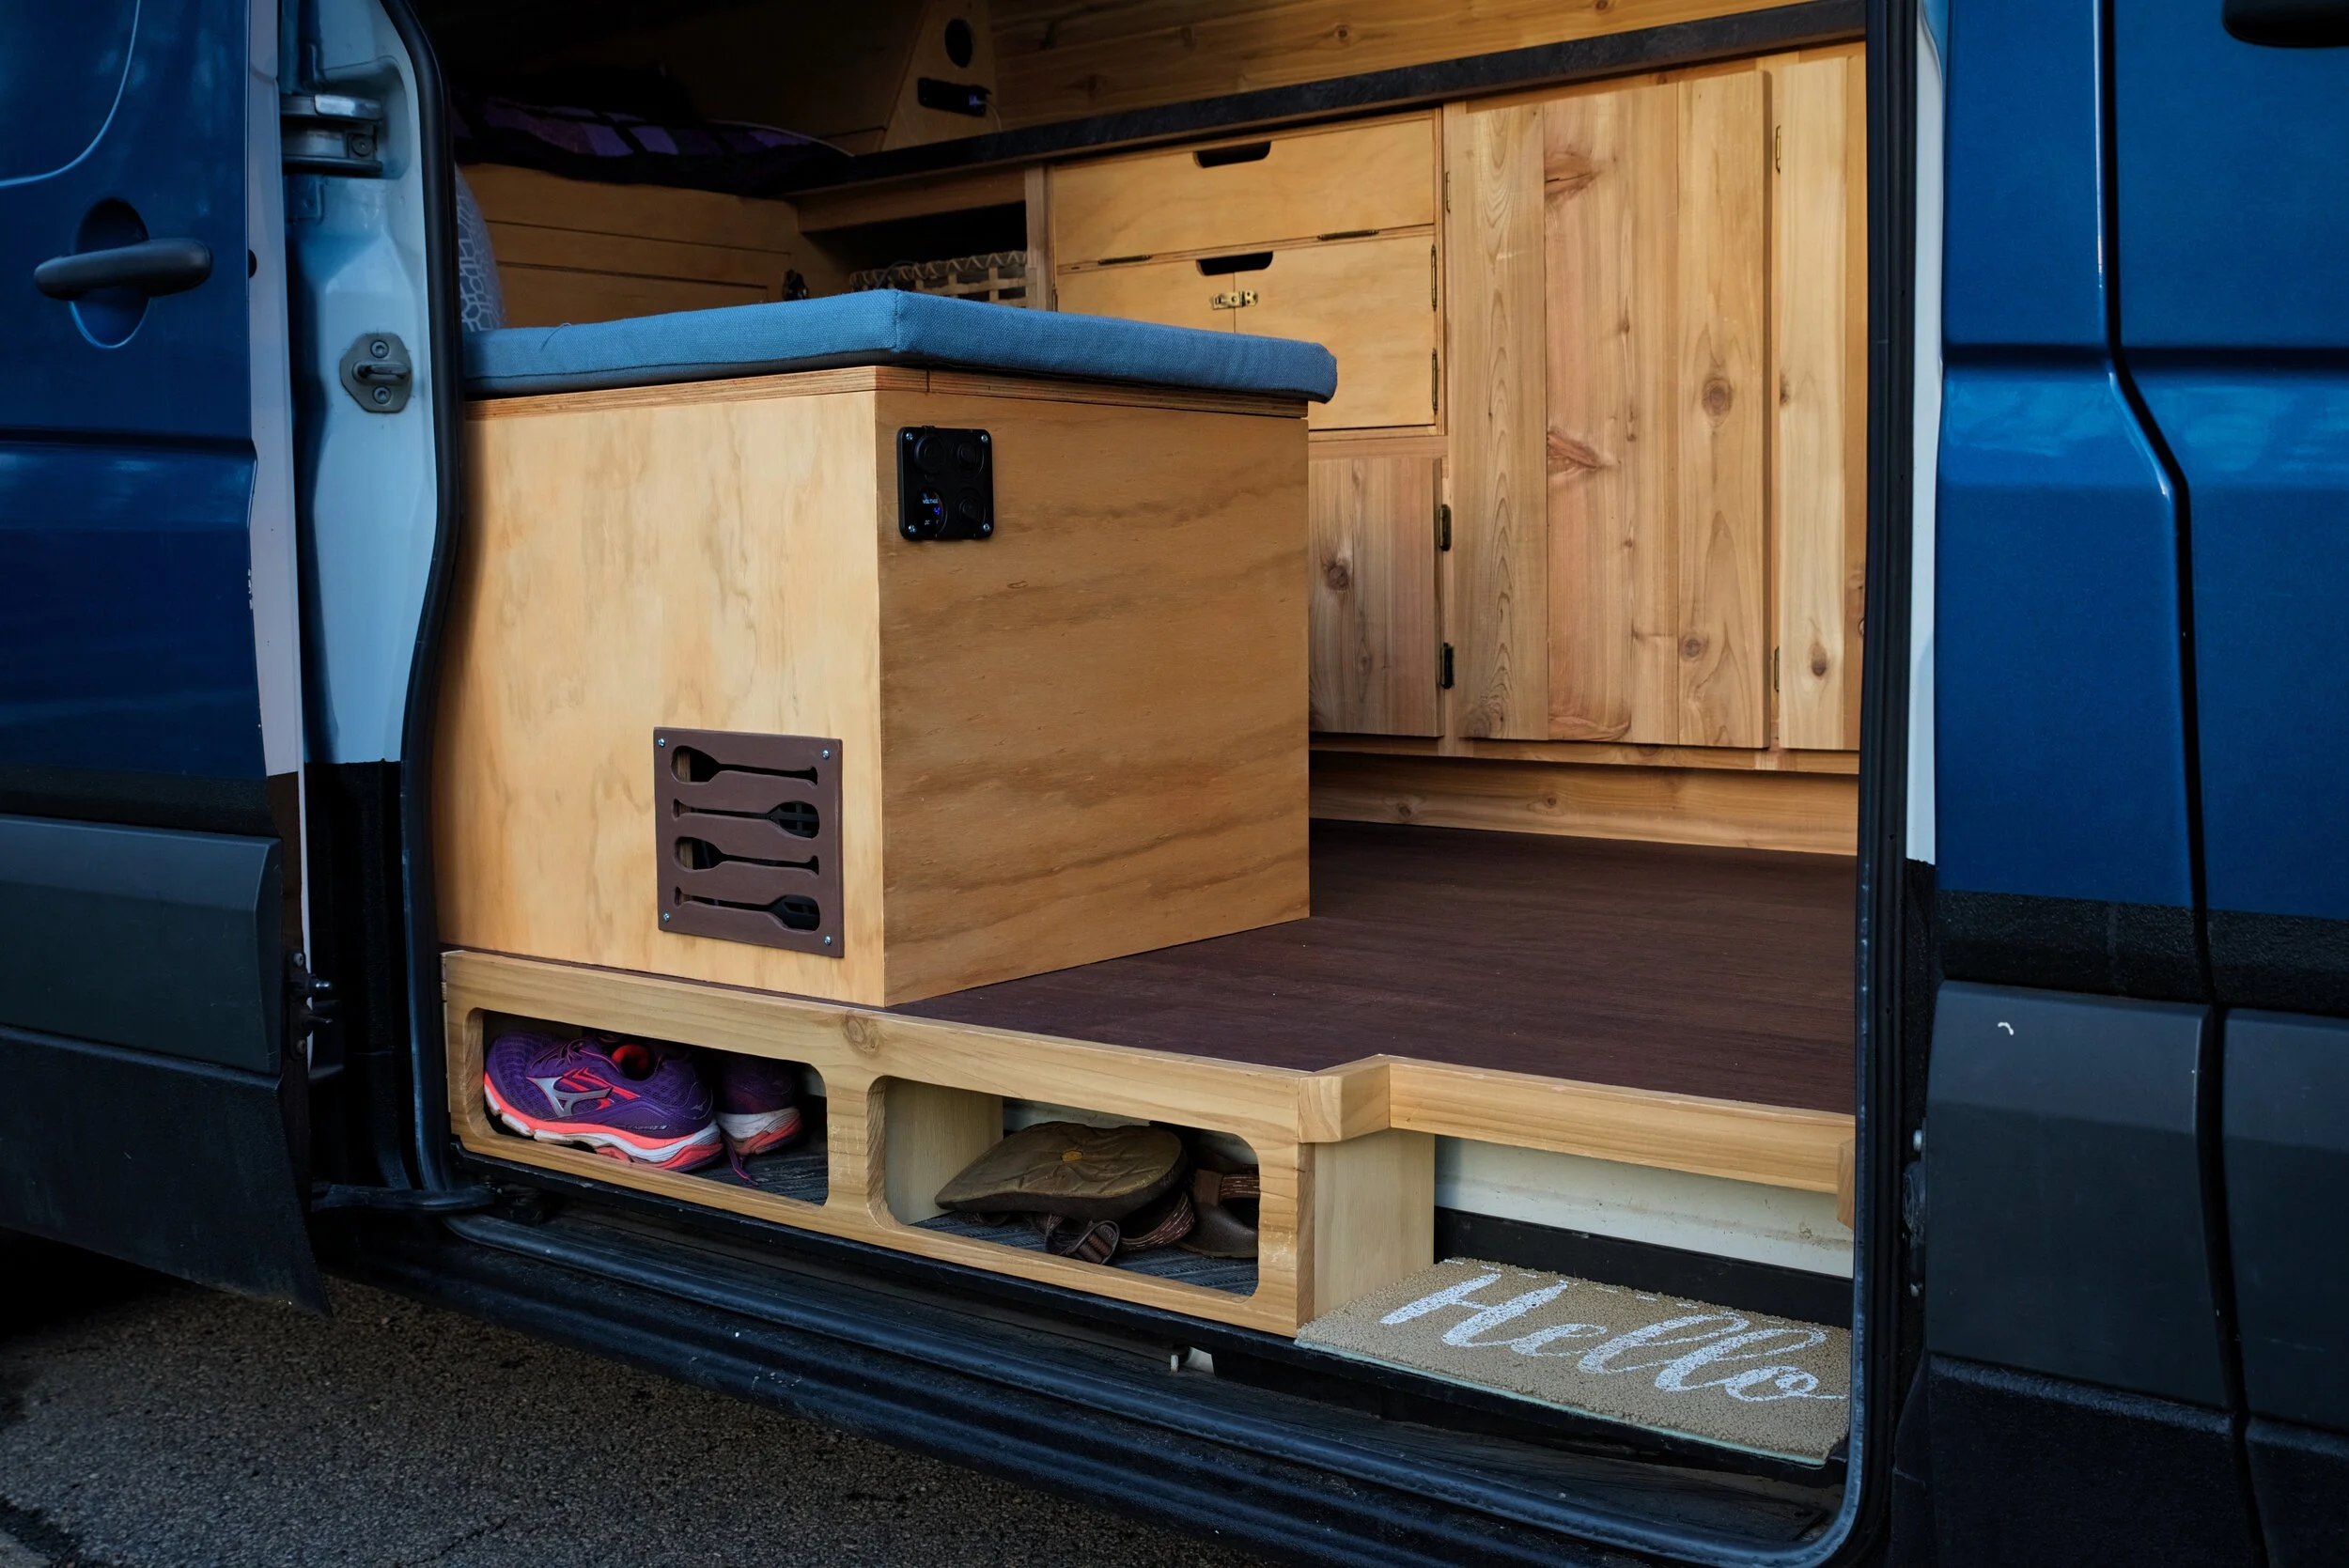
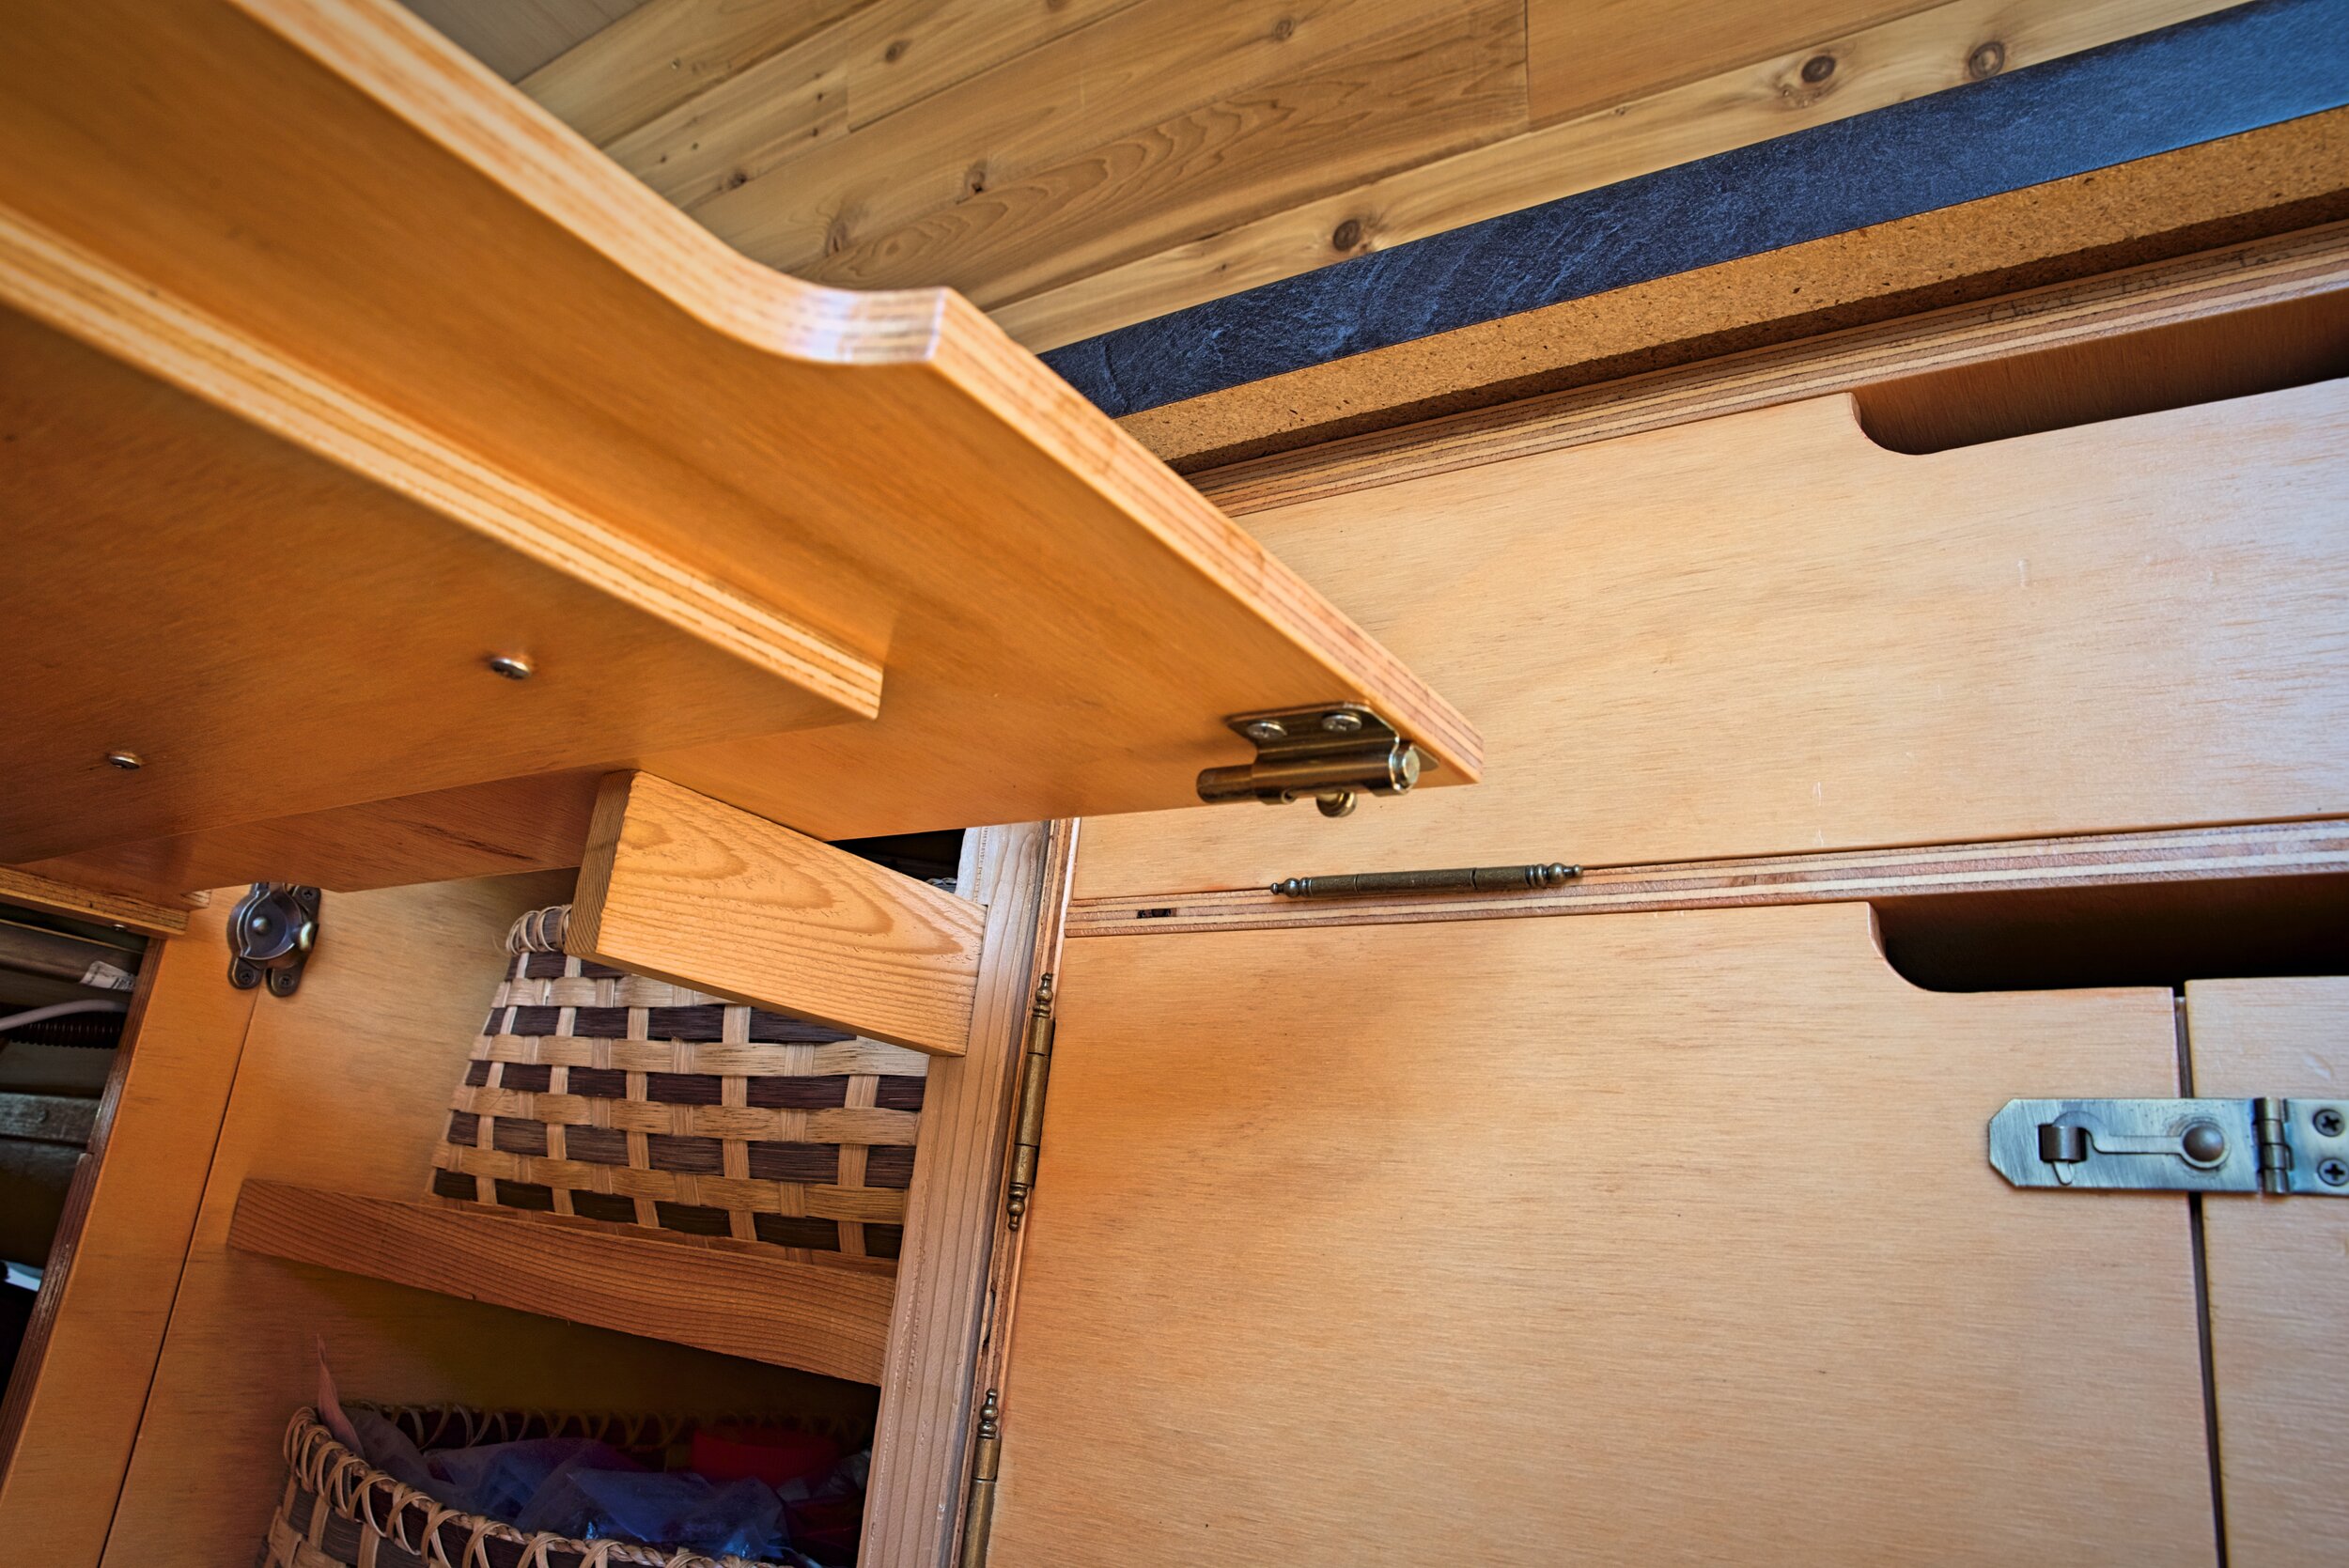
Cabinetry and Storage
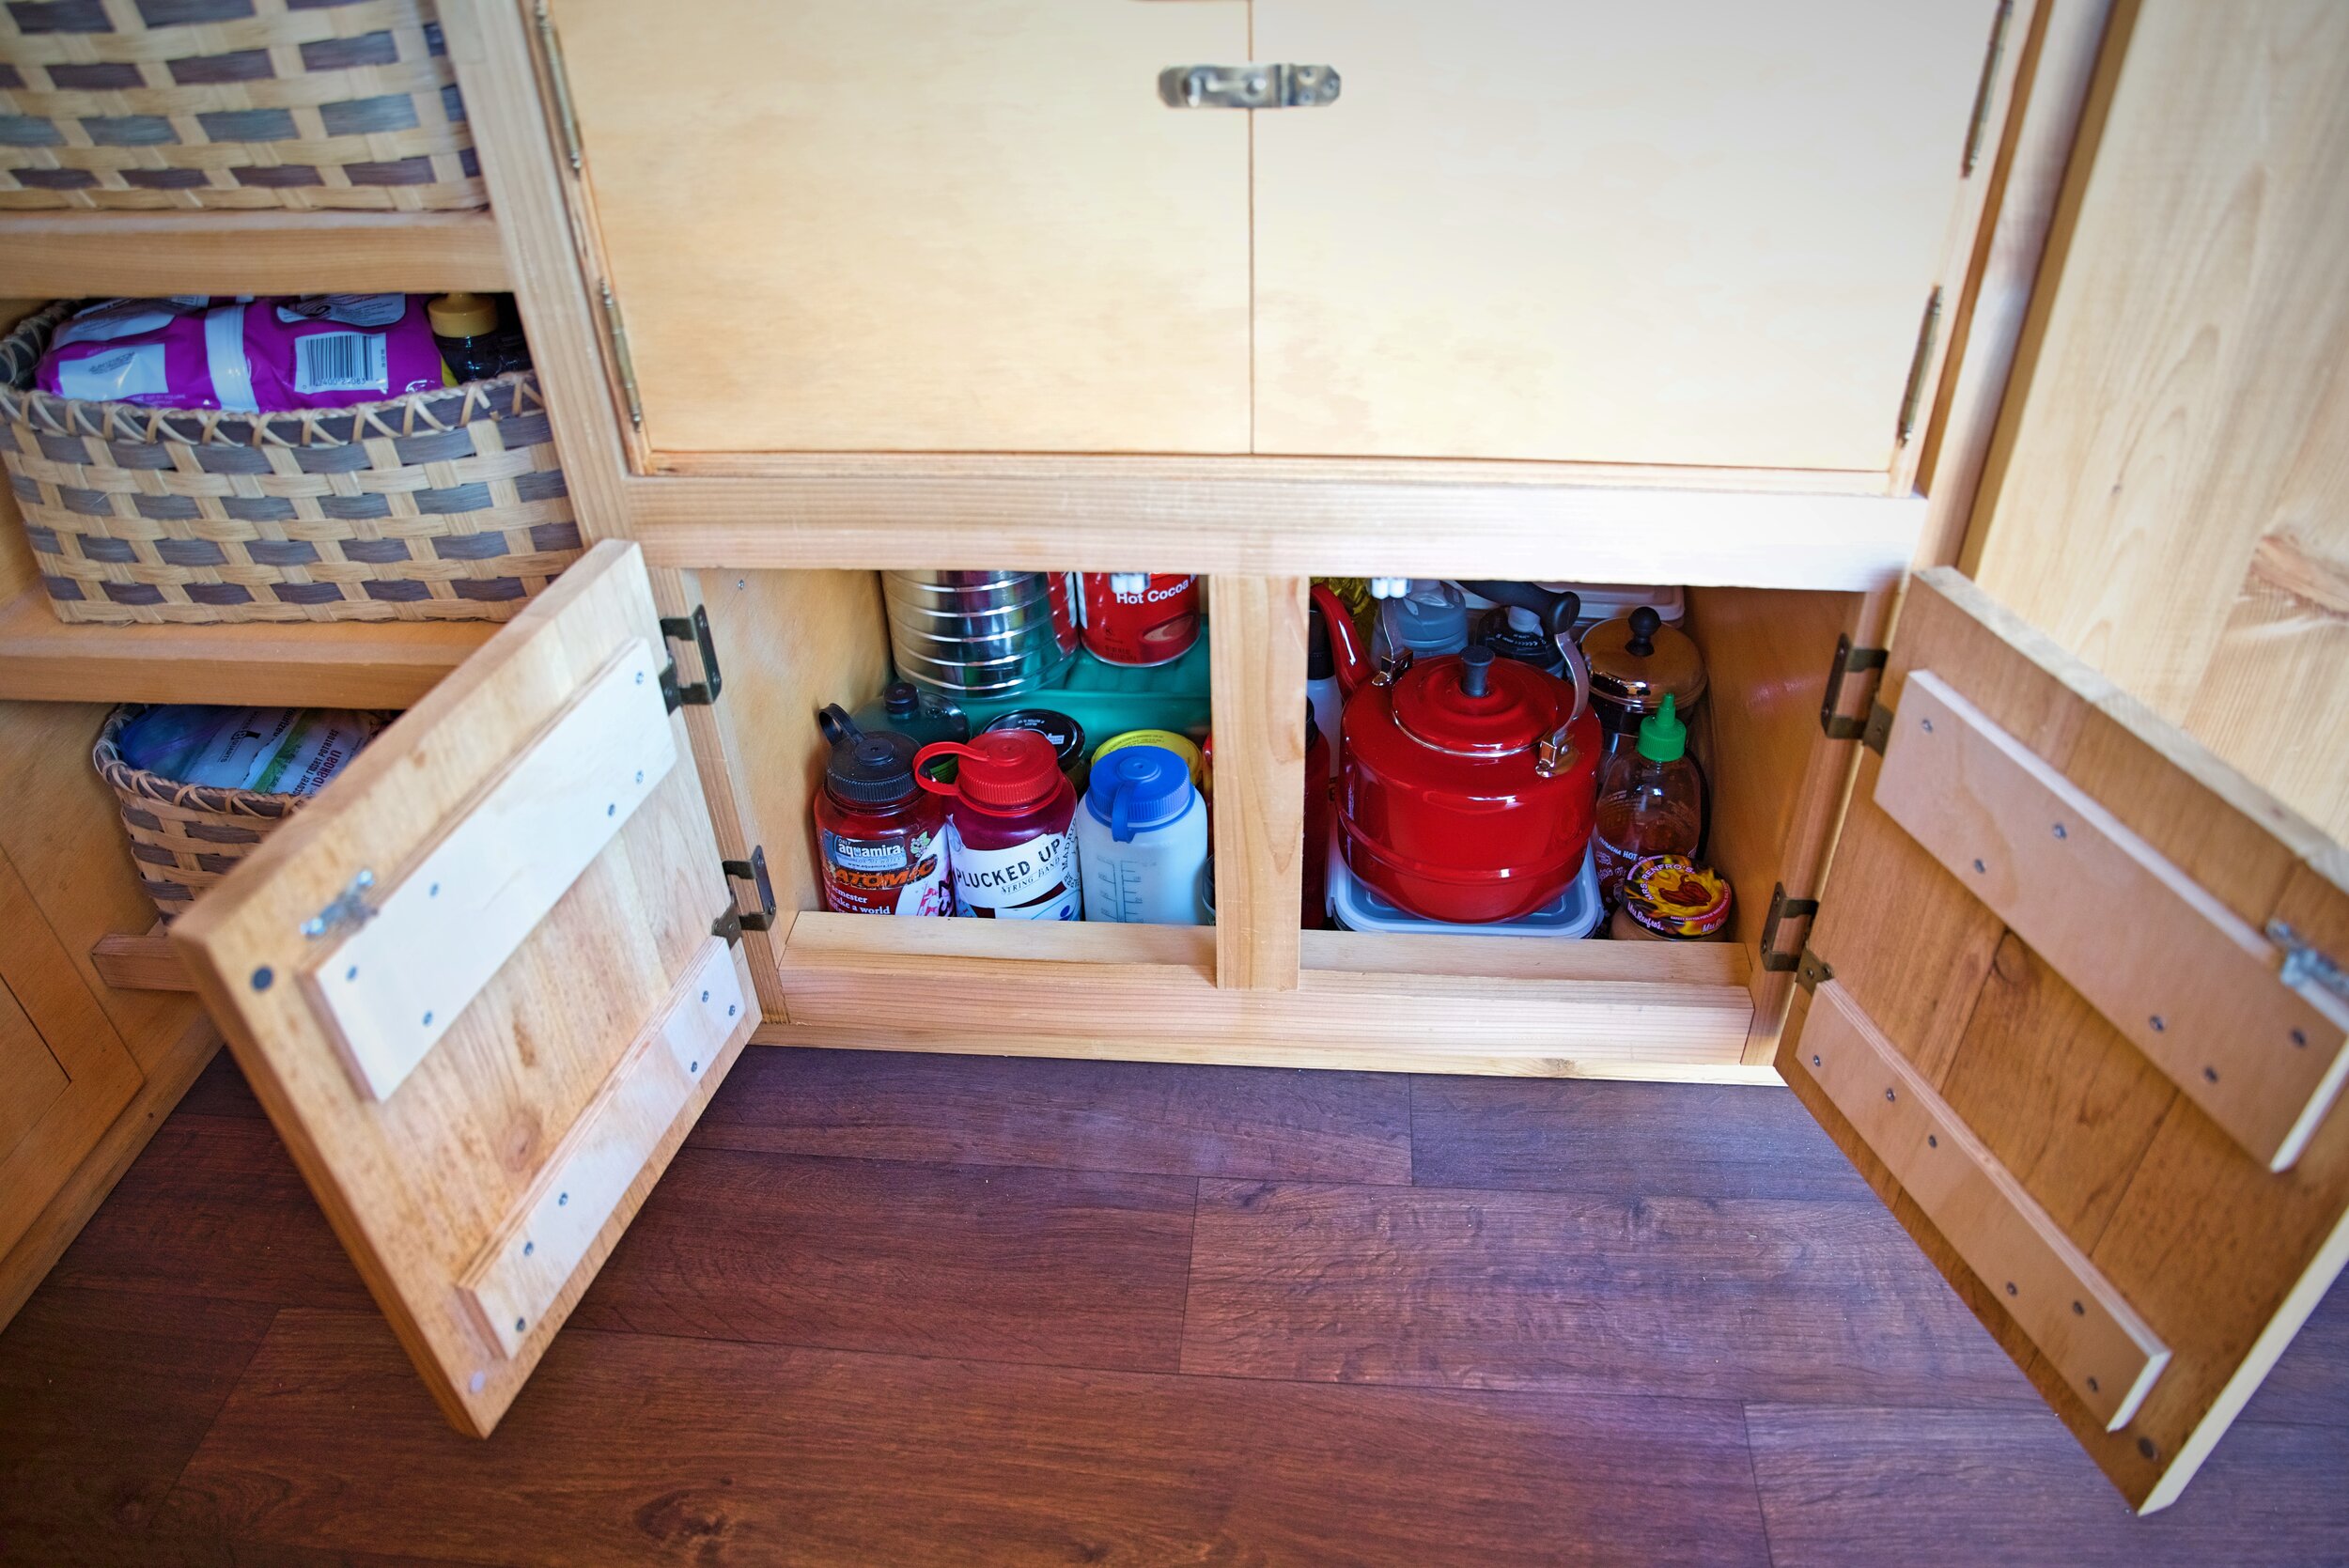
Under our chuck box, we built in a large storage area for food and cookware such as our teakettle or coffee mugs. Next to the chuck box we have three shelves. We wove our own baskets to perfectly fit these shelves.

Having practical storage in your camper van build is absolutely essential. We wove these baskets to fit exactly into the space we had.
Our cabinets are made of plywood with a simple case and frame design. Overall our cabinets have been very sturdy and held up well. We always had plenty of storage for our kitchen.
Our cabinet doors and the face frame are made of unfinished cedar planks. Overall we love the look of our cabinets. However, were we to do the van over, we might consider finishing the wood. Any drop of oil or even the oil from our hands is visible on the unfinished wood.
Our cabinets are simple case and frame cabinets—-with a few vanlife twists.
The beautiful antique brass hardware we purchased has proved to be durable and stylish. We originally chose not to add handles on our cabinets, but now we could see adding come cute little handles (like this) to our cabinet doors.
We are extremely glad that we did not add overhead storage. It was very nice to be able to work on an open countertop that was well lit as we were cooking each day. It made the van feel open and livable and we are glad we opted not build the upper cabinets we had considered.
Take a closer look at how we built our cabinets in our camper van conversion.

Our kitchen is “galley style” with cabinets on one side and a long bench to sit at and for storage on the other.
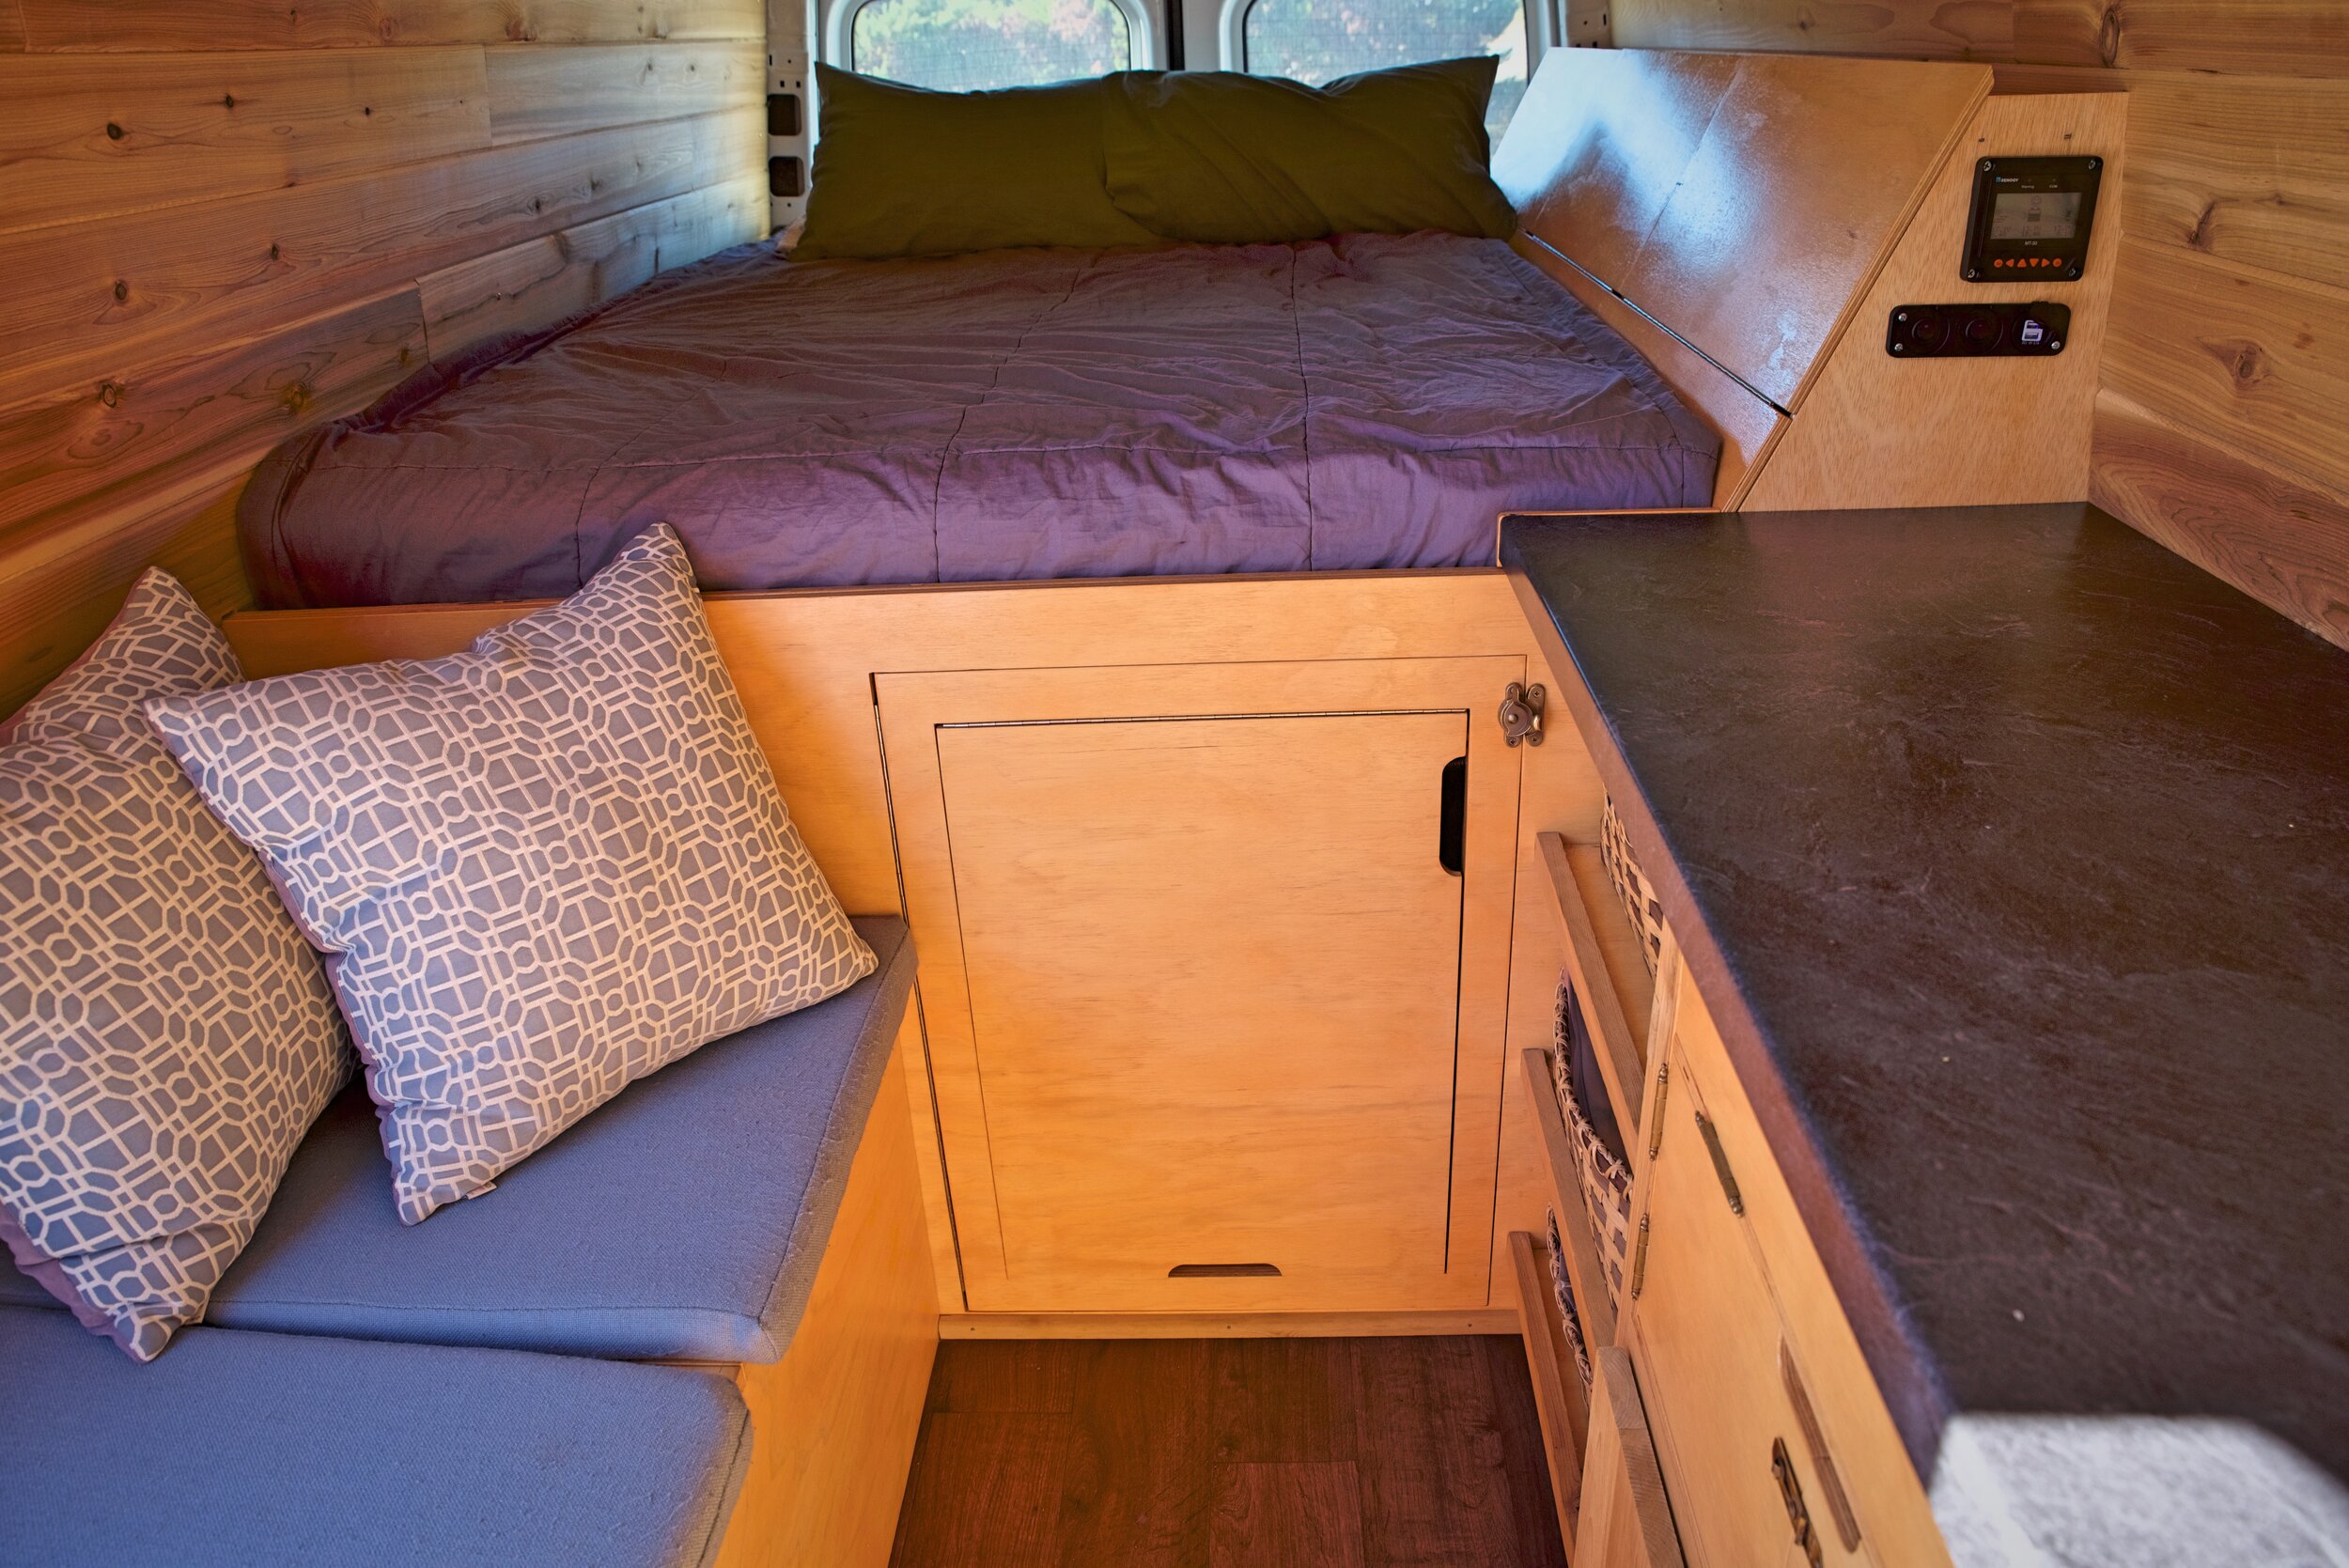
Fridge and Bench
On the other side of the van across from the counter and cabinets. by the large sliding door, we have a bench that runs along the wall. The bench stores our fridge and also large storage space.

We love having this “bigger” storage space in our bench. We also planned this space to allow us to add a small toilet if needed. We didn’t need it though!
The “fridge bench” is made of a think ¾-inch plywood. The top of the bench is on a long piano hinge that we can open up to access the fridge and the storage area.

We sewed these cushions to go on top of of the bench in our camper van.
Our high-efficiency Dometic fridge was probably the best expensive item that we bought for the van. Even though these 12-volt fridges are expensive, it was worth it because it was a low draw on our solar powered battery. The fridge can also be used on 120-volt household electrical systems as well.
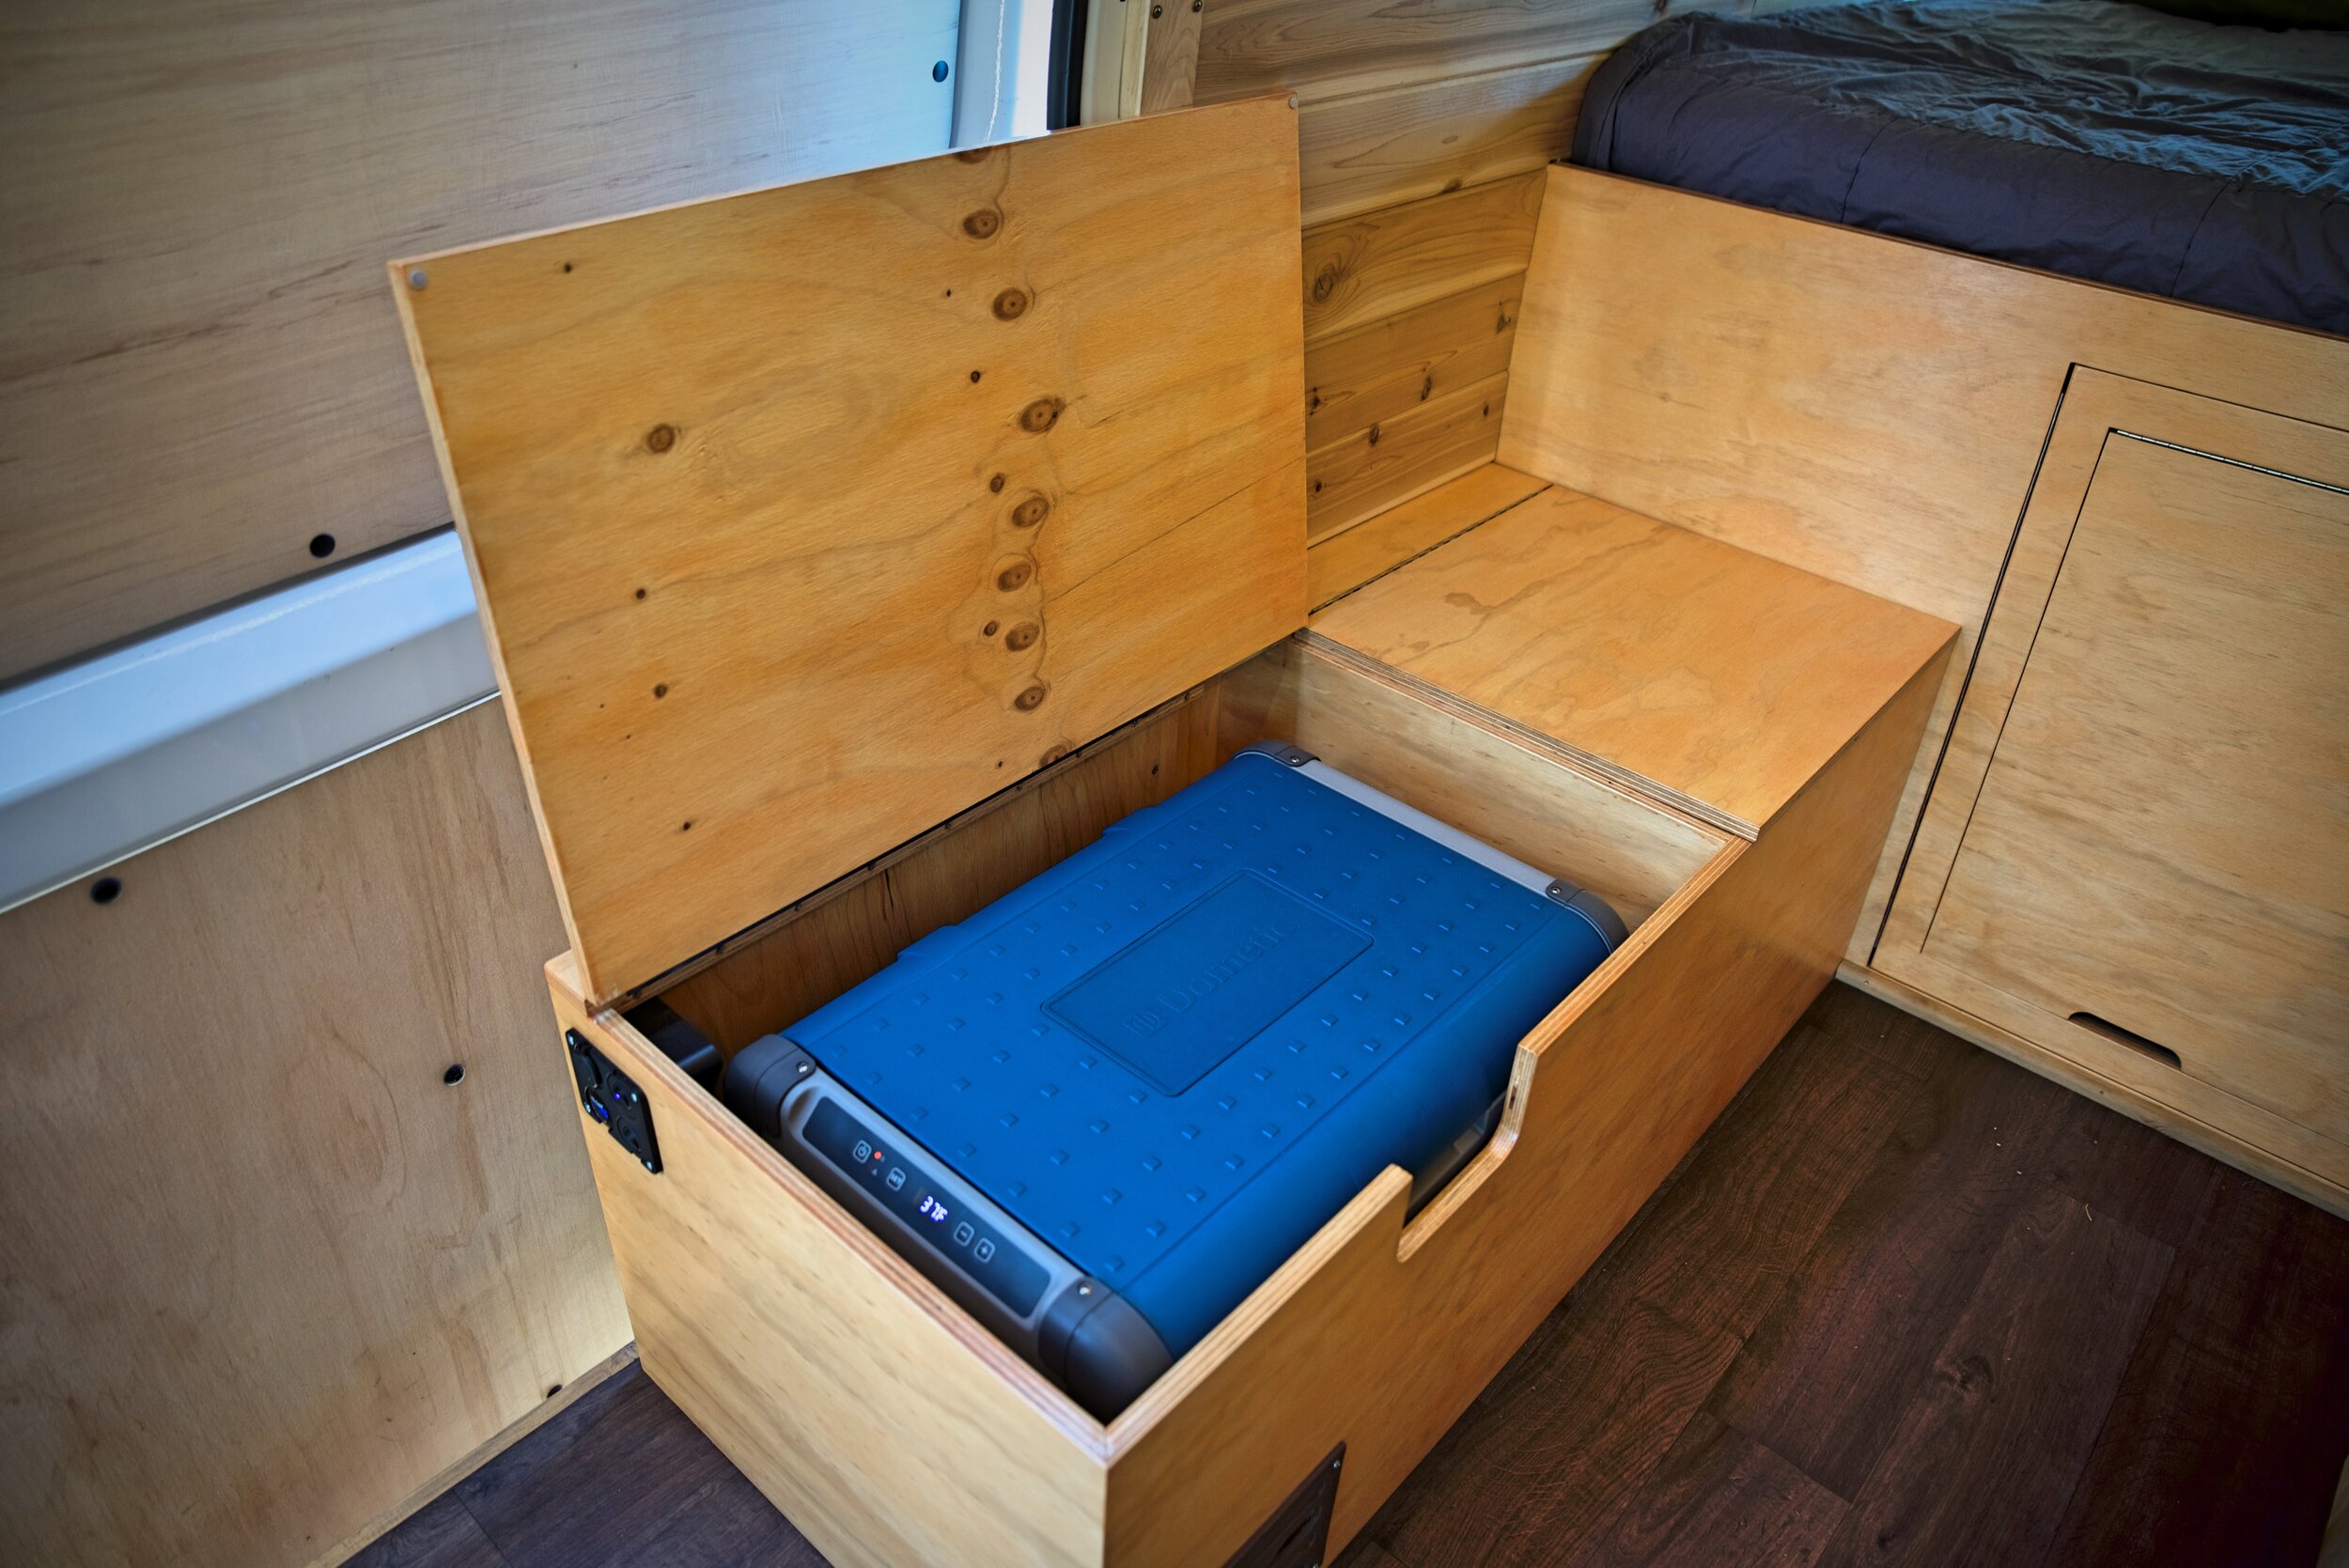
Even though Dometic fridges are expensive, for us it has ben worth it.

This fridge can hold a surprising amount and it’s super efficient too!
In the event of an outage with our solar system like we had a fuse blow, the fridge holds it’s temperature really well, as long as you don’t open it too much. It also has an internal regulator that will prevent it from overdrawing the battery in a situation such as this. It’s a redundancy that gives you peace of mind about the electrical system in your van.
Read more about the bench that stores our fridge.
Table
In between the bench and the cabinets, we have a fold up table in the van. This small table is just big enough for two to sit at, but it’s really more comfortable for one. We would have liked to make it a little longer, but ultimately there wasn’t a good way to build a longer table.

Having this little table in our van has added a super useful additional surface in our van. Truthfully, we mostly eat on the bed though.
The table is built into a large door on the front of our bed that allows us to access the storage space under our bed. Under the bed we have three stacking bins where we kept our pantry. This was a perfect solution so that we could have this area as part of our kitchen storage, yet still access the rest of what we have stored under the bed.

We built a large door into the front of the bed so that we could access the storage underneath. Theres a small table built into this door.
The table is made of finished 1/2-inch plywood, reinforced with a ¾-inch piece. The hinges on both the door and the table are piano hinges cut to the correct length. The door and table stays closed with a sash lock and a slide lock.
Find out more about the design of our fold-up camper van table.
The table is probably one of our more creative designs that we incorporated into the van.
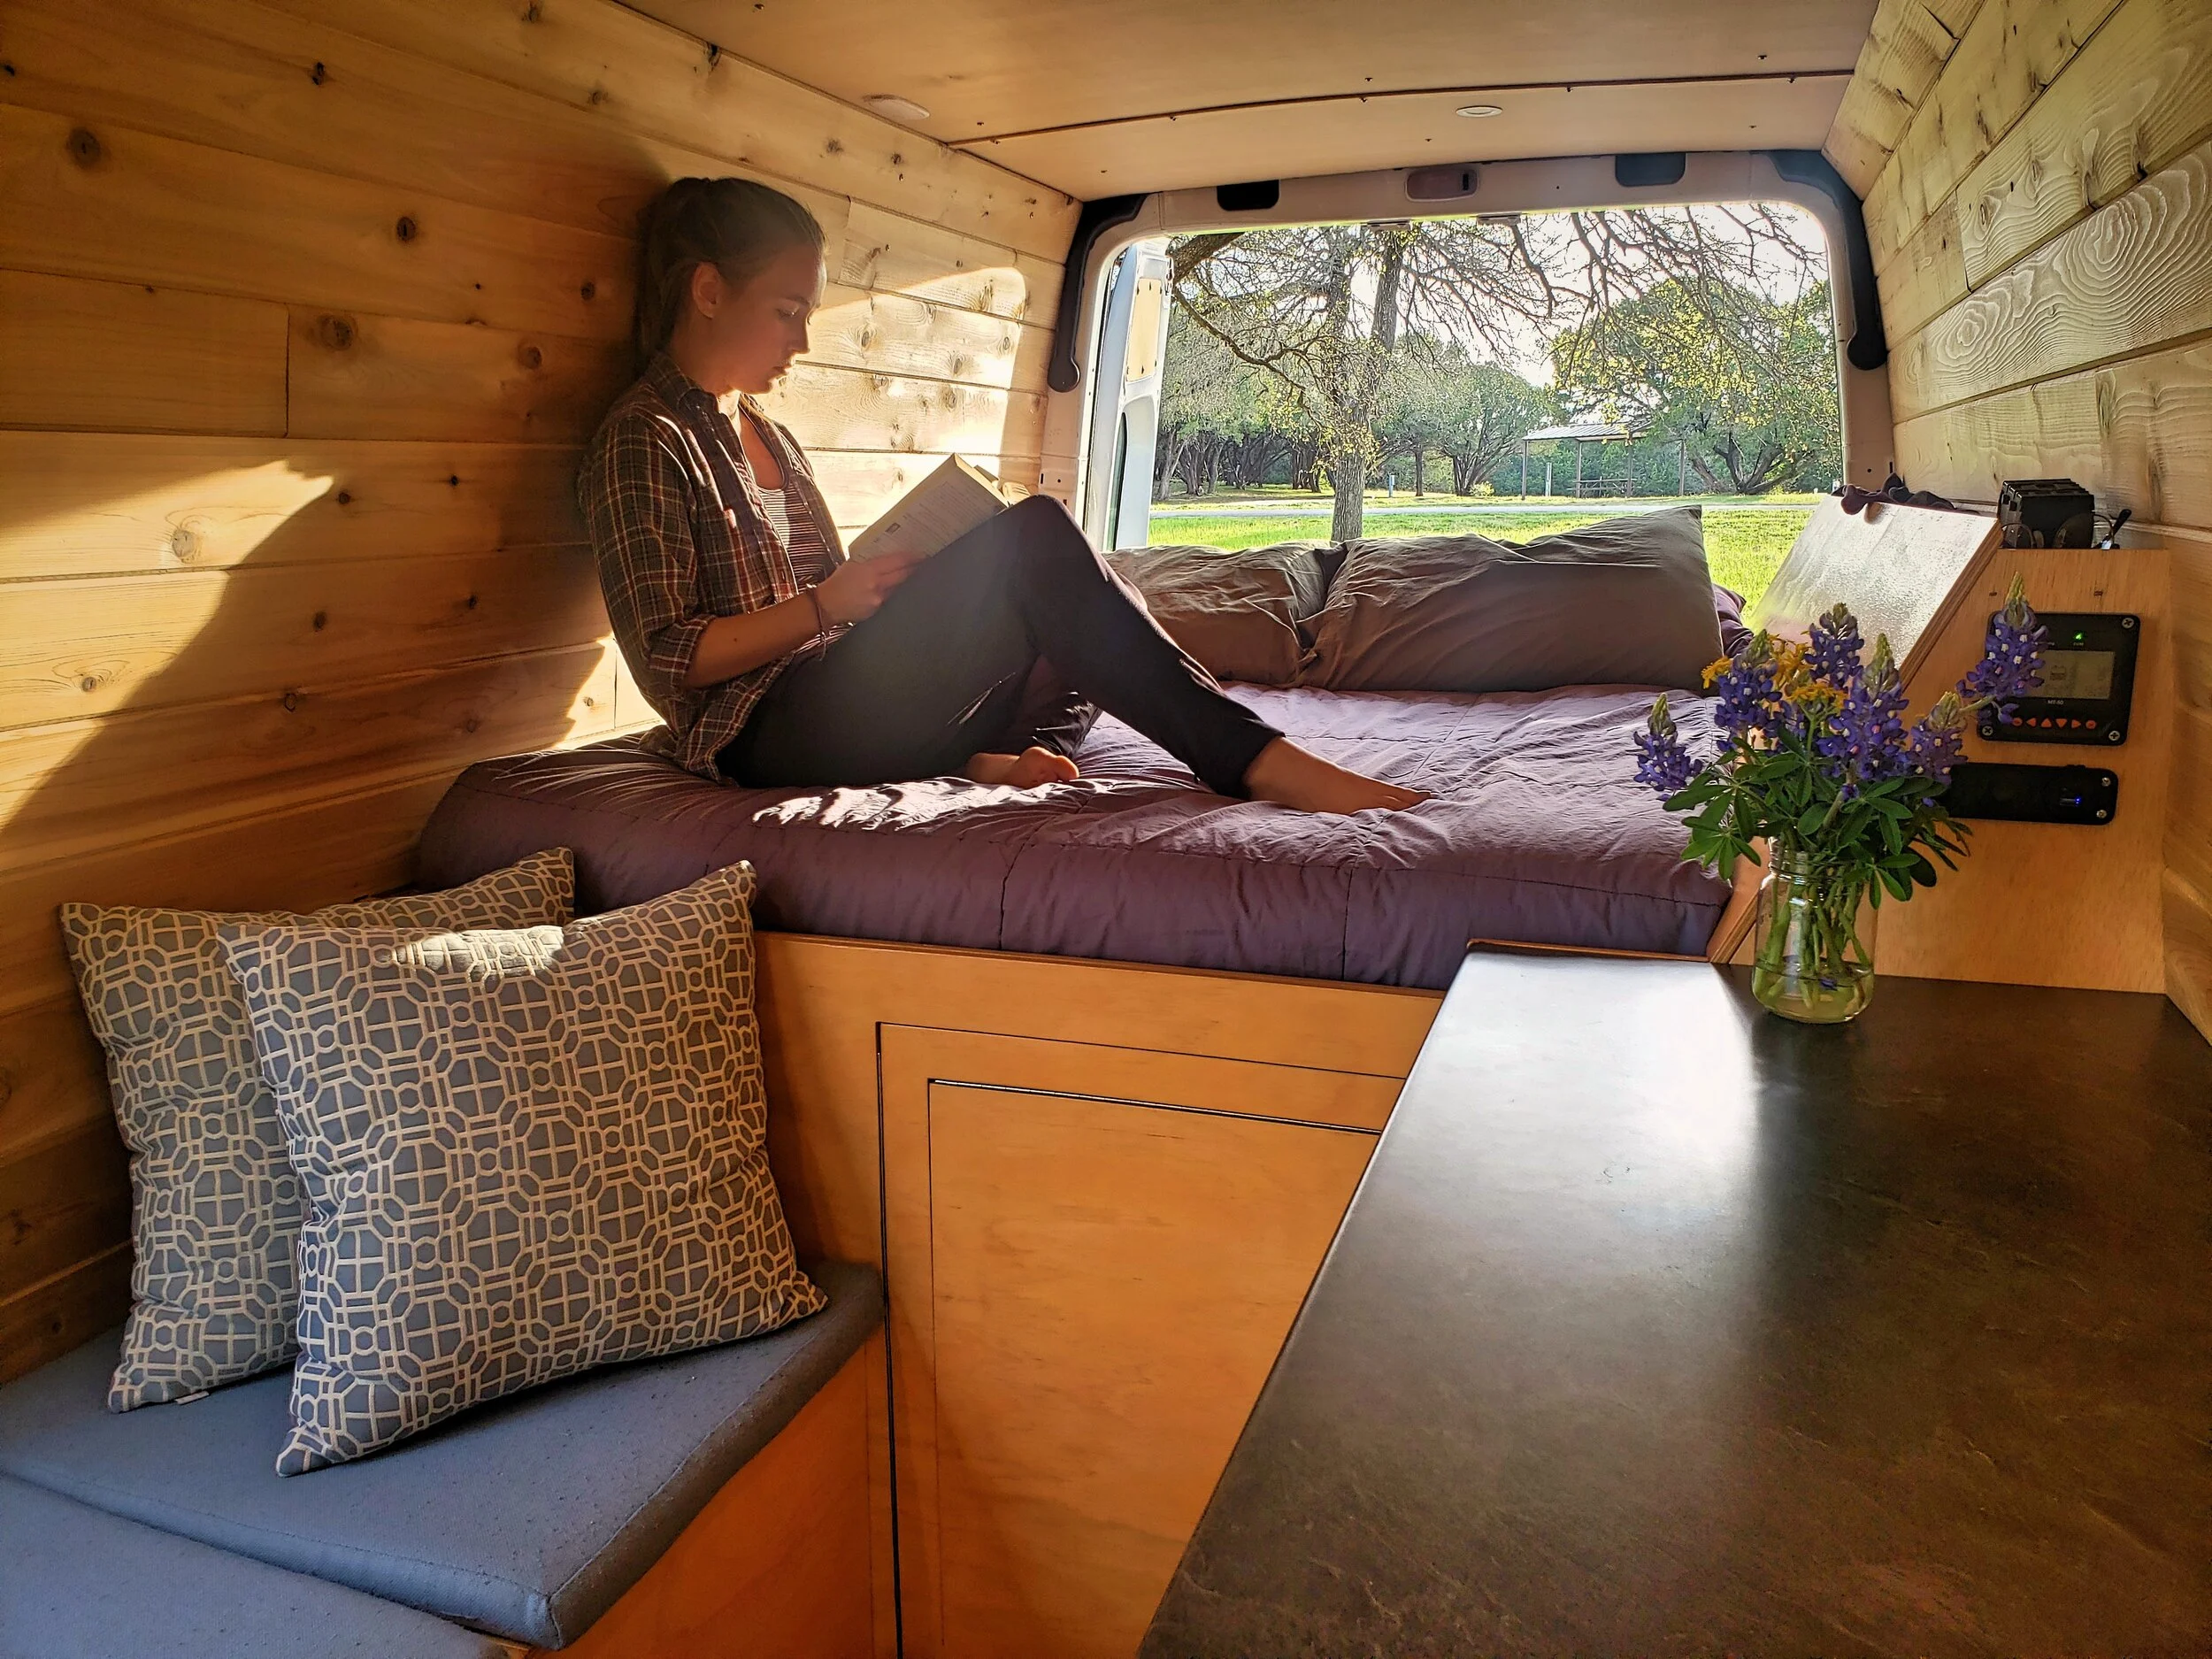
Bed Platform
Our bed platform makes up the back section of our van with the mattress oriented lengthwise in our van. Living in our van full-time, it was important to have a normal, full-size mattress in our van, and we are glad we prioritized this space for sleeping and didn’t put in an undersized foam mattress. Temperature control is also a major issue in a confined space like a van, and an inner spring mattress tends to be cooler for sleeping than a foam mattress.
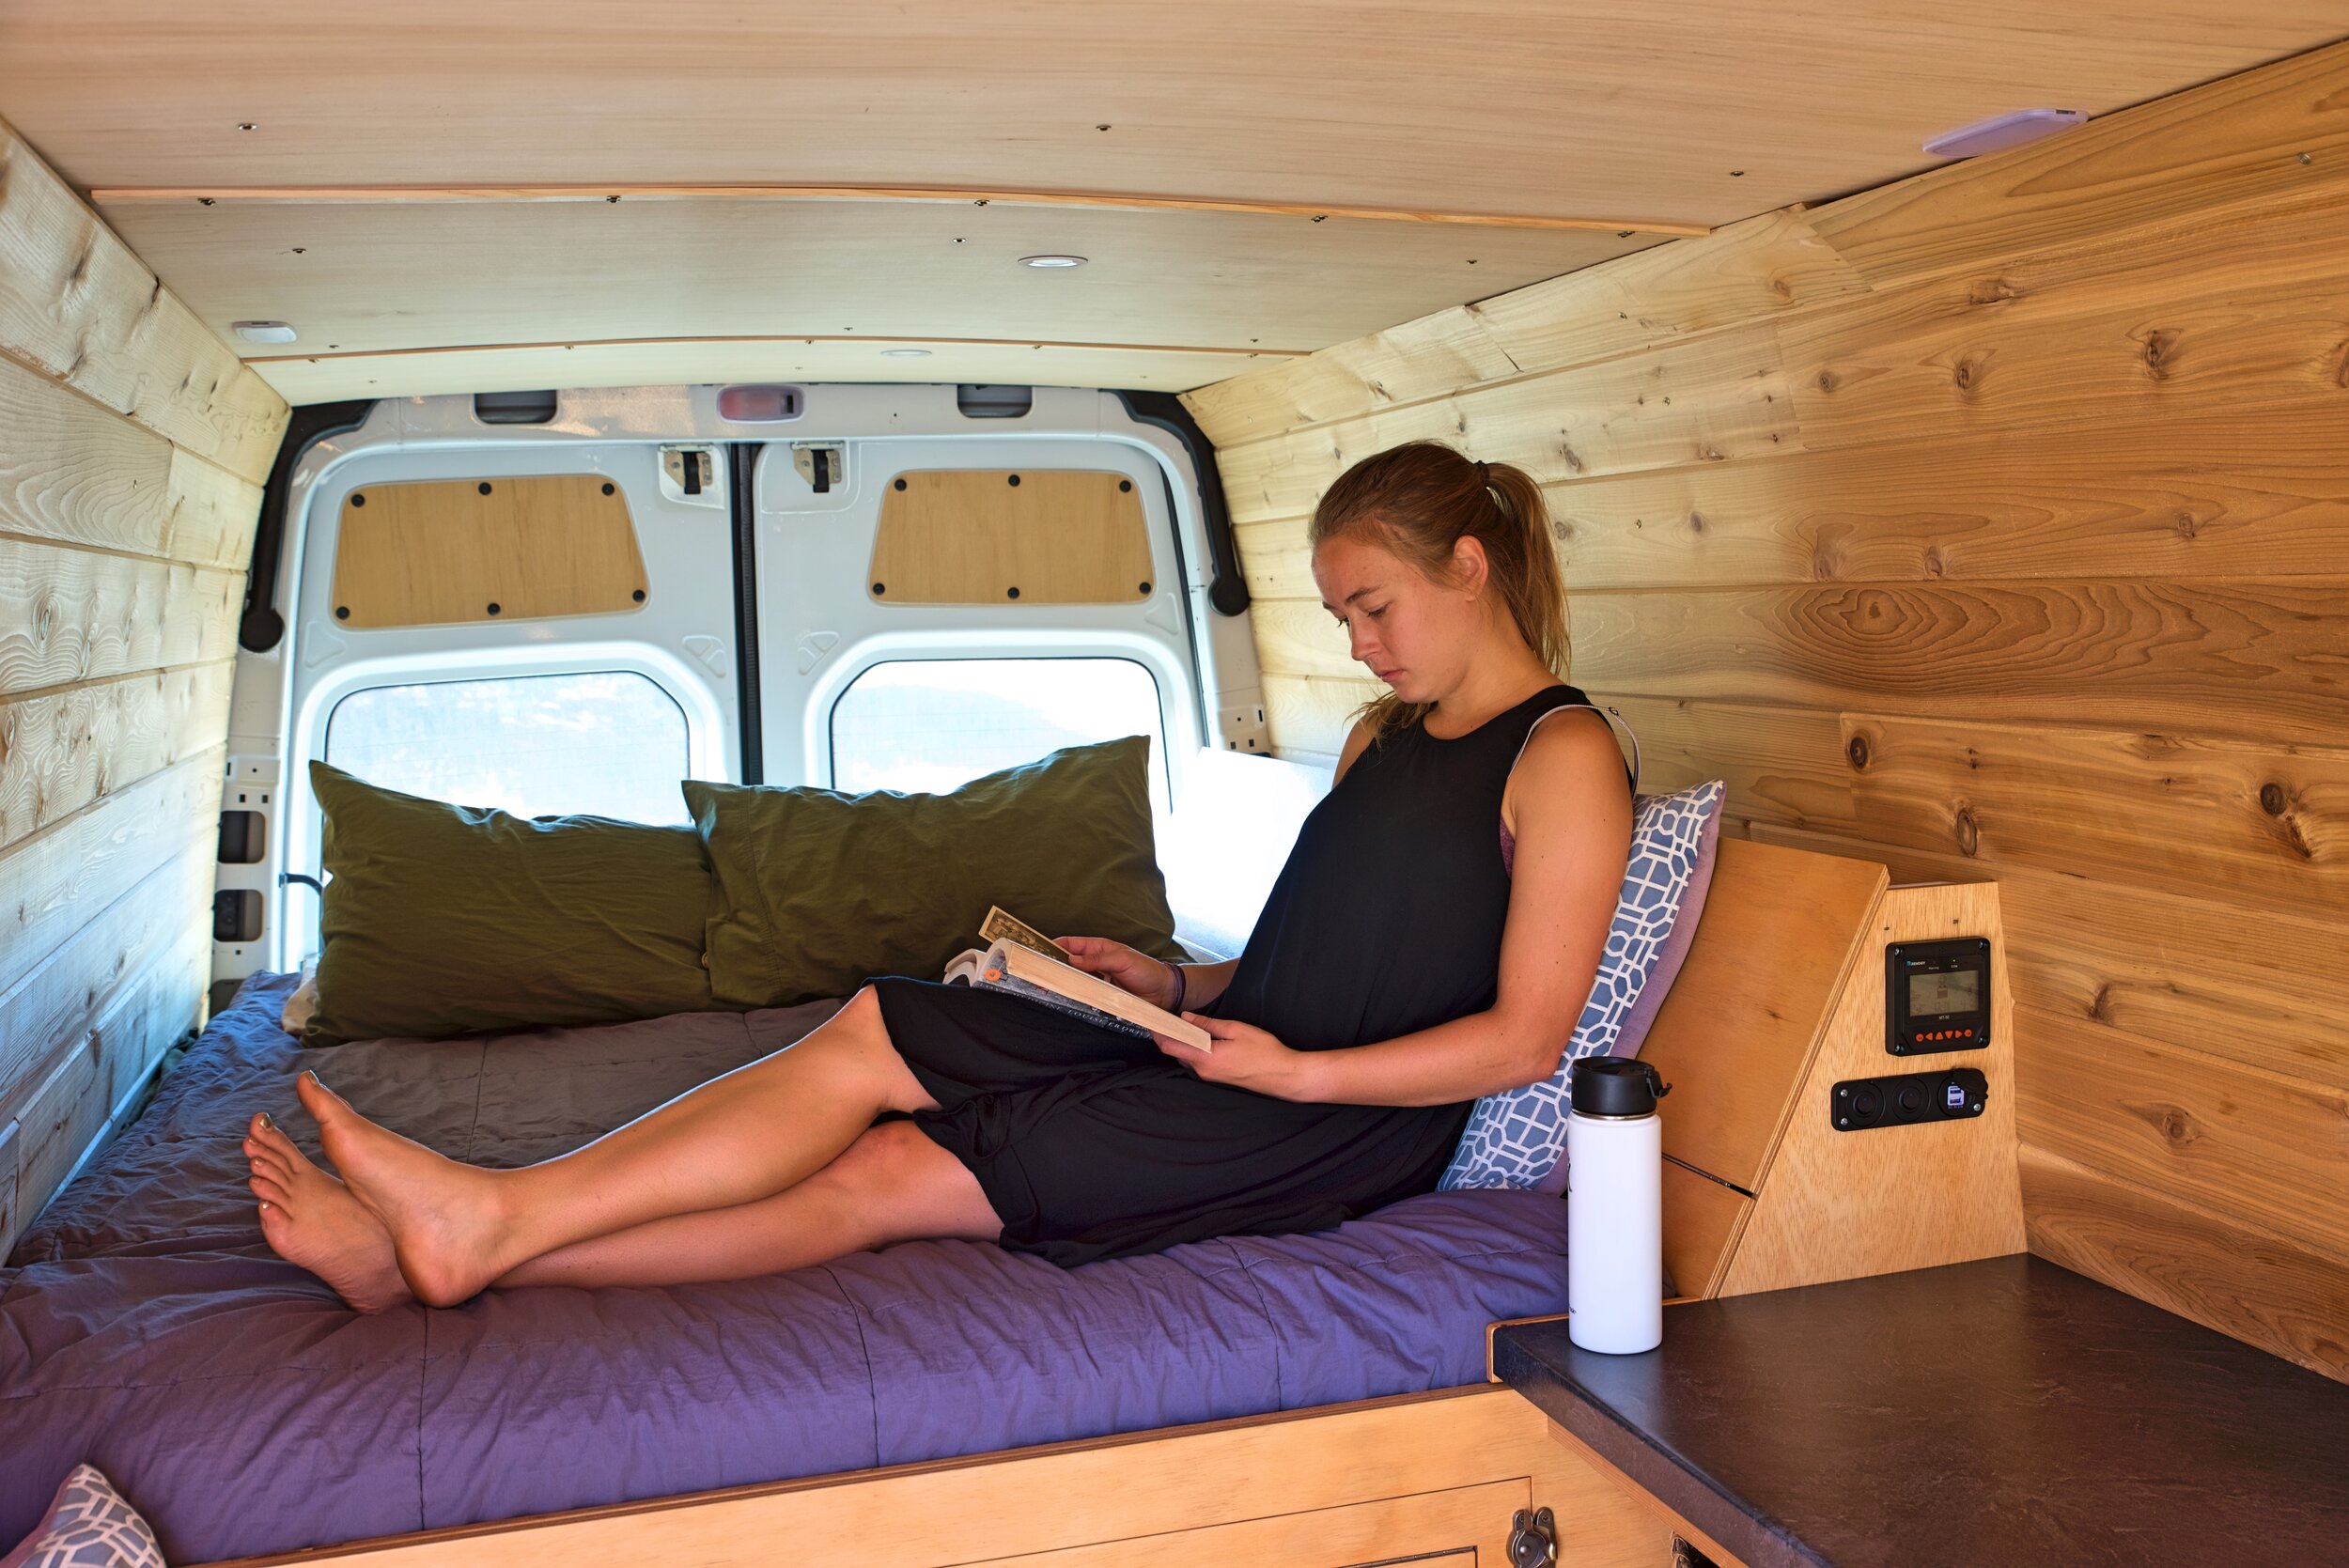
We built angled cabinets into our van which allows our bed to double as a bed and a couch.
The bench makes it much easier to get up on the bed.

There’s nothing better than having a new view outside your bedroom every night.
Like our cabinets, the bed platform is made out of finished plywood. The cabinet is angled so that we can put a pillow against it and use it like a couch for relaxing. The cabinet doors are weighted with an extra ¾” piece of plywood on the back. Even though we don’t have any latches on these doors, we rarely have any issues with them opening while driving. The doors can be folded down to rest on the bed so that we can use them like a table.

We designed these cabinets so that we fold down the door we can use it like a small table.
The platform of the bed itself is made of ¾” inch plywood, which is reinforced with steel angle iron. We made the bed platform in two removable pieces so that we could take them out and use our van to move something large like a kayak or to easily access our gel battery.

Our full size bed bed gives us a comfortable place to sleep after a long day of adventures.
The bed platform is supported on each side with no legs in the middle. 2x4 legs support the cabinet and a rail is used to support the platform on that side. On the other side, the bed platform is supported by aluminum angle that is bolted directly into the wall of the van. This structure has proved to be very secure, and we are glad we put a little extra design time in to have a more open storage area under the bed.
Check out more about our camper van’s bed platform.
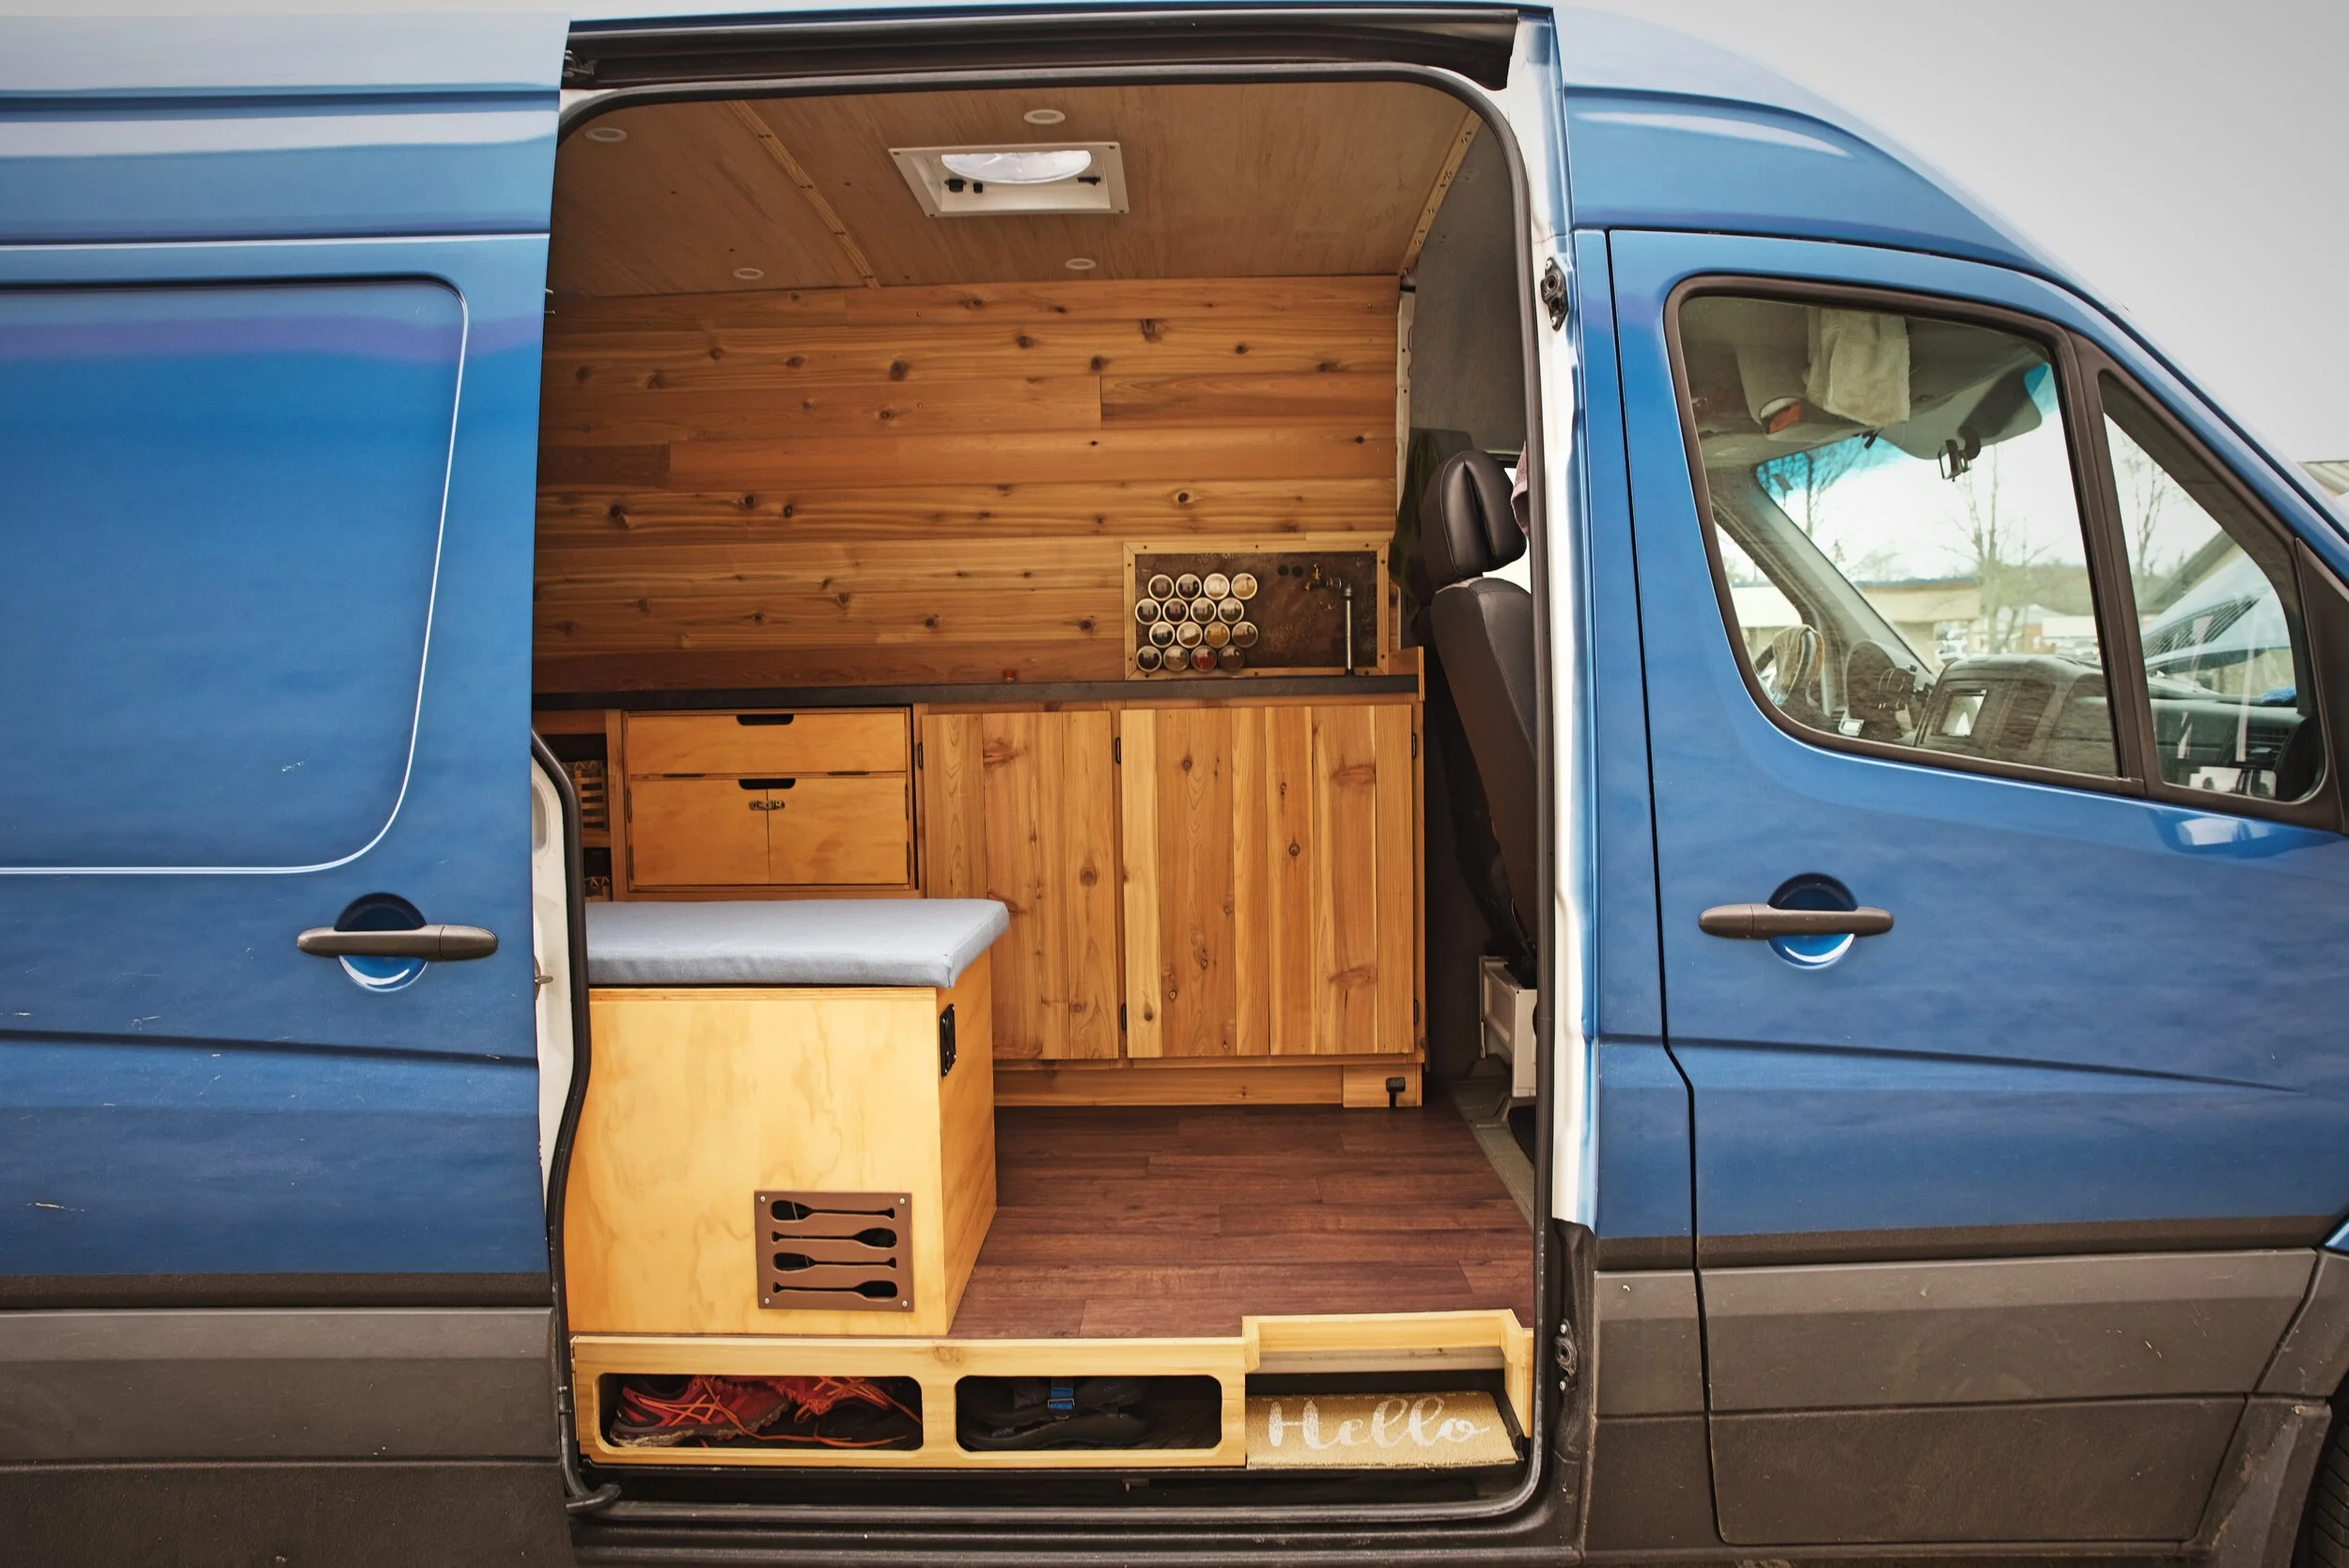
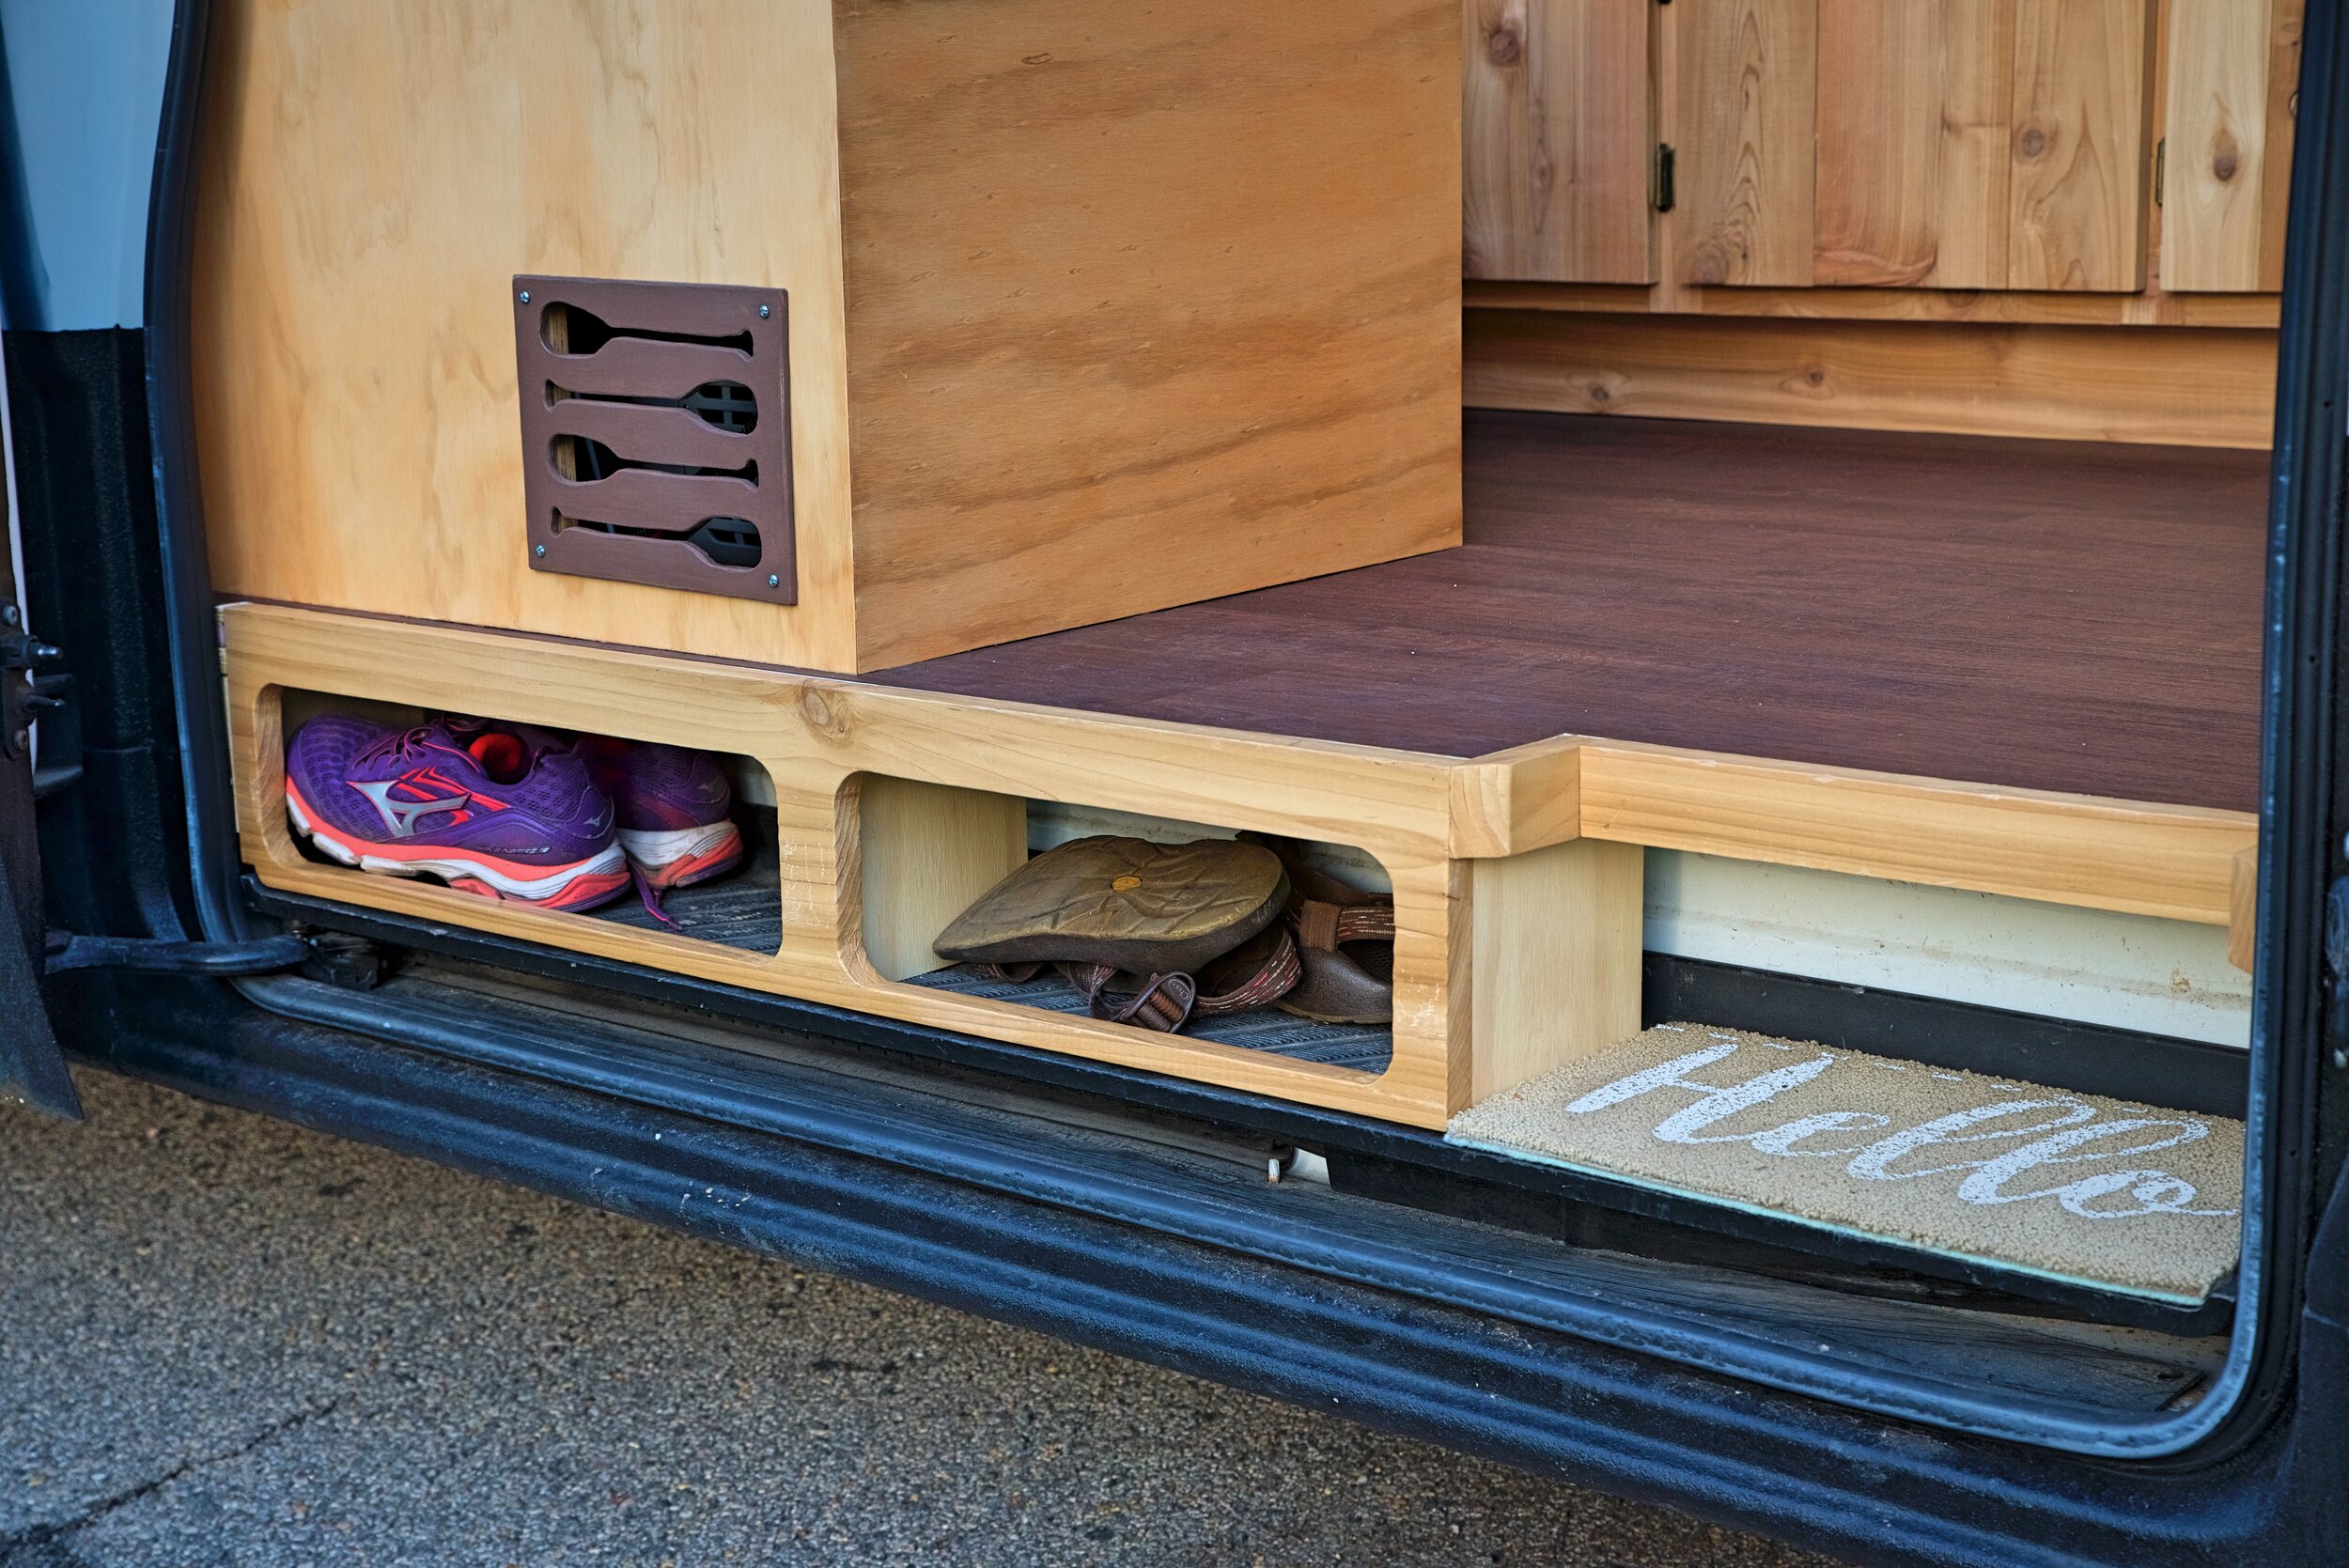
Bike and Gear Storage
The storage area in our van we sometimes call the “garage” because it stores so much random stuff. This area is primarily unfinished, we used the van’s original flooring and plastic paneling in this area. We did add a light under our bed so that we could see under the bed even if it was dark out.
Behind the big door in the front of our bed platform, we keep our stacking bins with food. These can easily be taken out to access our other gear.

We keep a full pantry of ingredients just inside this door under our bed platform. We can easily remove these stacking crates to access the other stuff under the bed.
To the left of the “pantry” we have our charge controller and our large gel battery that weighs as much as I do.
Underneath our bed cabinets we keep our camping year such as sleeping bags, backpacking quilts, tents, and backpacks. Ian also keeps his large toolbox with all his tools for fixing the van in this area. Often we will also have extra oil for the van in this area since we purchase it whenever we see it go on sale.
Under our bed we also store our road bikes. A lot van builds you see on the internet will have a rolling drawer to pull bikes out from under the bed. But the great thing about bikes is that they already have wheels! Rather than spending on those pricy heavy-duty drawer slides, we use the rear wheel of our bikes as the roller. We remove the front wheel and use a fork clamp to keep the bikes in place.

We have a super simple solution to storing our bikes in our camper van
We wheel our bikes under the bed and then clamp the front fork to these.
Walls, Ceiling, Floor, and Finishes
The walls in our van are made of beautiful tongue and groove cedar paneling. We opted not to finish the cedar paneling. We loved being able to smell the cedar scent whenever we heated up water for tea or coffee. However, the cedar is very soft and can scratch easily and the paneling in our kitchen shows any little splatter of oil. We might have finished our cedar walls if we were to do it again.

Using cedar paneling in your van will make your van smell amazing when it rains or when you heat up water.
Our ceilings are made of a simple 1/8-inch piece of lauan plywood with flexible flat pine trim covering the seams. We also did not finish the ceiling and that has been fine. We strategically placed our 12-v lights based on the various uses of our van.
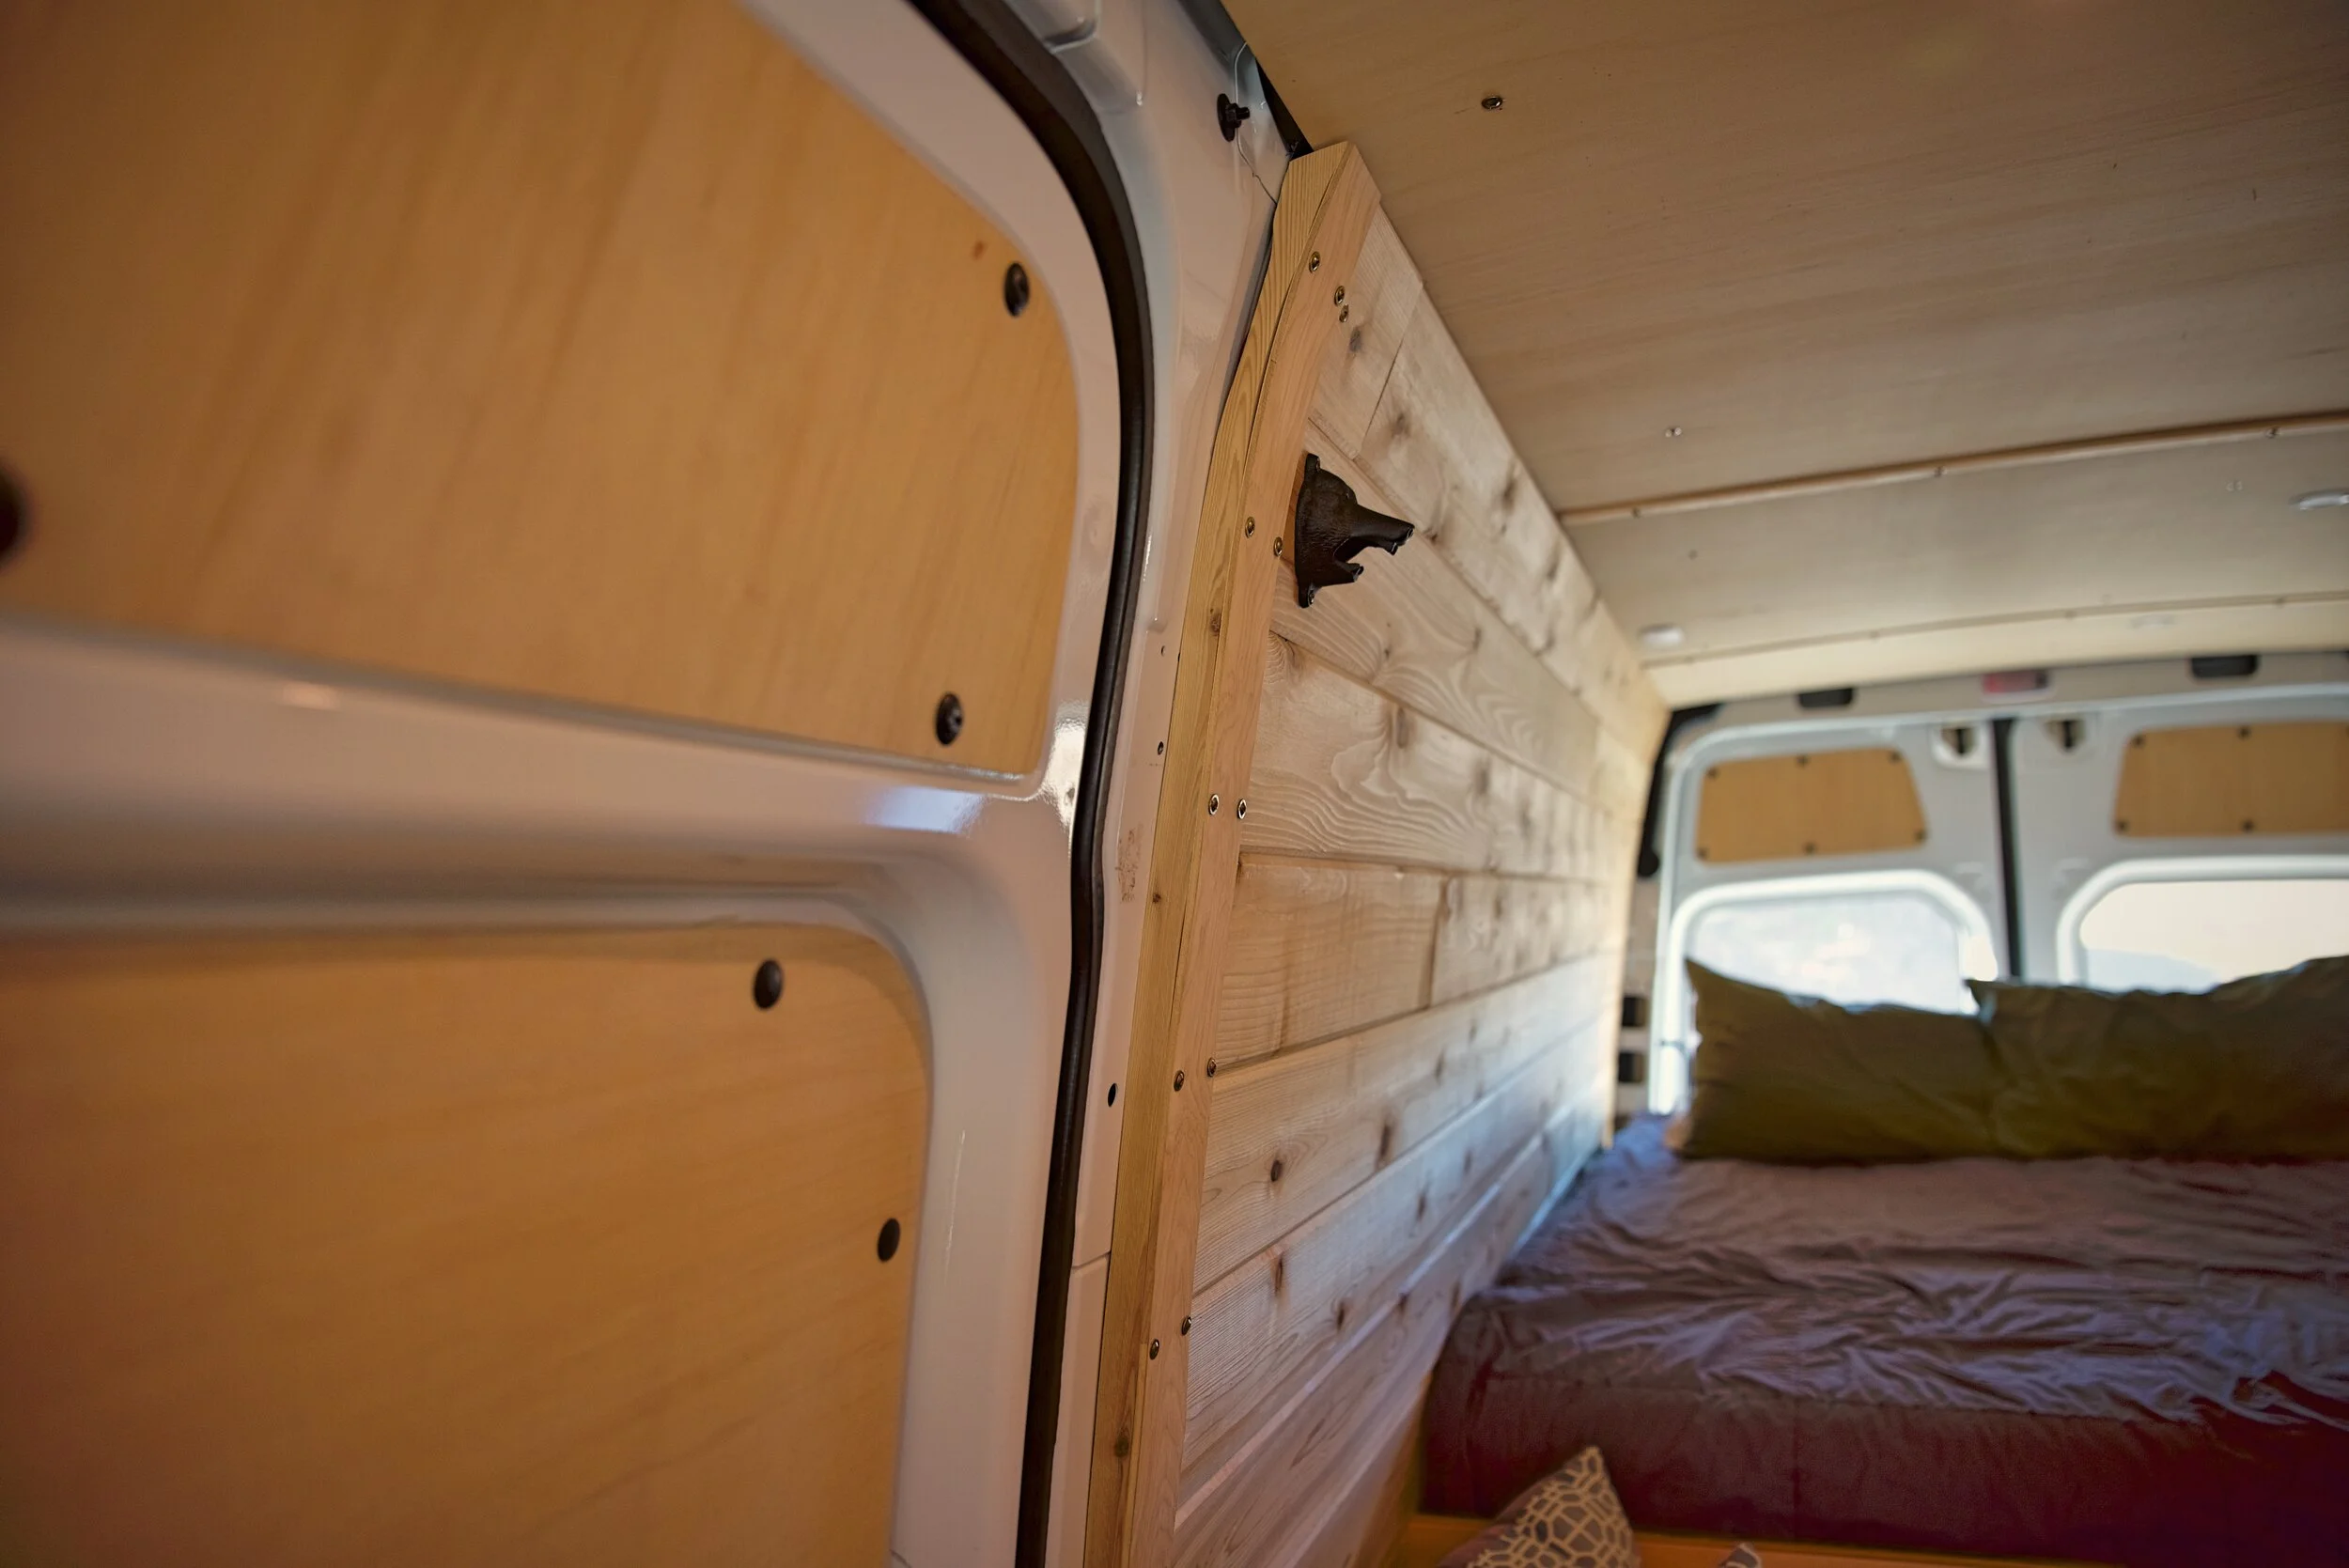
We added wood paneling to the doors of our van in place of the plastic panels.
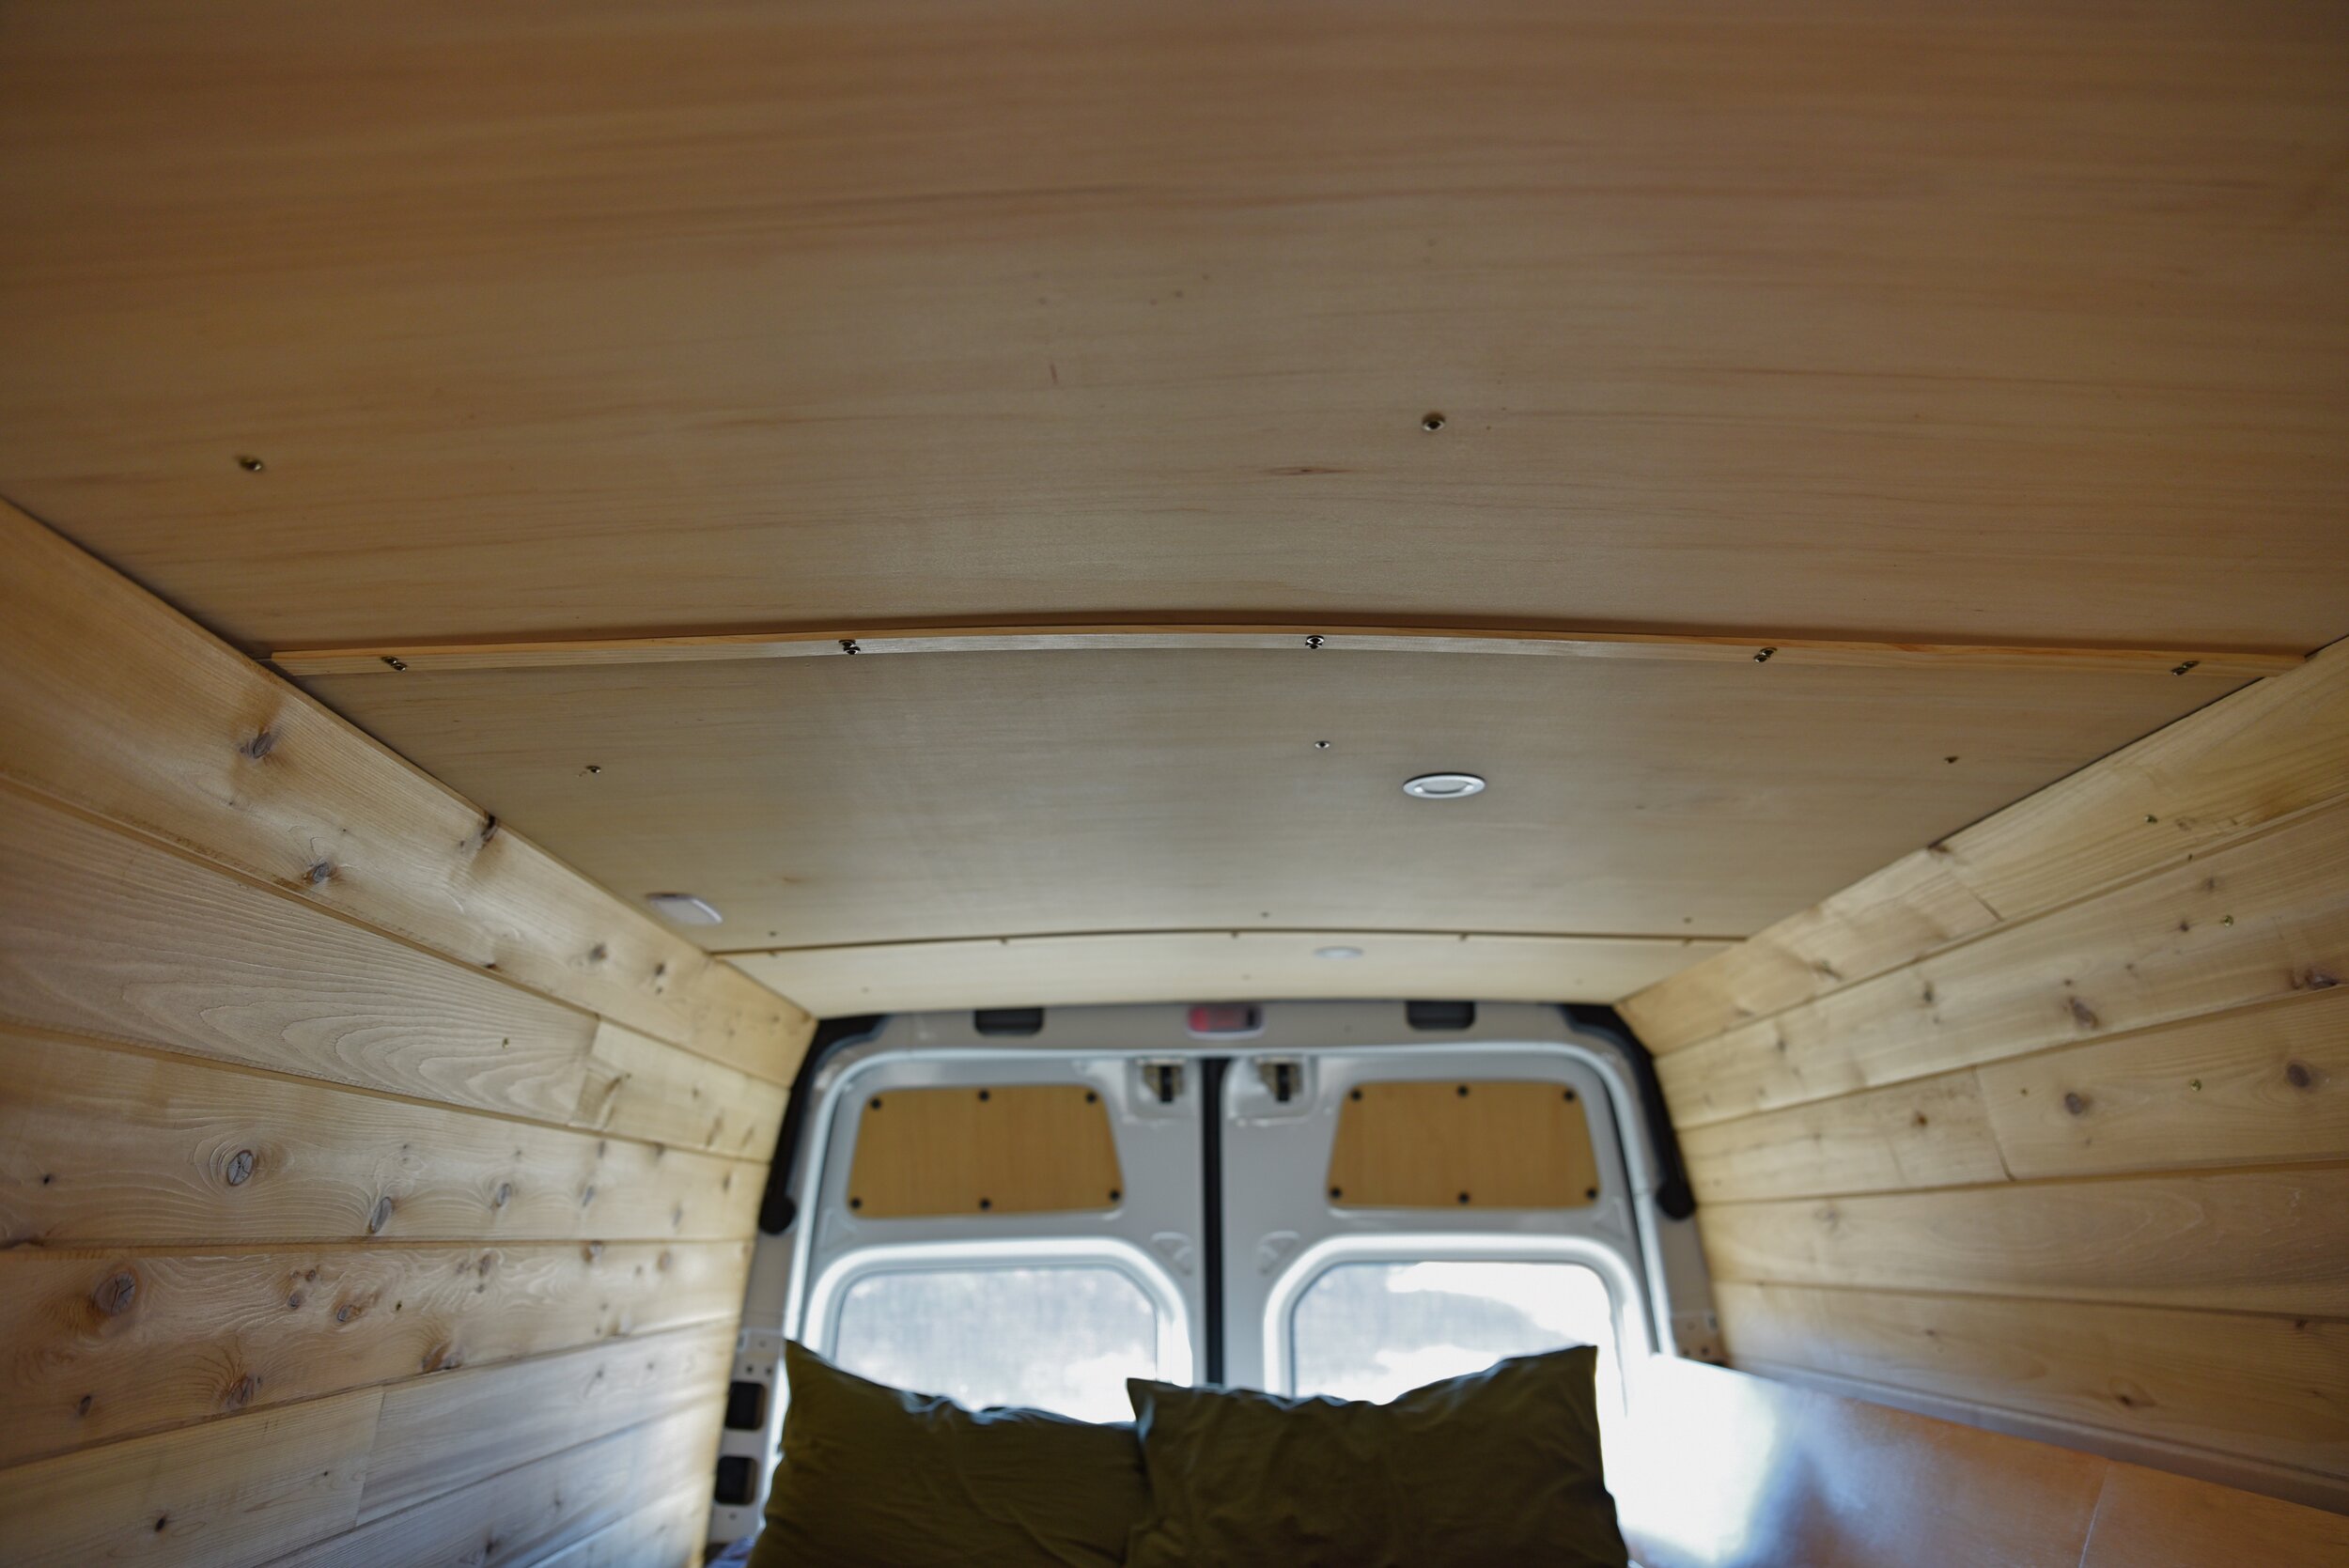
We used a simple 1/4” plywood on the ceiling of our van.
All of the plywood in our van was finished with water-based polyurethane. This finish is highly durable and it had done a good job of protecting the plywood in our van build from water, dirt, and oil. We’ve got details about why we think this is the right finish for the interior of the van here.
The floor of our van is a durable wood pattern vinyl flooring. The flooring is one of the things we would have changed in our van build if we could do it again, at least when it comes to the way we installed it. We installed it in the cold, and then when we drove into the warmer southern climate, the floor immediately bubbled up! We would have heated up the van and installed it if we were to do it over.
We extended the floor of our van into the step area to give ourselves a little extra space.
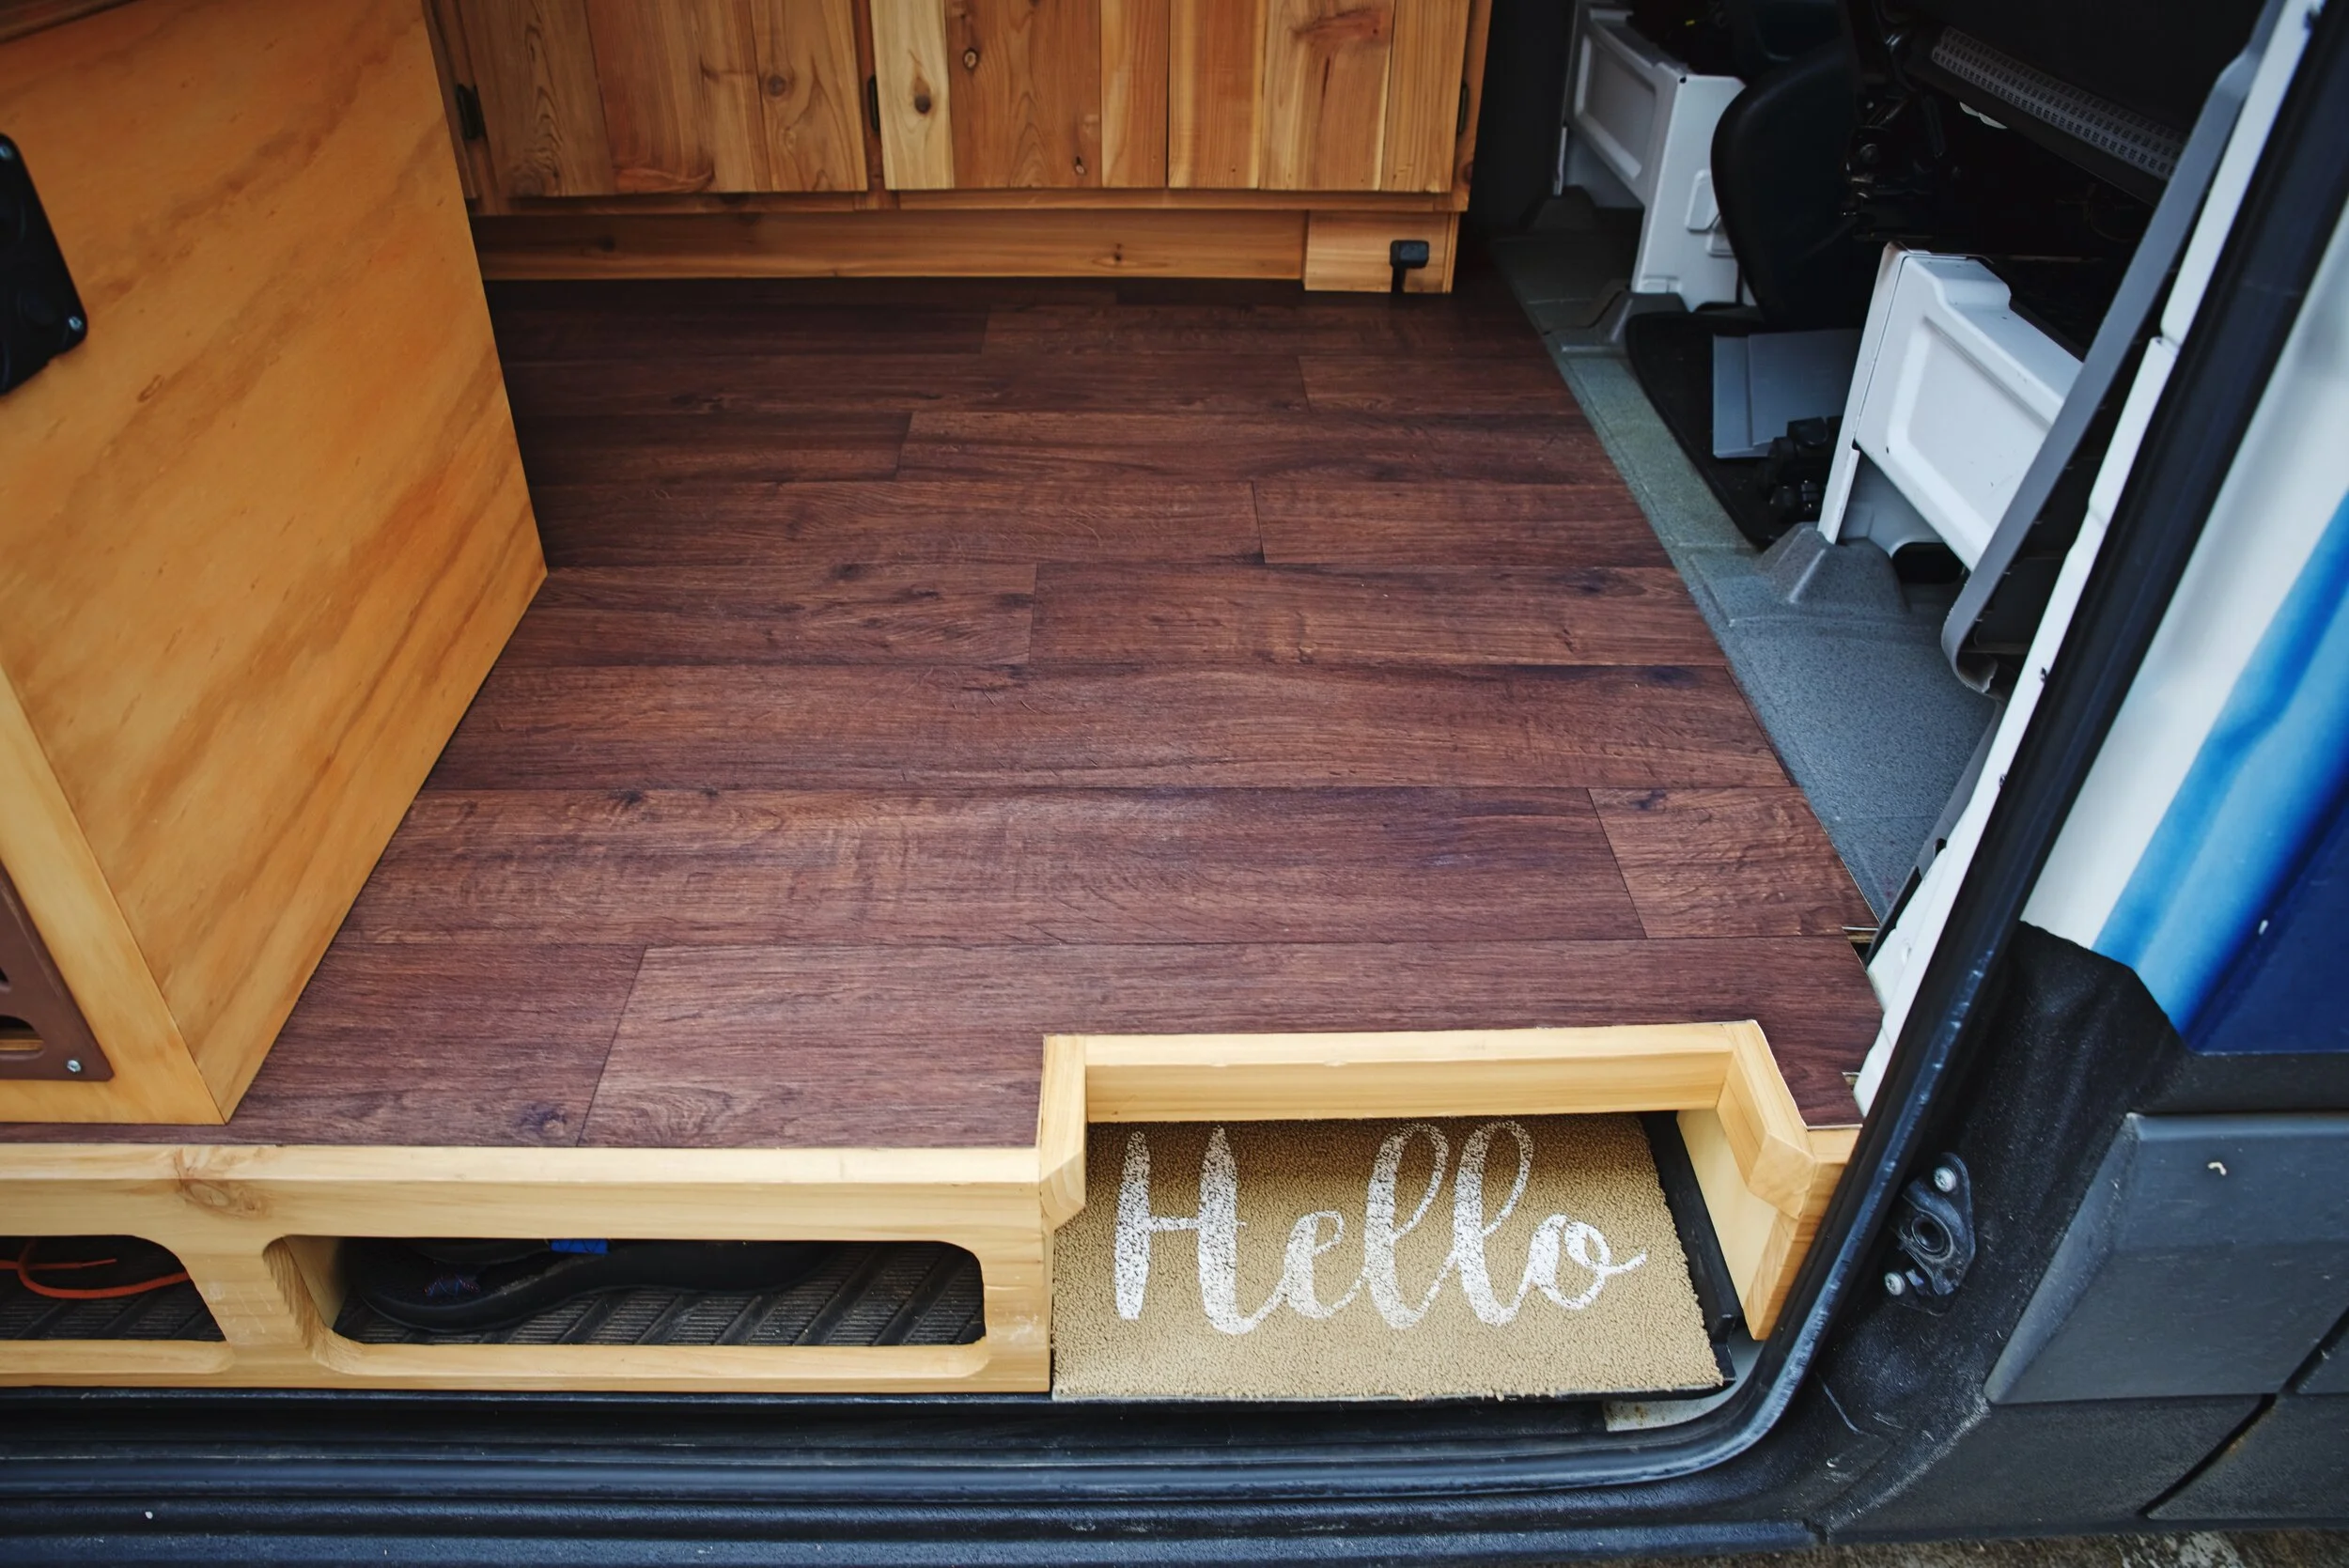
Our vinyl flooring is super durable, but it did bubble up a little bit after we installed it.
One of the best things we did for our van conversion, was by a new carpet for the front cab area of our Sprinter. This made the transition between the front and the back area of the van seem more seamless and overall made the van more cozy and comfortable.
Building a Van that Feels Like Home
To sum it up, we have been very happy with our simple and uncluttered camper van. We carefully chose which of our needs were most important and cut out the rest. For example, we opted not to include a shower in our van. When your building out a van it’s important to think about how you will use your van and prioritize those uses so that your van will feel like home.
If you have questions about our van build or would like input for your own, reach out to us here!
Let us know if you have questions about our van build or yours! We love to hear from other vanlifers!