
Constructing a DIY Propane Locker for Our Van
Including a full size propane tank in our has saved us over $500 in fuel costs. Our DIY propane locker built into the cabinetry of our van allows us to store and use the propane more safely for cooking.
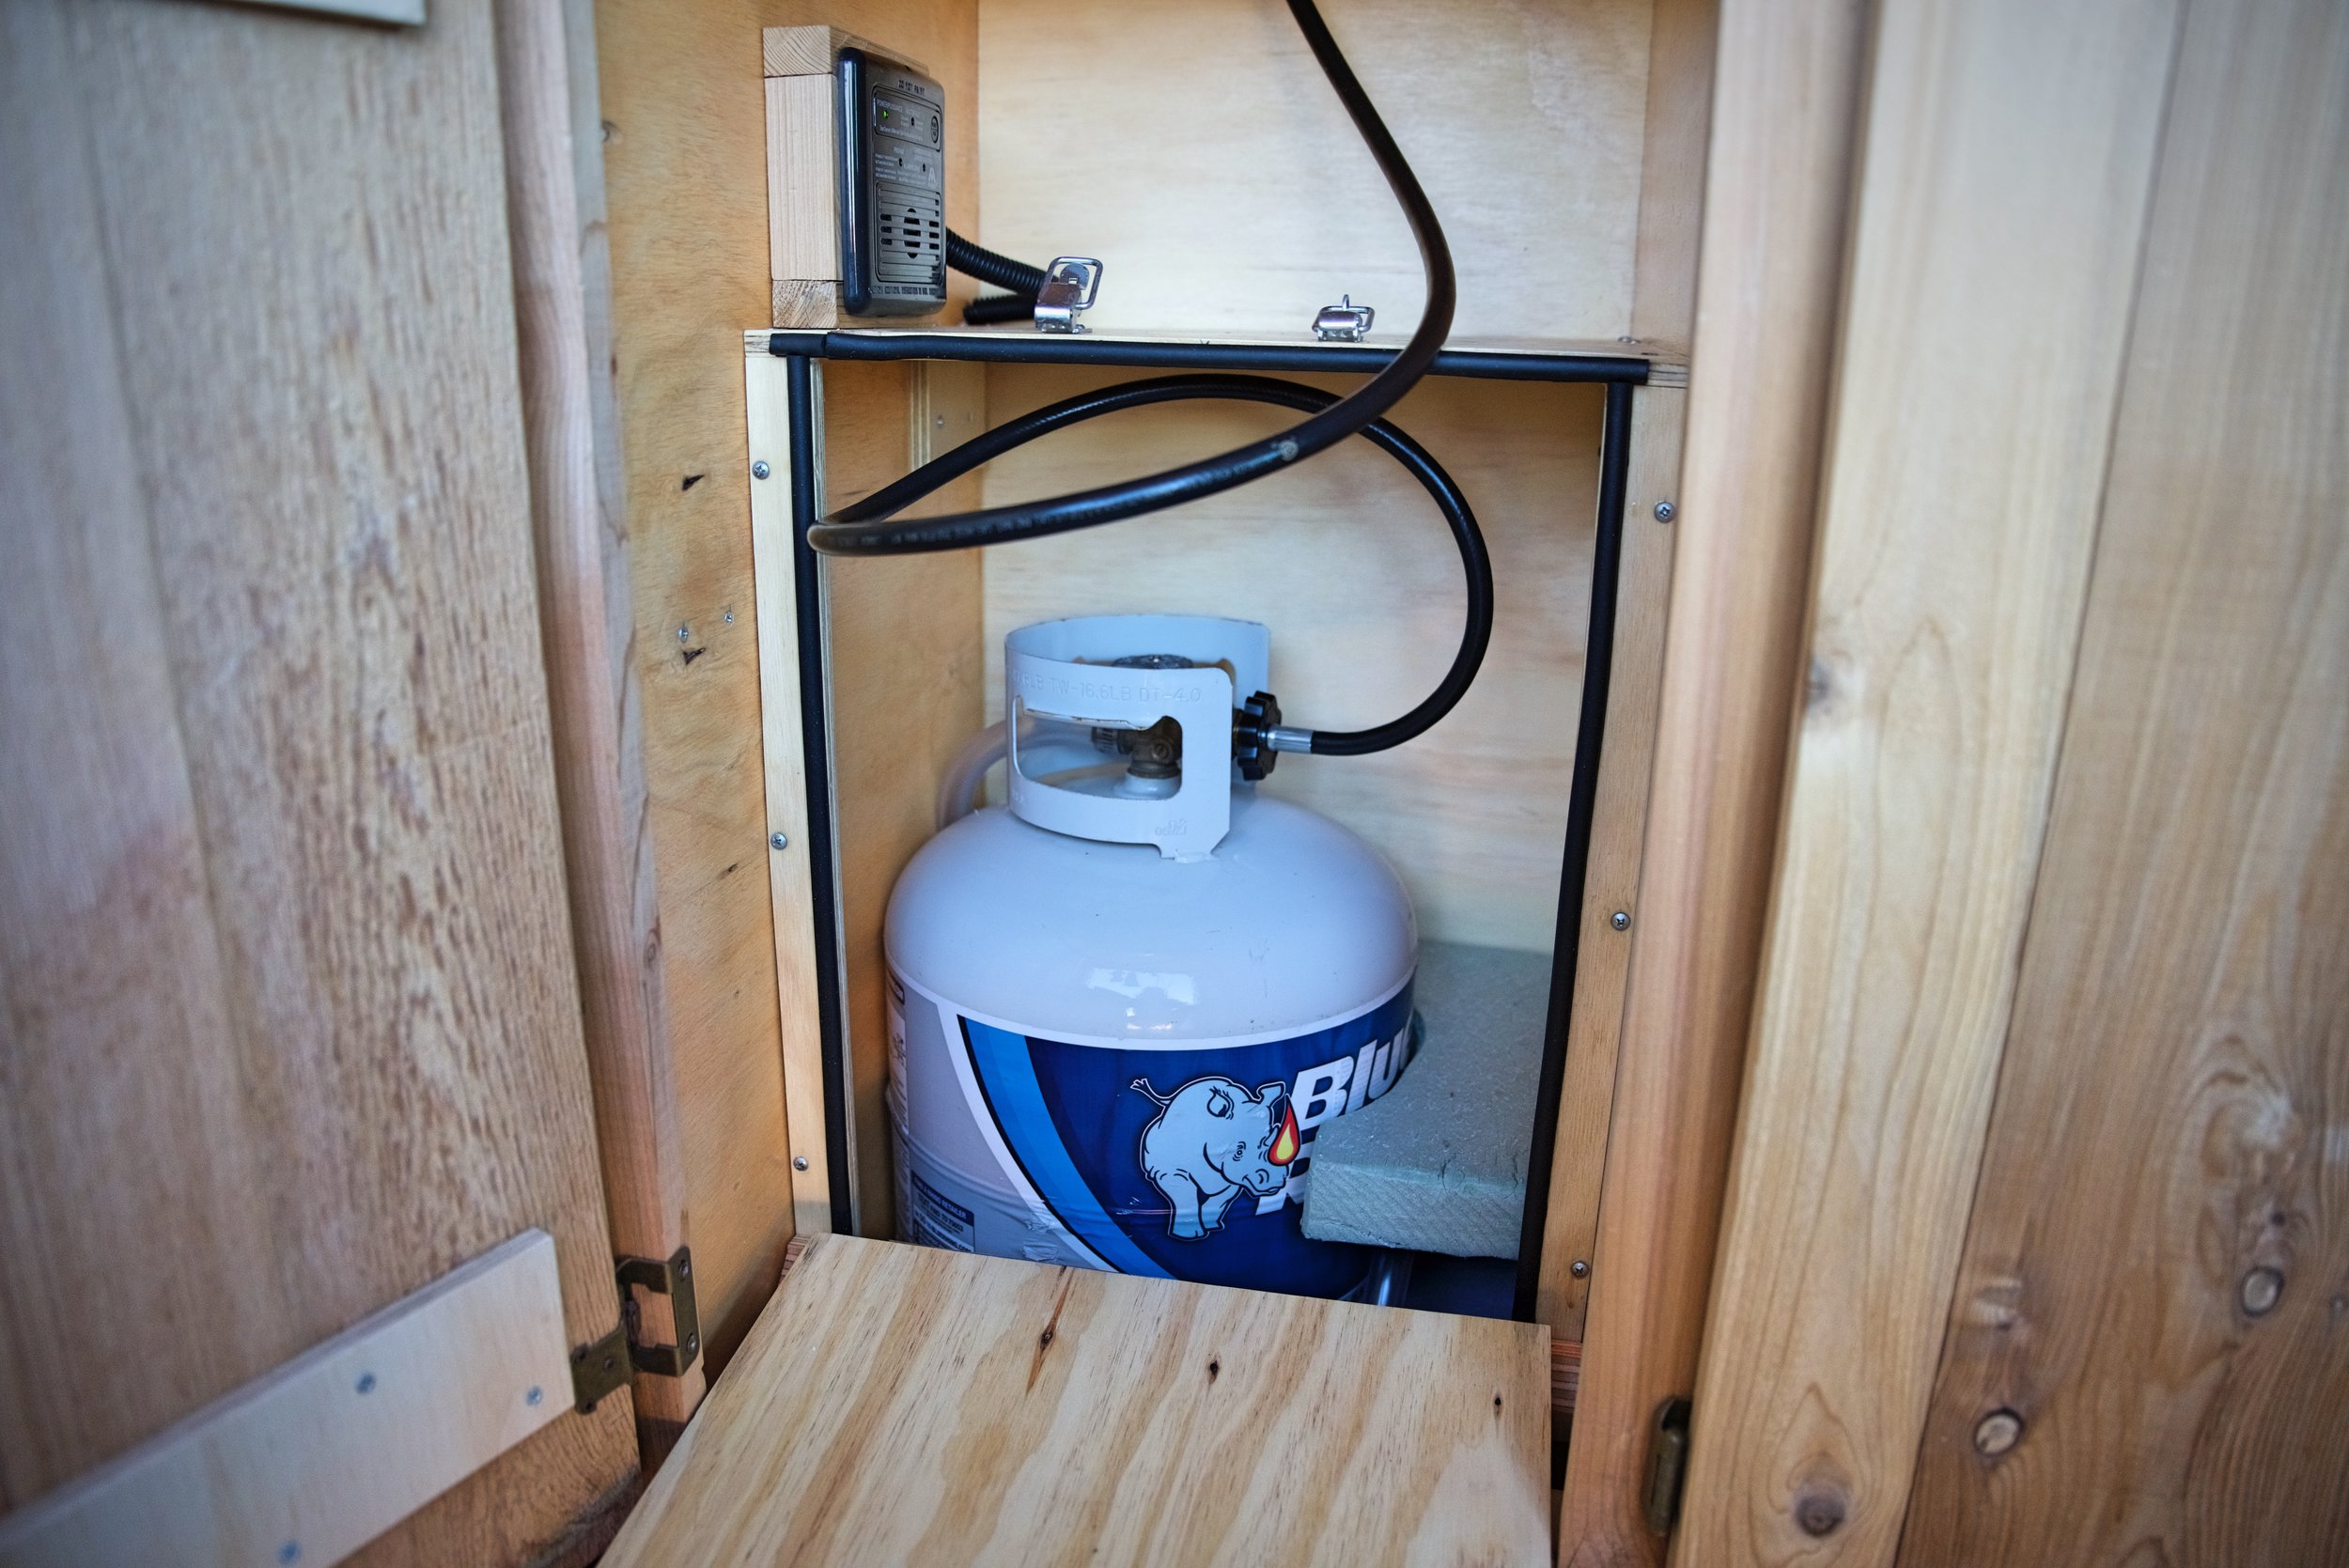
Our kitchen in our DIY Sprinter conversion is one of the most important spaces in our build. To cook in our van, we have a Camp Chef Everest stove that burns propane. The stove runs off a full-size, 20-lb propane tank like you would connect to a barbecue grill. We store our propane tank in an airtight gas locker that we built from plywood, silicone caulk, and weather stripping. The safety pressure-relief valve of the propane tank is vented out the bottom of the van’s floor. We can access the tank through a hinged door on the front, and a high-pressure hose and adapter runs out of the locker and through our counter top so we can attach the tank to our stove.
Tools
Materials
1/2" sanded plywood (about 1 sheet)
Scrap piece of 2”-thick rigid foam insulation
Deciding on a system for how we would cook in our van was one of the things we researched the most prior to our build. We knew that if we didn’t have the ability to cook meals comfortably in our van we would end up eating out all the time. That’s unhealthy and expensive. We researched the possibility of cooking with an induction cook top powered through our solar panels and battery (read about our solar power system). While this would have been our safest option, we would have also had to spend a lot more to build a higher powered solar system. We decided that a fuel-burning camp stove would work best for our van build.
We looked at camp stoves powered by different types of fuels, such as alcohol or white gas. We found that these types of stove aren’t really safer than propane, the fuels are more difficult to find, and the stoves of this variety offer less control than traditional LP-burning camp stoves. Propane powered camp stoves are common in many van builds, and ultimately that is what we decided to use as well. Our pick, the Camp Chef Everest, offers amazing temperature control, and it’s even possible to get a low simmer with this stove.

We use a two-burner camp stove in our van to cook our food. Unless it’s really hot, we usually cook two hot meals a day.
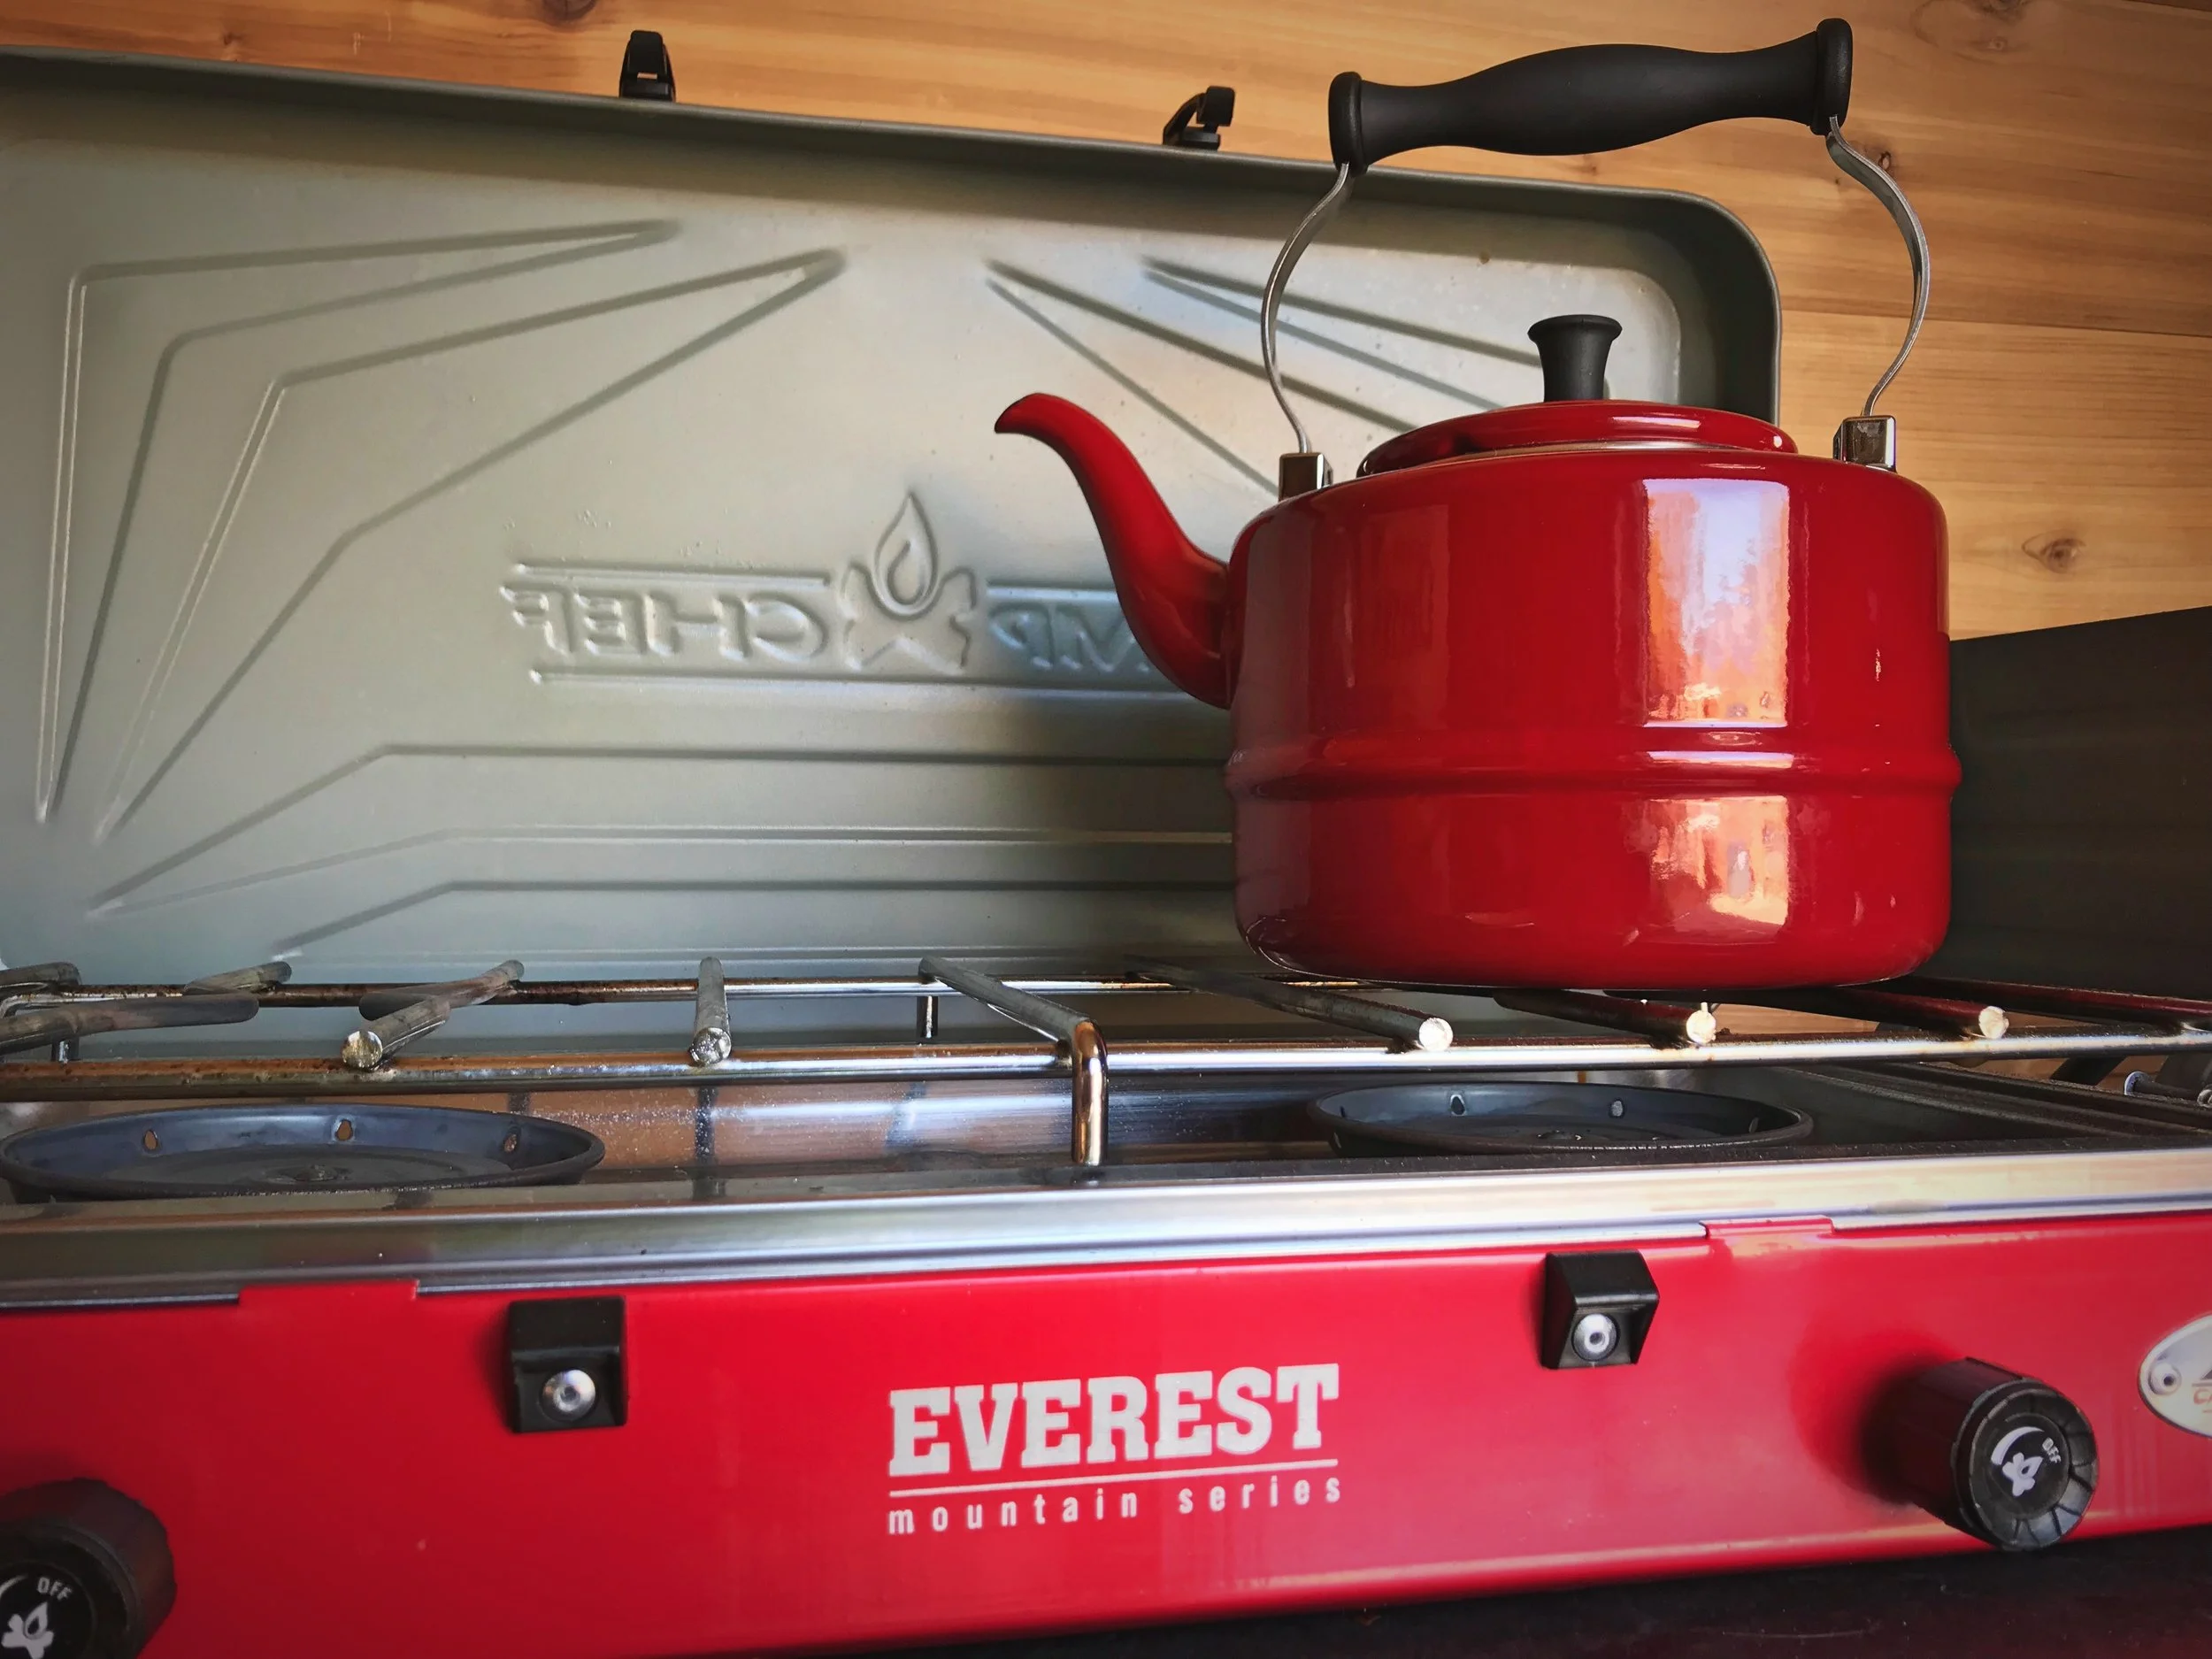
Our Camp Chef Everest stove has proved to be a great stove for vanlife. It gives you a lot of control over temperature.
Once we picked a propane-based cooking system, there were still many design considerations for the van build. A lot of vanlifers exclusively use 2-lb, green propane cylinders for all their cooking with their camp stove. These small cylinders are pretty expensive at about $3 a piece and they are hard to recycle. We sometimes use these small cylinders when we use our portable chuck box for cooking outdoors (check out our article on our chuck box here.) We usually can cook about three or four meals on one of the 2-lb cylinders. We cook two hot meals each day, which means that we’d be spending at the very least $50 per month on fuel for cooking. (Over the course of a year, we have only spent $60 total on fuel with our large propane tank.) We’d also be creating 17 cylinders of waste each month because these small cylinders are disposable and not designed to be refilled like the big ones. It would be kind of like eating off paper plates every night. Including a full-size 20-lb propane tank in our van build was a must.

Cooking outside with our chuck box is one of our favorite things to do on warm summer evenings. This spot in Meeker, Colorado was especially perfect. Cooking with our chuck box outdoors it the only time we use 2-lb propane cylinders.
Of course, driving around with a 20-lb propane tank in your vehicle is not exactly advisable. Living and cooking with a propane tank in your home is even less advisable. We knew we needed to find a safer way to store our propane in our camper van. We looked at mounting the tank on the back of the van like you see on many RVs. The mounts that would work with our van without having to drill a bunch of holes in our body panels are expensive, RV propane cylinders are sometimes stolen, and with a propane hose still running through the van, we could still be at risk of a leak. Plus a big propane tank on the outside of our van would really cut down on the stealthiness of our van. We discovered that boats that have a propane system keep the cylinders in air tight lockers. Purchasing one of these lockers is incredibly expensive though—around $500!
We decided that the best option for our van conversion would be to build our own DIY propane locker. The propane locker is built from plywood with weather stripping and silicone caulk to keep it airtight. The over-pressure valve on the propane tank, which allows gas to release if the tank becomes too hot, is vented through the floor. The locker is built into one of our kitchen cabinets. We have a hinged door on the front of the locker that allows us to take the tank in and out and turn in on or off. A hose runs through a gasket in the locker and then through a grommet in our countertop so that we can connect the stove to our tank.

These are the plans for the propane locker in the cabinetry of our van.

We always use the fan for ventilation when we are cooking. With ventilation, cooking with camp stove is not that much different than cooking with a gas stove and a hood in a typical household.
There is no doubt that our homemade propane locker is not as safe as a professional locker, but we’ve taken some precautions to make using the propane in the van safer. The concerns with using propane indoors are that cooking may lead to carbon monoxide poisoning or a leak would lead to build up of gas resulting in explosion. We installed a 12-volt CO and propane detector so that we would be alerted to any leaks in the system. In almost a year of full time travel, we’ve never had the alarm go off once. Whenever we cook, we make sure our fan is running so that we can ventilate our space (for more on our roof fan, read “Installing the Fan”). As much as possible, we cook with the door open. Our propane tank is always turned off when we are not cooking. In reality, many houses have propane or natural gas stoves and ovens. With proper ventilation, taking care to ensure that the flame never goes out, and vigilance, it’s possible to use a camp stove safely indoors.
A note about propane safety: This article simply explains how we manage our propane system in our van. Just because we haven’t blown our van up yet, doesn’t mean this system is safe. Even with all the precautions we take while cooking, we understand we are taking a risk by having a tank of highly flammable gas in our van. In fact we would advise that you spend the extra money if you can to buy a professional locker or even better to go the electric route for cooking.
Building and Sealing the Locker

Ian works on the outside case for the cabinet that would eventually contain the propane locker.
Our cabinet are simple plywood cases with a solid wood face frame. This L-shaped case holds the propane locker and the other wall is shared with the cabinet that holds our water system.
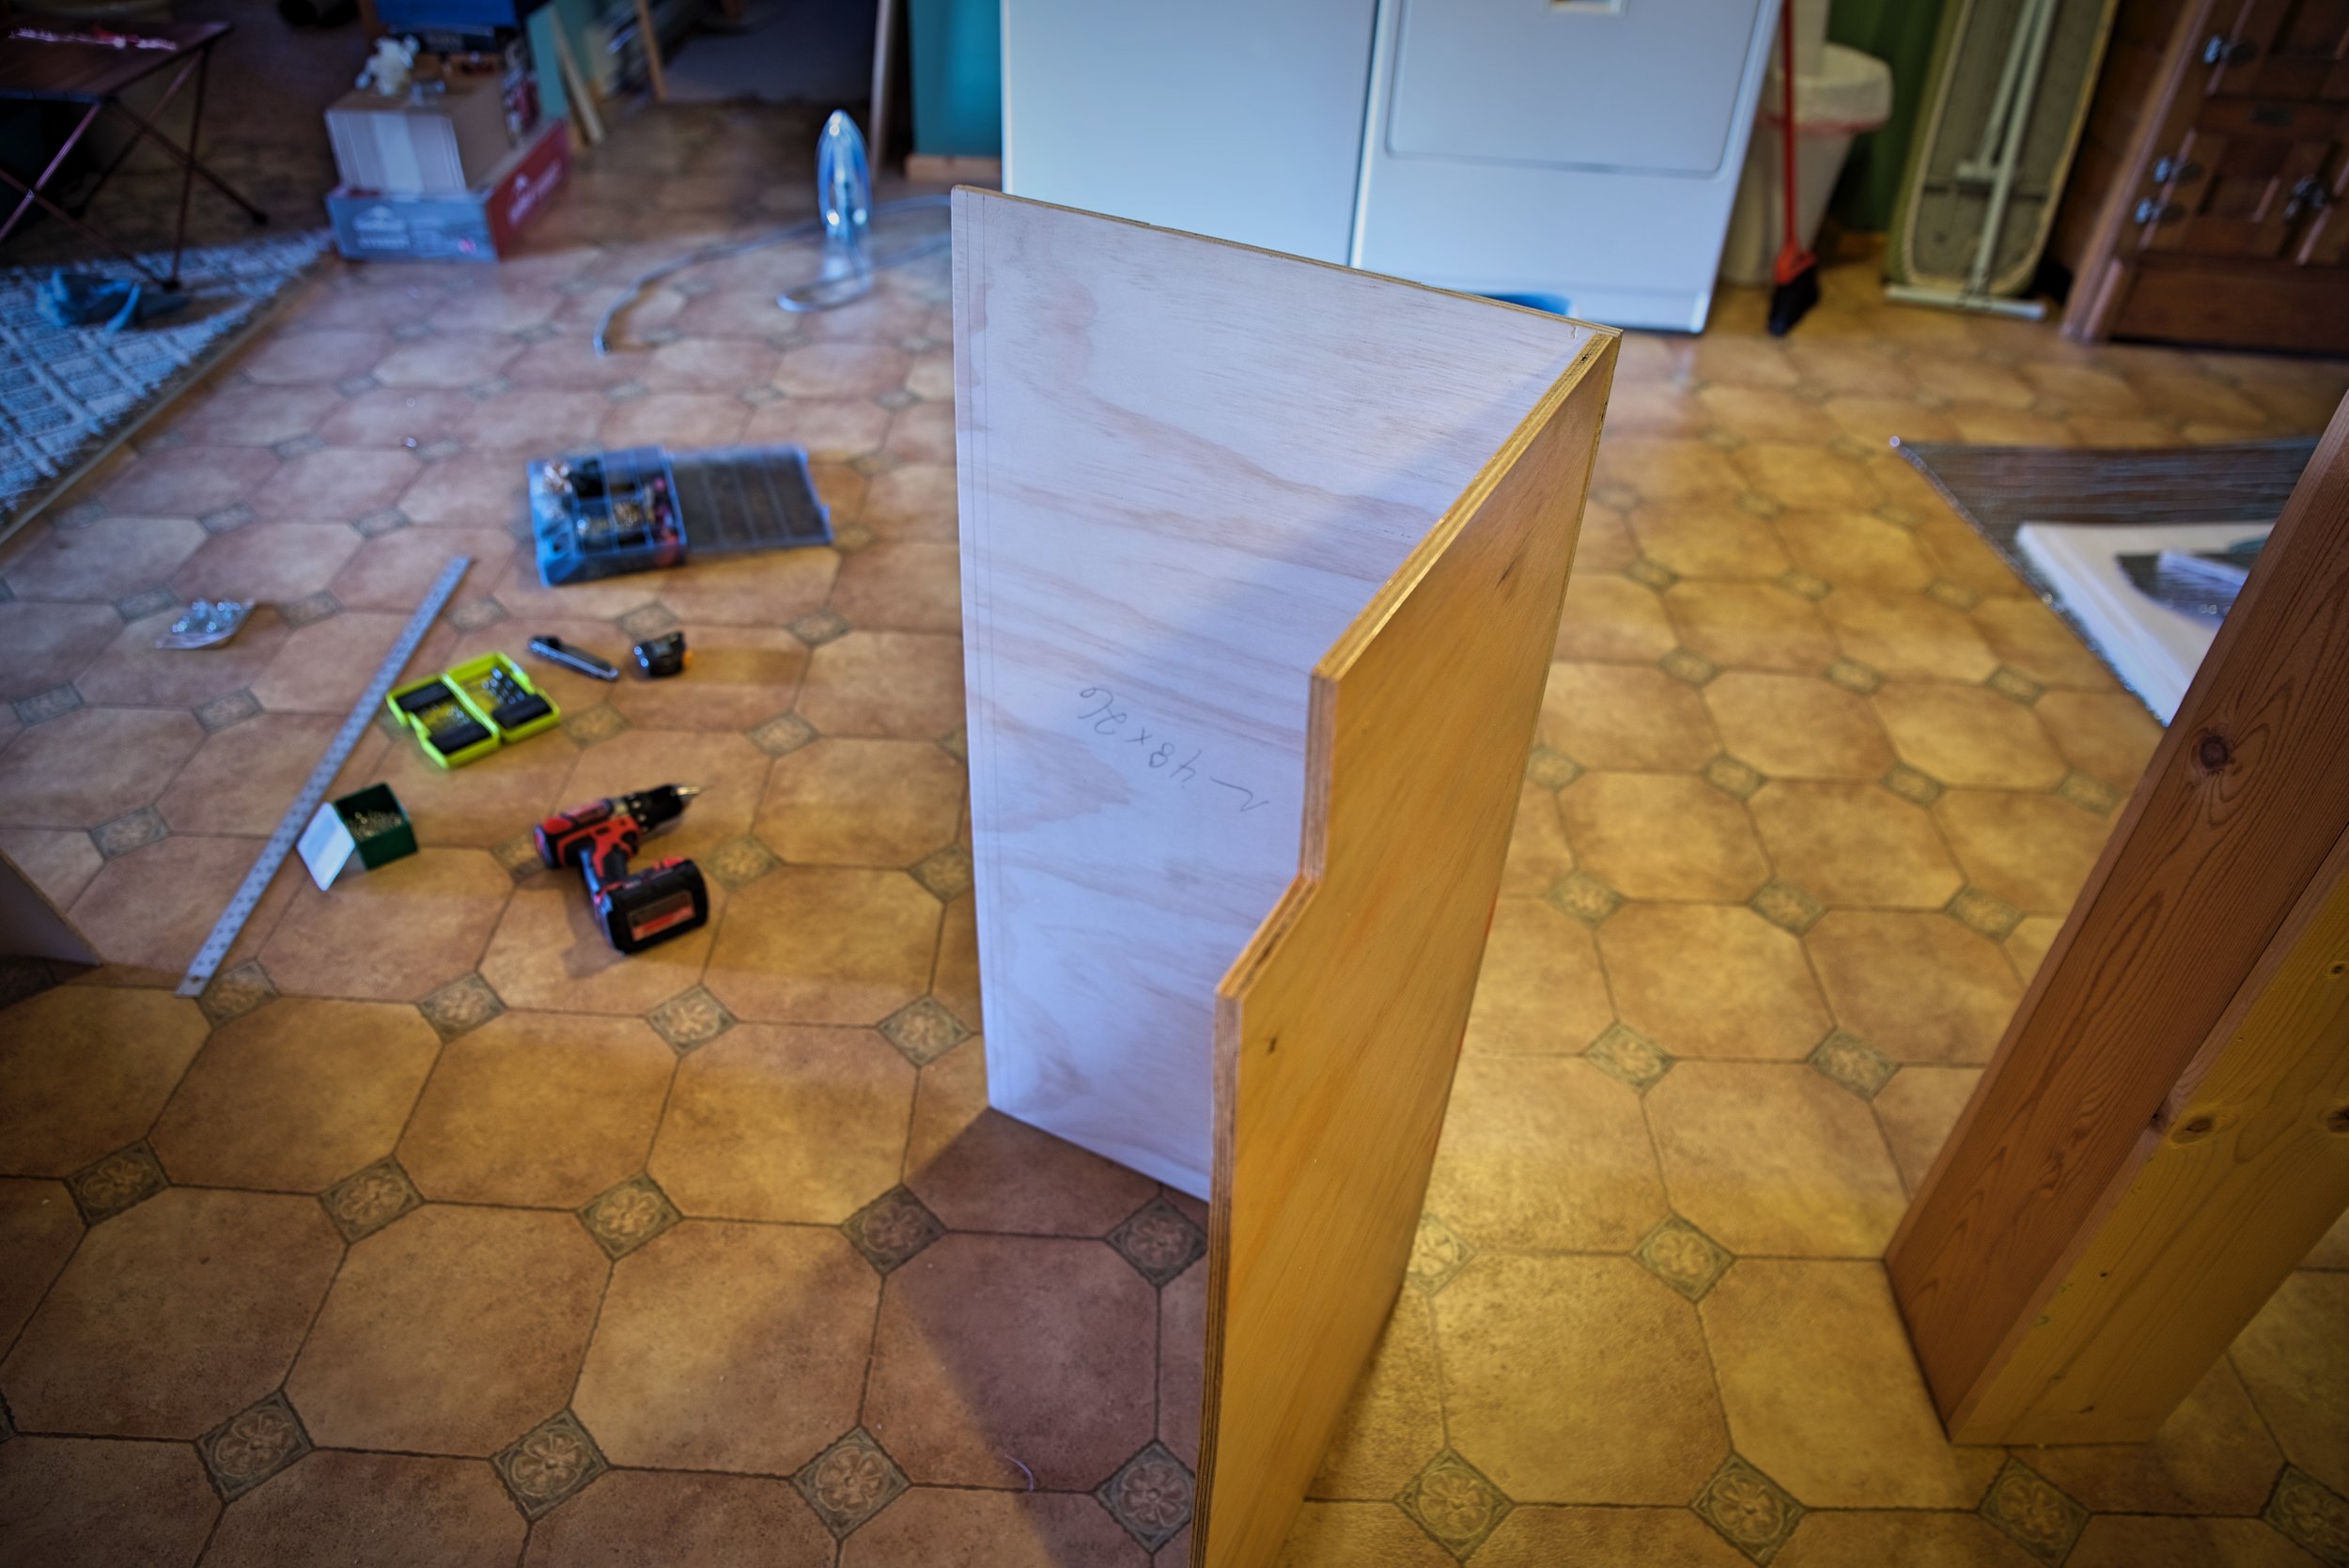
Our propane locker is basically a cabinet within a cabinet. The airtight locker is built into one of the cases of the custom kitchen cabinets we built for our van (Read about how built our Sprinter’s cabinetry here.) The cabinet cases are made of a 1/2” sanded plywood, and the propane locker is made of the same material. The plywood is joined using countersunk screws. Building with plywood can be a bit tricky, because it can warp easily, and because screwing into the end grain of plywood is difficult. Pre-drilling the holes with a countersink drill bit is a huge help. It will make it so much easier to drive the screw in straight and it prevents splintering of the plywood.

Ian marks the holes needed to attach the piano hinge.

Pre-drilling countersink holes is really helpful if you are trying to build cabinets from plywood.
Once we had constructed the outside case for the cabinet, we built the inside airtight box that would contain the 20-lb propane tank. This meant building a lid and a hinged door that could open so that we could take the tank in and out when it needed to be exchanged. The door needed to be big enough to allow us to get the tank in and out, but it also needed to be smaller than the frame of the cabinet that it was in so that we could open it all the way without it being obstructed by the face frame of the cabinet. We inset the hinged propane locker door with two thin strips of plywood on either side.
The door is an overlay door meaning that it is mounted on top of the structure of the locker rather than inset within the doors frame. The door had to be an overlay door so that we could create a seal using weather stripping when it was closed.

Those two tabs on the top of the propane locker allowed us to easily screw it in to the walls of the cabinets on either side.

We added these two angled pieces of wood around the hinge to reinforce the places where we had accidentally split the plywood a bit when attaching the hinge.
We used a piano hinge (also called a continuous hinge) for the door of the propane locker. We used these hinges in many places in our van build. They can be bought in lengths of up to 90 inches and then you simply cut them to your desired size. We used a hack saw to cut the hinge to the correct length a iron file to de-burr the cut ends. Because they are screwed to the door along their entire length, piano hinges can withstand the bumping and rattling of life on the road. Even if one screw becomes loose, there are 11 more to hold the door in place. They also are a good choice for plywood cabinetry because when screwing into the the end grain of plywood you may not get a great hold at every spot, so more screws have a better chance of holding over time.
When we attached this piano hinge some of the screws splintered the front ply of the plywood, so we added reinforcements to the wood on either side of the hinge. We had to make the side of the reinforcement facing the hinge angled at 45 degrees or the door would not be able to swing open all the way.
We finished all the inside wood of the cabinets including the propane locker with clear, water-based polyurethane. (If you want to know more about how we finished the wood in our van, read our article about our cabinets.)

The door is inset from the walls of the larger cabinet, because it needed to be able to swing open within the face frame of the cabinet.
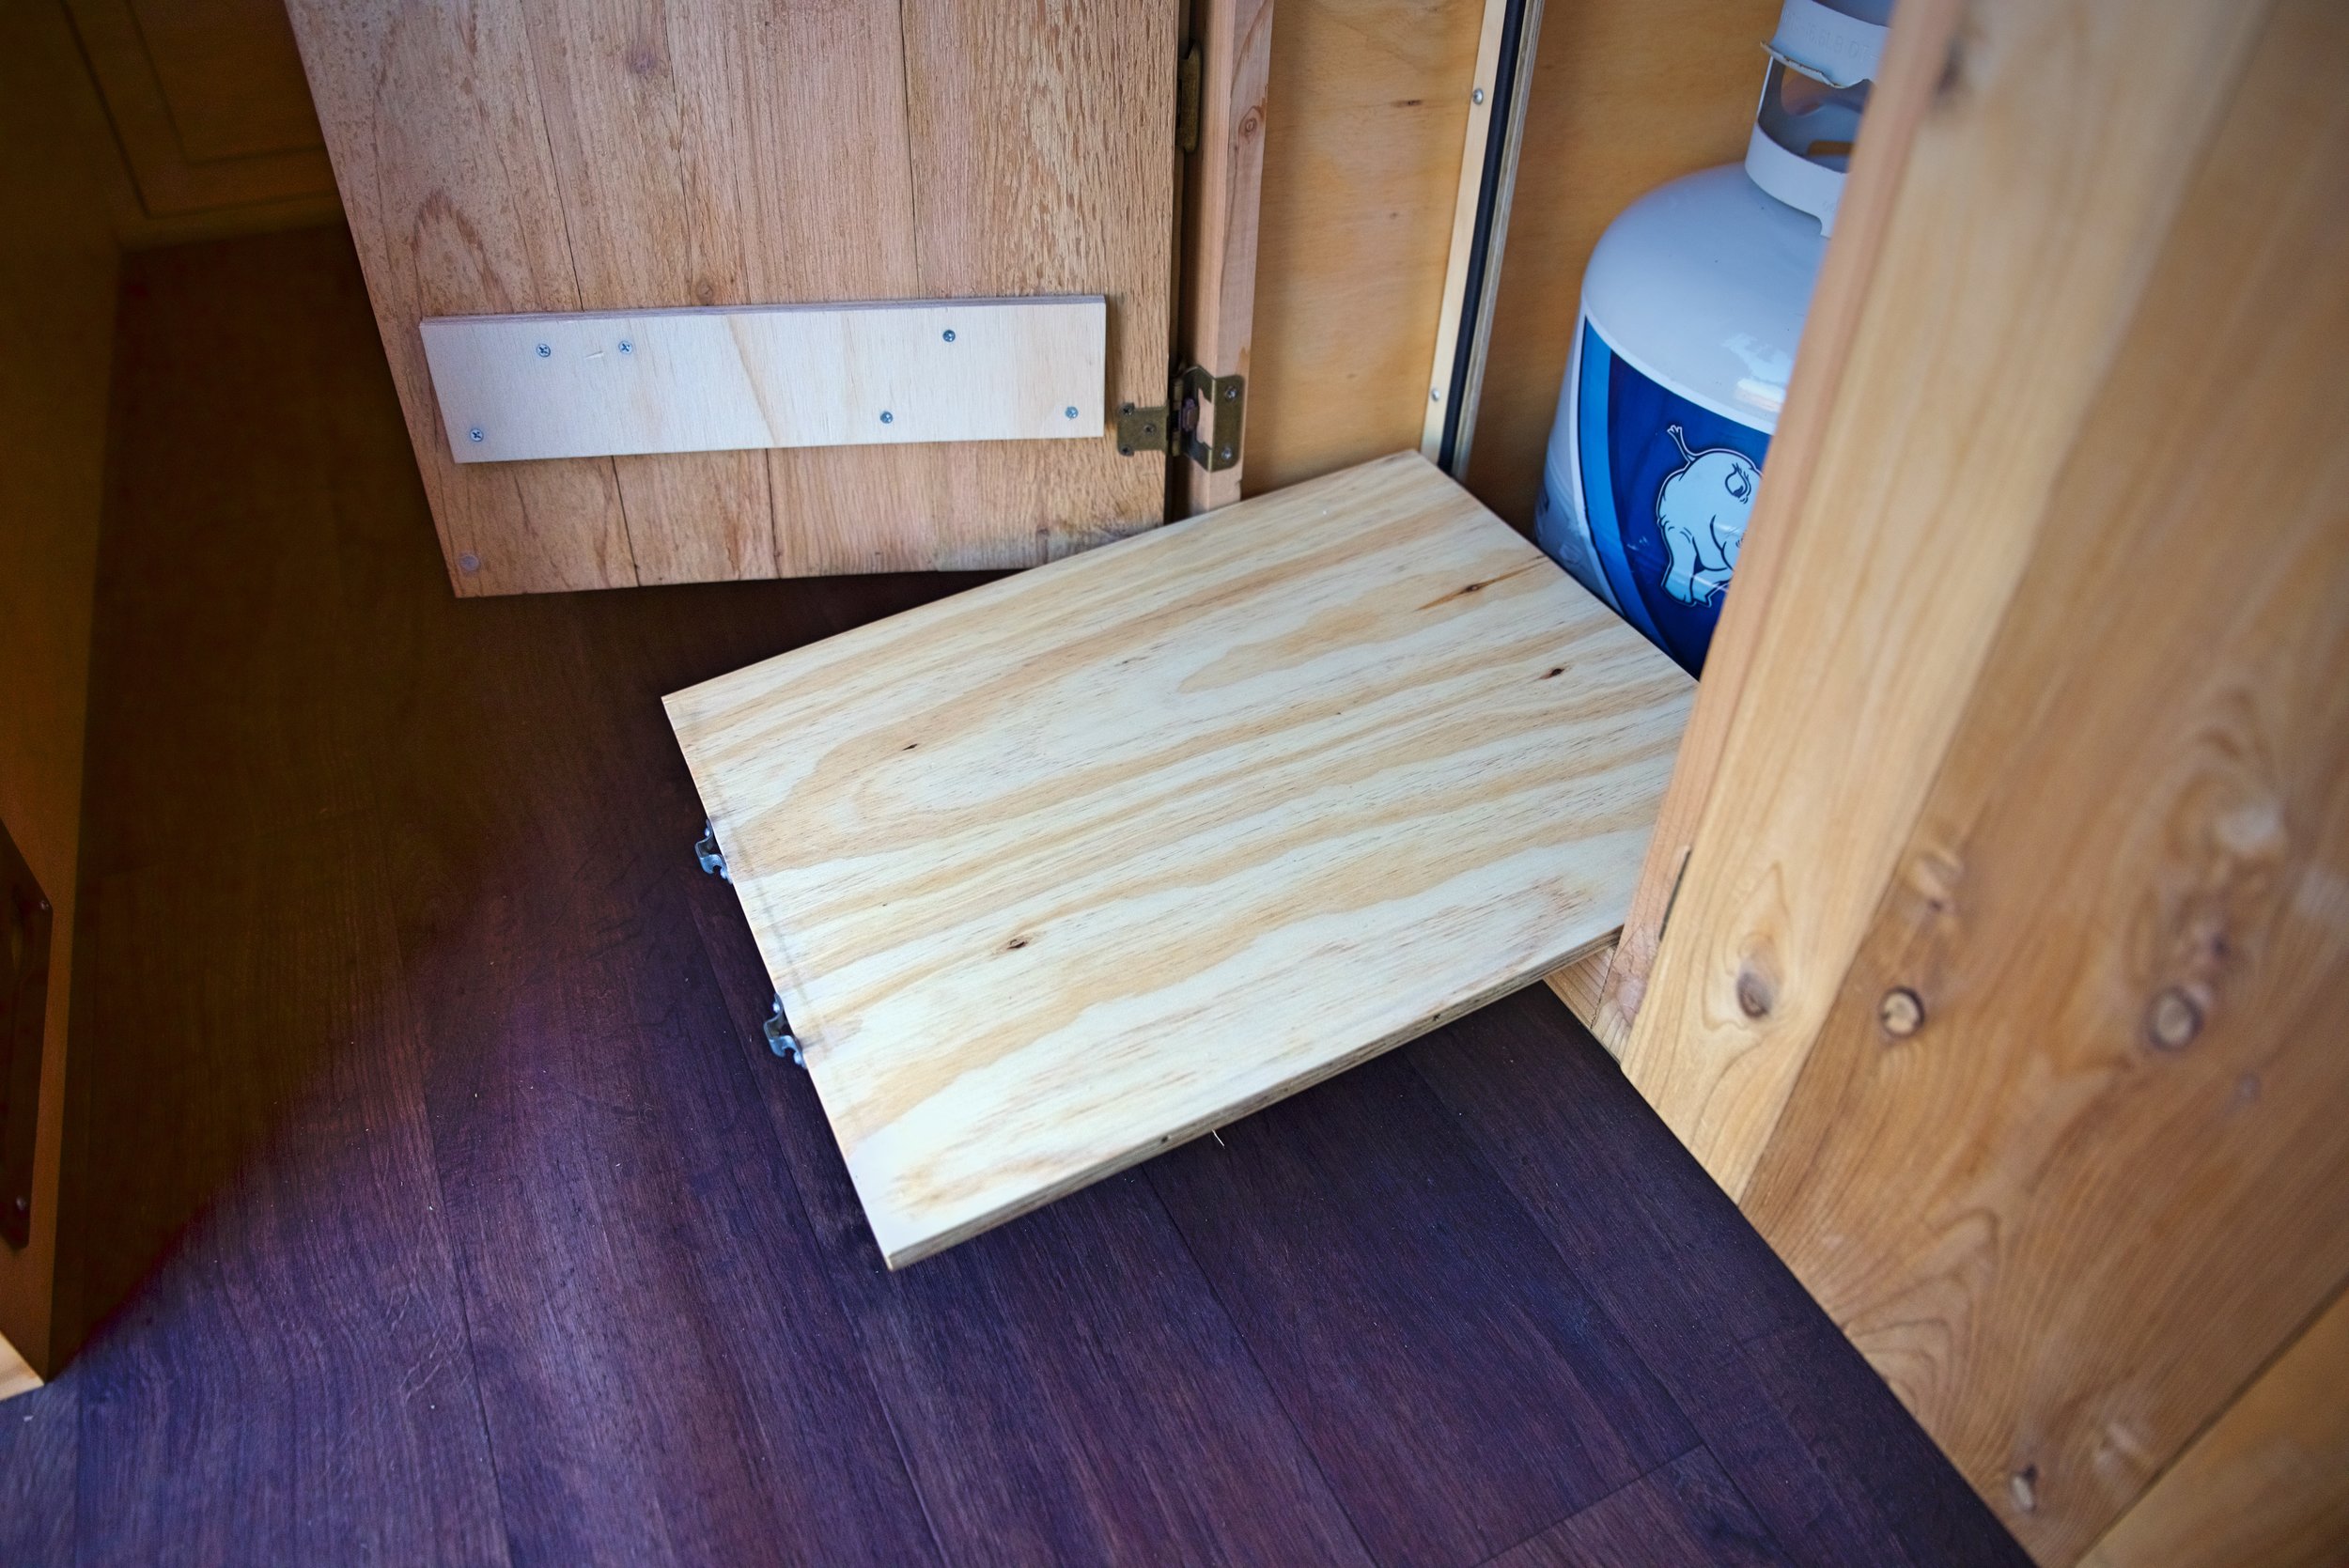
We are able to open the door of the propane locker all the way through the door of the larger kitchen cabinet.
Once the propane locker was totally constructed, we needed to make it airtight—or as airtight as possible. The main concern was to create a gasket around the edge of the hinged door so that if the propane tank were ever to leak, the gas would not leak into our living space through the cracks in the door. We used a rubber tape weather stripping to create a seal. The tape is a D-shape so when the door closes on it, it compresses, creating a seal.
The weather stripping had an adhesive backing, so it was really easy to put on the propane locker door. Right by the edges of the hinges we did have to shave the tape down with a utility knife to make the hinge close all the way.

This weather stripping had adhesive backing, so it’s very easy to use.

We put weather stripping all the way around the frame of the door. When the door is closed, it compresses the rubber tape to make a seal.
Besides the weather stripping gasket around the door, we also sealed all the cracks on every joint in the wood with a clear silicone caulk. We ran a bead of the clear silicone caulk along the bottom of the locker and the vinyl floor of the van, because propane is heavier than air and it could leak out underneath the cabinets if we didn’t seal it.
To seal a seam with caulk begin by cutting the tip of the caulk at an angle at the size you want for your bead of caulk. Use a squeeze tube or a caulk gun to run a bead of caulk along whatever joint you want to seal. To smooth the bead into the joint, wear rubber gloves or cover your finger with a plastic shopping bag. Dip your finger in water and run your finger along the bead of caulk, smoothing it into the joint. If you gather a big blob of extra caulk, wipe it off with a paper towel and wet your finger again. Once you have smoothed the entire joint, wipe up any stray caulk that you may have missed. Then let your caulk cure for the specified amount of time before touching it or working in the area to avoid messing it up or getting any dust or sawdust in the caulk.
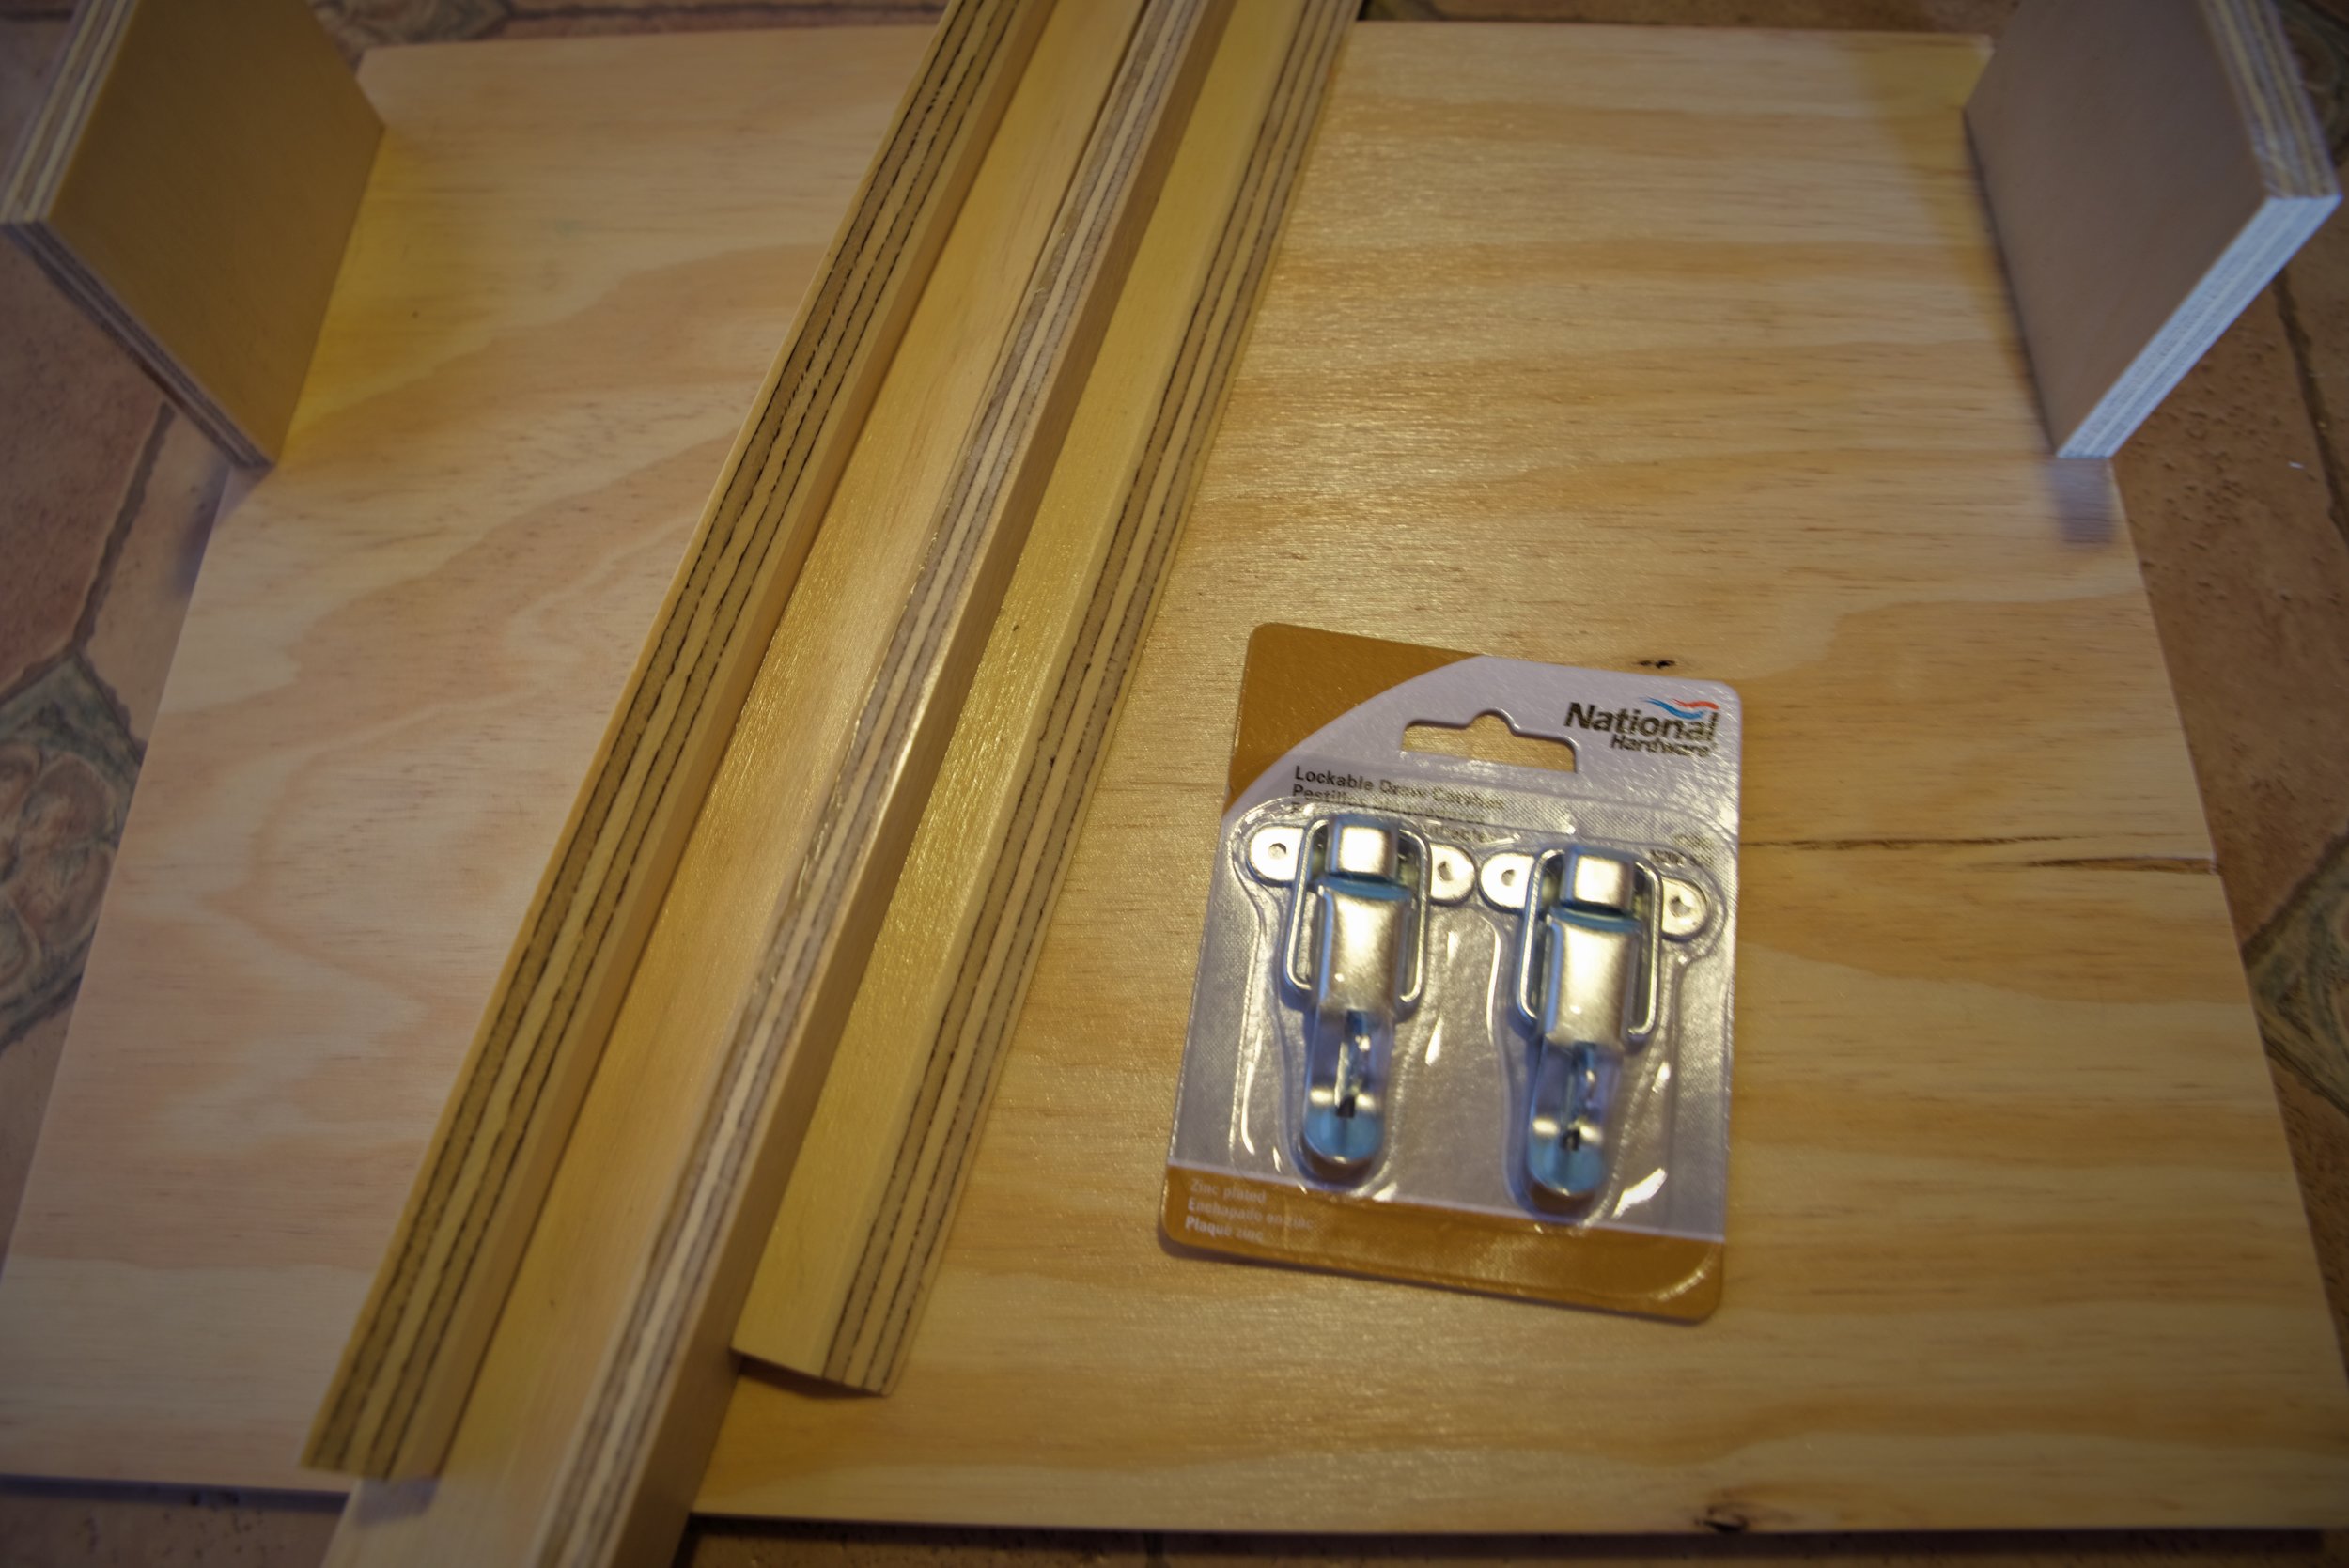
These suitcase latches are really easy to install and use.

The u-shaped arm bar pulls the latch tight so that our seal is compressed.

To turn our propane on when cooking, all we have to do is pop these two latches open.
We used a suitcase-type latch on our propane locker. These latches make it possible to seal the locker tightly every time we close it without much effort. A small pull arm allows you to open it. To close it, you just slip the u-shaped arm bar over a small hook-shaped receiver and snap the pull arm back into place over a small tab. The tab has a hole in it for a padlock, so we could theoretically lock the propane locker if we ever needed to store something valuable in the van. We had to buy these latches in a size that was small enough to be mounted to 1/2” plywood. Installing them was really easy because they came with small pan head screws.
Connecting the Hose, Stove, and Tank

We can run the hose through the slit in the weather stripping into this c-shaped hole and then close the door.
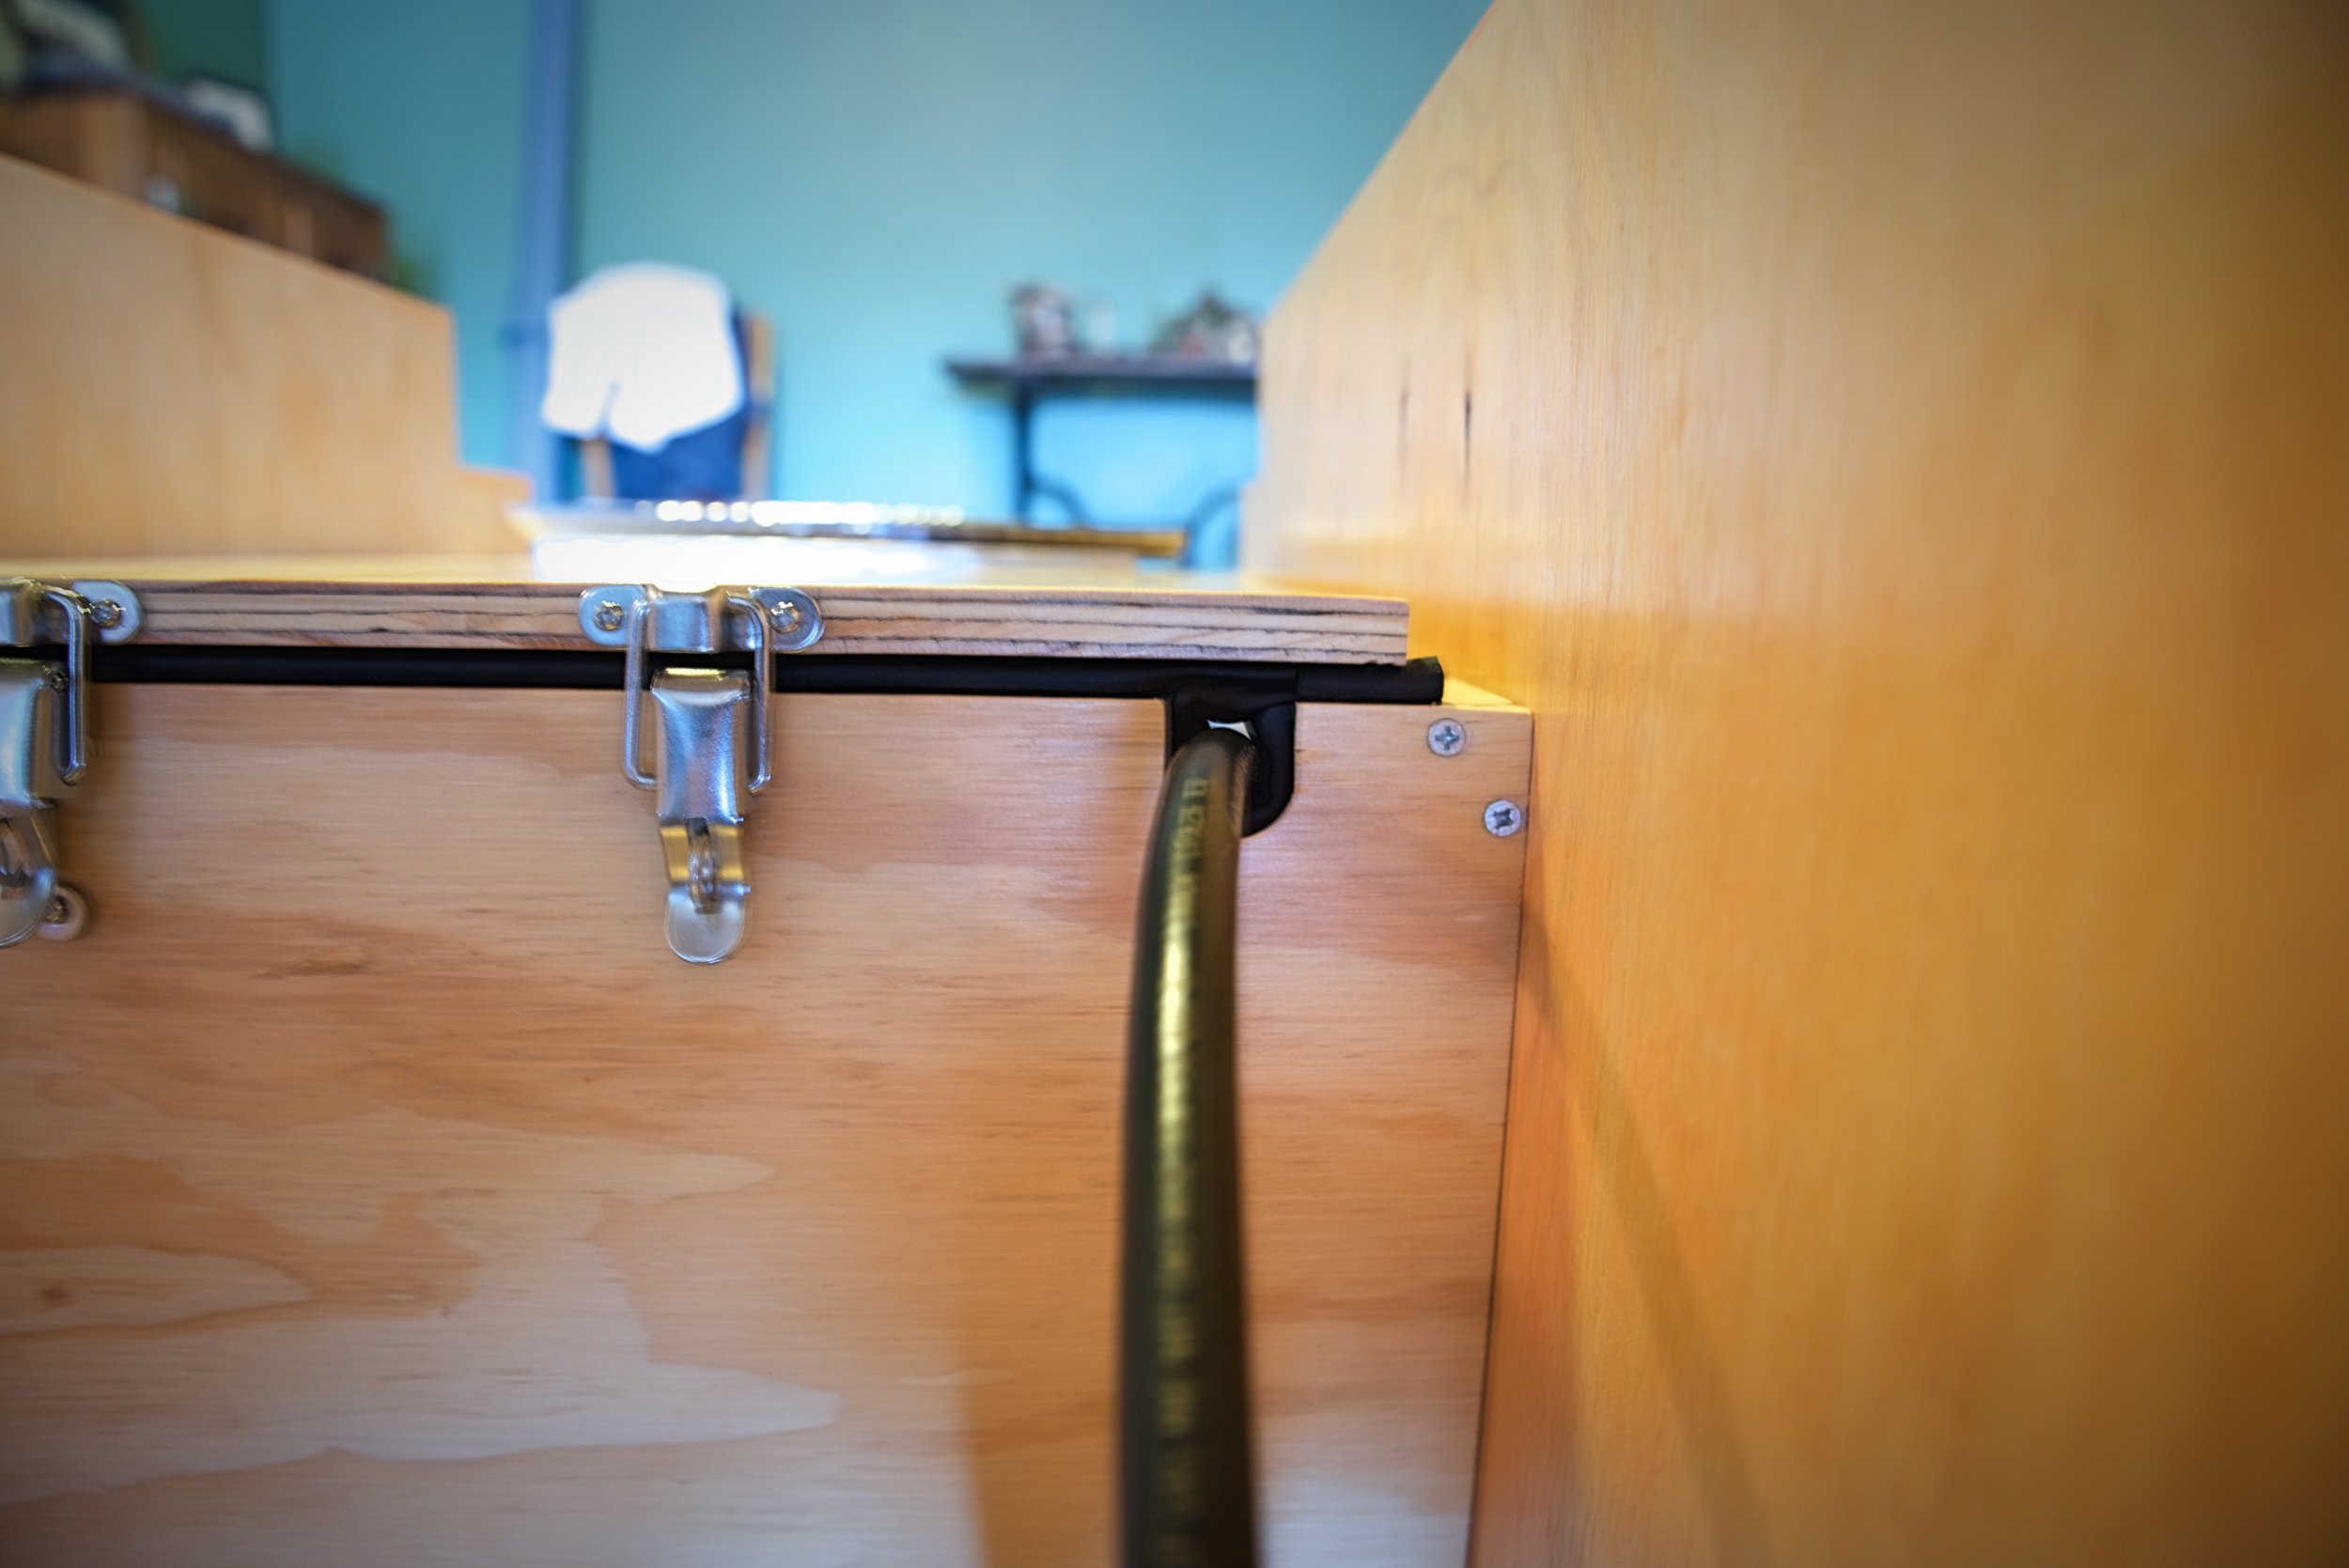
We created a gasket around the hose with more weatherstripping running around the hose.
We have a 5-foot hose and adapter that allows us to connect the propane tank to our stove while it’s in the propane locker. These high-pressure hoses are pretty affordable and they allow you to connect a large propane tank to a campstove. Our campstove has its own regulator, but you can also buy these hoses with regulators on them. By connecting the 20-lb tank to our two-burner stove rather than using 2-lb cylinders, we estimate that we have saved over $500 in about a year of travel. We’ve only had to exchange the tank five times during the course of our travels at about $17-25 per tank exchange after the initial $40 tank purchase.
We had to find a way to run the hose from the propane tank out of the propane locker. We drilled a small hole next to the door of the locker, and then used a pull saw to cut the outside of the hole off and create a c-shaped hole. We cut a small slit into the weather stripping so we could pull the hose in and out of the c-shaped opening. Then we lined the entire hole with the same weather stripping to create a gasket around the hose.

The hose runs out of our propane locker through a hole located in the top corner of the door.

The hose connects to the propane cylinder, which is secured inside the propane locker using a piece of rigid foam.
We have our propane tank secured within our locker using a 2”-thick piece of rigid foam insulation cut into a shape that fills the space between the cabinet wall and the tank. This prevents the tank from knocking around while we are driving. When we need to change the tank we just pop this piece of insulation out.
The hose screws onto the valve of the propane tank, just like how you’d attach it to a barbecue grill. Once the hose is attached the gas should not flow until you’ve opened the valve using the metal knob on top of the tank. Likewise, even if you open the valve for the propane tank, it should not release gas unless you have a hose connected.

The hose goes through a hole in our counter top so we can connect it to our camp stove when cooking in our camper van.

We used this desk grommet to make the hole look more finished and to prevent the hose from slipping back underneath.
From the propane locker the hose runs through a hole in our countertop so that we can easily access it and attach it to our stove. We drilled the hole in the countertop using a 1.5” hole saw attachment for a power drill. A 1.5” hole is big enough to allow the stove end coupling to pass through the top of the counter. We taped over the place we were going to drill through in the counter’s surface with masking tape prior to drilling. Any time you are cutting through a laminate surface, taping the area to be cut or drilled helps prevent the laminate from cracking or splitting. We drilled through the top of the countertop, because the drill has a tendency to punch through the last bit of wood, and we didn’t want to punch through the countertop and break its laminate surface.
To make the hole in the countertop look more finished, we installed a 1.5” desk grommet in the counter. The top grommet has two pieces. The bottom piece sits within the hole, and the top piece fits within the bottom piece. The top piece of the grommet has a smaller hole in its side that slides around the hose. This prevents the hose from slipping back underneath the countertop.

The grommet gives a clean looking access port for the propane hose in our Sprinter.

The grommet prevents the hose from slipping under the counter, but we can still pull the hose out for attaching it to our stove.
Venting the Propane Locker
Even though we have the propane locker, ideally we wouldn’t want to fill the locker up with propane. All modern propane tanks are equipped with a safety relief valve. This valve is located on the back of the threads where you connect your hose. The safety relief valve will vent if there is ever too much pressure in your propane tank. This can occur in hot weather or if your propane tank has been overfilled (although all modern propane tanks also have a mechanism that prevents overfilling). Vehicles can get hot, and we are often changing altitude (which affects pressure), so we knew we wanted a way to vent this over pressure vessel outside in case it was ever activated.

All modern propane tanks have an over-pressure relief valve on the back side of the hose valve.

We connected a vinyl tube to the over pressure relief valve so that we could vent propane outside our van if the valve was ever tripped.
We connected a clear vinyl tube to the safety relief valve of the tank using a hose clamp. We then drilled a hole through the floor of our van to the outside. We used a hole saw drill attachment capable of cutting sheet metal, and then just drilled straight through the floor. We ran our hose from the relief valve out of our van’s floor. On the outside we attached a plastic 90-degree hose barb coupling to the hose. Our hope with this was that we’d be able to prevent water from splashing up into our van as we drove in wet weather.
Many people also include exchange holes in their propane lockers to let fresh air in. Our thought on this is that propane is heavier than air so the propane will have no trouble sinking out of the van into the surrounding open area. Additionally, if the tank is relieving its pressure, it’s at a higher pressure than the surrounding air, so it will have no issue pushing the gas out the bottom of the van.

Here are all the layers we had to drill through in the floor of our van.

This 90 degree fitting should prevent too much water from splashing up into the van while we drive.

This vinyl tube runs from the propane tank to outside our van.
Installing a 12-Volt Propane and CO Detector
Another precaution we took for the propane system in our van was to install a propane and CO detector in the same cabinet as our propane tank. Our dual propane gas and carbon monoxide detector is an Atwood 31011 RV Carbon Monoxide and Propane Gas Detector. If the propane were ever to leak we would be alerted by this propane detector. If we were ever to produce dangerous levels of CO in our van, we would also be alerted. In fact small lights would tell us which dangerous gas was causing our issues.
The propane and CO detector is 12-volt and is powered by our solar power system and battery. It’s hardwired into our power system so we never have to worry about the batteries dying. You might be thinking, “What about at night or if you don’t have sunshine? Won’t that detector stop working?” Because our solar system is a bit over-built for our needs, we have never once not had enough power for all the things drawing on our solar power system. We have more than enough stored power to last overnight and probably several days. Even on cloudy days, our battery is fully charged before noon. In short, the only way this thing would stop working is there was something wrong with our solar system. Fortunately there is a small green light on the detector that lets us know it has power and is working.

We had to file a small channel in the back of the frame so that we could run the wires from the detector to our power system.

The propane and CO detector mounted above our propane locker before we finished the cabinets.
The propane and CO detector comes with a plastic mount for mounting the detector within the wall of an RV. We didn’t want to cut a hole in the wall of one of our cabinets, so we just built a small wooden frame that goes around the outside of the propane detector that we could mount it with. We had to file a small hole in one side so that we could run the wires out the backside of the wooden frame once it was mounted. We covered the wires with a black plastic conduit to protect them from wear and tear and to clean up the look of the wires.

The propane detector shows a small green light when it’s working and has power.

We always keep this small fire extinguisher handy in our van.
It’s likely that any accident that might happen with our stove and our propane system would be due to human error rather than a malfunction in a propane tank or too much pressure. For that reason, we always keep a compact fire extinguisher in the same cabinet with the propane tank. Hopefully we will never have to use it, but any time you’re working with open flame and pressurized gas inside a mostly wooden camper van, it’ a good idea to have something to put fire out with.

If we have any of these small green cylinders in our van, we try to keep them in the propane locker as well.

The propane locker is tucked into our larger cabinetry, so we can access our tank, but we don’t have to look at it.
Although it’s never been put to the test, on the whole, we think that are propane locker serves its purpose well. Any propane system in a vehicle will never be 100 percent safe, but we believe our propane system makes us safer while cooking. Having a full-size propane tank is easier and more affordable than cooking with 2-lb propane cylinders, and we are glad we picked propane for our cooking system in our van.