
Installing Our Sink and Fresh Water System
Just add water: How we Installed Water Storage, Plumbing, and a Sink in our Sprinter
Our van conversion has a fully equipped kitchen in it, and an important part of that is the sink and accompanying water storage system. We installed a full-size sink and we have 10 gallons of fresh water storage, along with 2.5 gallons of gray water storage. Our faucet is powered by a foot pump, so we can use both hands for washing dishes, but the pump also doesn’t draw on our solar power. This article offers a detailed description of our water system and how we installed our sink.
Tools
Materials
1/2” outer-diameter clear, food-grade PVC hose (about 3 feet)
1/2” inner-diameter clear, food-grade PVC hose (about 8 feet)
Scraps of cedar planks
2.5-gallon disposable water jug
White vinegar and salt
1/4” and 1-1/8” flat pine trim (about 6-1/2’)
3/4” wafer-head, self-tapping, brass-coated screws (about 14)
Installing the Sink in the Countertop
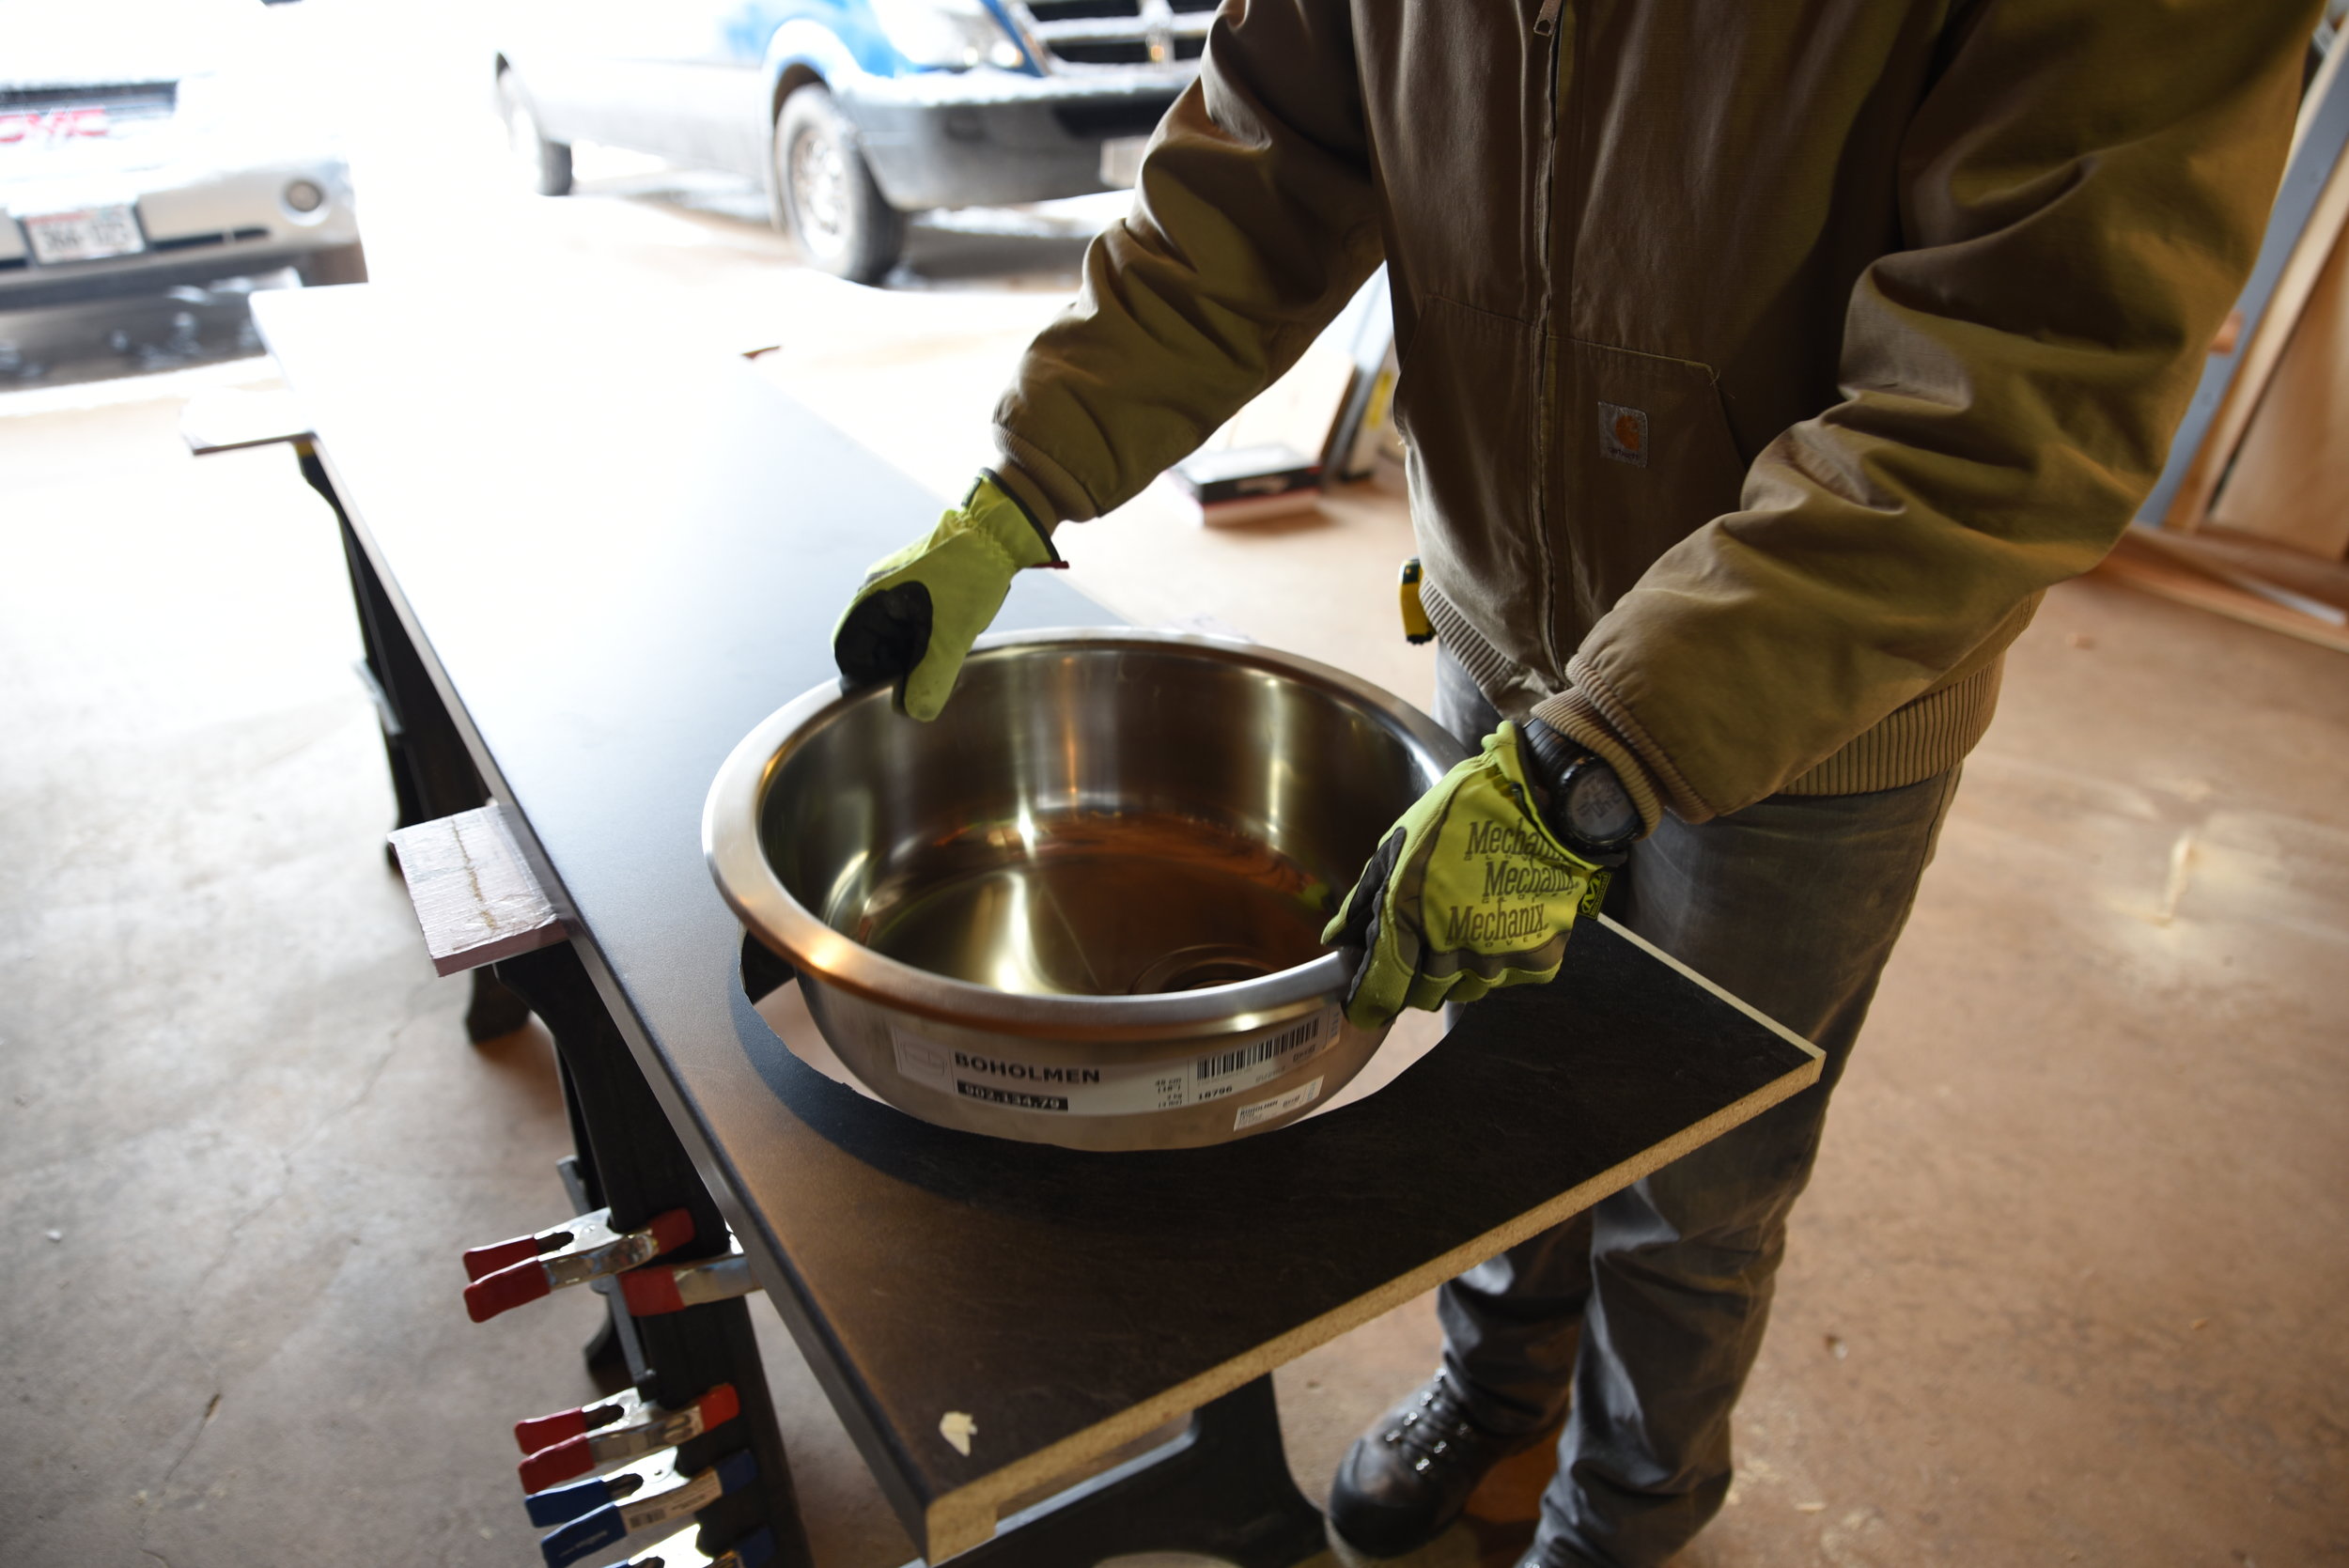
Our sink is a full-sized stainless steel kitchen sink that we purchased from Ikea. Many van conversions use small bar sinks, but we wanted a normal sink large enough to wash our pots and pans comfortably. Our sink is about 18” across and 6” deep so we have plenty of space for washing and cleaning.
To install the sink, we had to cut a circular hole in our laminate countertop. The sink comes with the specifications for the size for the hole. We first traced the sink, and then we moved the line in about a half inch, so that the lip of the sink would rest around the edge of the hole. We drew this circle on the bottom of counter, because the jigsaw splinters the side that is up. Since the cut would be hidden though, we didn’t tape the line to prevent any chipping of the laminate.
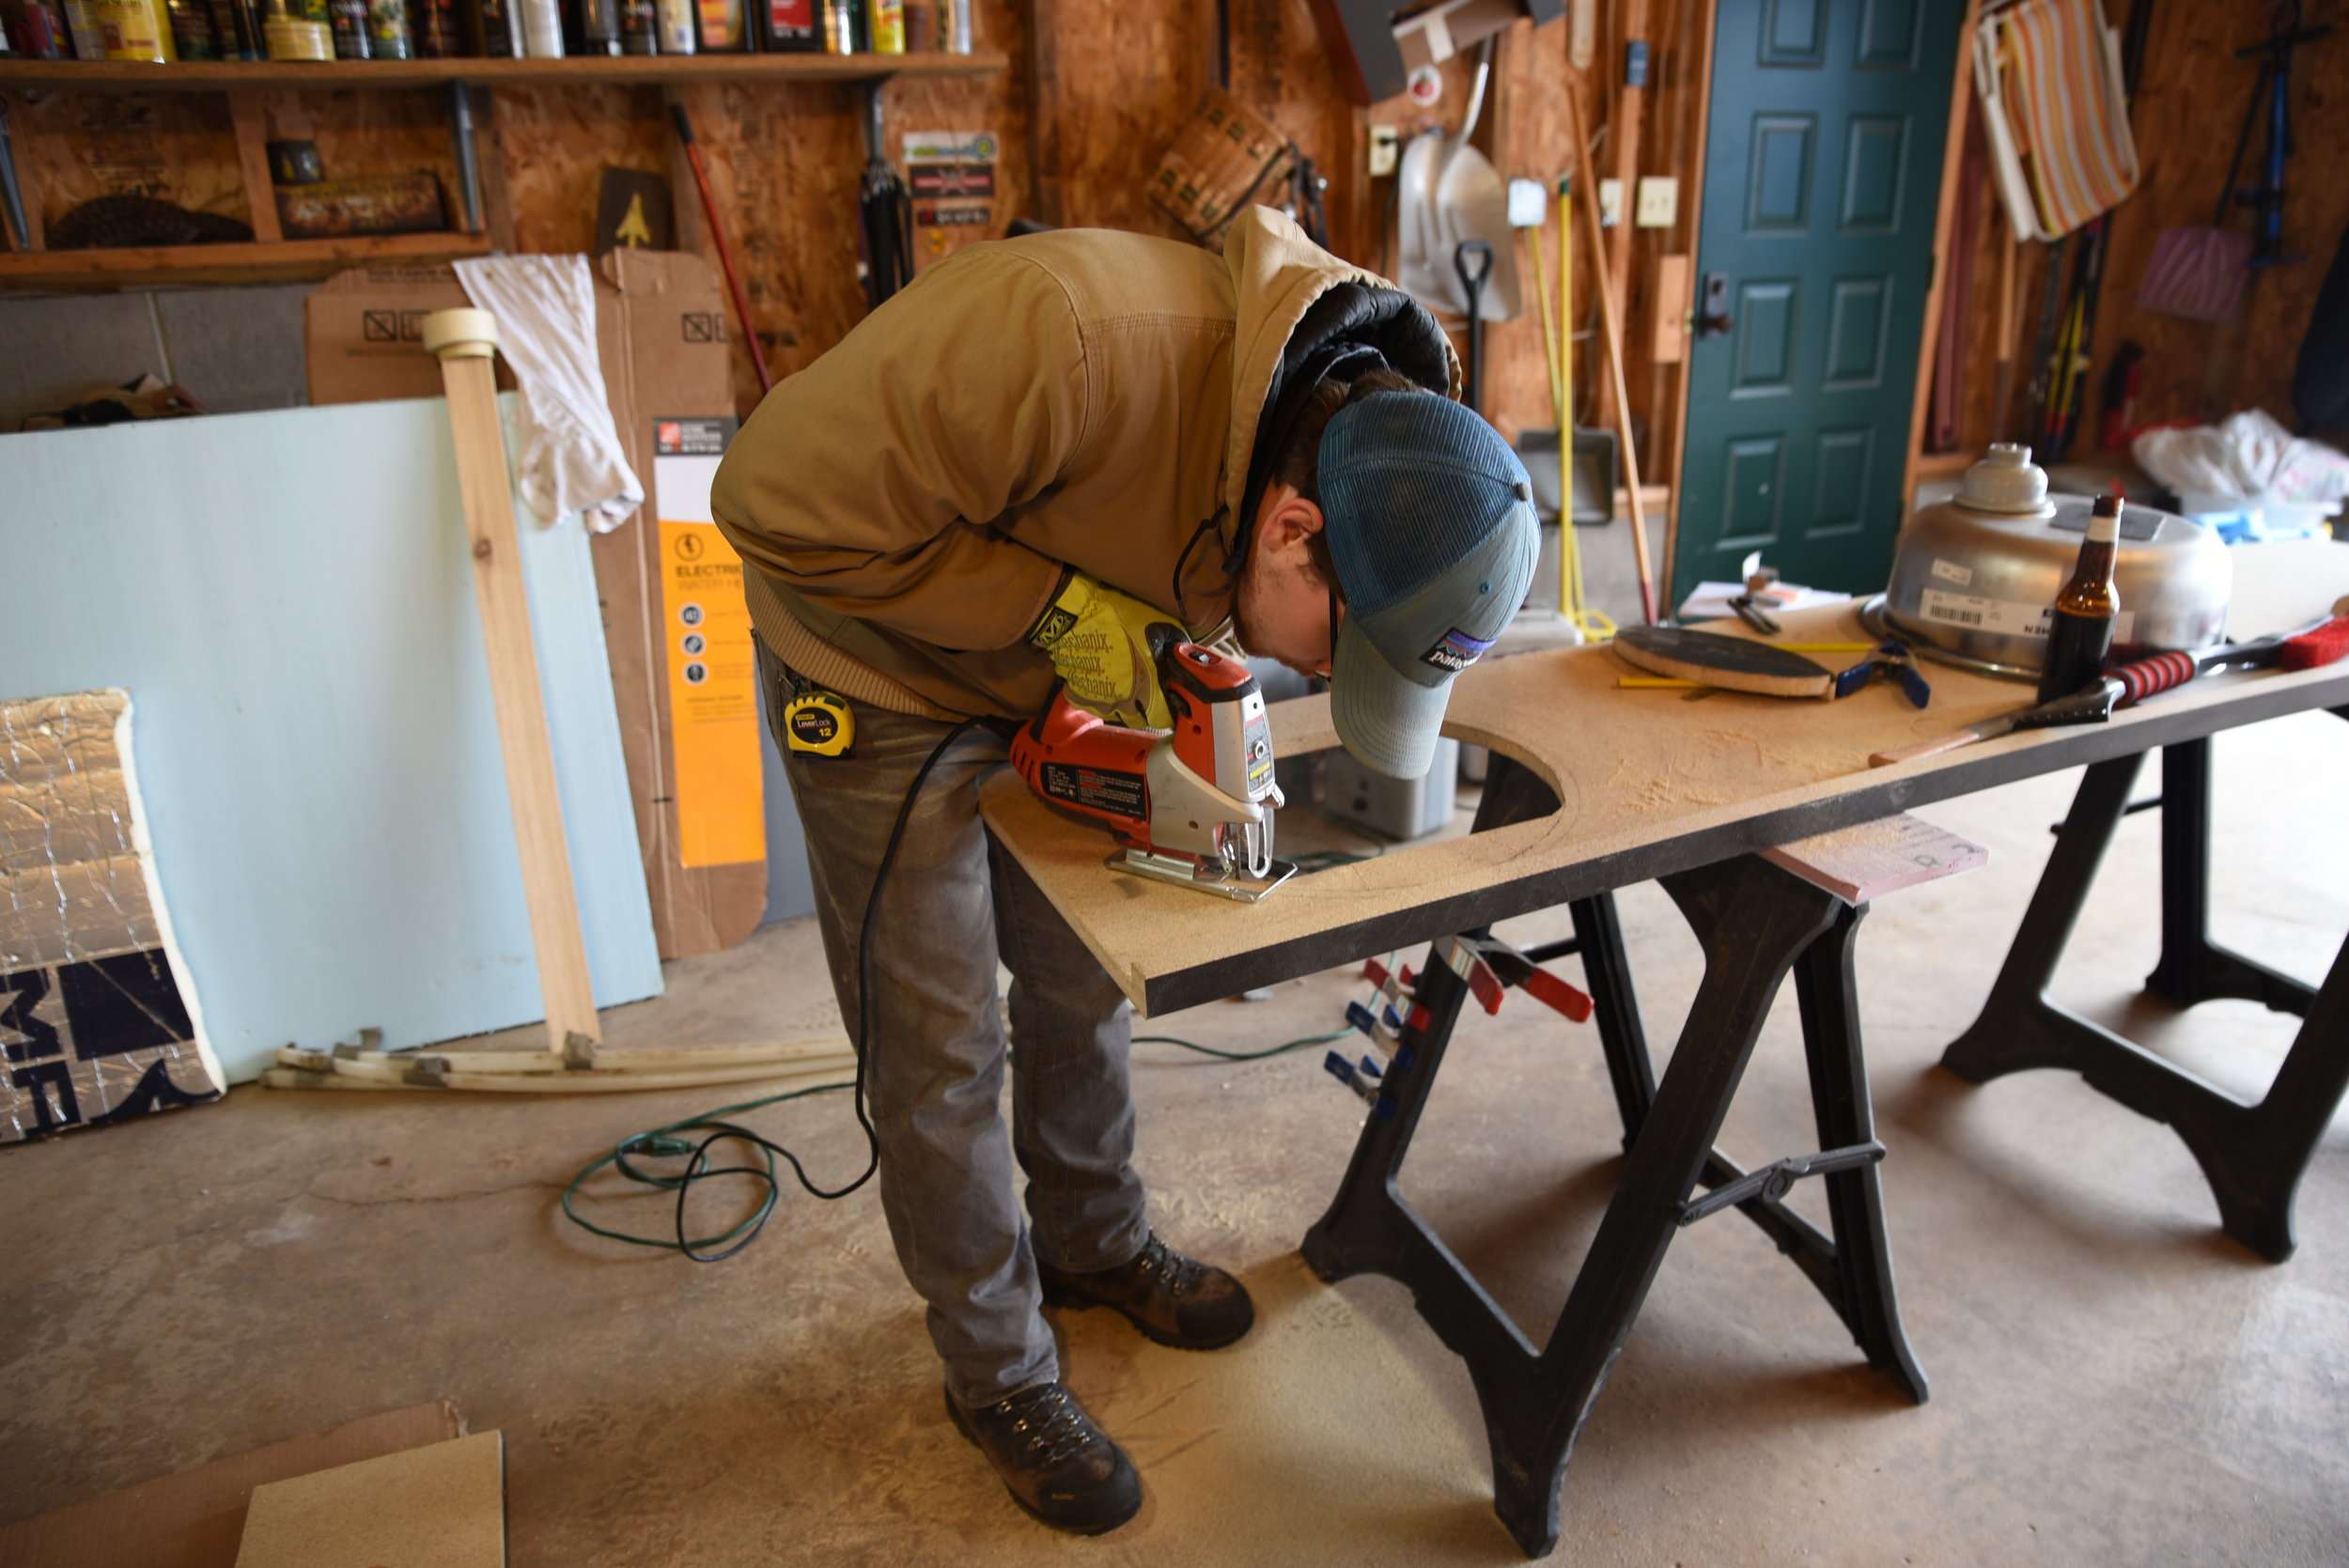
Ian carefully cuts the hole for the sink using the jigsaw.

In this photo, you can see the traced line from the sink rim and then the cutting line about a 1/2” on the inside of the traced line.
Once we had the circle drawn, we started the cut by drilling a hole that was large enough to fit the jigsaw blade in. We first cut the middle section out of the sink, and then cut the front and back curves out. We had to make sure to support the pieces while they were cut, so when we got to the end of the cut they didn’t break suddenly and peel the laminate back.

Here is the finished cut for the sink. It may not be pretty, but it is hidden under the rim of the sink, so any jagged edges doesn’t matter too much.
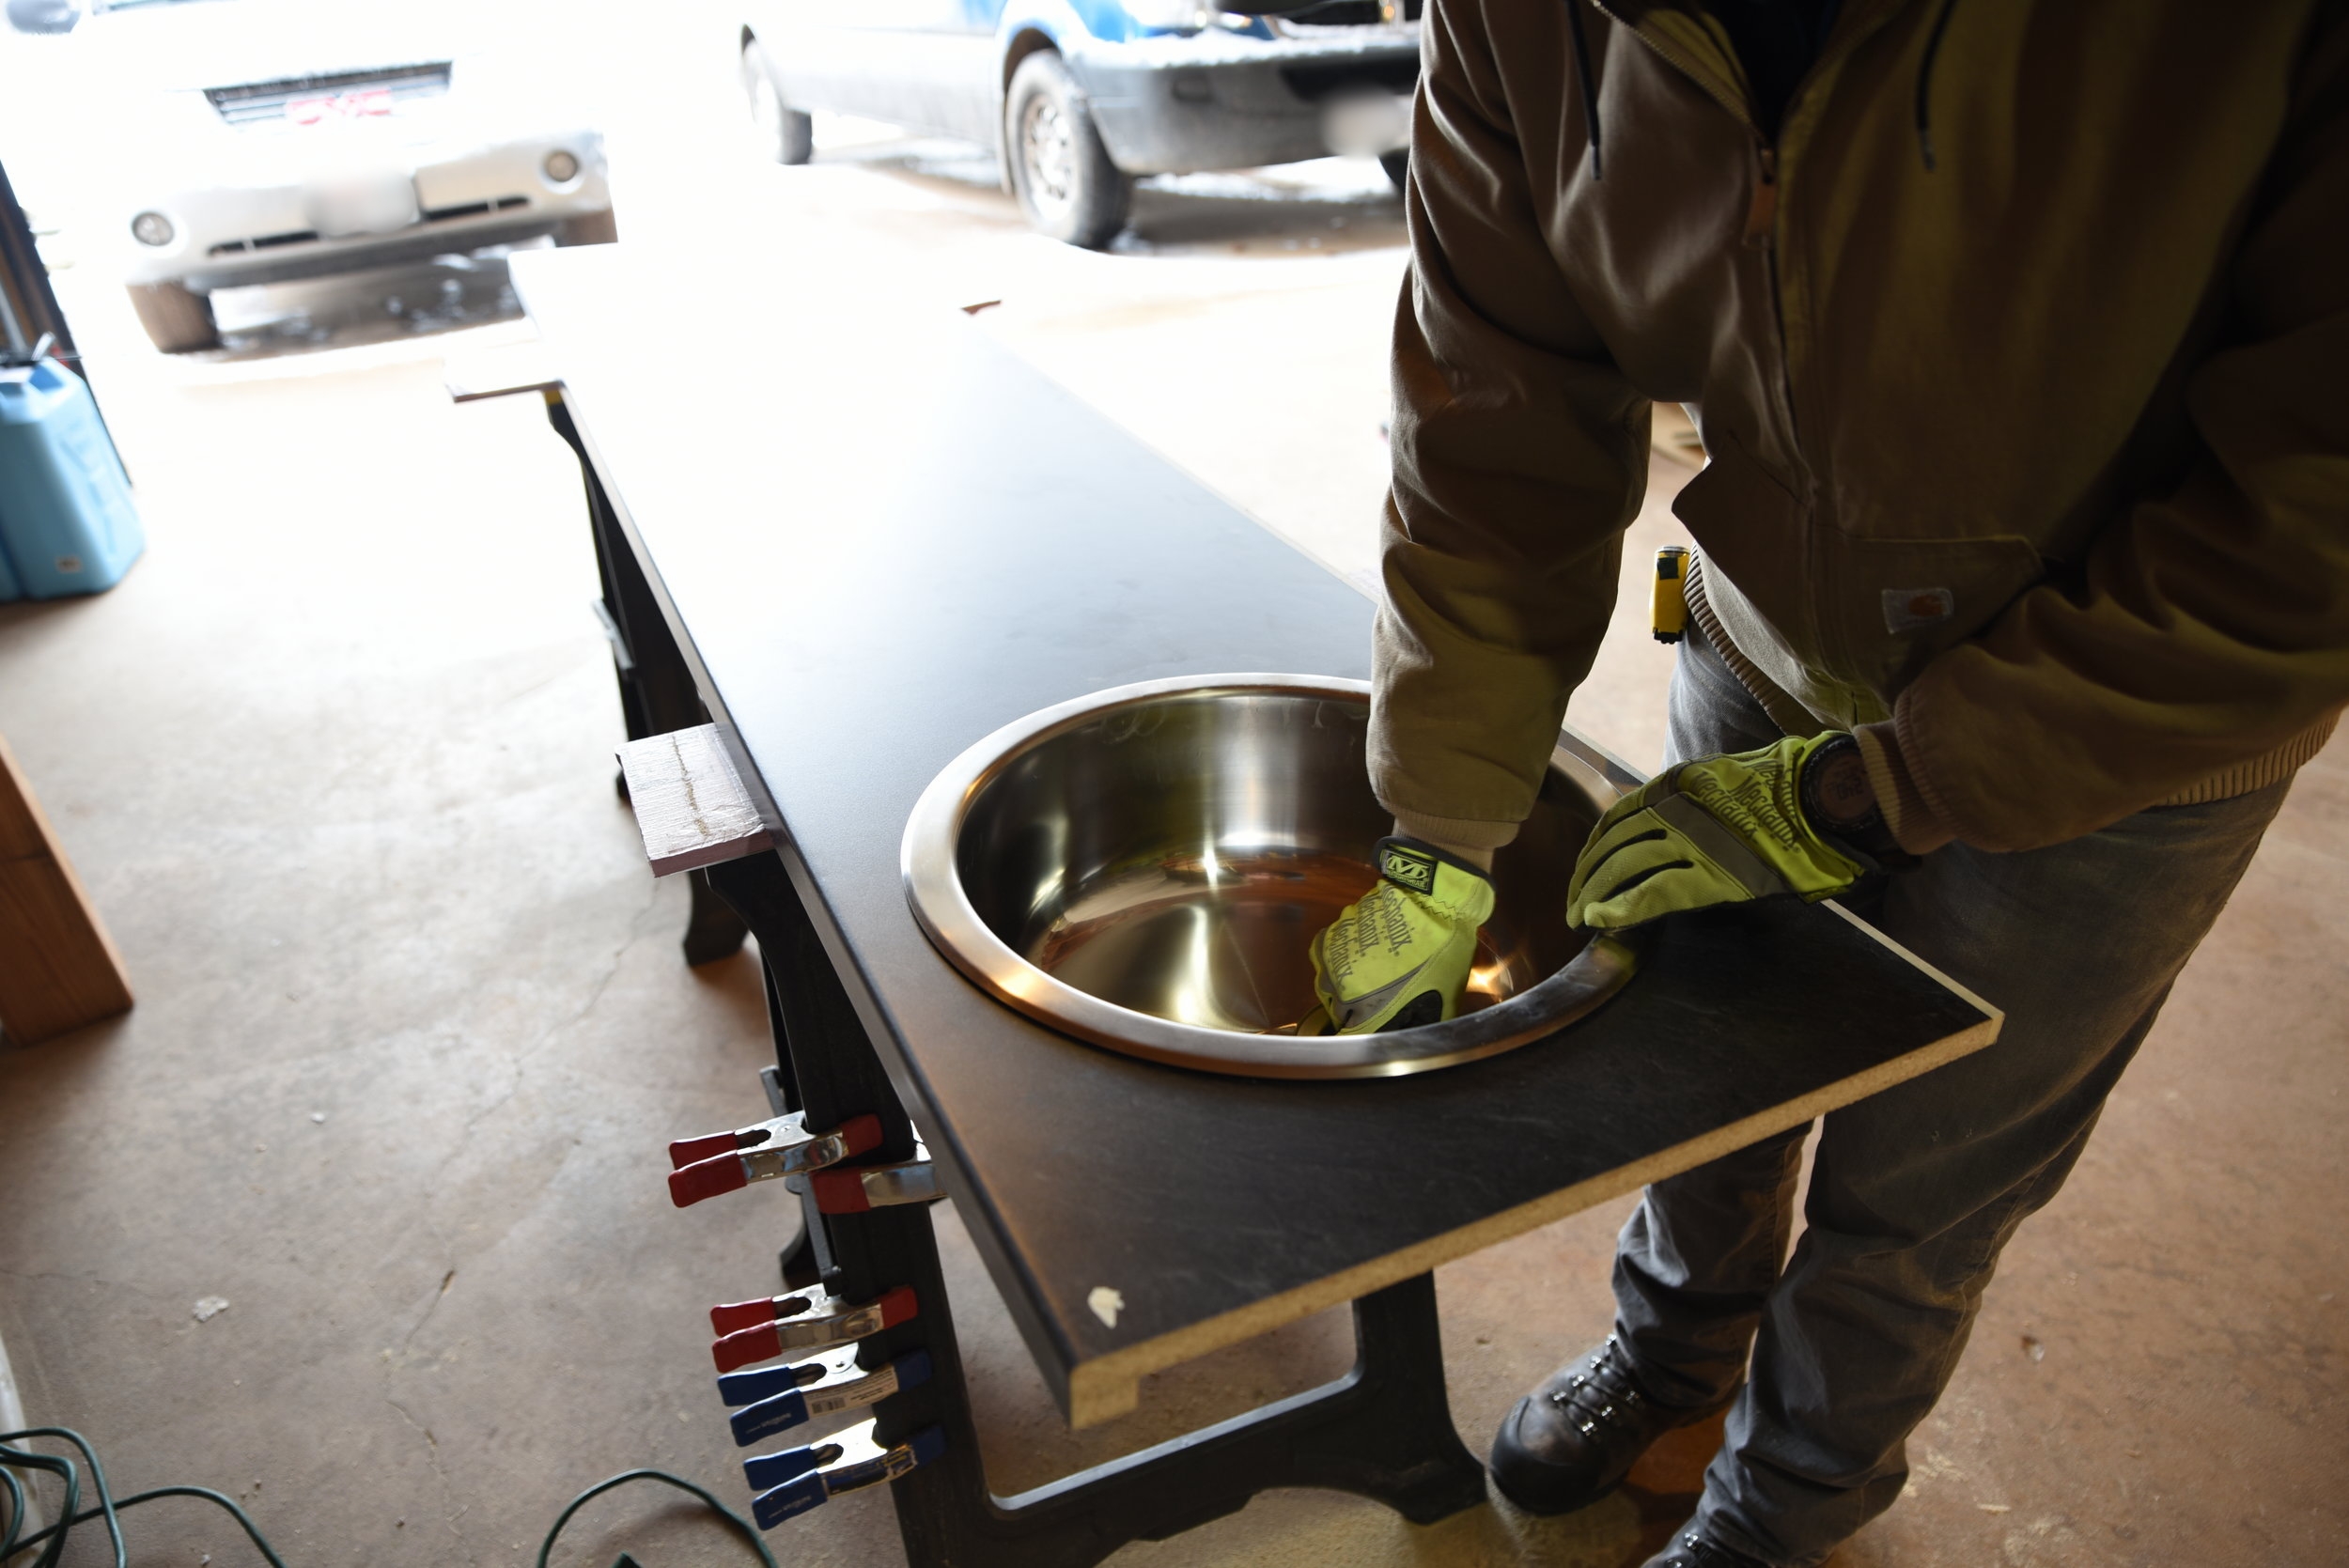
After cutting the hole, we trimmed a few areas where the curve wasn’t smooth. We then test fit the sink in the hole in the countertop, and fortunately it fit perfectly. We removed the sink until we had installed our custom cabinets and the countertop in the van.
We sealed the cut by applying a thin layer of waterproof clear silicone caulk to the inside edge of the hole in the countertop. This protects our countertop from any moisture that might get under the edge of the sink. We applied the sealant by wearing gloves and smearing the caulk along the inner edge of the cut.
Ian test fits the sink after cutting the hole.

We were careful during the conversion not to scratch the counter or the sink.
Once the countertop was in the van, we installed the sink. The Ikea sink came with four clips on the bottom side of the basin that allow you to clamp the sink on any 1-1/8” to 1-1/2” countertop, so installation of the sink was fairly easy. The sink has a rubber gasket under the rim that is compressed when you clamp the sink to the countertop. This, in addition to the silicone caulk we applied to the cut, should protect the counter from moisture.

The sink after installation—installing the sink was a very simple process.

We like our sink because it is wide and deep enough for doing all the dishes we have in the van.
Building a Custom Van Faucet
We have a simple human-powered water system. The water flow is controlled using a foot-operated galley pump designed for sailboats. With this system, it doesn’t make sense to have a faucet with knobs to control hot or cold or flow level. Whale Systems, the company that makes our foot pump sells basic faucets to go with their systems, but they are expensive and kind of unattractive.
Instead of purchasing a specialty product for nearly $80, we decided to create our own faucet using pipe fittings and a spigot valve with a vinyl tube running through it. Not only is this an effective solution that saved us money, it’s also a super cute addition to the van.

We built our faucet with five pipe fittings and vinyl hose.

It was easier to fit the hose through the faucet with the pipe fittings separated.
The faucet is constructed from basic pipe fittings that we screwed together. The base is a 3” black iron floor flange with a 1/2” opening that we were able to screw into the countertop. The stem of the faucet is an 1/2”x 8” galvanized pipe nipple. The rest of the stem is built using a 1/2” galvanized 90-degree elbow and a 1/2” galvanized female coupling. The head of the faucet is a 1/2” brass hose bibb, which helps direct the water’s flow downward. We could theoretically close the faucet’s flow using this valve, but it’s purely for decorative purposes.
We built the faucet to be about 9” inches above the counter, because we wanted to have enough room for washing dishes, but we also didn’t want it to be so tall that the water would splatter when it hit the bottom of the basin.
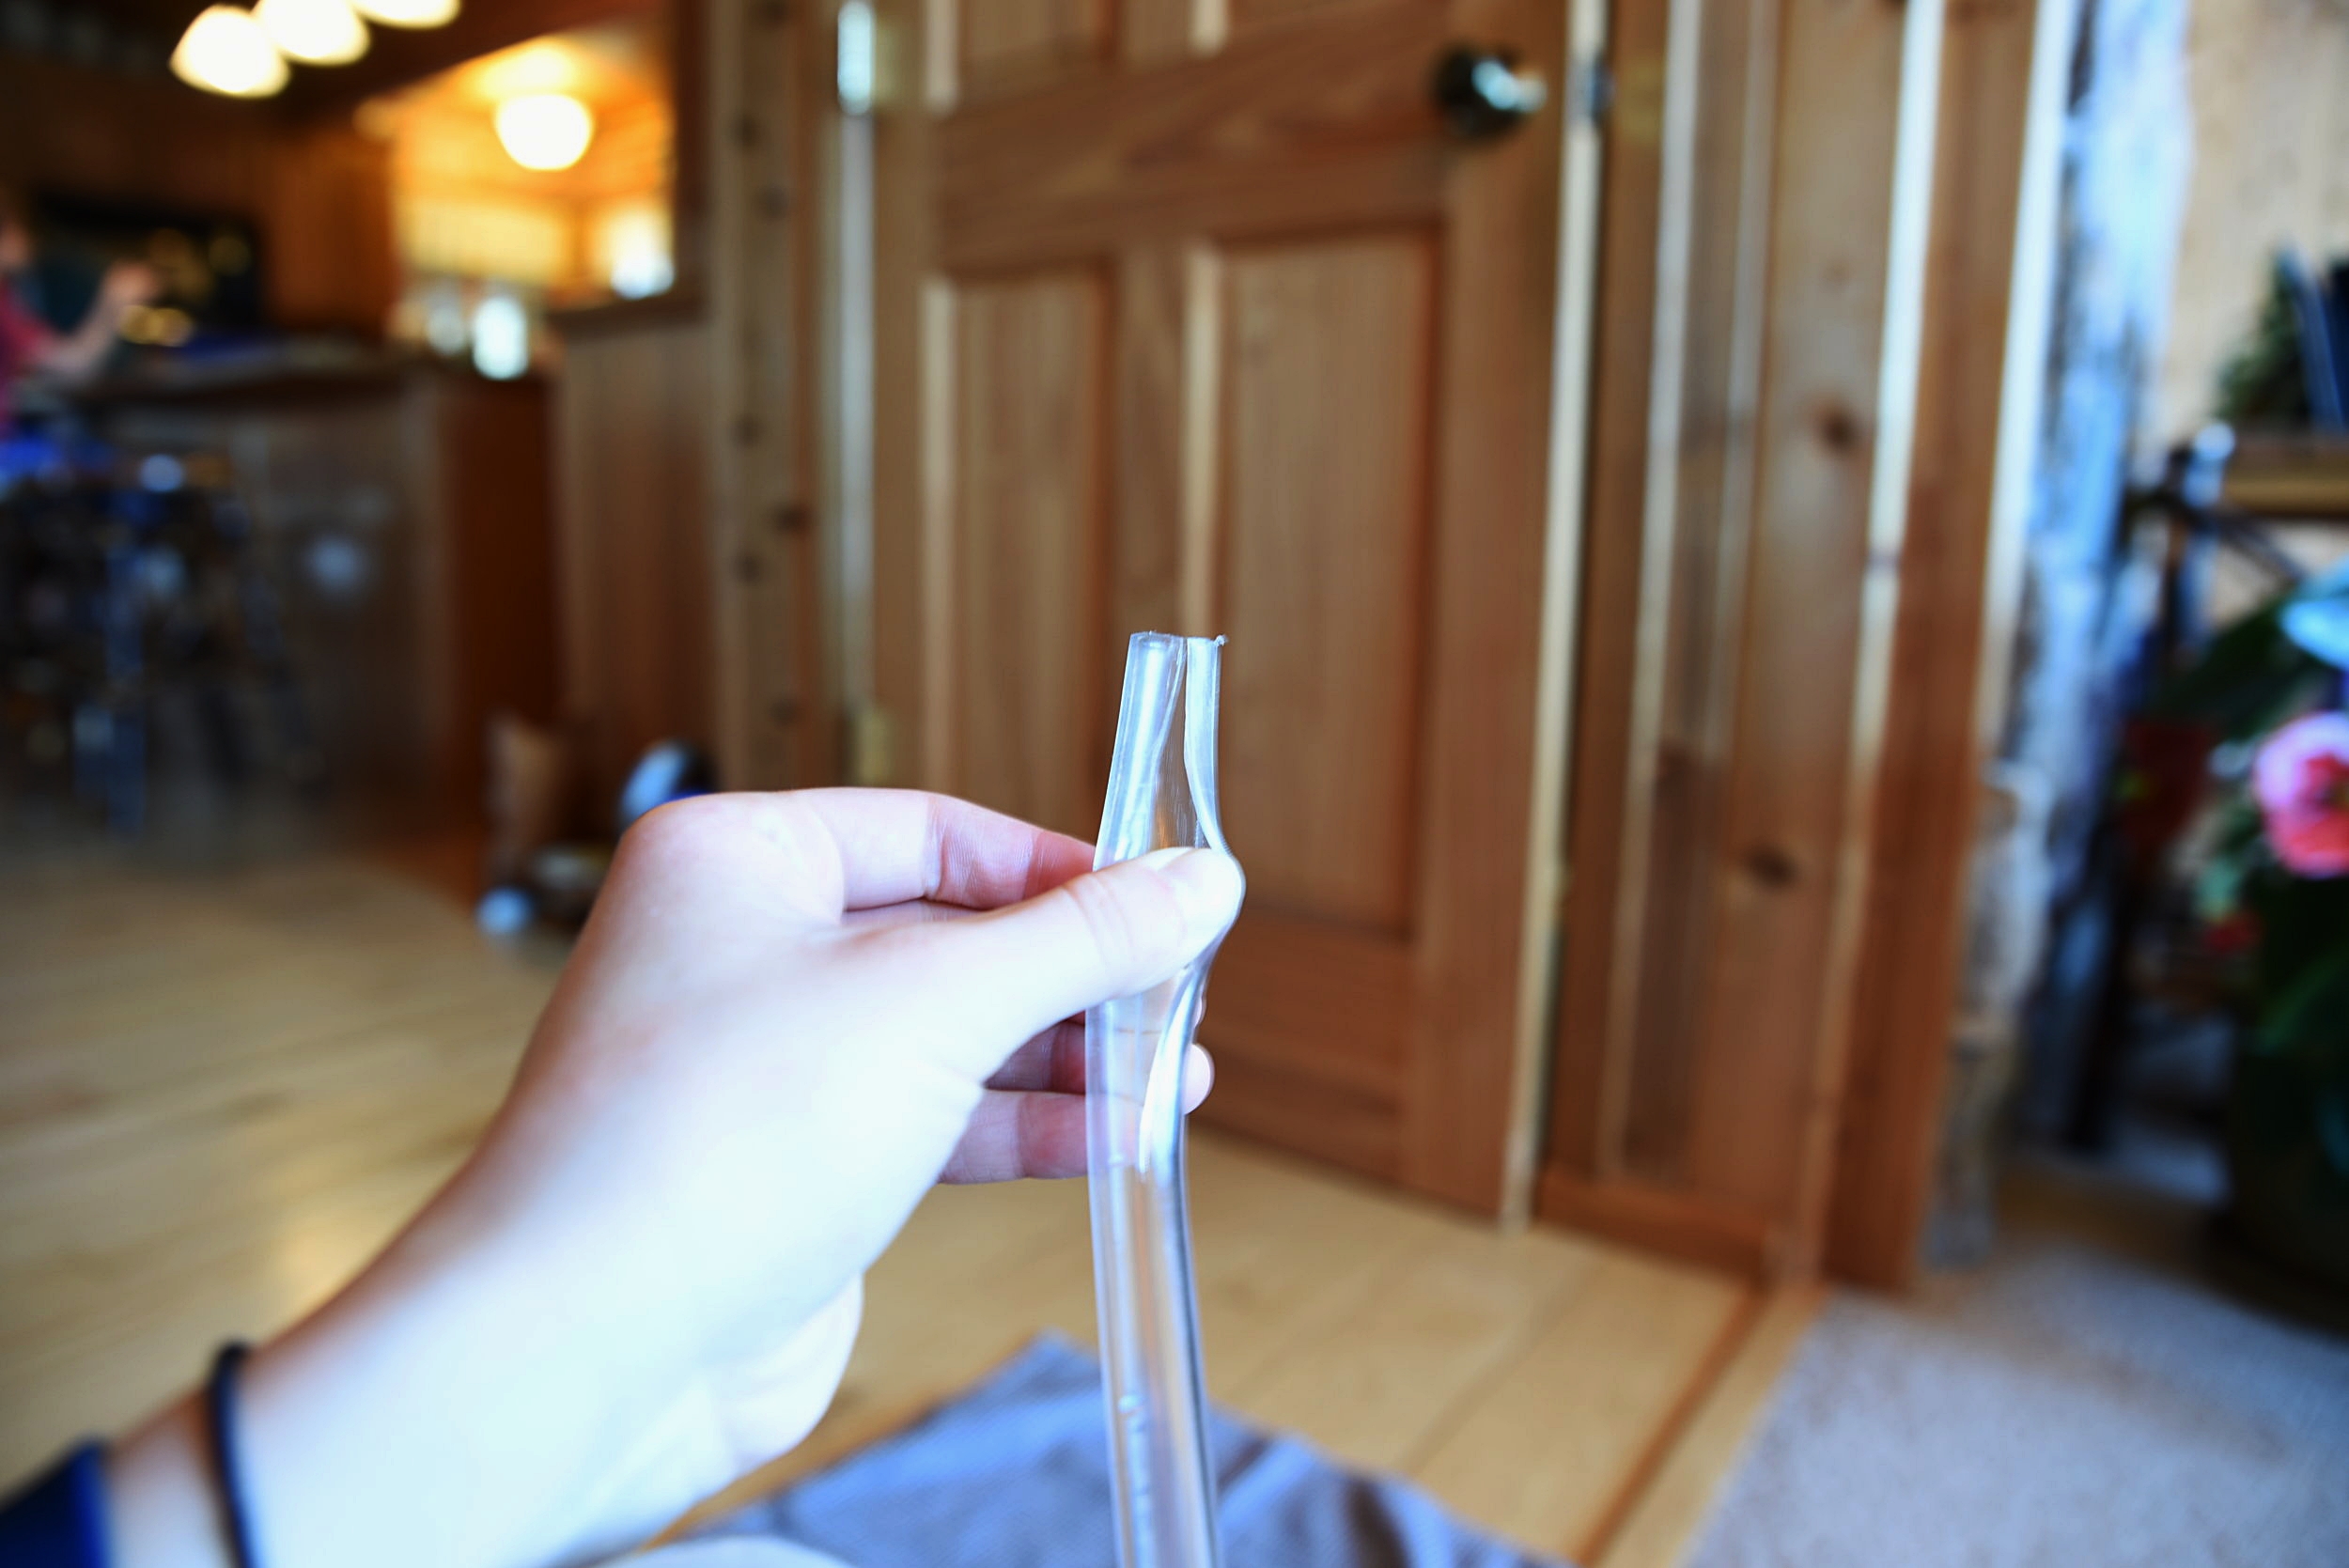
By cutting a slit in the end of the hose we were able to wrap the hose around itself to make the tip narrower.

Here are the completed faucet and hose ready to be installed.
The metal pipe fittings are only the structure for the faucet. There is a flexible vinyl hose running through the inside of the faucet. It was a bit tricky to fit the vinyl tubing through the fittings. We ended up cutting a slit in the hose, wrapping the hose around itself, taping the now slimmer tip, and threading it through each piece of the fittings. Once we had it through all the fittings, we cut off the section of the hose with the slit in it. Then we screwed all the pipe fittings back together.
When we attached the spigot valve faucet head, we ran a bead of silicone caulk around the inside of the thread of the spigot and around the outside of the hose. This layer of caulk should prevent any water from moving back down the faucet and damaging our counter top or dripping under the sink. For good measure, we also sealed the space between the hose and floor flange, so that if any water did make its way backward, it wouldn’t drip under the sink or seep into the countertop.

In this photo you can see the hose reducer and the hose clamps that we used to fix the mistake we made in hose sizing when we were creating the faucet.
The Whale Gusher Galley Pump that we picked for our van can be attached to 1/2” inner-diameter vinyl tubing. We mistakenly created the faucet using 1/2” outer diameter vinyl tubing. This mistake was easily solved with 1/2” to 3/8” hose barb reducer coupling. This piece allowed us to attach the hose from the faucet to the hose from the pump. We also used hose clamps on either side of the coupling to make sure no water leaks out.

We sealed the hole for the faucet’s hose using a silicone caulk.
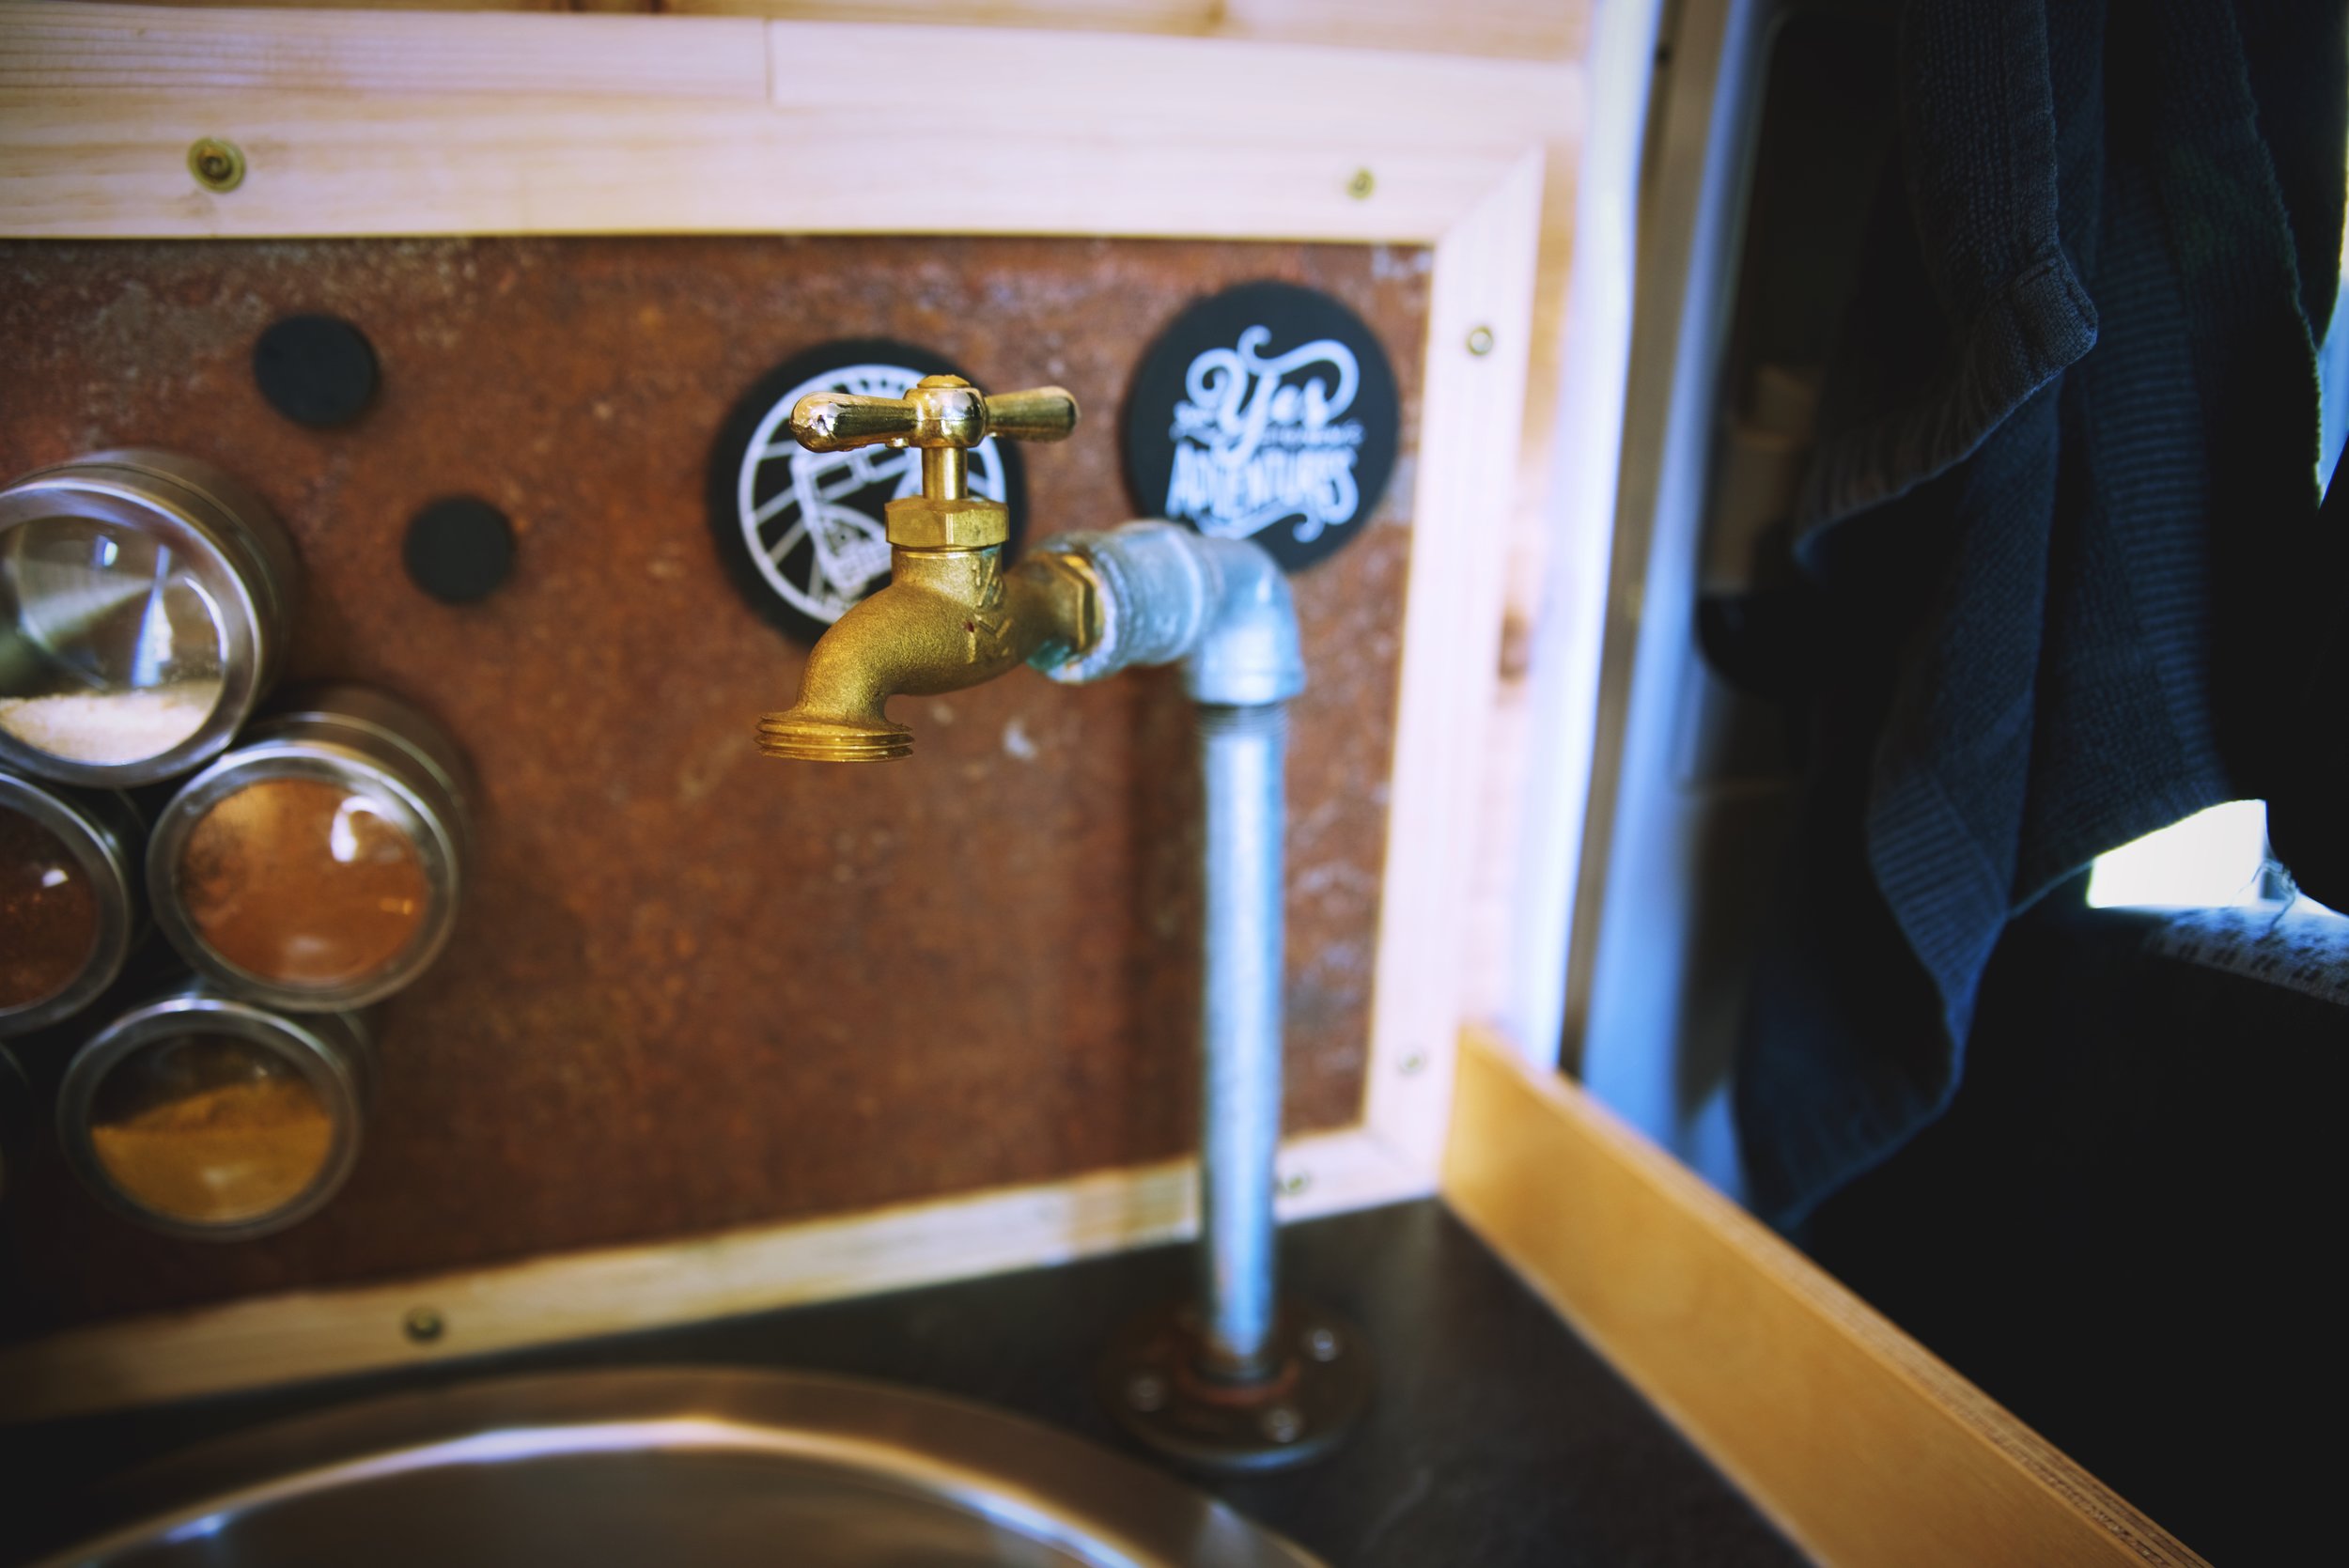
The finished faucet was both affordable and it matches the rustic look of our van’s interior.
We drilled a small hole through the the countertop that the hose from the faucet runs through. Like with the cut for the sink, we sealed the edges of the hole with silicone caulk. After the caulk had cured, we ran the hose through the hole, and mounted the faucet to the top of the counter by screwing the floor flange into the countertop using four small brass flathead screws.
Our Van Pump, Plumbing, and Water Storage

We used this Whale Gusher Galley foot pump to pump our freshwater to the faucet.

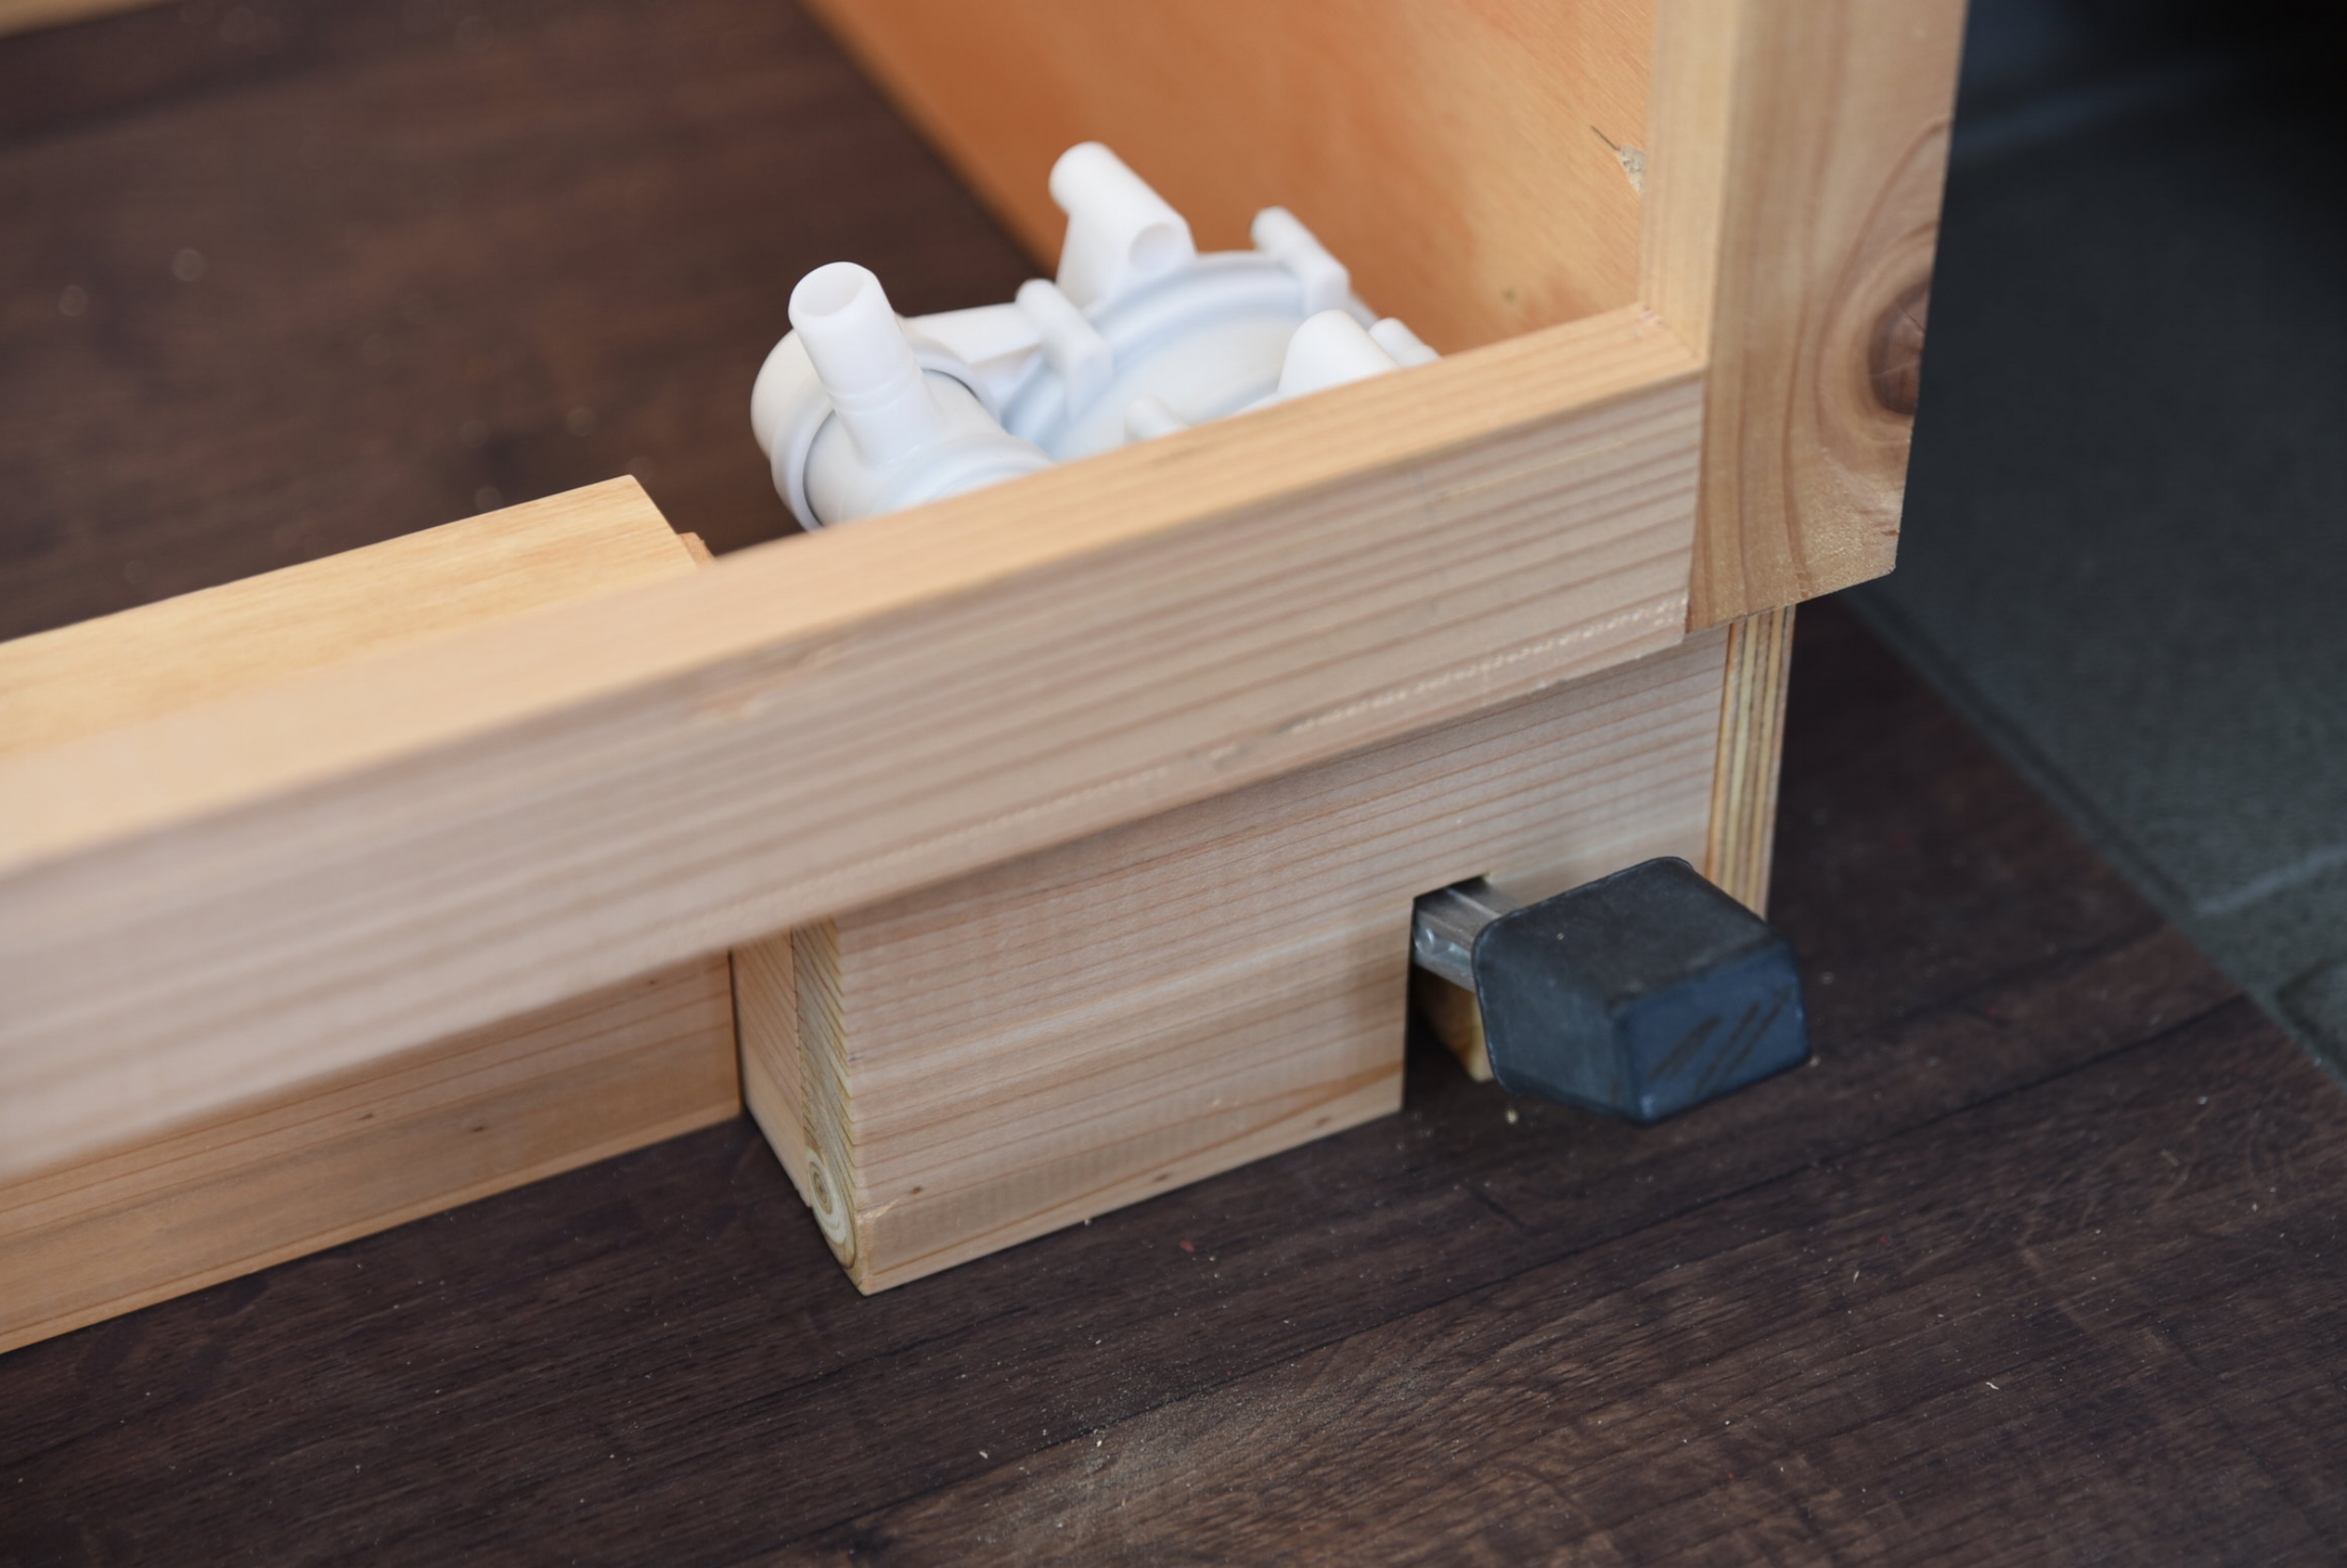
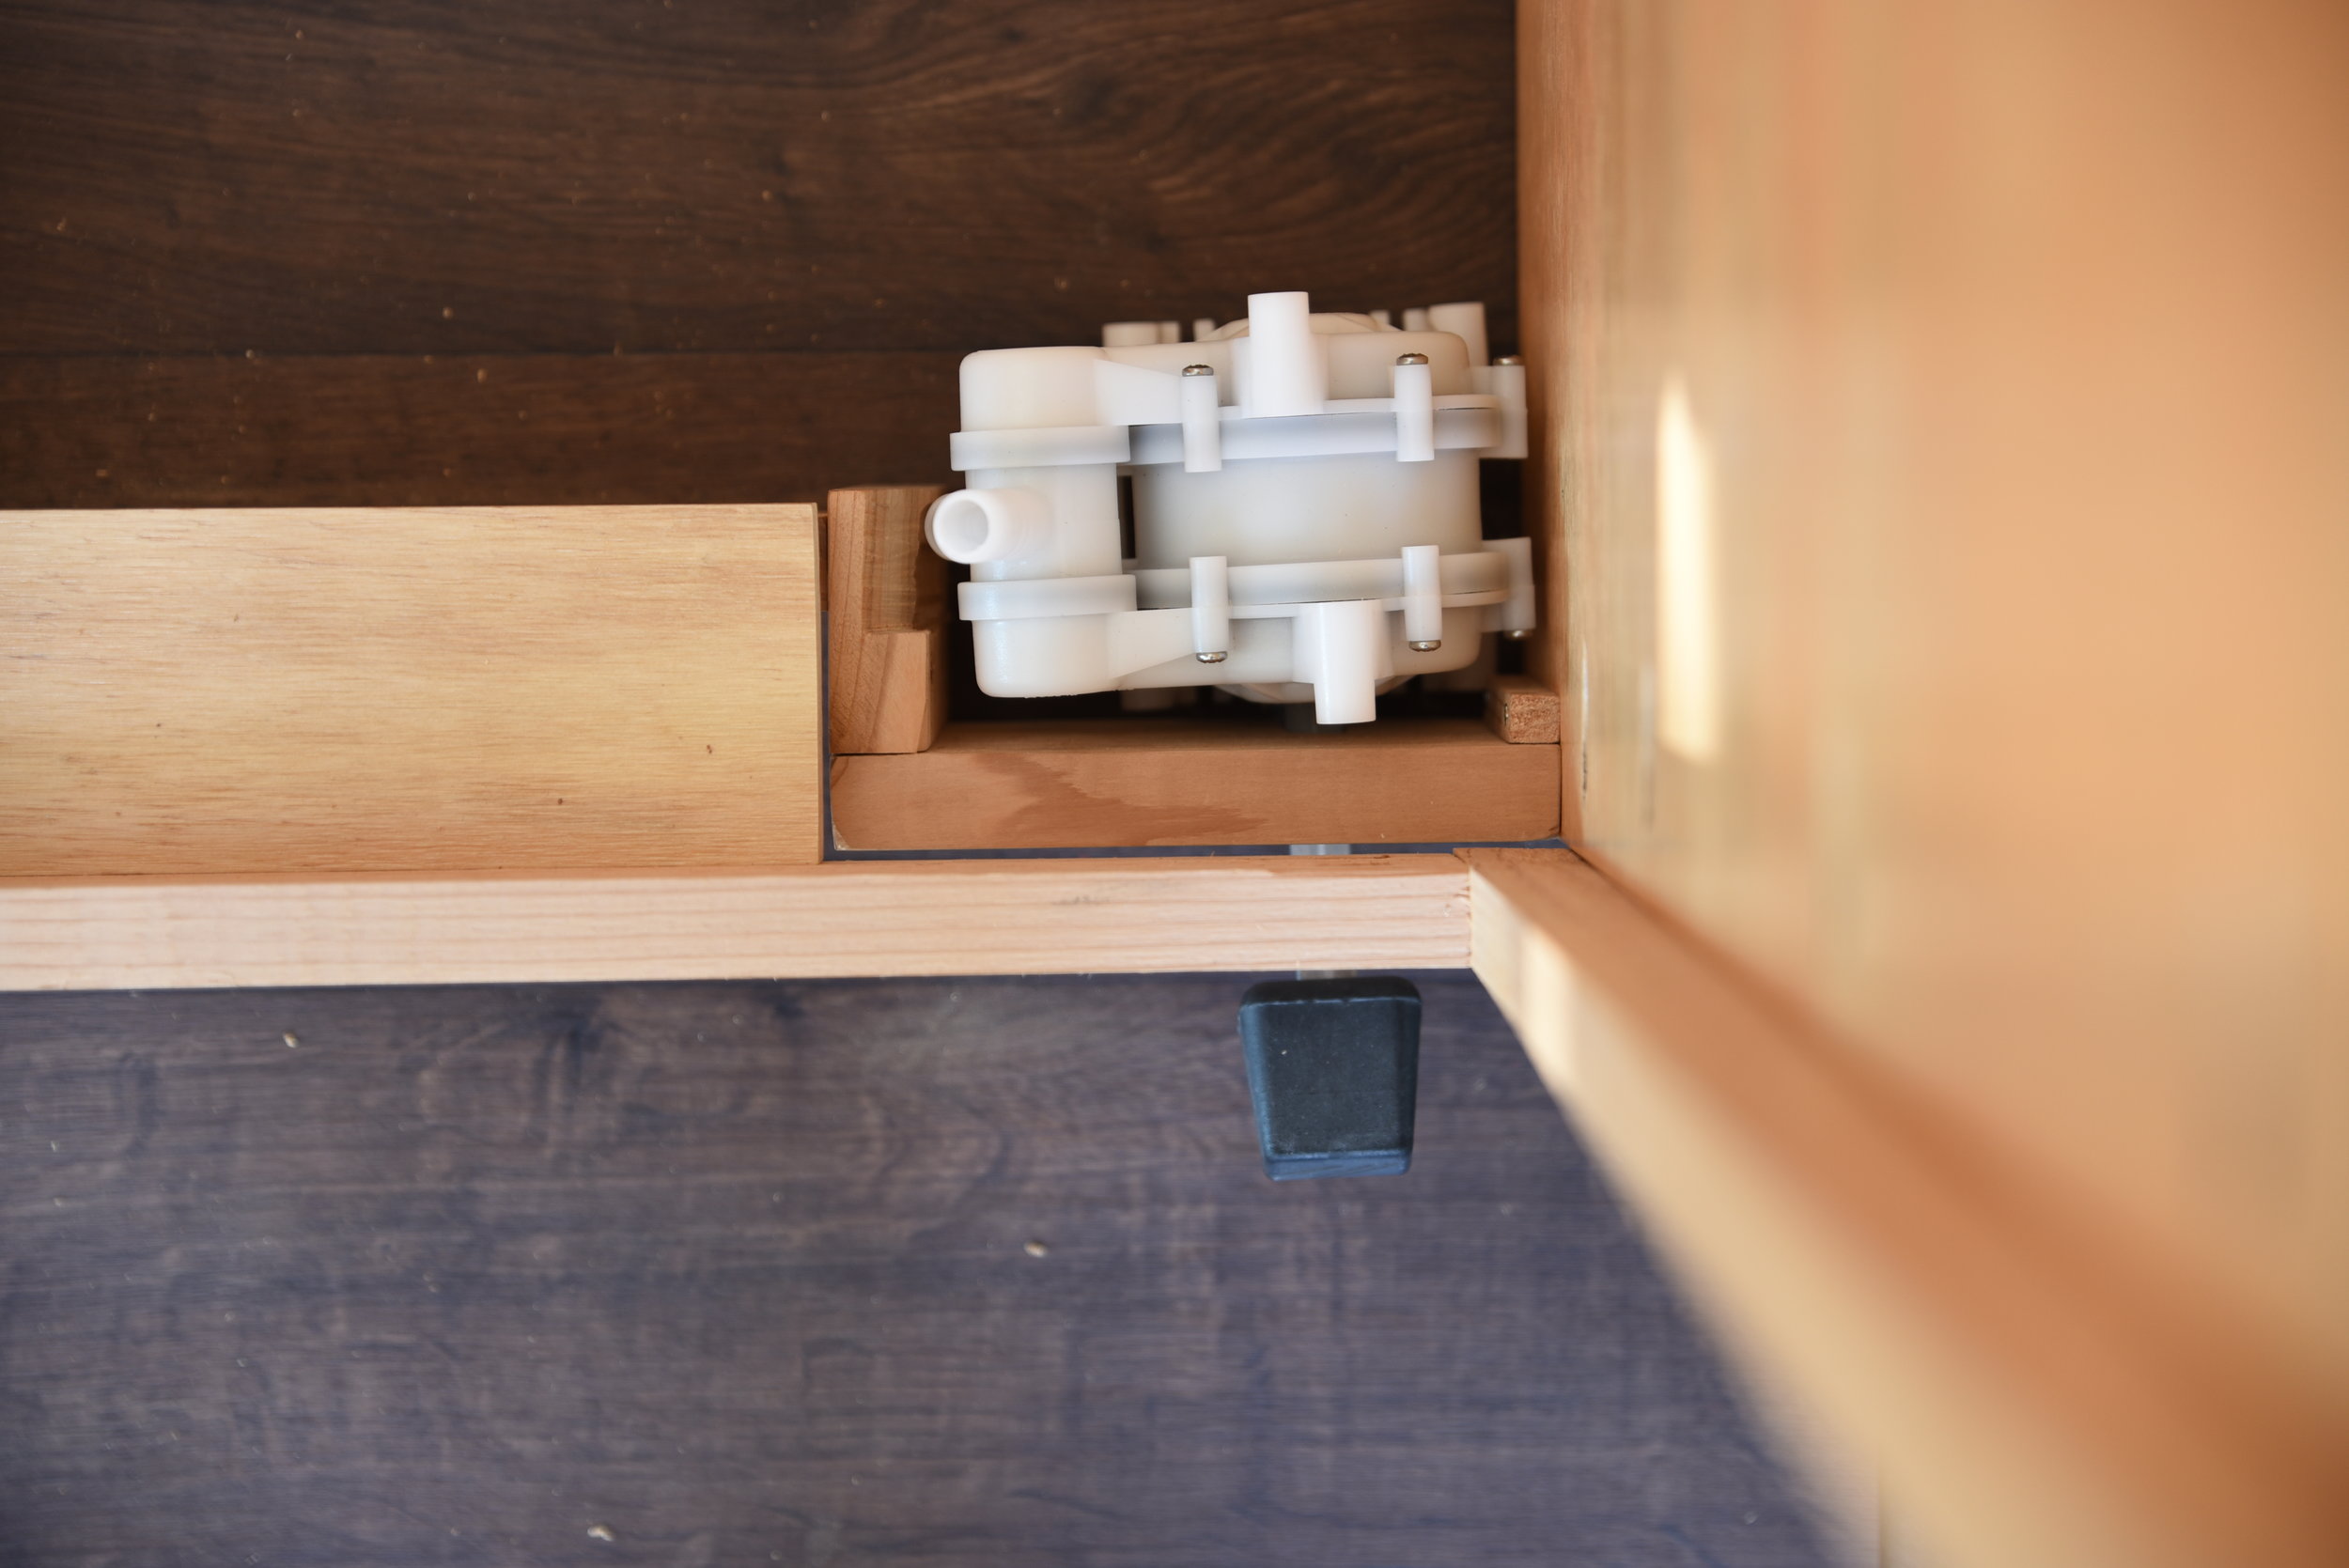
We built the foot pump into the baseboard of our cabinets in our van’s kitchen.
For our water system we wanted to go with a non-electric manual pumping system. We didn’t want to add to the draw on our solar power system, and electric pumps are often very loud. Some van conversions use hand-operated pumps, but we wanted to be able to use both our hands for washing dishes. We chose a foot-operated Whale Systems Gusher Galley Pump for the water system in our van. The pump mounts into the van floor, and it can pump up to 15 gallons per minute. Because it’s manually operated we have a lot of control over how much water comes out. We have also allowed this pump to freeze with no ill effects, which is a great advantage. These pumps are designed for use in boats, but they are commonly used in van conversions and RVs. If you can’t find a good solution for something in your van build, we’d highly recommend looking into how it’s done on boats. We got a lot of great ideas from live-aboard boats.
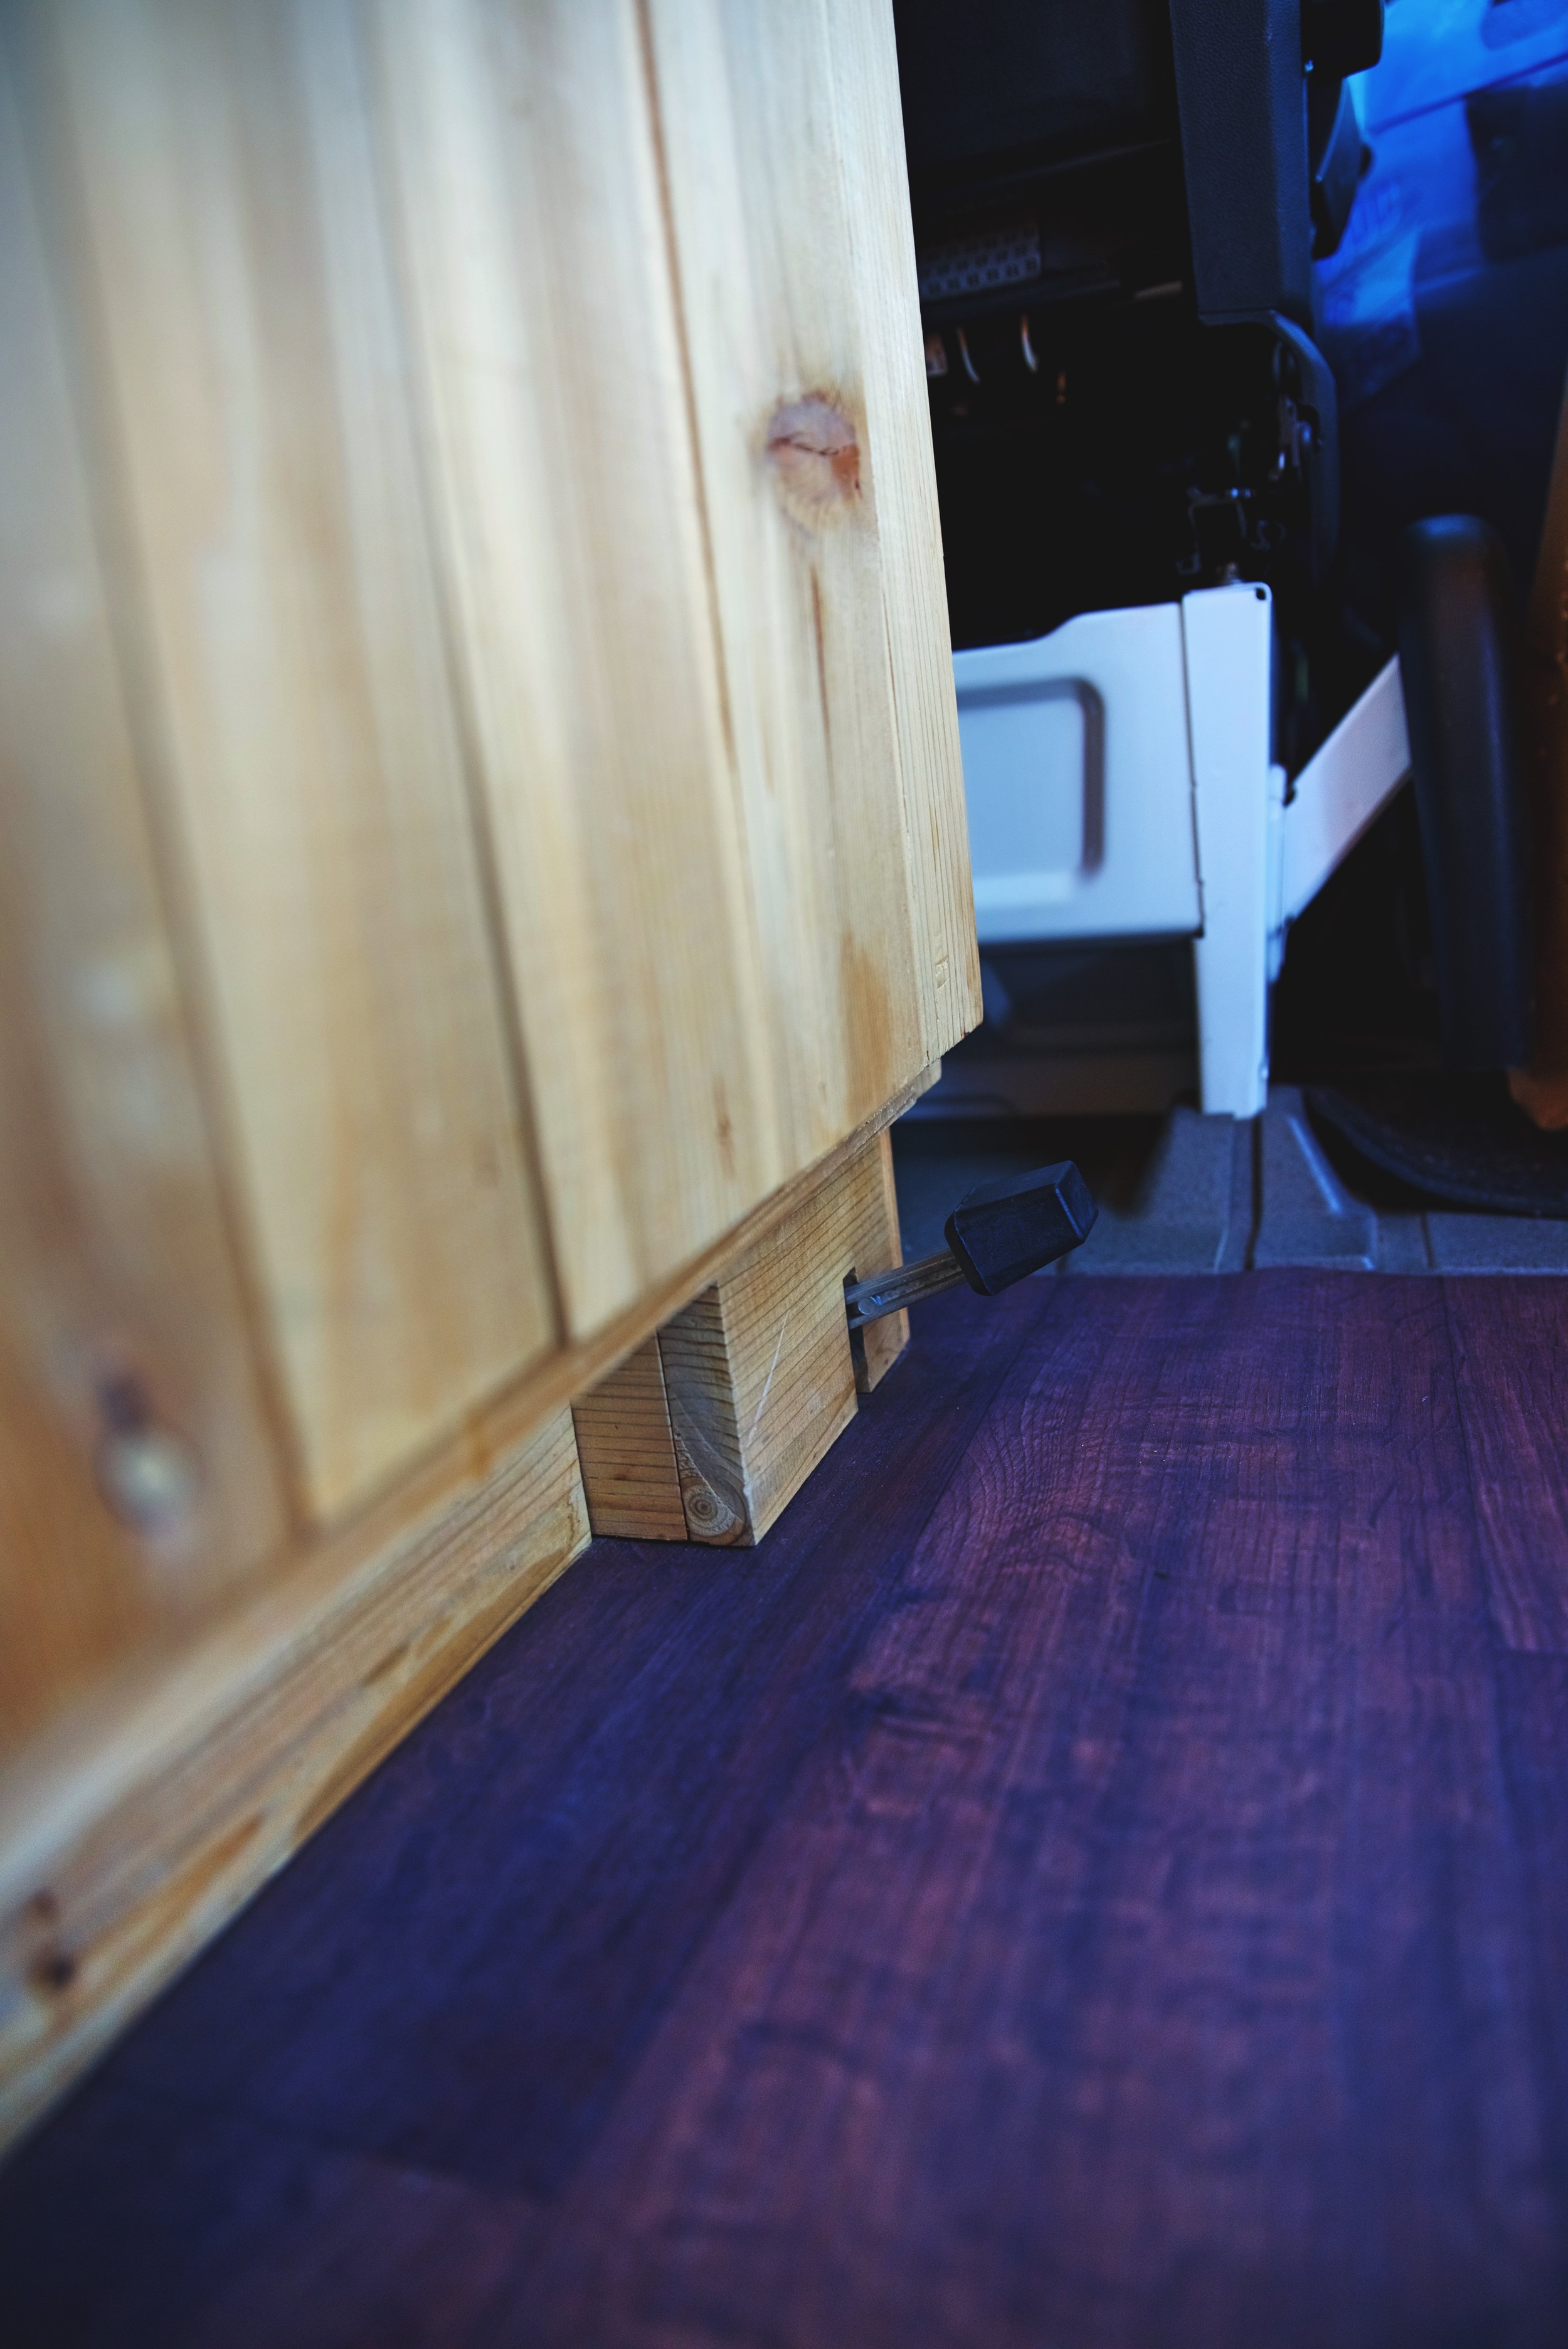
We cut a small slot so in the cover plate so that the pedal can move up and down.

Here is the hidden pump with the cabinets finished.
The pump is built into the toe kick of our cabinets. The pedal had to stick far enough out from the edge cabinet bottom that we would be able to pump it without obstruction. We created a cedar, removable cover that hides all of pump besides the foot pedal. If we ever need to pull the pump out to fix it or replace it, we will only have to remove this small cover plate rather than the whole toe kick.
In this picture you can see the removable cover plate that houses the foot pump.
We had to move the pump out a few inches from the toe kick so that we could use the pedal without hitting our feet on the cabinetry.
The next step was attach the 1/2” inner-diameter vinyl tubing to the pump. The intake for the pump is the barb on the bottom, and the output is the barb on the top. It’s easier to get the hose on the pump if you lubricate it with a little bit of water. You can buy these pumps in right-handed or left-handed versions, with the intake and outlet on either the right or left side, depending on the system you want to build.
The hose we used is clear, flexible PVC tubing. Make sure that any tubing that you buy for your drinking water is rated as food-grade or for beverage dispensing. There are many types of tubing that are designed to convey gases or chemicals and that aren’t safe for drinking water.

We used a smaller hose for the faucet and the 1/2” inner-diameter hose for the pump.

The pump’s intake is the bottom barb and the output is the top barb. The two barbs rotate so that you can position them however works for your system.
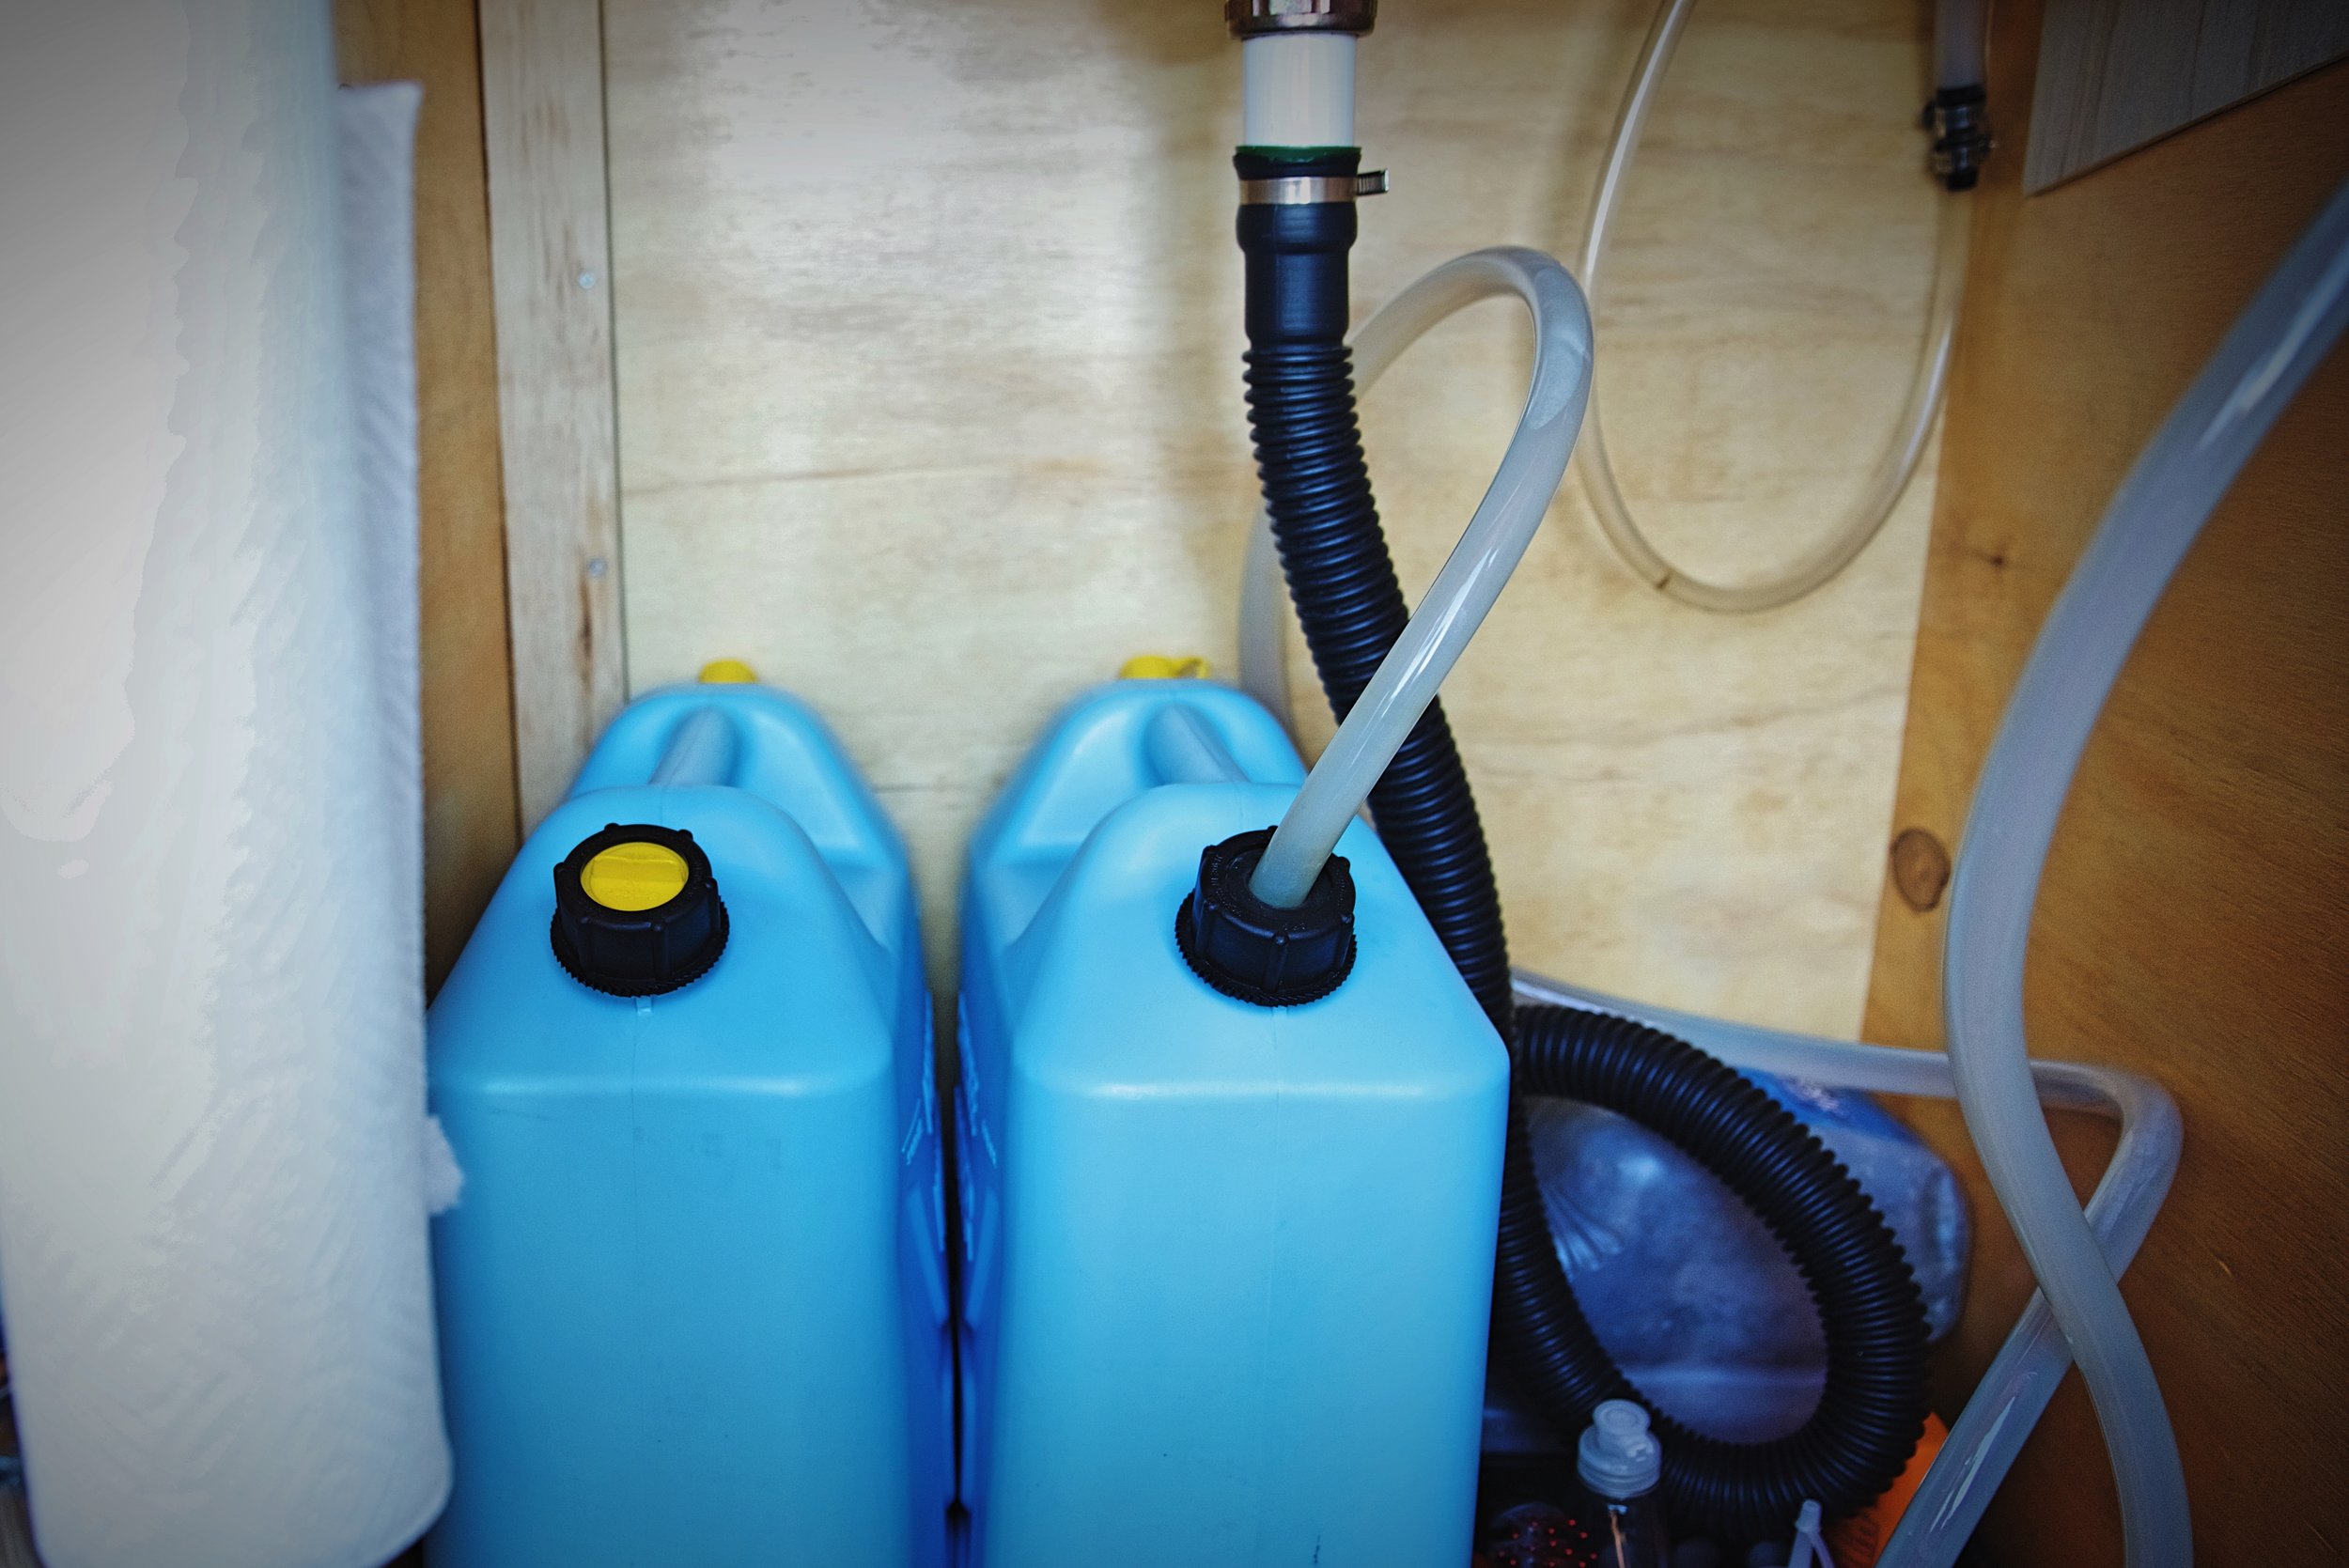
The intake hose runs to a BPA-free, five-gallon jerry can for potable water. We designed our under-the-sink cabinet to hold two of these five-gallon jugs. The two blue jugs hold our fresh water for drinking and washing. Ten gallons of water usually lasts about a week or two depending on whether we are cooking real food or just eating instant ramen and fruit.
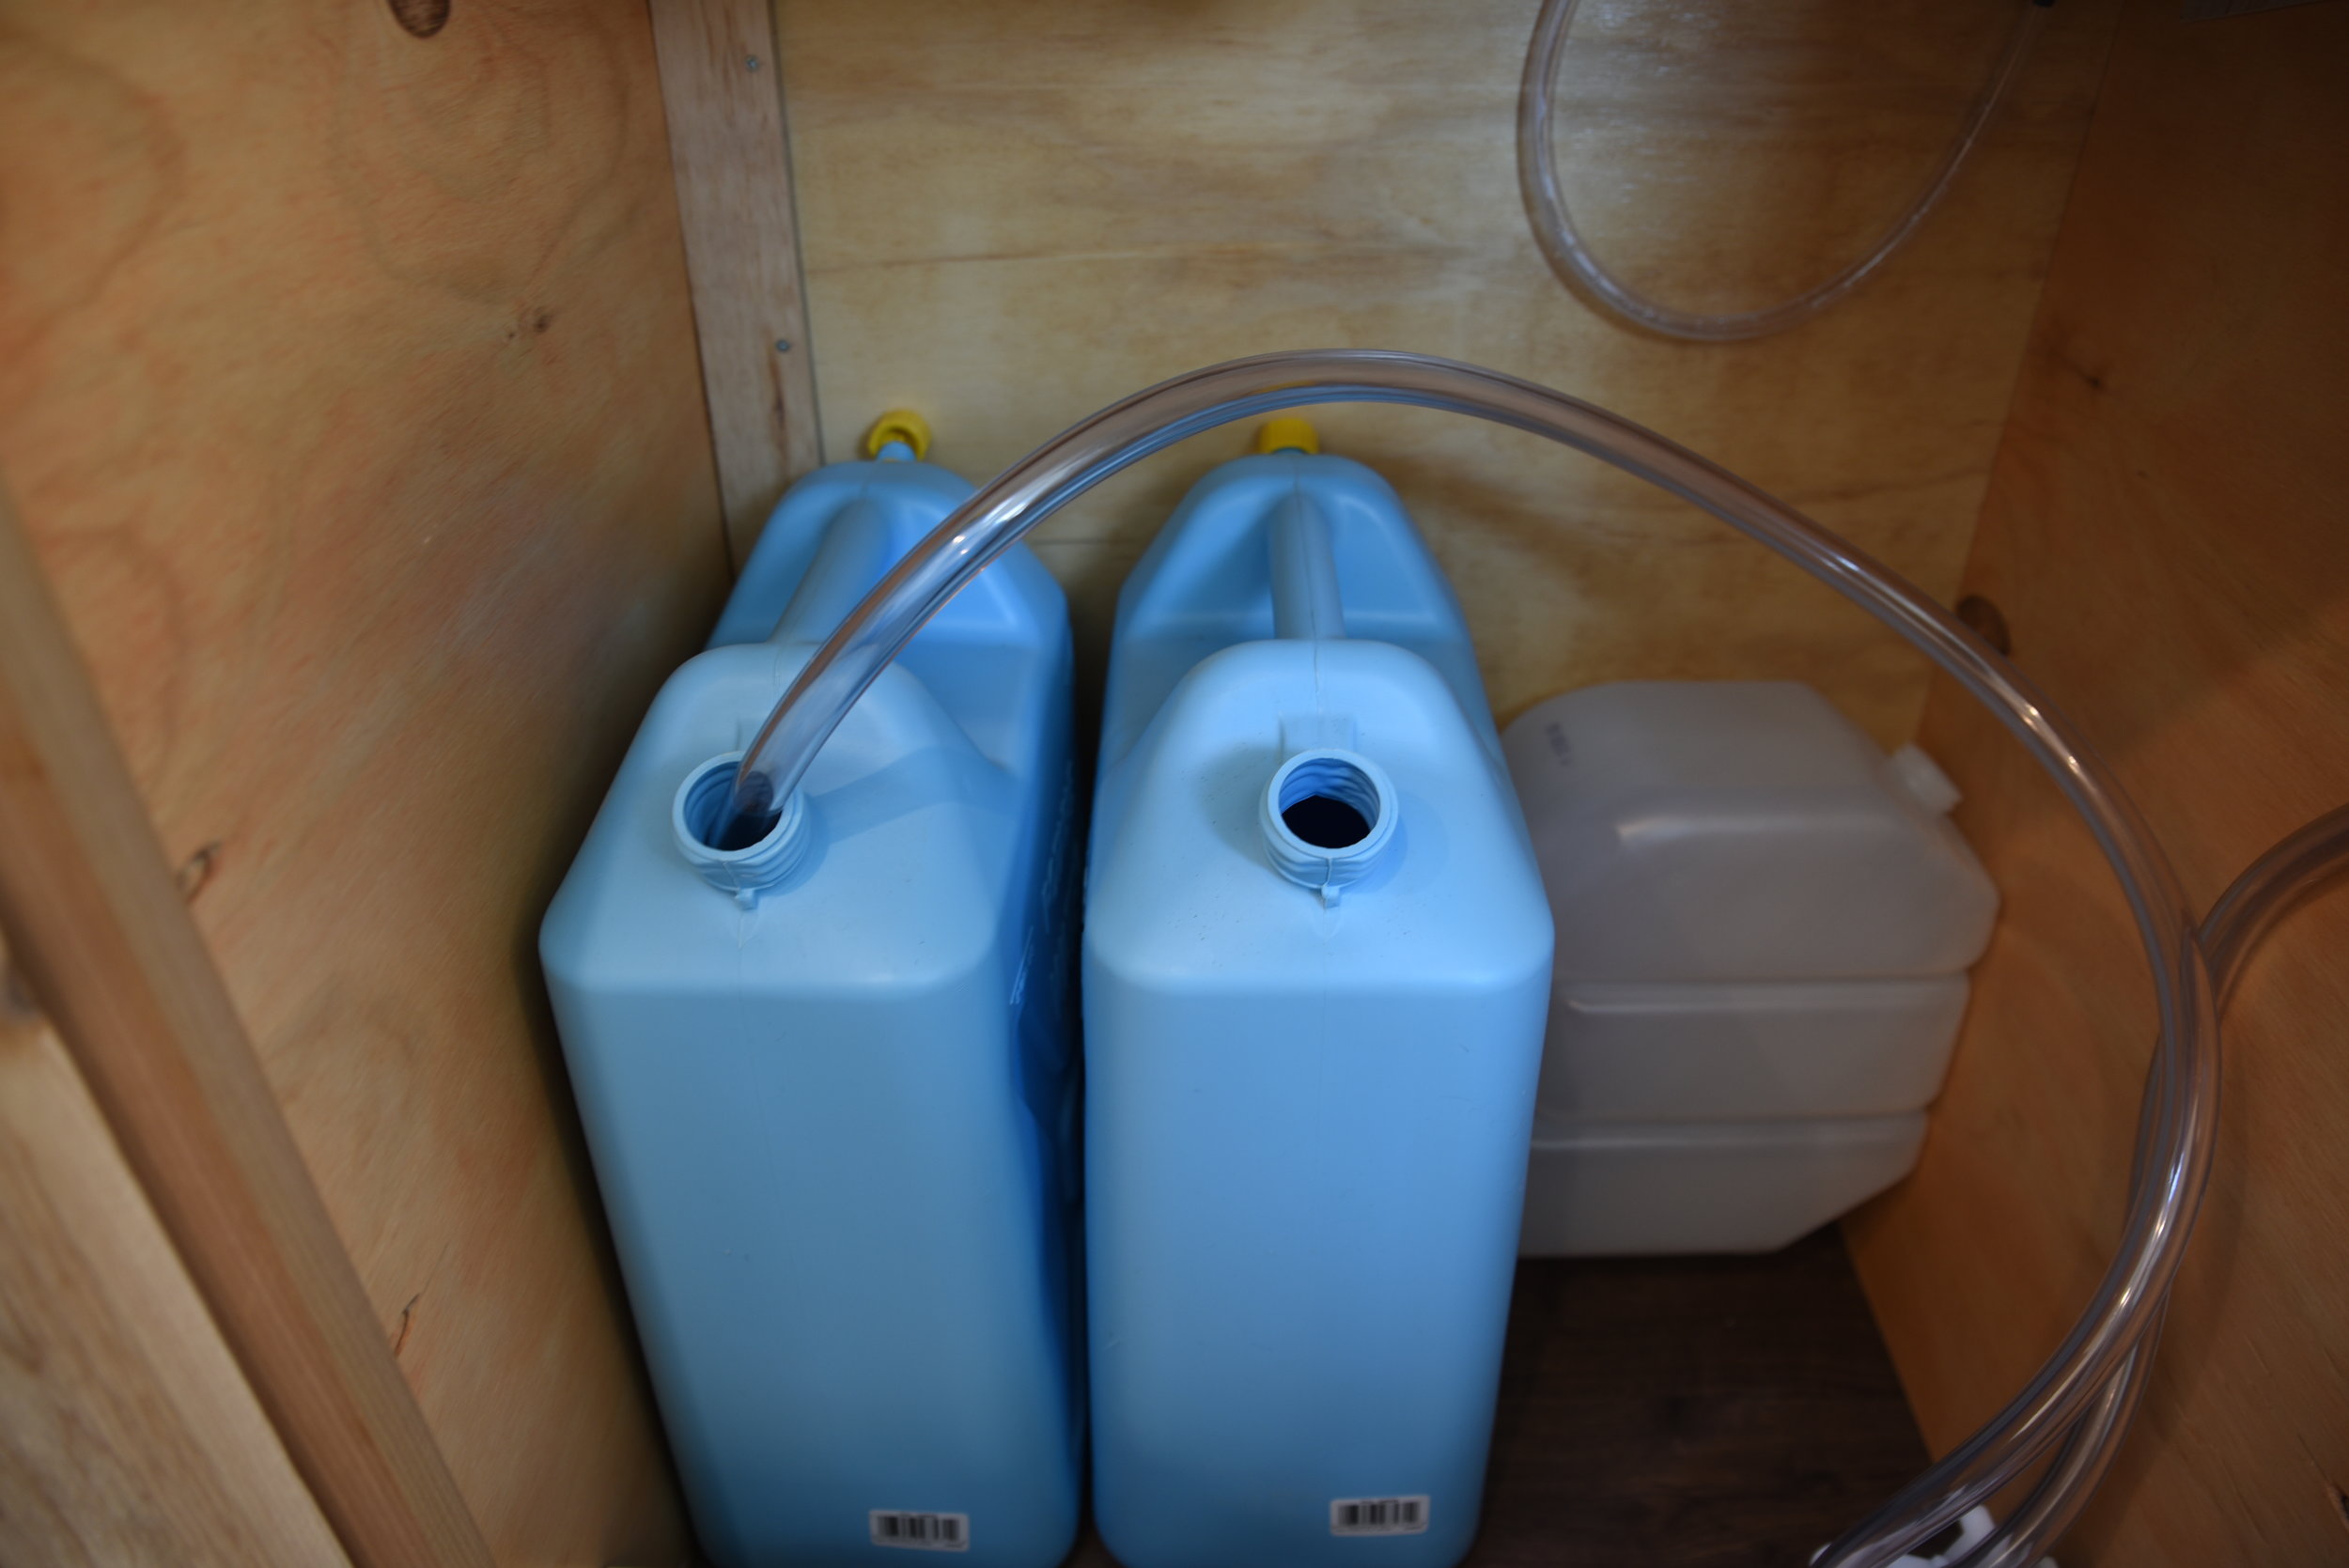
The intake hose runs to our two freshwater jugs.

When one freshwater jug runs out, we move the hose to the full one.
We keep one of the jerry cans closed, and when the first one runs out, we simply switch the hose to the full one. To prevent splashing while we drive we found a wide rubber flat washer that we cut to the right size so that it could fit around the hose but inside the cap of the jerry can.

We had to cut this rubber flat washer hole bigger so that it could fit around our hose.

We put the rubber washer inside the cap, so when we screw the cap down, the water doesn’t splash out while we drive.
The output hose runs from the pump to an inline water filter. We purchased the pump from Whale Systems so it works with our pump without affecting flow or pressure. The filter contains carbon for taste and odor and silver to inhibit bacteria growth. We never use water from streams or lakes in our water system because this is not a bacterial filter like you would use for backpacking. But sometimes we get water from gas station or rest stop spigots, so this filter takes care of any funky smells or tastes.
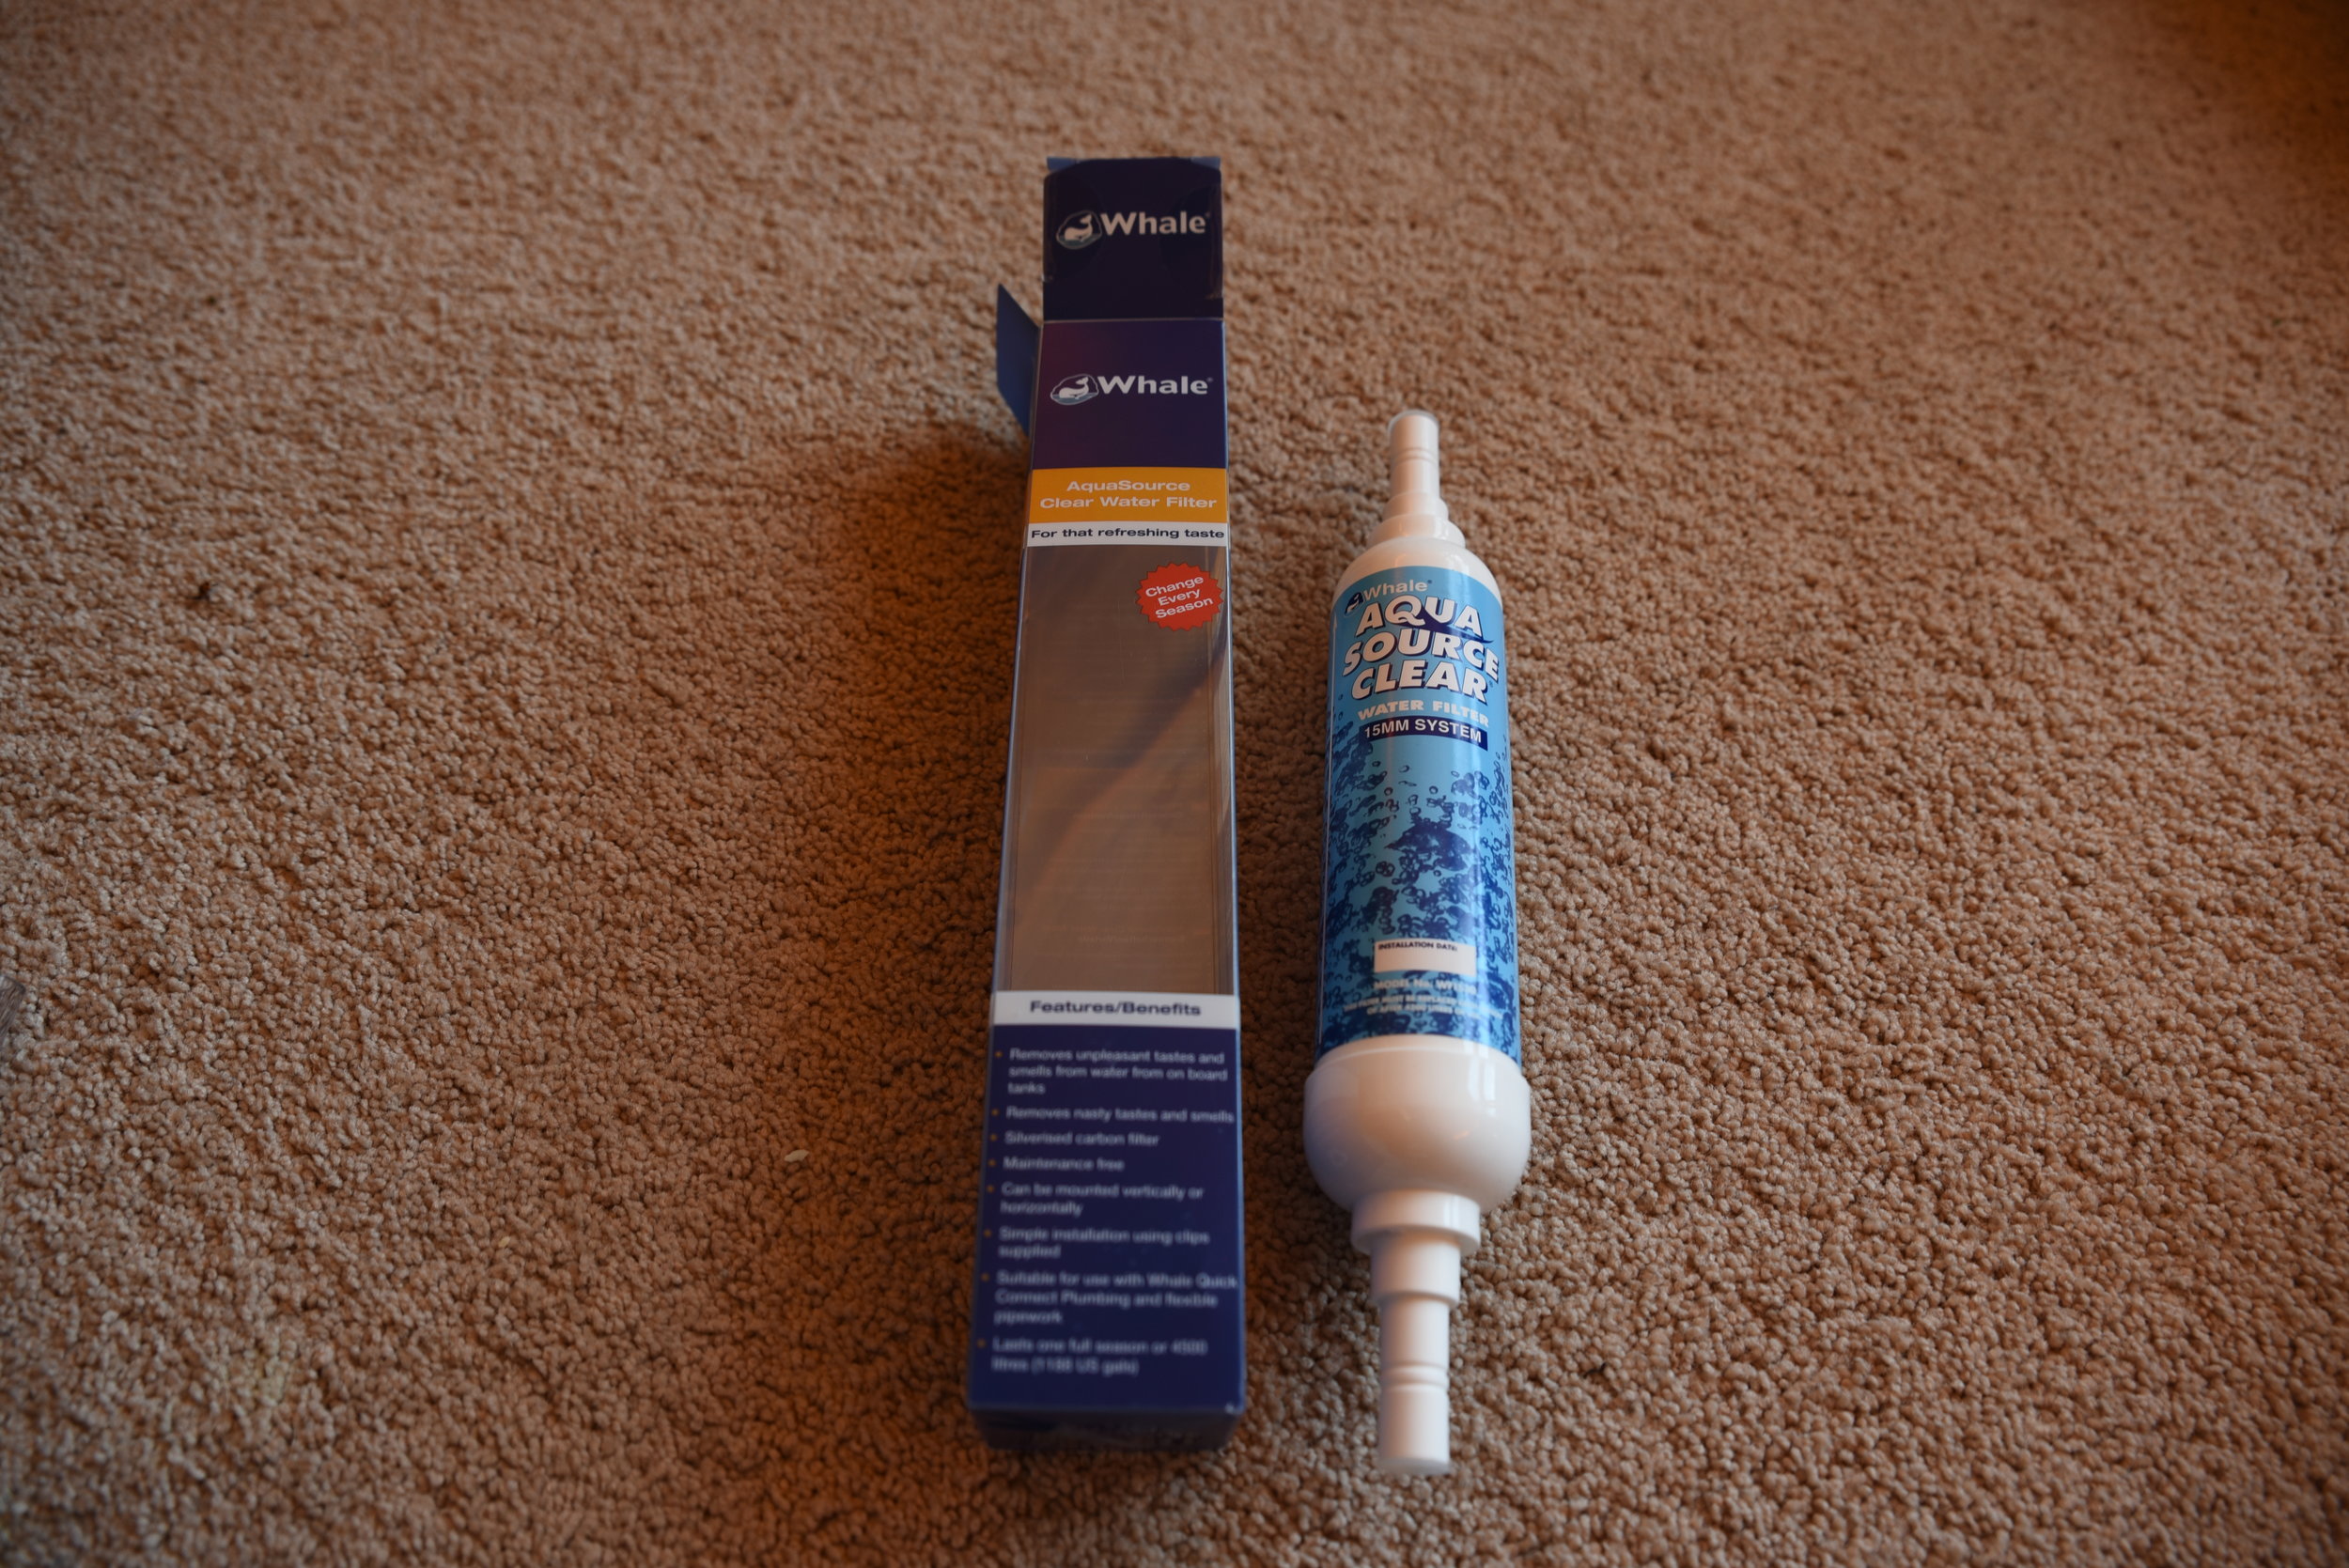
The Aqua Source Clear Filter from Whale Systems can clean up to 1,188 gallons of water.
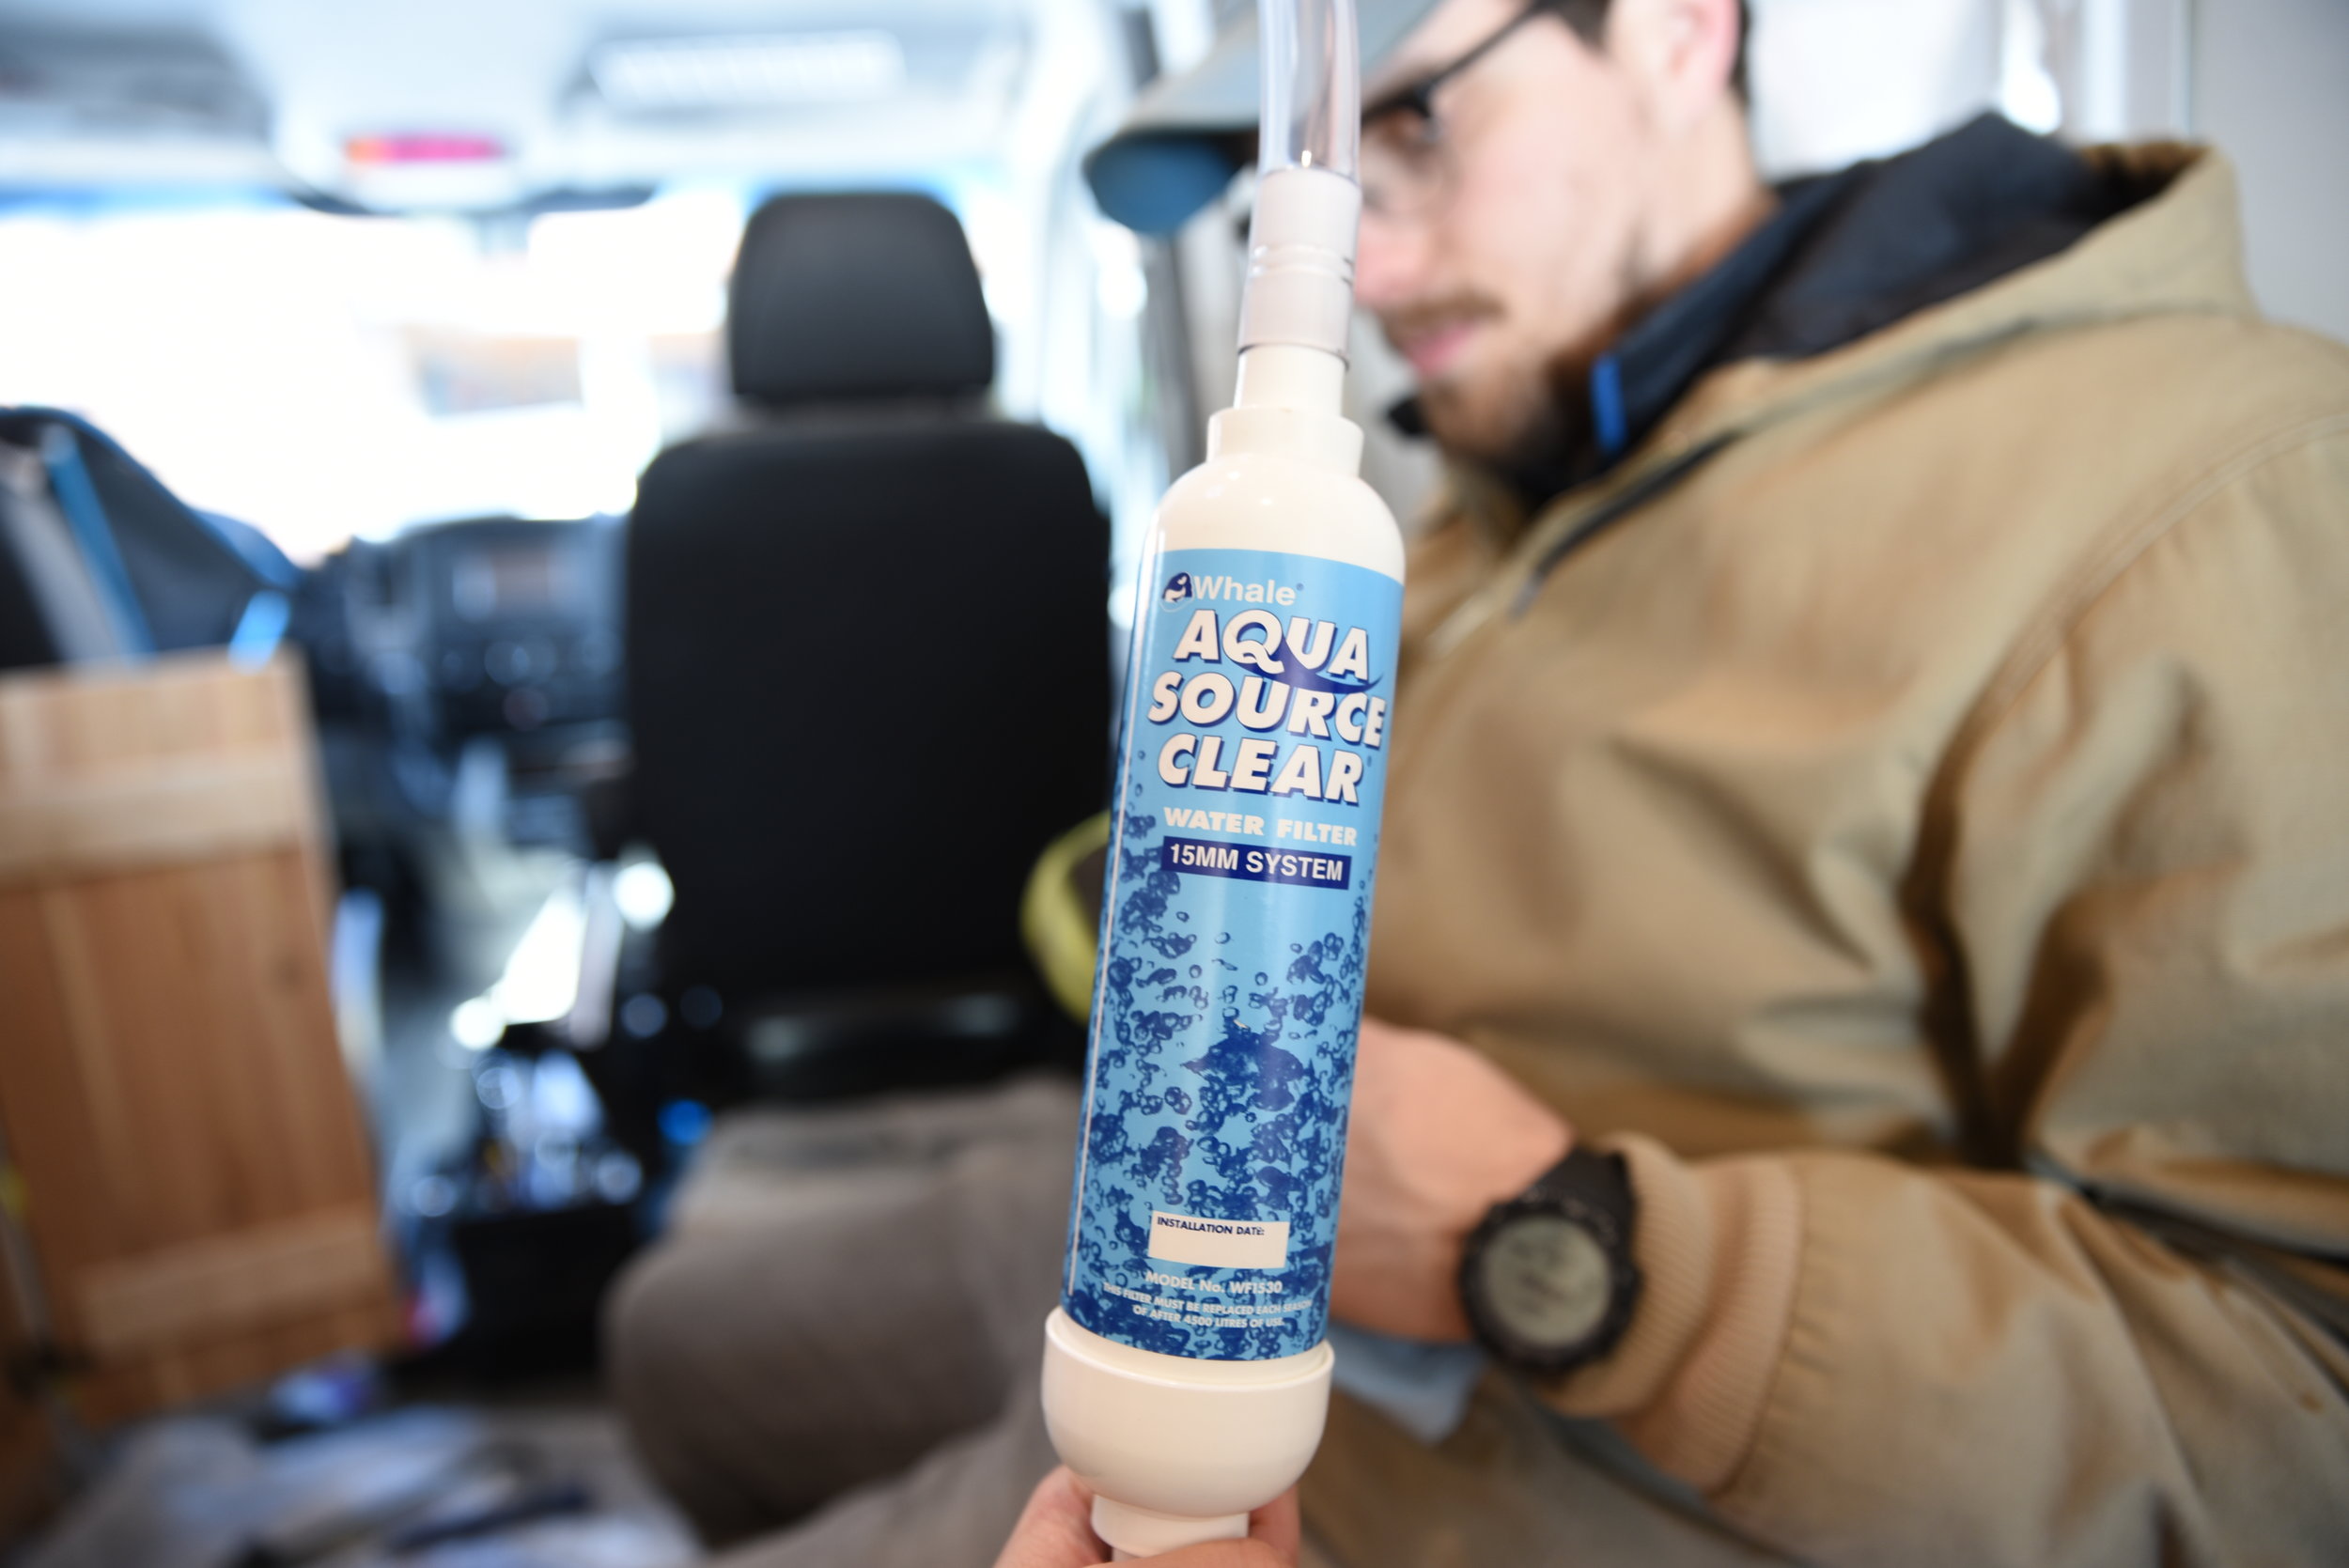
The filter connects to the same 1/2” inner-diameter hose the pump uses.
The filter has a slim profile, and it comes with plastic mounts so we could mount it on the inside wall of the cabinet. It’s also designed so it can be mounted horizontally. We attached the water filter next to the sink basin. We had to mount it with a thin piece of plywood as a spacer so that the screws for the mount wouldn’t poke through the other side of the cabinetry. It does have a direction, so make sure that the water will be flowing in the bottom and out the top.
After going through the filter, the hose runs to a reducer coupling, which attaches to the faucet’s hose.

We mounted the filter out of the way next to the sink’s basin.
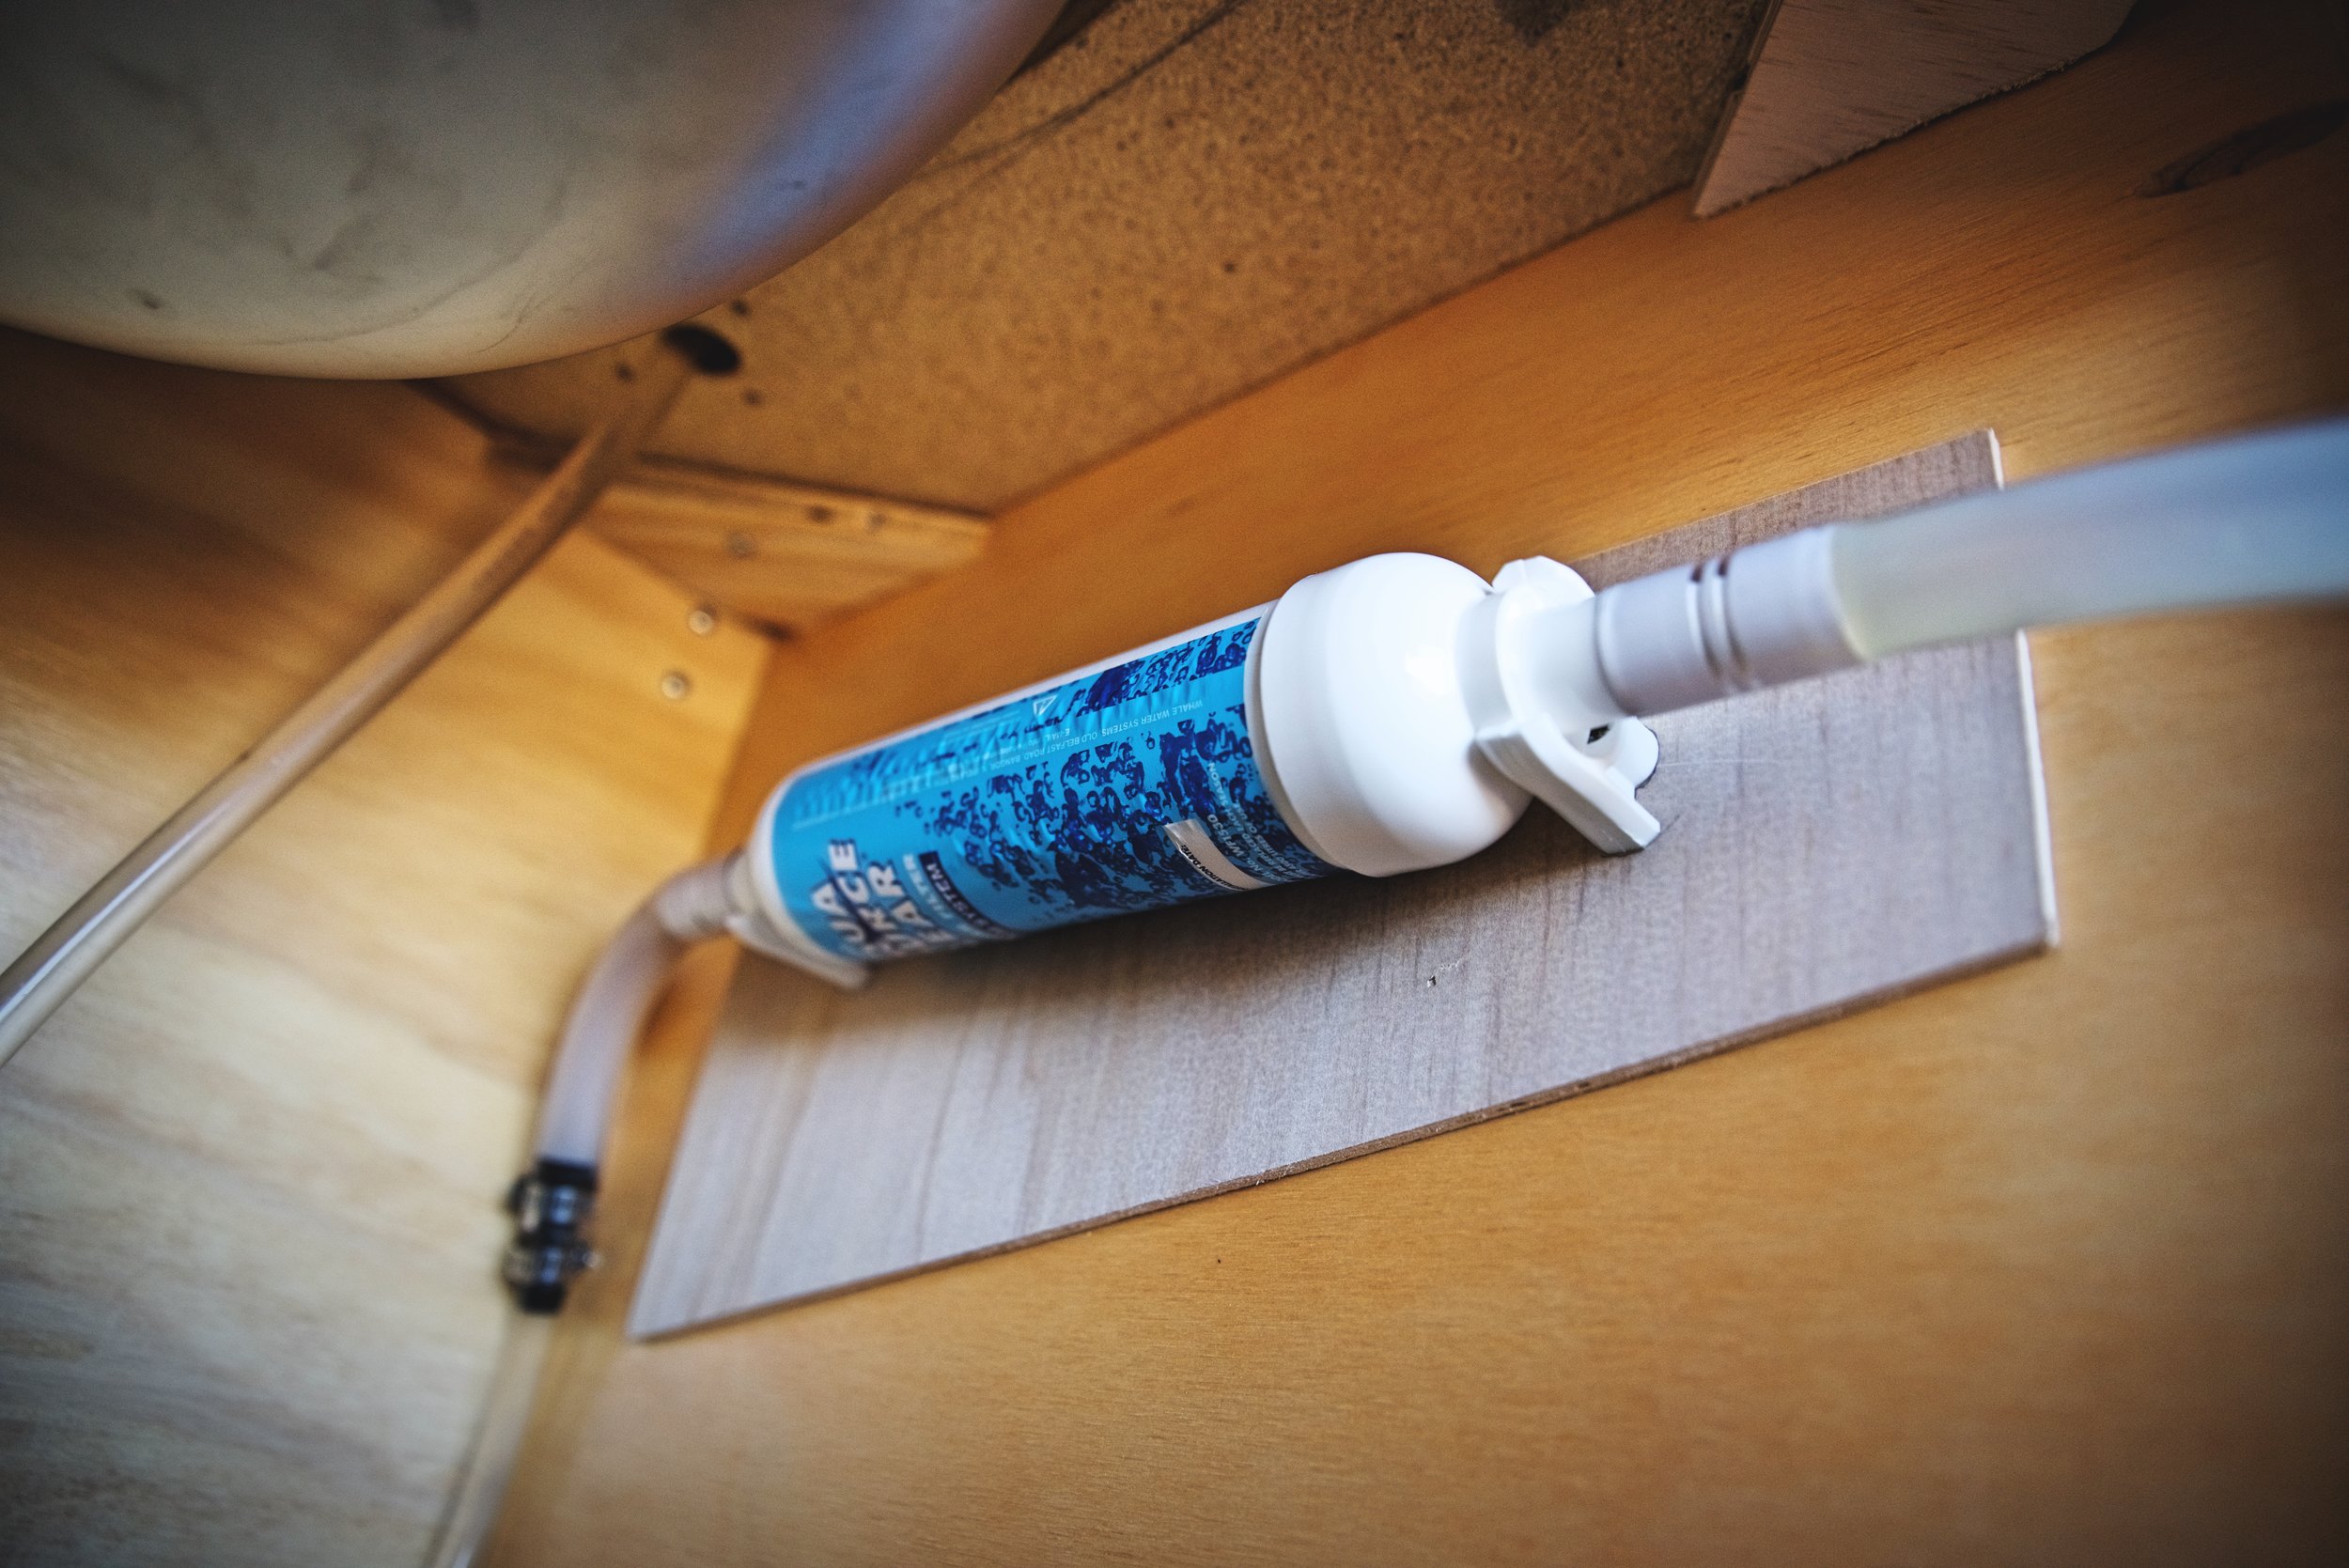
We mounted the filter to the wall using the provided plastic clips. These clips will allow us to easily change the filter whenever we drink 1,188 gallons of water.
The waste water that drains from our sink runs into a disposable plastic 2.5-gallon water jug. We chose this container, because we can easily replace this jug on the road when it gets gross and stinky. Whenever the inside of the jug gets coated in grease and grime, we just buy a new jug of drinking water that we drink and then use that to replace the old gray water jug.
We usually have to dump our gray water about twice a week. We dispose of our gray water as frequently as we can in drains or toilets. Since it’s a smaller amount that most RVs usually hold in their gray water tanks, we can also dispose of our gray water like you would while backpacking with Leave No Trace principles depending on the environment we are in. If the area has bears or is a desert environment you need to be especially careful about gray water disposal. We only use small amounts of biodegradable soaps, and we disperse the water in an arc over a wide area at a distance from campsites to avoid attracting animals.

We capture our gray water using a 2.5 gallon disposable drinking water container.
We put a loop in our flexible drain pipe to act as a P-trap. You can also spot a grimy gray water jug in this photo.
For the drain pipe we considered using a hard PVC drain pipe that you’d find in your average kitchen. Instead, to make taking the jugs in and out easier, we decided to use a flexible sump hose for the drain pipe. We used a PVC tailpiece and a slip nut to attach the sump hose to the sink strainer that came with the sink. We slid the sump hose over the drain pipe and sealed it using a rubber reducing washer and a large hose clamp.
The sump hose came in a 40-foot length so we just cut off one 3-1/2’ length for the drain hose. The nice part about having so much extra is that we can replace the drain hose when it get super stinky.
We used a 3-1/2’ length so that we could put a loop in the drain hose. This loop acts like a P-trap for the drain—it holds a small amount of water in the drain pipe to prevent stinky air from escaping from the dirty water and up the drain. Because the sump hose is long and flexible, we can take the gray water jug out of the cabinet and then remove the hose whenever we need to dump the gray water.

The flexible sump hose of our van’s drain pipe is attached to the tailpiece of our sink strainer with a rubber reducing washer and a hose clamp. We’ve never had any leaks from the drain.
Creating a Custom Backsplash for Our Camper
Our walls in our van are unfinished cedar tongue and groove. We knew we needed to protect the area behind our sink from moisture with some sort of backsplash. We wanted something that looked decent, but that was very affordable. We worried that tile and grout would split and crack on bumps on rough roads. We looked at some faux-tin plastic ceiling tiles, but those weren’t really the look we were going for.
We chose a weldable steel sheet to use as the backsplash. We purchased three 12”x24” sheets to line up behind the counter, but ultimately we only used one behind the sink. Rather than allowing the metal to unevenly rust on it’s own, intentionally added a rusted patina to the medal to add to the rustic interior style of our van.

The weldable sheet metal after being washed.

To create a rusty patina for our backsplash, we catalyzed the oxidation using vinegar and salt.

We got this amazing blue speckled patina, but we weren’t able to stop the oxidation process in able to maintain it.
To rust the weldable sheet metal, we first had to remove the layer of oil that coats the sheets to prevent them from rusting. We just washed them with some dish soap. Be careful not to cut yourself, because the edges are extremely sharp.
To rust the sheet metal, we sprayed them with white vinegar and then sprinkled salt on top to create an interesting texture. At first the metal rusted in a neat speckled blue and rusty brown pattern, but unfortunately the bluish patina only lasted a few minutes. Even after gently wiping away the salt and the vinegar, the sheet metal continued to rust and we lost all of the blue patina. We even tried sticking them in the oven on high heat, because we read that halts rust. Nope! It doesn’t.

Rust-Oleum Stops Rust—for when you want some glossy rust in your van.

Don’t spray this in your house. It was a bad idea. We had to open all the doors and windows.
After the sheet metal had dried completely, we wiped any remaining salt grains off and sealed the sheets to try to prevent additional rusting. We used Rust-Oleum Stops Rust Clear Satin Enamel Spray Paint. We sprayed four even layers of this enamel on the sheets. The clear enamel gave the sheets a much nicer texture than the bare rusted metal at least.

This is the product we used as a sealant. The oxidation continued underneath the enamel.

The enamel did give the backsplash a nice glossy finish and texture.
Despite its name the Rust-Oleum Stops Rust Clear Enamel coating did not stop the rust. The reaction continued to occur underneath the sealant, so now the backsplash is a more or less solid brown rust color, rather than a speckled rust pattern. Still pre-rusting the sheets has given us an even layer of rust rather than a splotchy rust patches from anywhere that we splashed the backsplash while washing dishes.
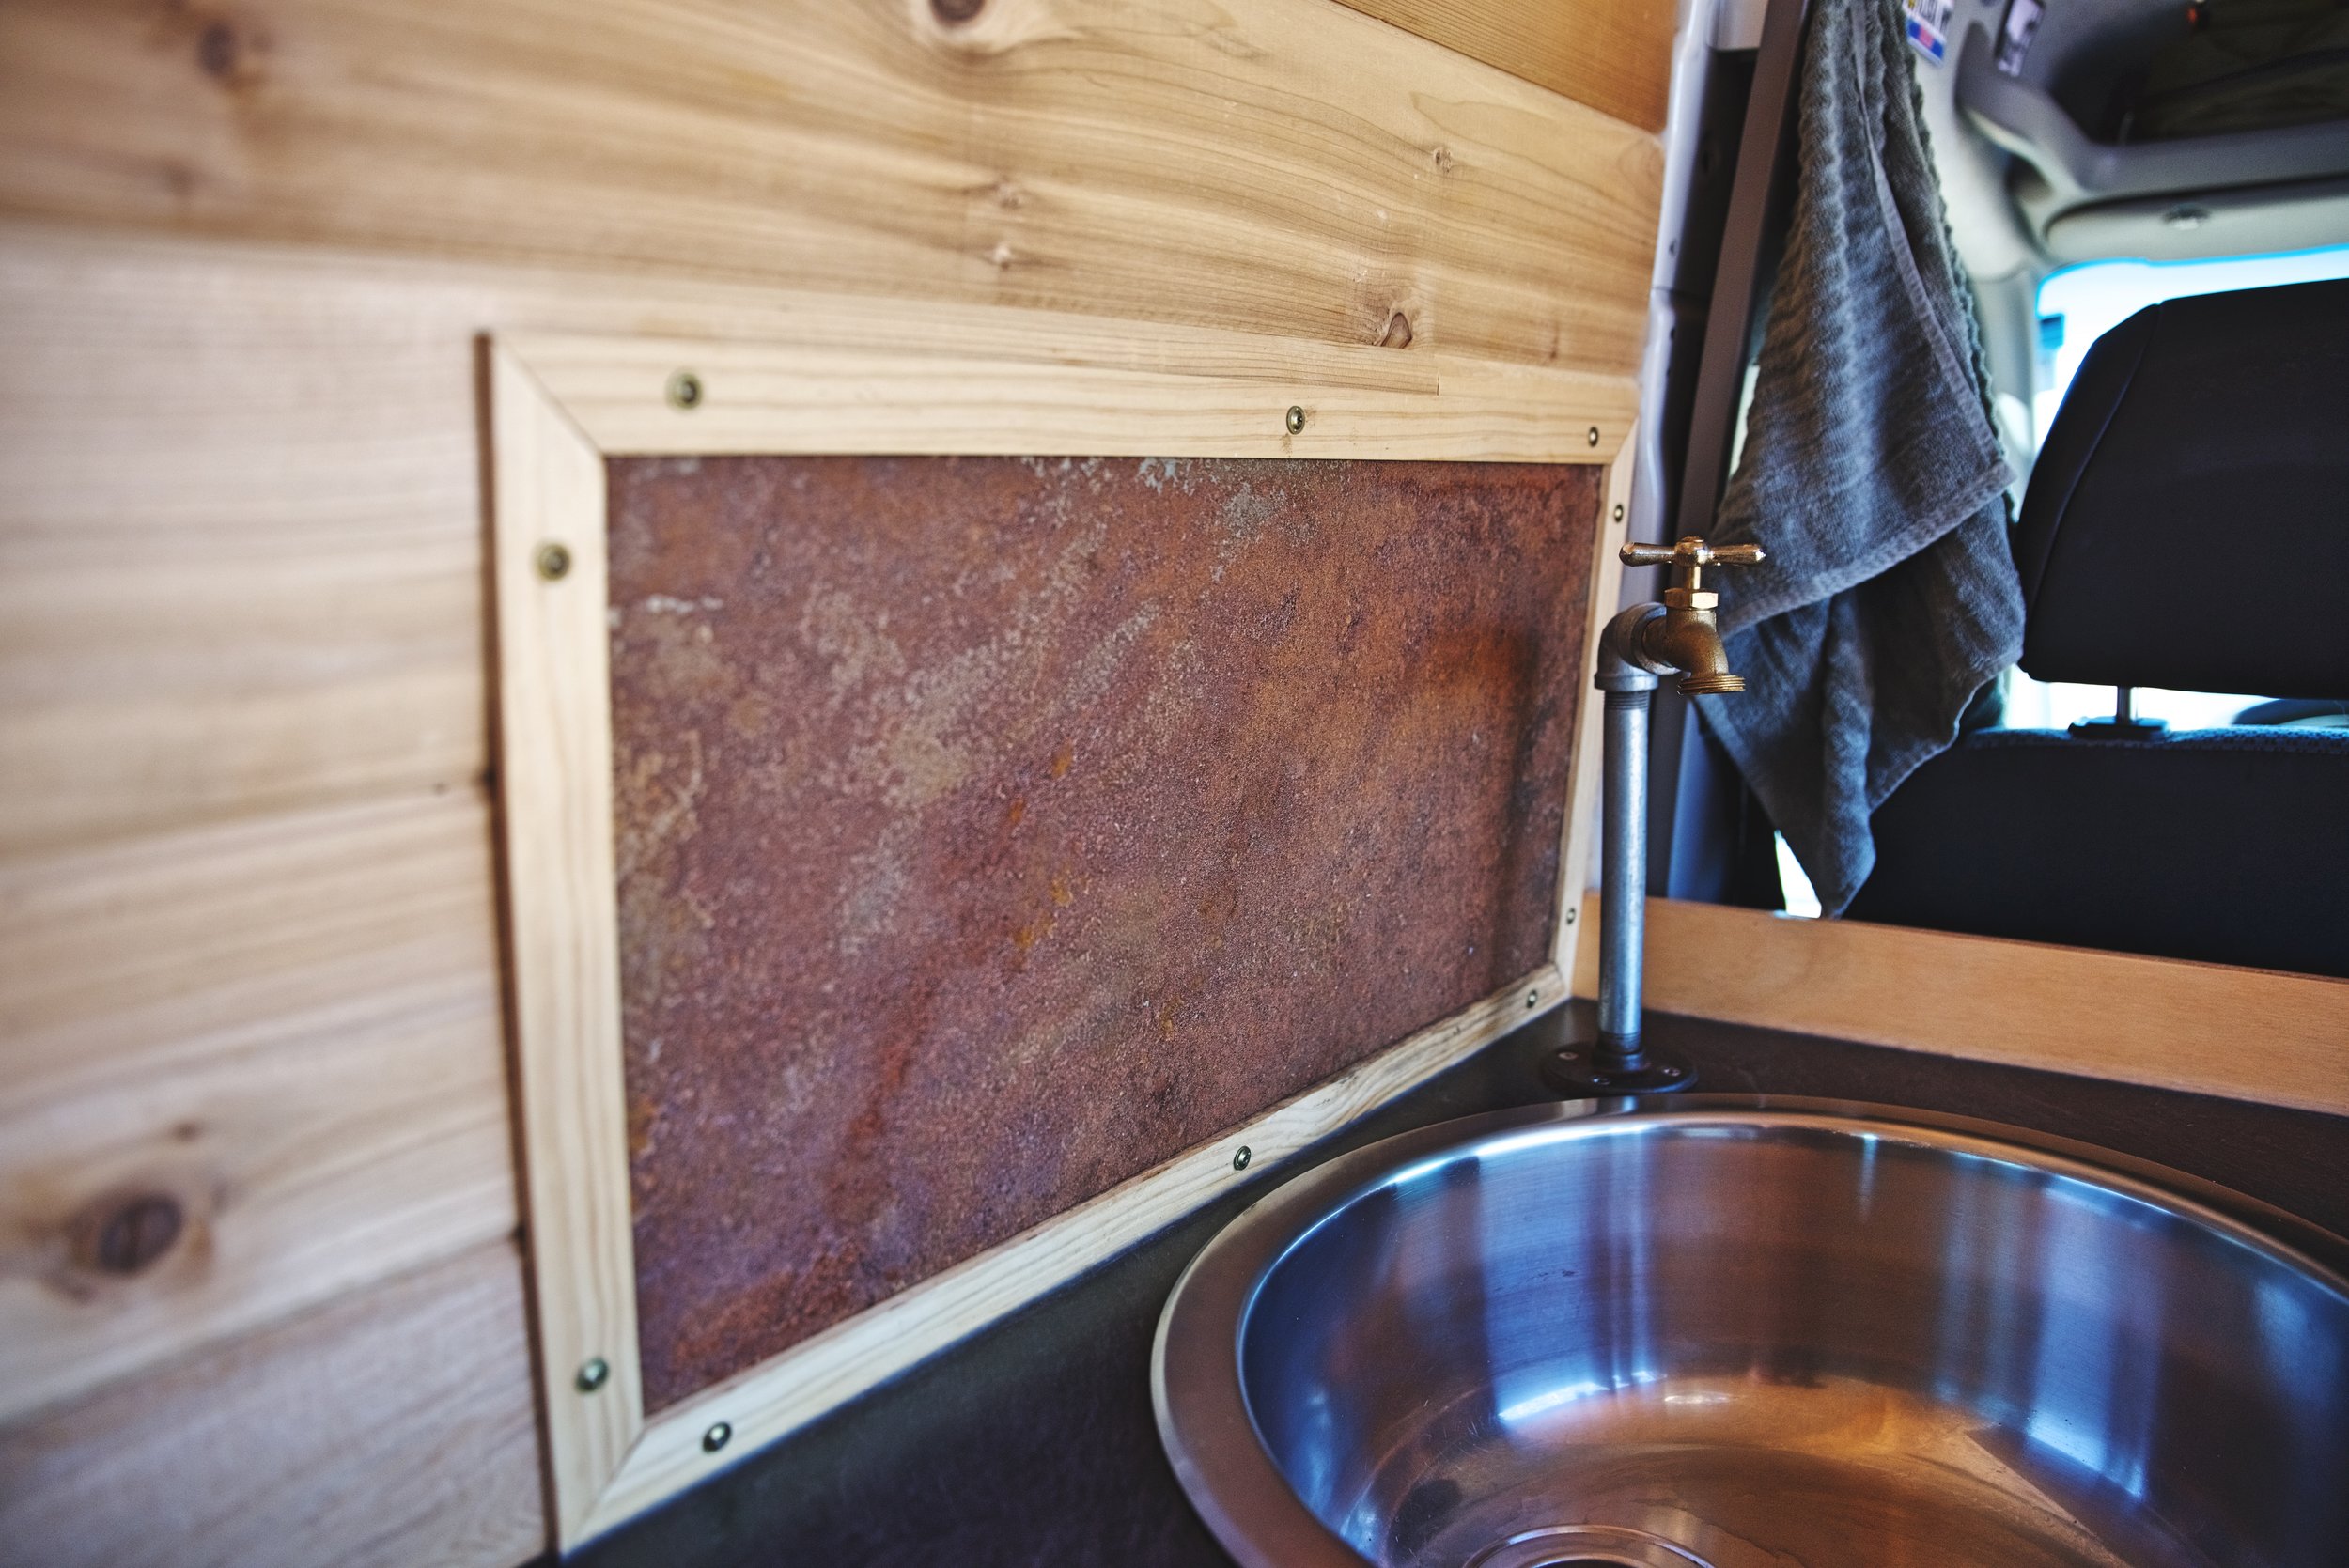
We mounted the backsplash with a flat pine trim. If we were to create the frame again, we would probably seal it with some clear polyurethane because the rust has begun to stain the wood a bit gray.
After the clear sealant had dried, we mounted the backsplash on the wall. We used 1/4" x 1-1/8" flat pine trim (the same as on our ceiling) to create a frame around the backsplash. Then we used a power drill to attach both the rusted backsplash panel and the frame over the top of the cedar planks. We used the same wafer-head, self-tapping brass-coated sheet metal screws that we used on our walls and ceilings so that the style would match.
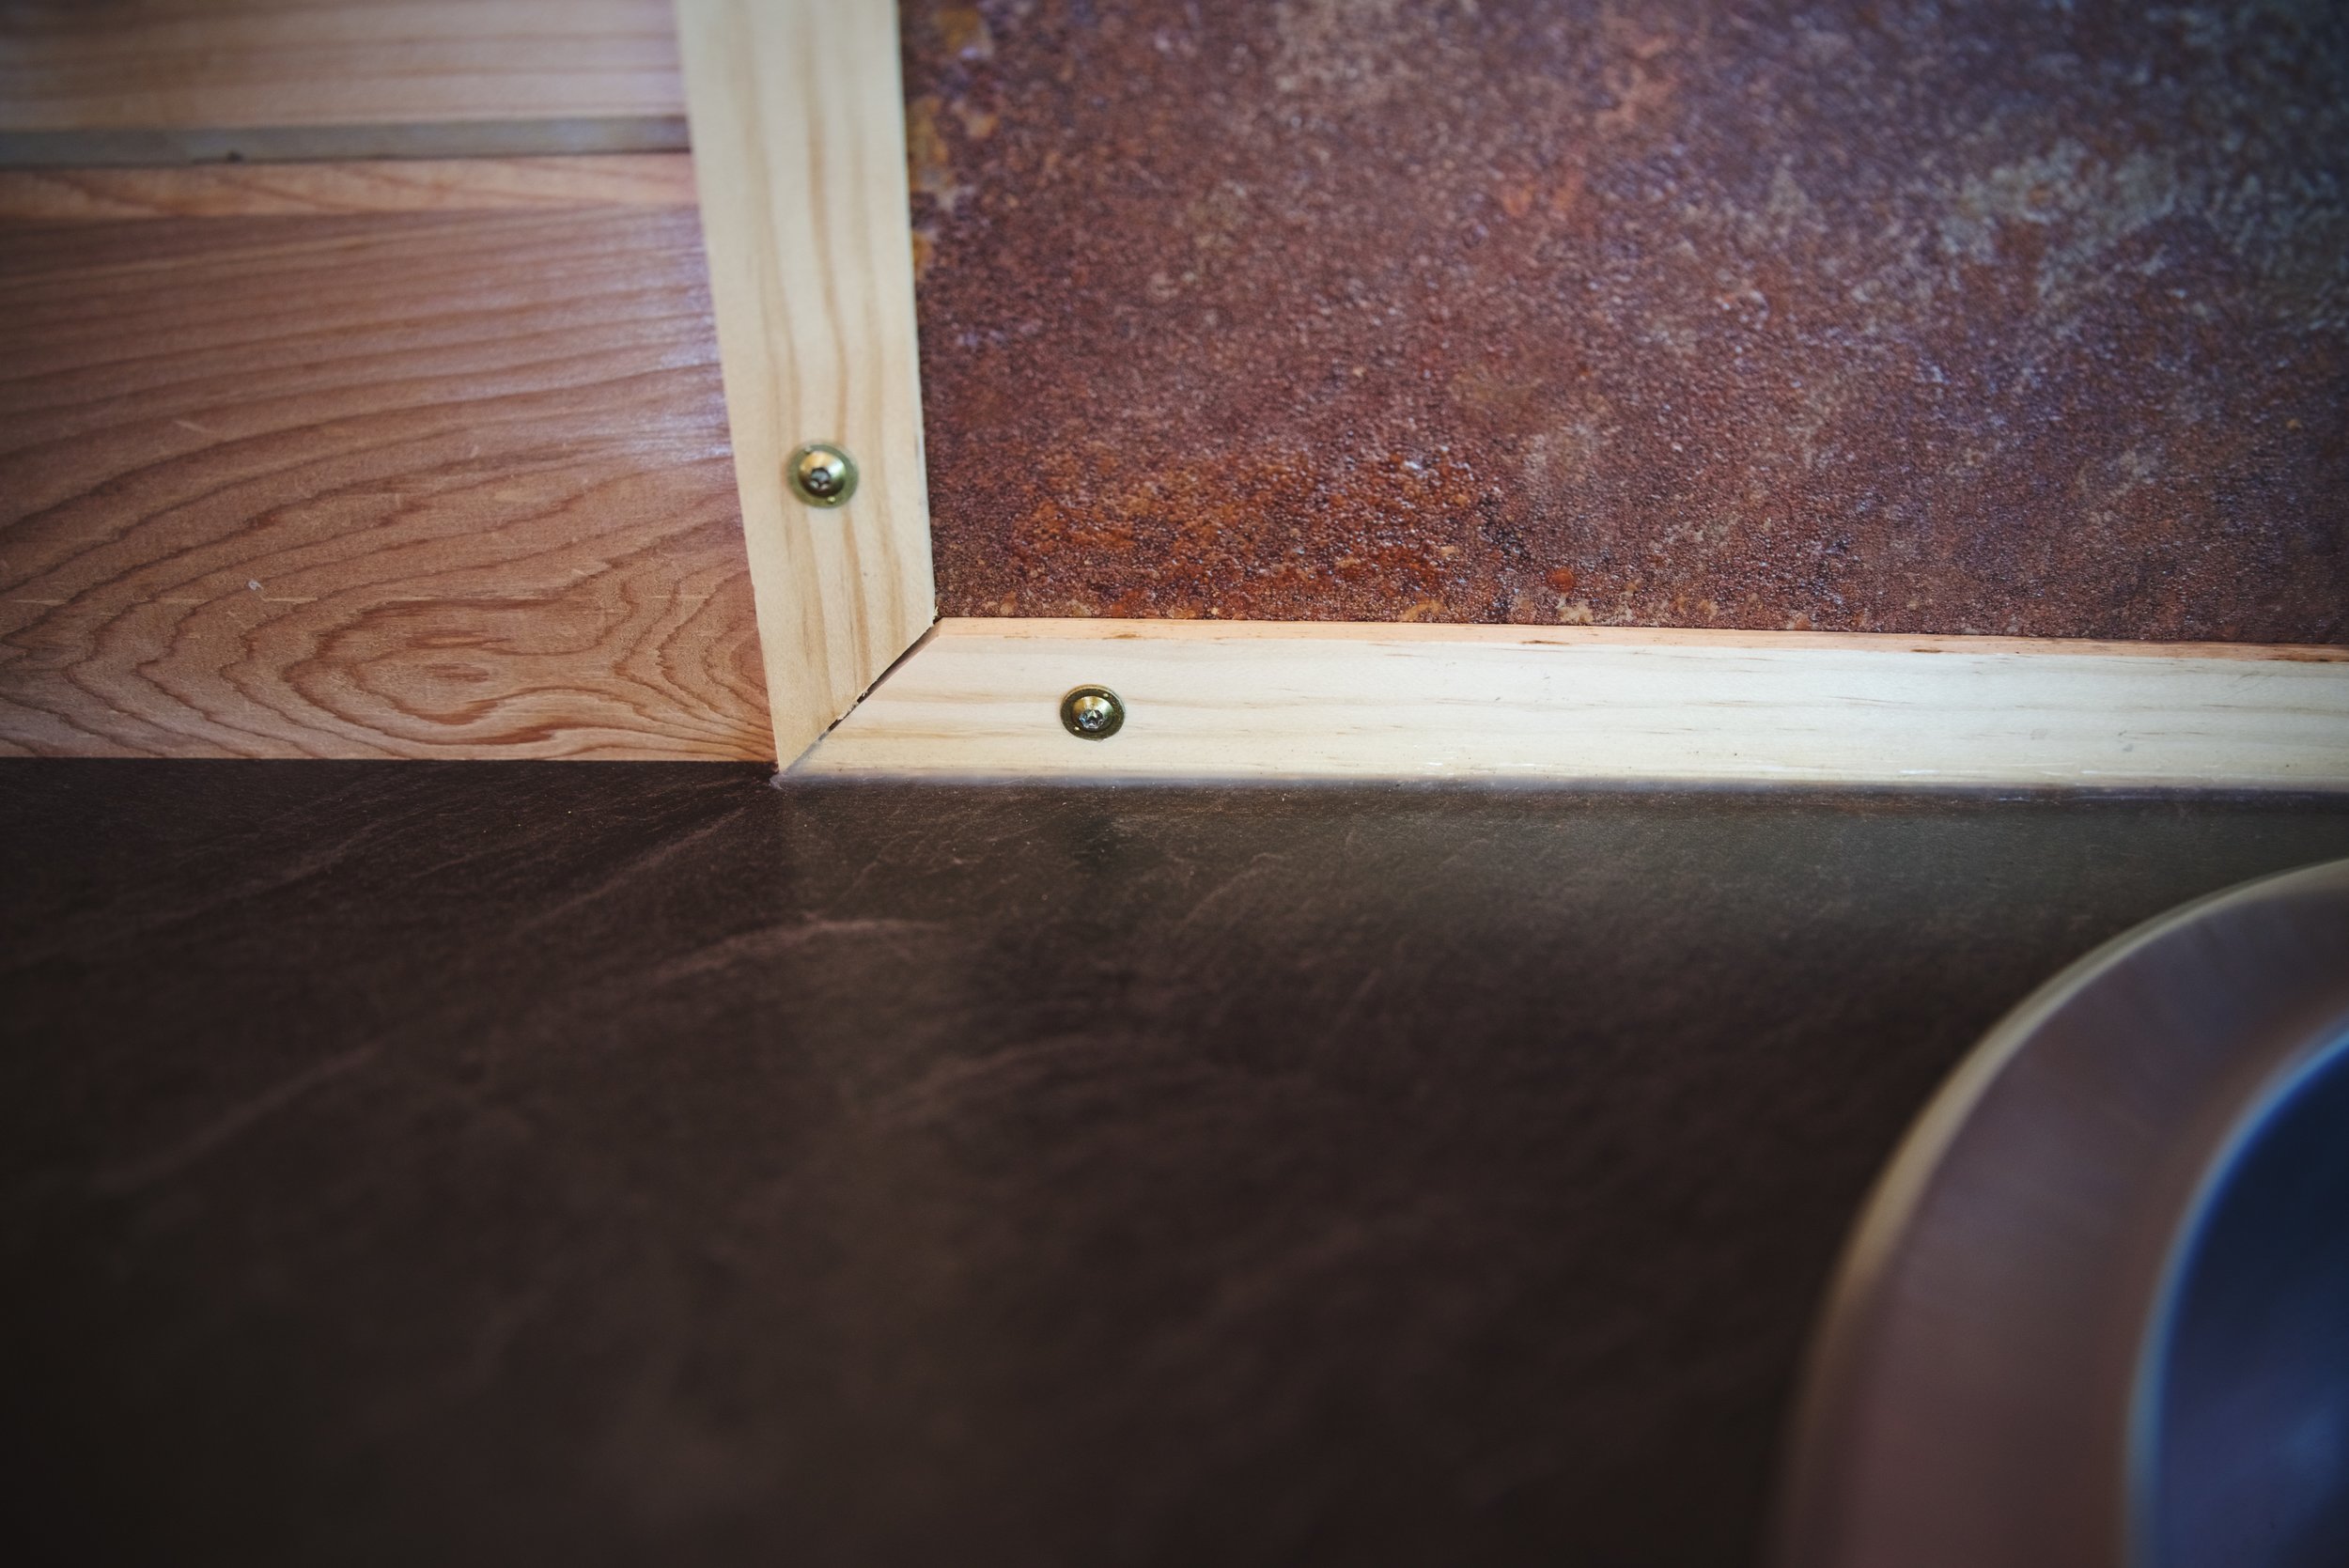
We sealed the bottom of backsplash with caulk so that water wouldn’t run behind the counter.

We also sealed the joint between the end of the cabinetry and the counter to stop water from getting in that seam.
The final step for installing the sink in our van was some caulking. We ran a bead of the clear silicone caulk along the bottom of the wooden trim on the backsplash. We also ran a bead of clear caulk along the edge of the countertop and the end cap lip of our cabinetry.
To create a nice looking line of caulk, cut the tip of the caulk at an angle at the desired size for the caulk bead. Use a squeeze tube or a caulk gun to run a bead of caulk along whatever you want to seal. To smooth the bead into the joint, wear rubber gloves or cover your finger with a plastic shopping bag. Dip your finger in water and run your finger along the bead, smoothing it into the joint. If you gather a big blob of extra caulk, wipe it off with a paper towel and wet your finger again. Once you have smoothed the entire line, wipe up any stray caulk that you may have missed. Then let your caulk cure for the specified amount of time before touching it or working in the area to avoid mussing it or getting any dust or sawdust in the area.

The sink is both an attractive and an extremely functional area of our van’s kitchen. We keep our magnetic spice tins attached to our metal backsplash, which is a good way to keep them organized while living on the road.
We use our finished backsplash as a place to store our magnetic spice tins along with other magnets. Our sink and faucet are functional for washing dishes and use while cooking, and we’ve had no issues with our water pump. It even froze a couple of times with water in it, and it’s held up fine, in spite of that. The ten gallons of freshwater lasts us long enough between our opportunities to get water, and we like that we can change our gray water jug.
Aside from refilling and dumping water, we don’t think about our water much at all. We don’t have to worry about leaks or a faulty electric pump or heater. For this part of our van, we both agree that simpler was the better way to go. Although we would change some minor aspects, our water system works well for us.